SecureAuth Authenticate app user guide
The SecureAuth Authenticate app provides multi-factor authentication (MFA) on your mobile device. When you log in to a protected application, Authenticate sends a push notification or displays a one-time passcode so you can verify your identity.
Quick start guides
Download these one-page guides to share with your organization.
Download and install
Search for SecureAuth Authenticate in your device's app store.
Android: Download from Google Play
iOS: Download from Apple App Store
For supported OS versions, see the SecureAuth Authenticate app section in the compatibility guide.
Pair your device
Before you can use Authenticate, you need to pair the app with your user account. Your organization determines which pairing method is available to you.
Pair with a QR code
Use this method if your organization provides a QR code during enrollment.
On your computer, follow your organization's instructions to open the QR code enrollment page.
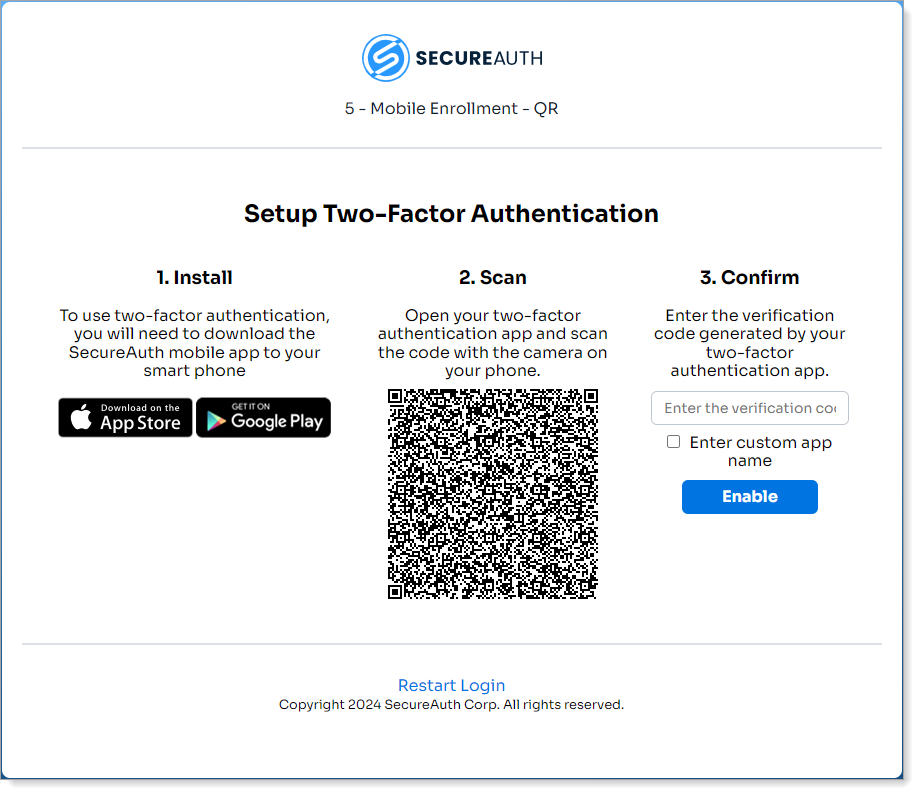
QR code enrollment page
Open the Authenticate app on your mobile device.
First-time setup: The app opens directly to the QR scanner.
Adding another account: Tap the QR code icon in the top left of the Dashboard. Or, tap Settings (gear icon) > Add Account > Scan QR Code.
Point your device's camera at the QR code on the enrollment page. The app scans the code and starts the pairing request.
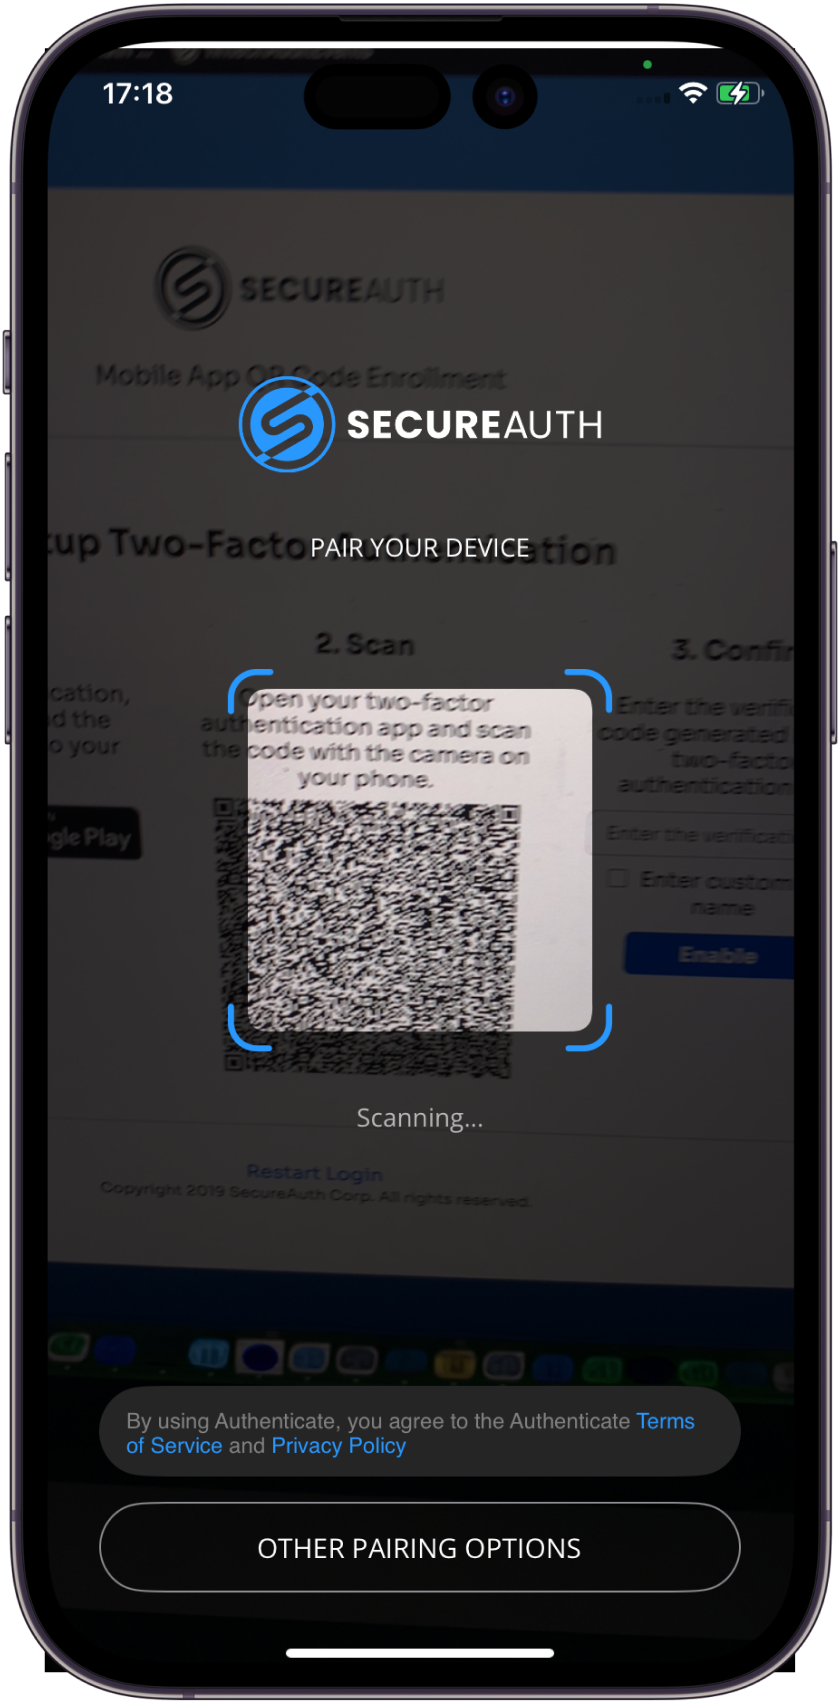
QR scanner in the Authenticate app
The app displays a 6-digit verification code with a countdown timer. Enter this code on the enrollment page in your browser to confirm pairing.
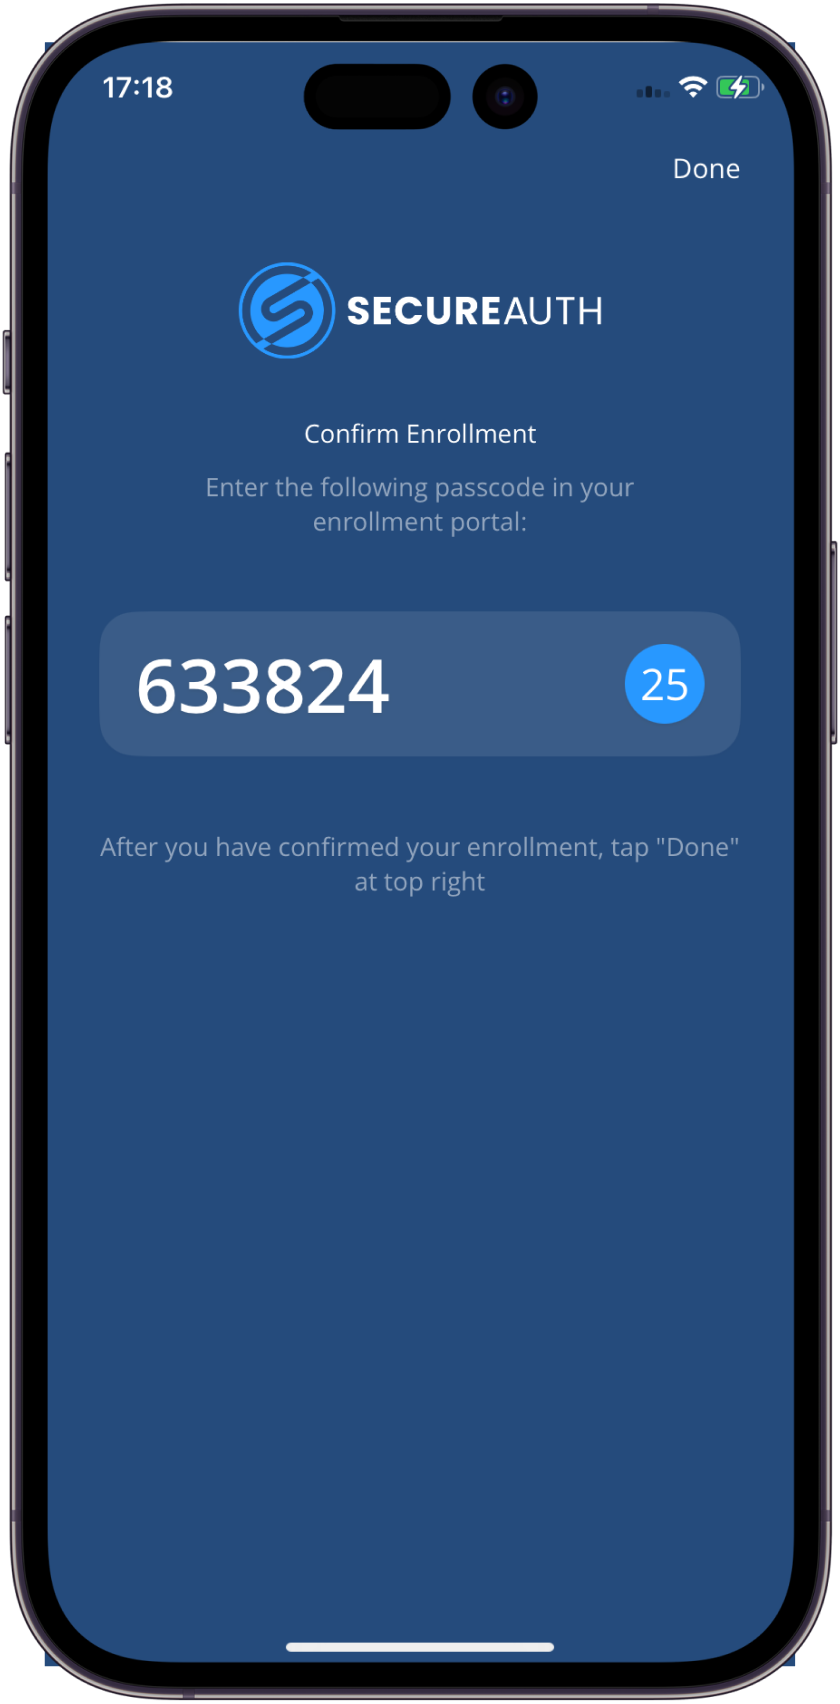
Verification code with countdown timer
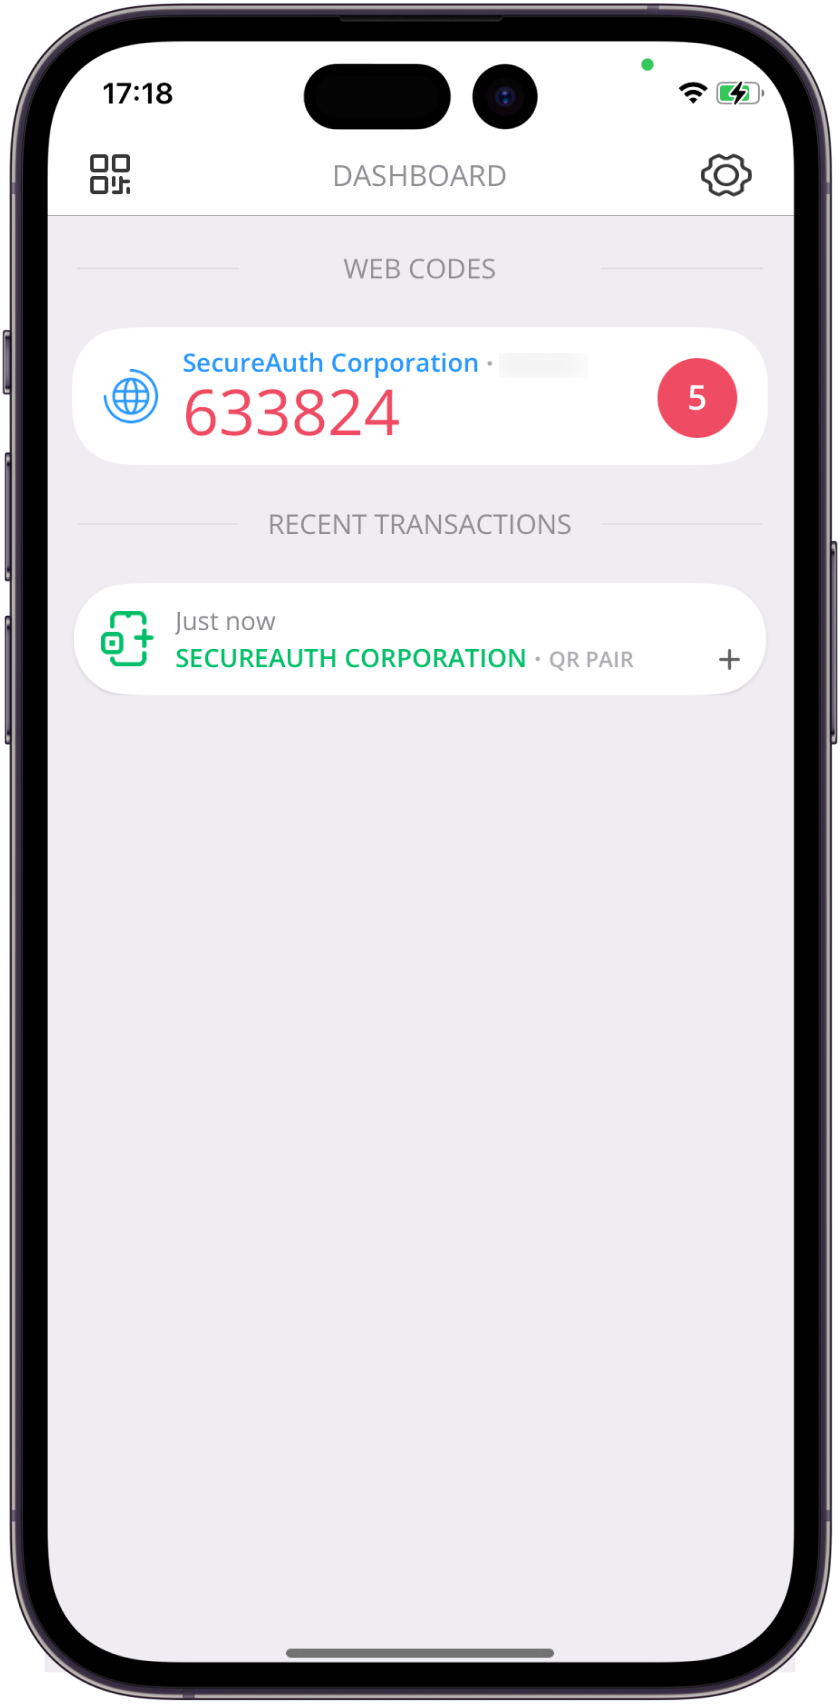
When pairing is complete, your account appears on the Dashboard. Your offline code displays under Web Codes, and the pairing transaction appears under Recent Transactions.
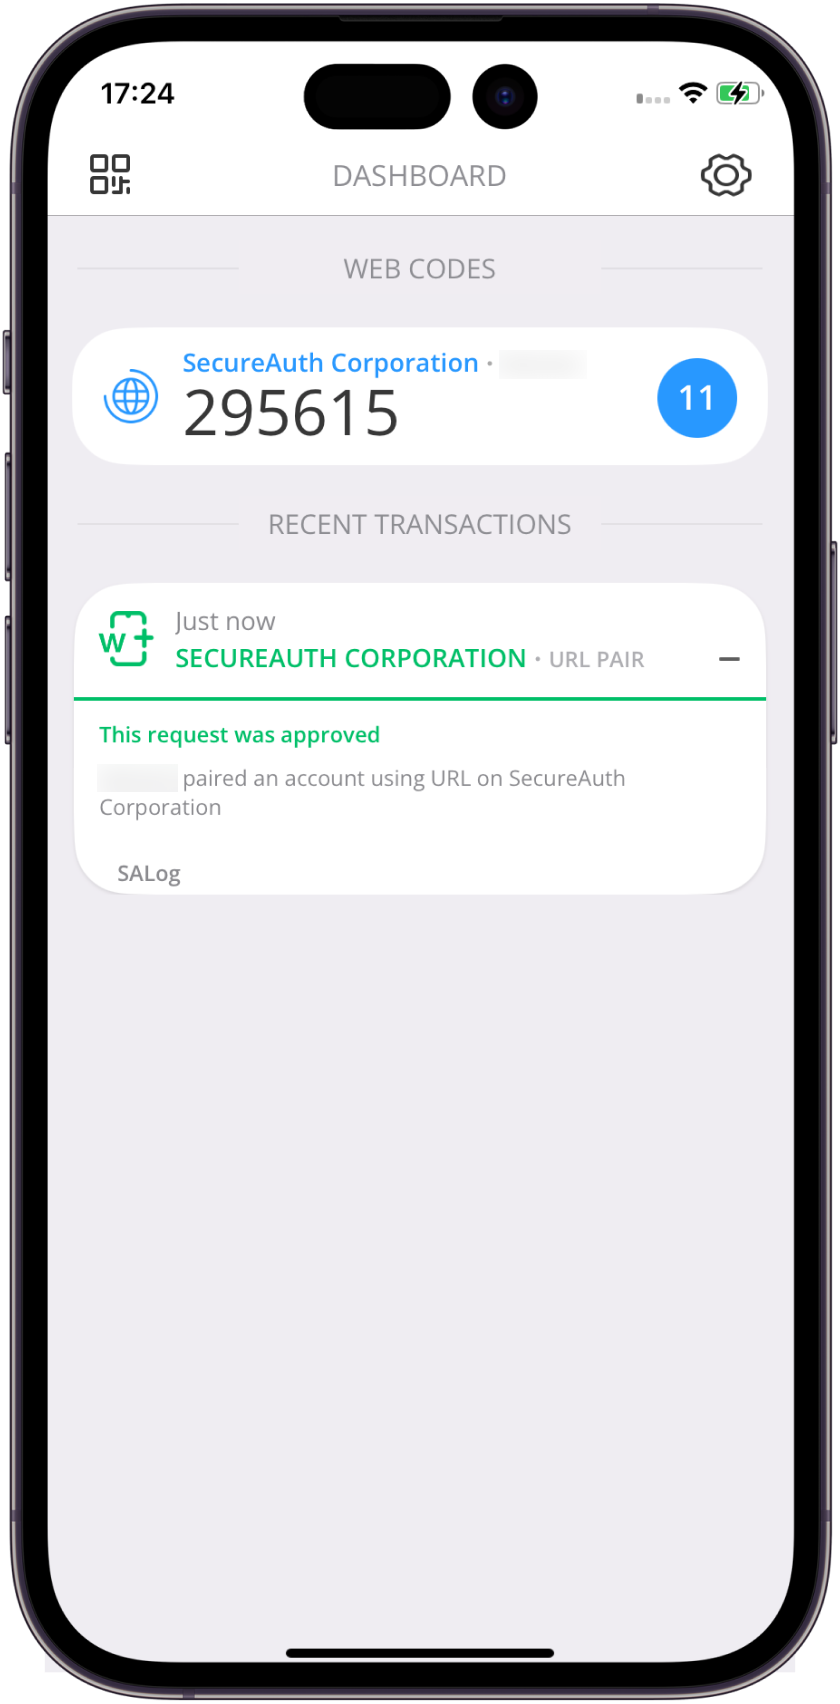
Dashboard after successful pairing
Pair with a URL
Use this method if your organization provides an enrollment URL.
Follow your organization's instructions to get the enrollment URL.
Open the Authenticate app on your mobile device.
First-time setup: Tap Other Pairing Options on the Pair Your Device screen.
Adding another account: Tap Settings (gear icon) > Add Account.
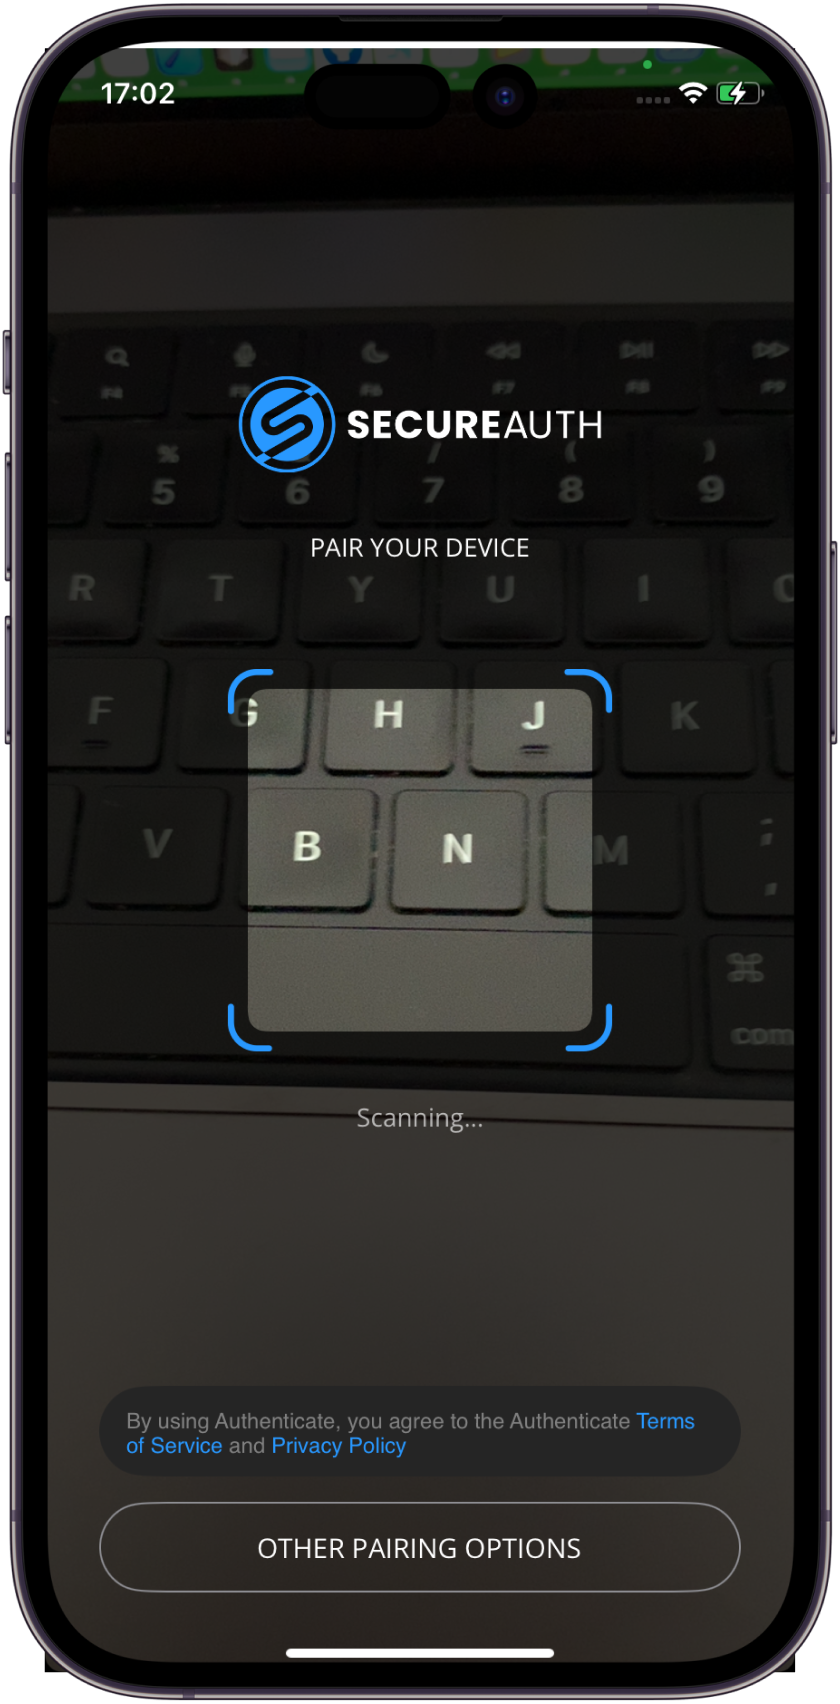
Pair Your Device screen with Other Pairing Options button
Enter the enrollment URL in the URL field and tap Pair.
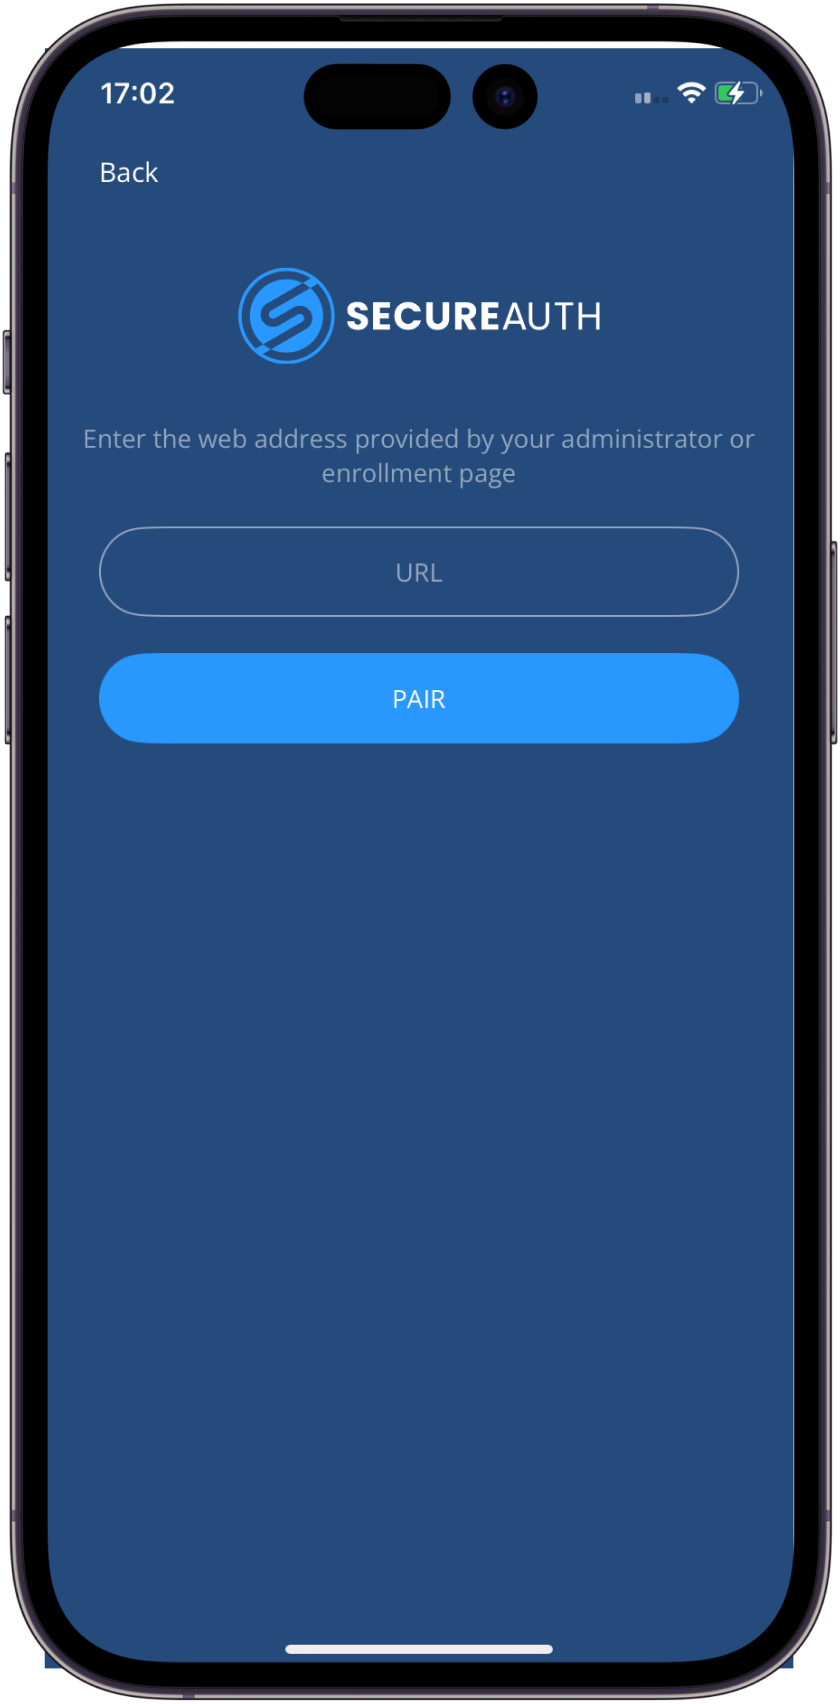
URL pairing screen
On the enrollment page that opens, enter your username and password and tap Submit.
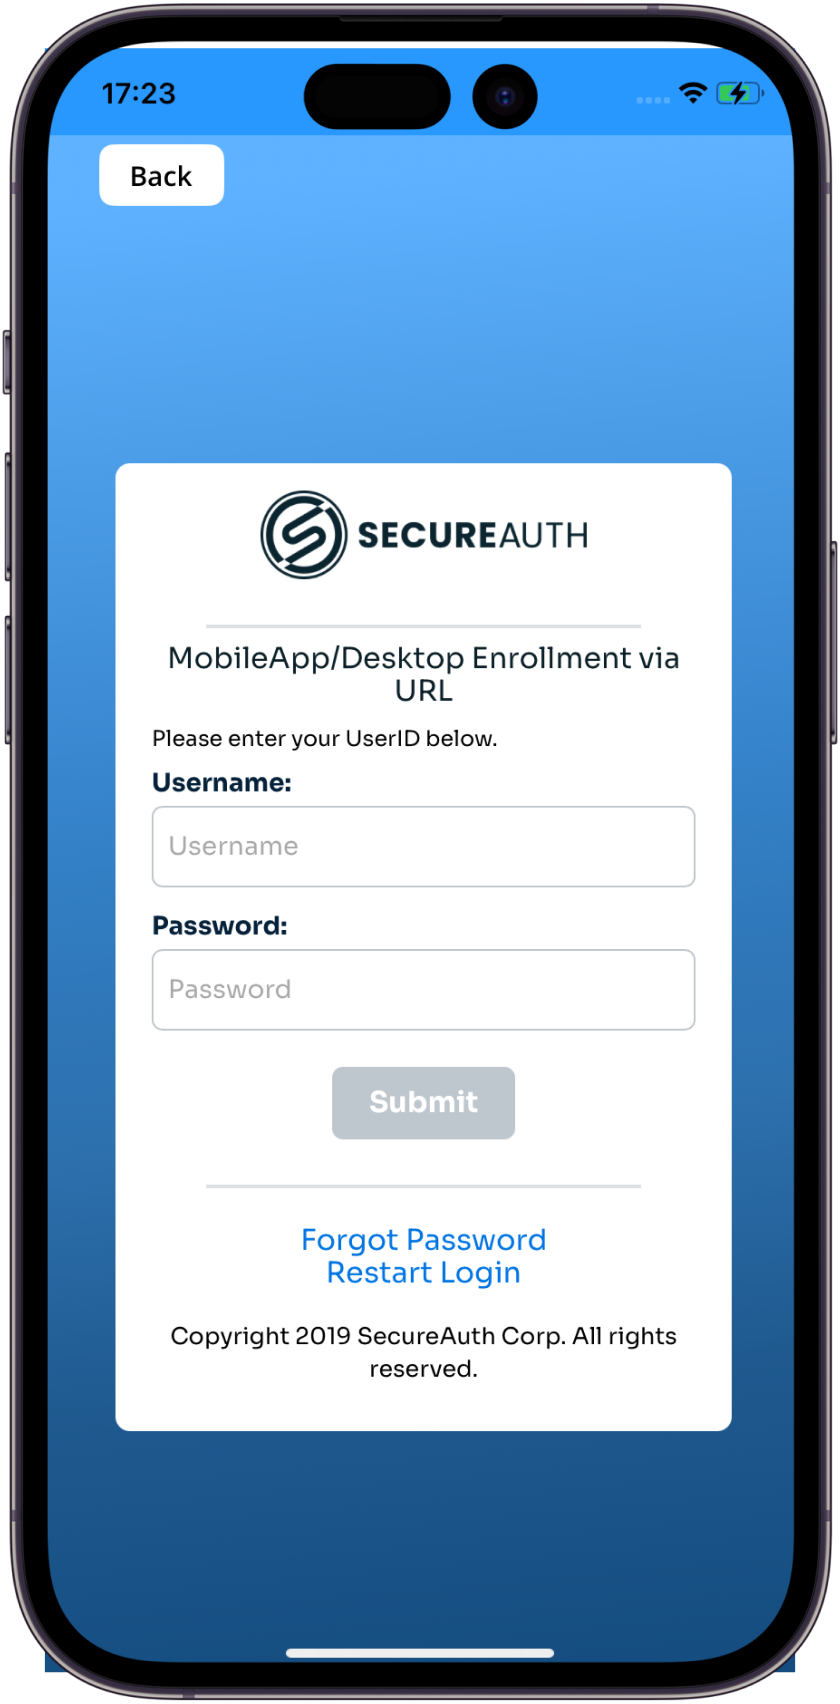
URL enrollment page with credential fields
If prompted, select a delivery method for your verification code and enter the code when you receive it.
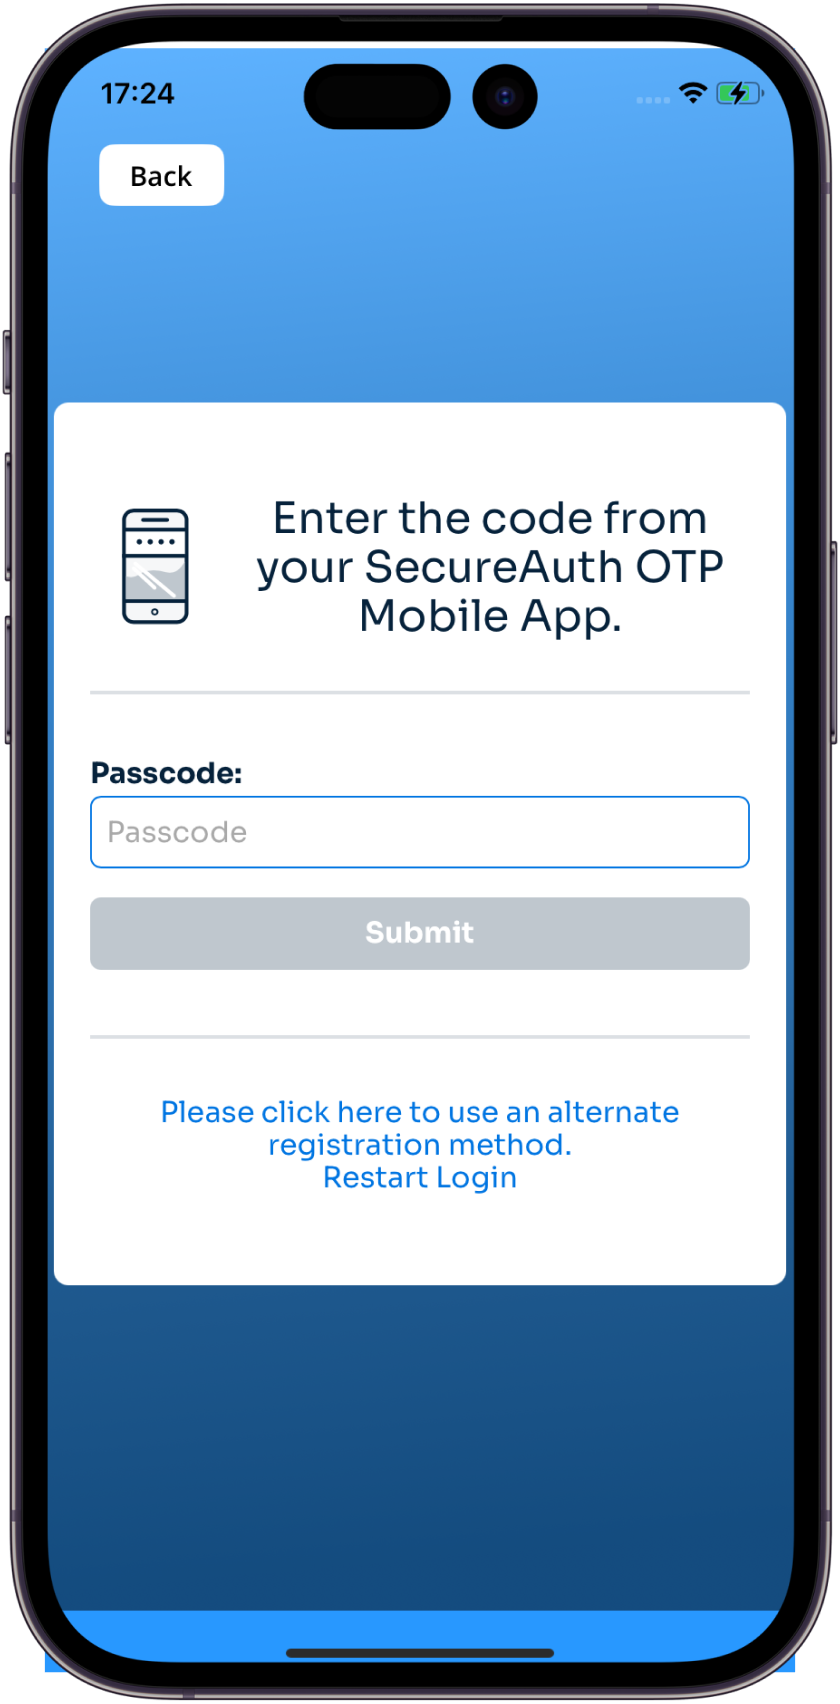
Verification code entry page
When pairing is complete, your account appears on the Dashboard with your offline code under Web Codes.
Dashboard after successful pairing
Approve login requests
After you log in to a protected application, Authenticate prompts you to verify your identity. The verification method depends on your organization's settings.
Normal push
A pending request appears on the Dashboard with Accept and Deny buttons and a countdown timer. Tap Accept to approve the login.
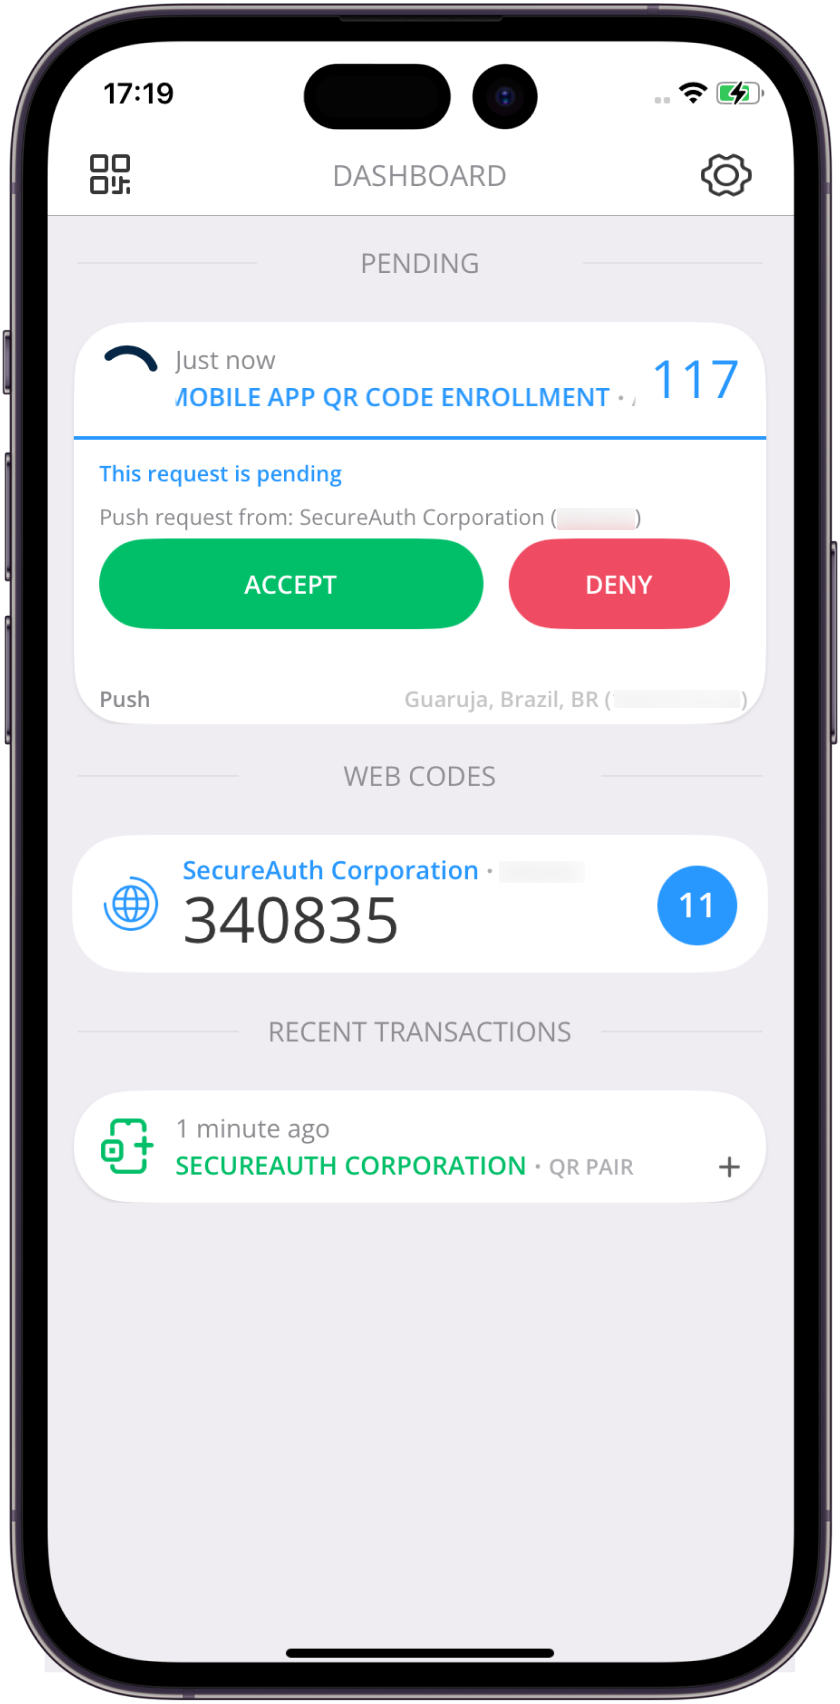 |
Pending login request with Accept and Deny buttons
OTP push
A notification displays a 6-digit one-time passcode with a countdown timer. Enter this code on the login page in your browser.
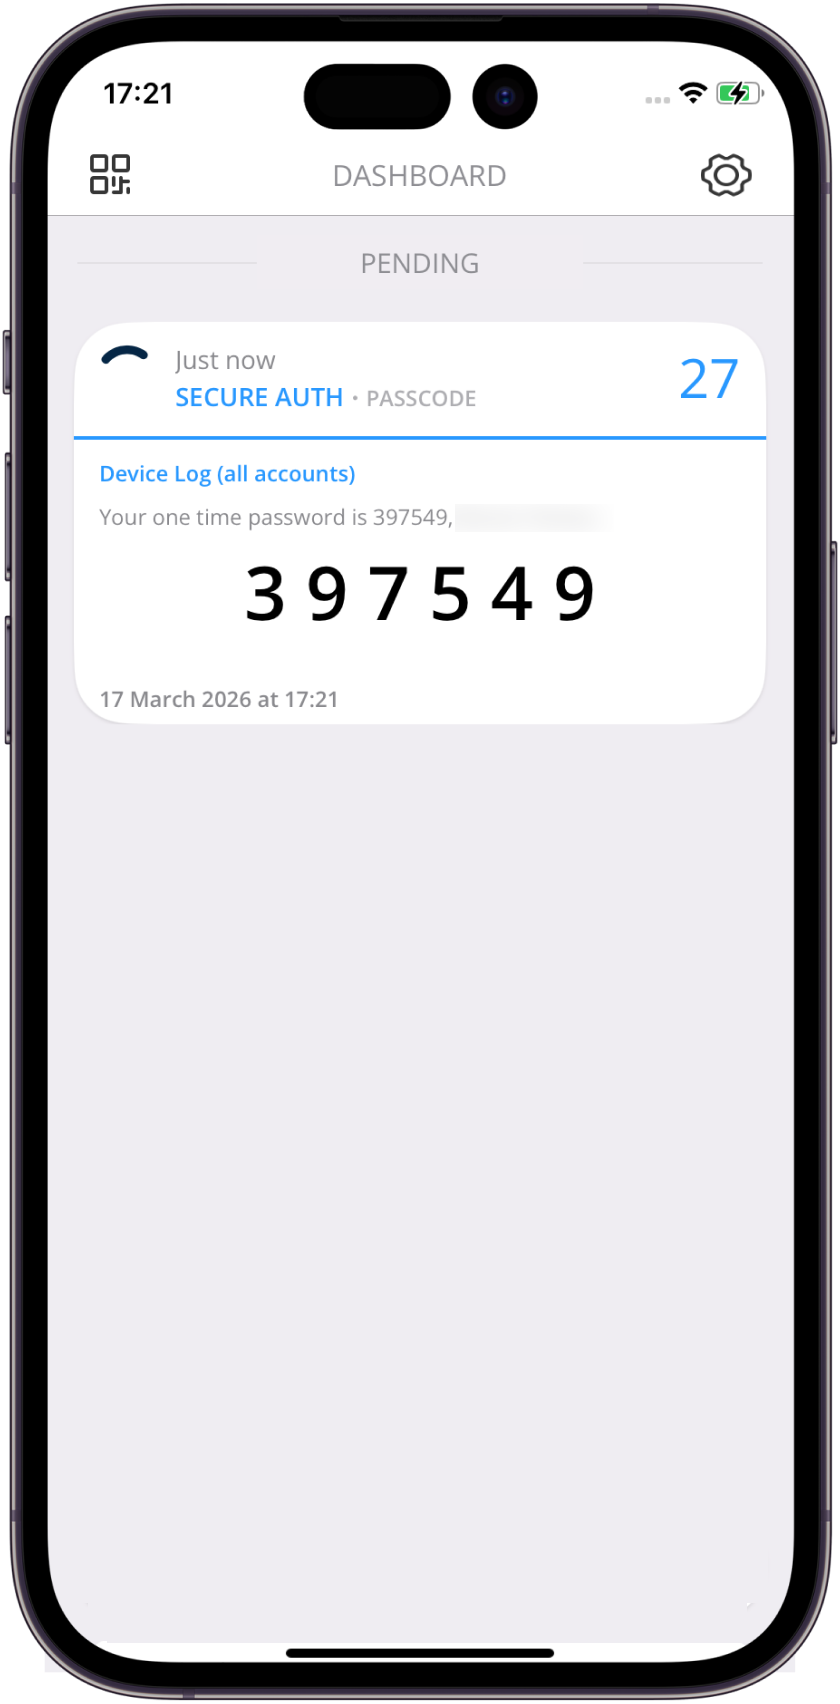 |
OTP push notification with one-time passcode
Biometric push
A pending request appears with Accept and Deny buttons. After you tap Accept, your device prompts you to confirm with Face ID or a fingerprint.
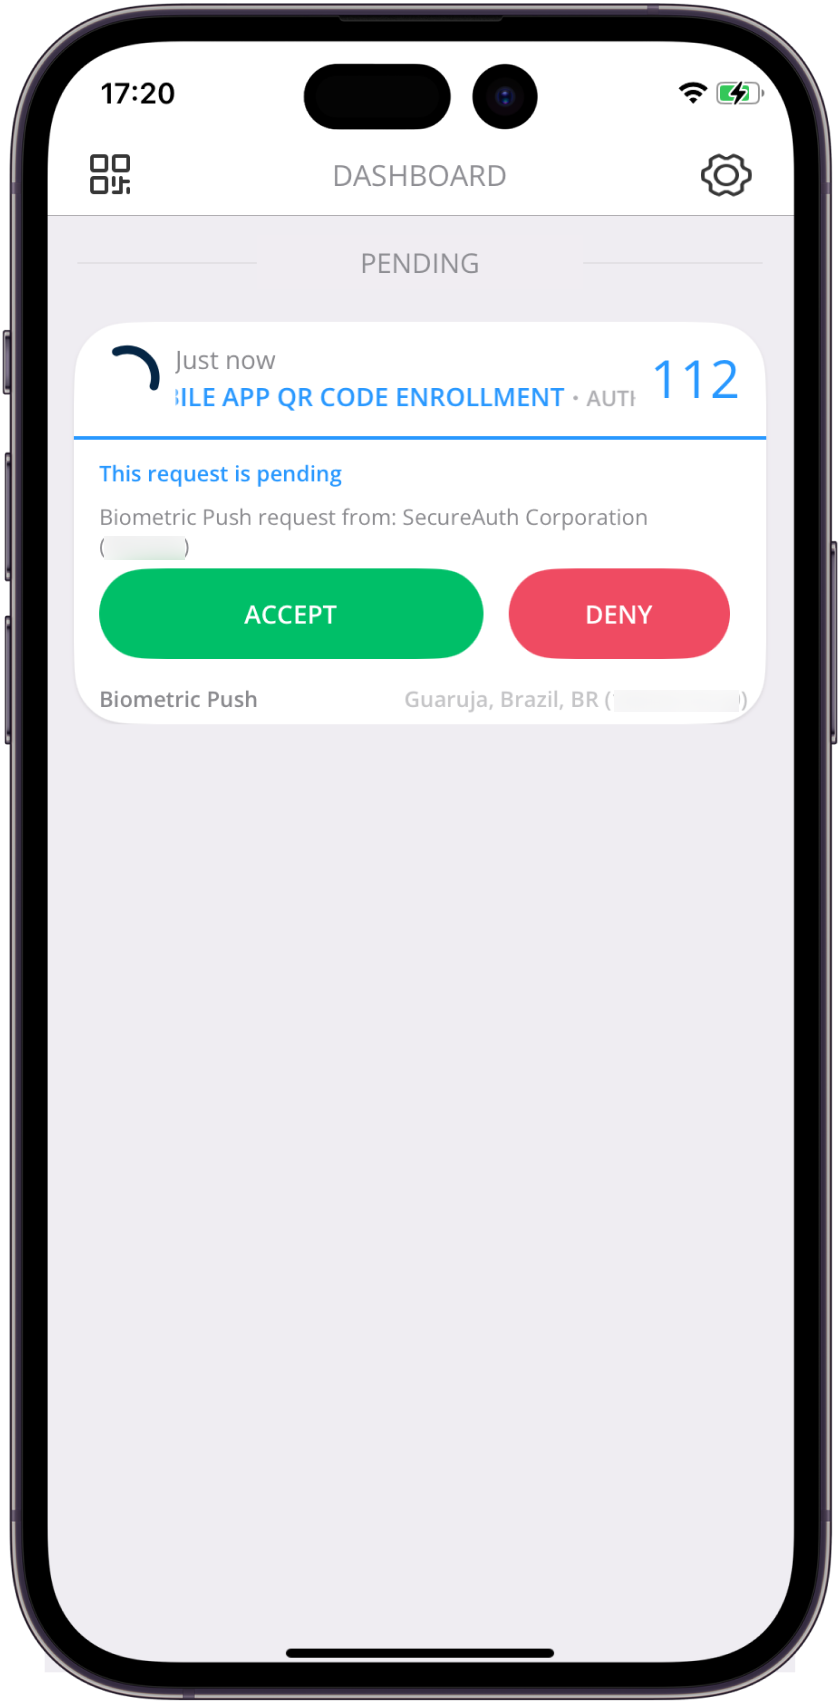 |
Biometric push verification request
Symbol push
A pending request displays a set of symbols in Authenticate. Find the symbol that matches the one shown on the login page in your browser and tap it in the app.
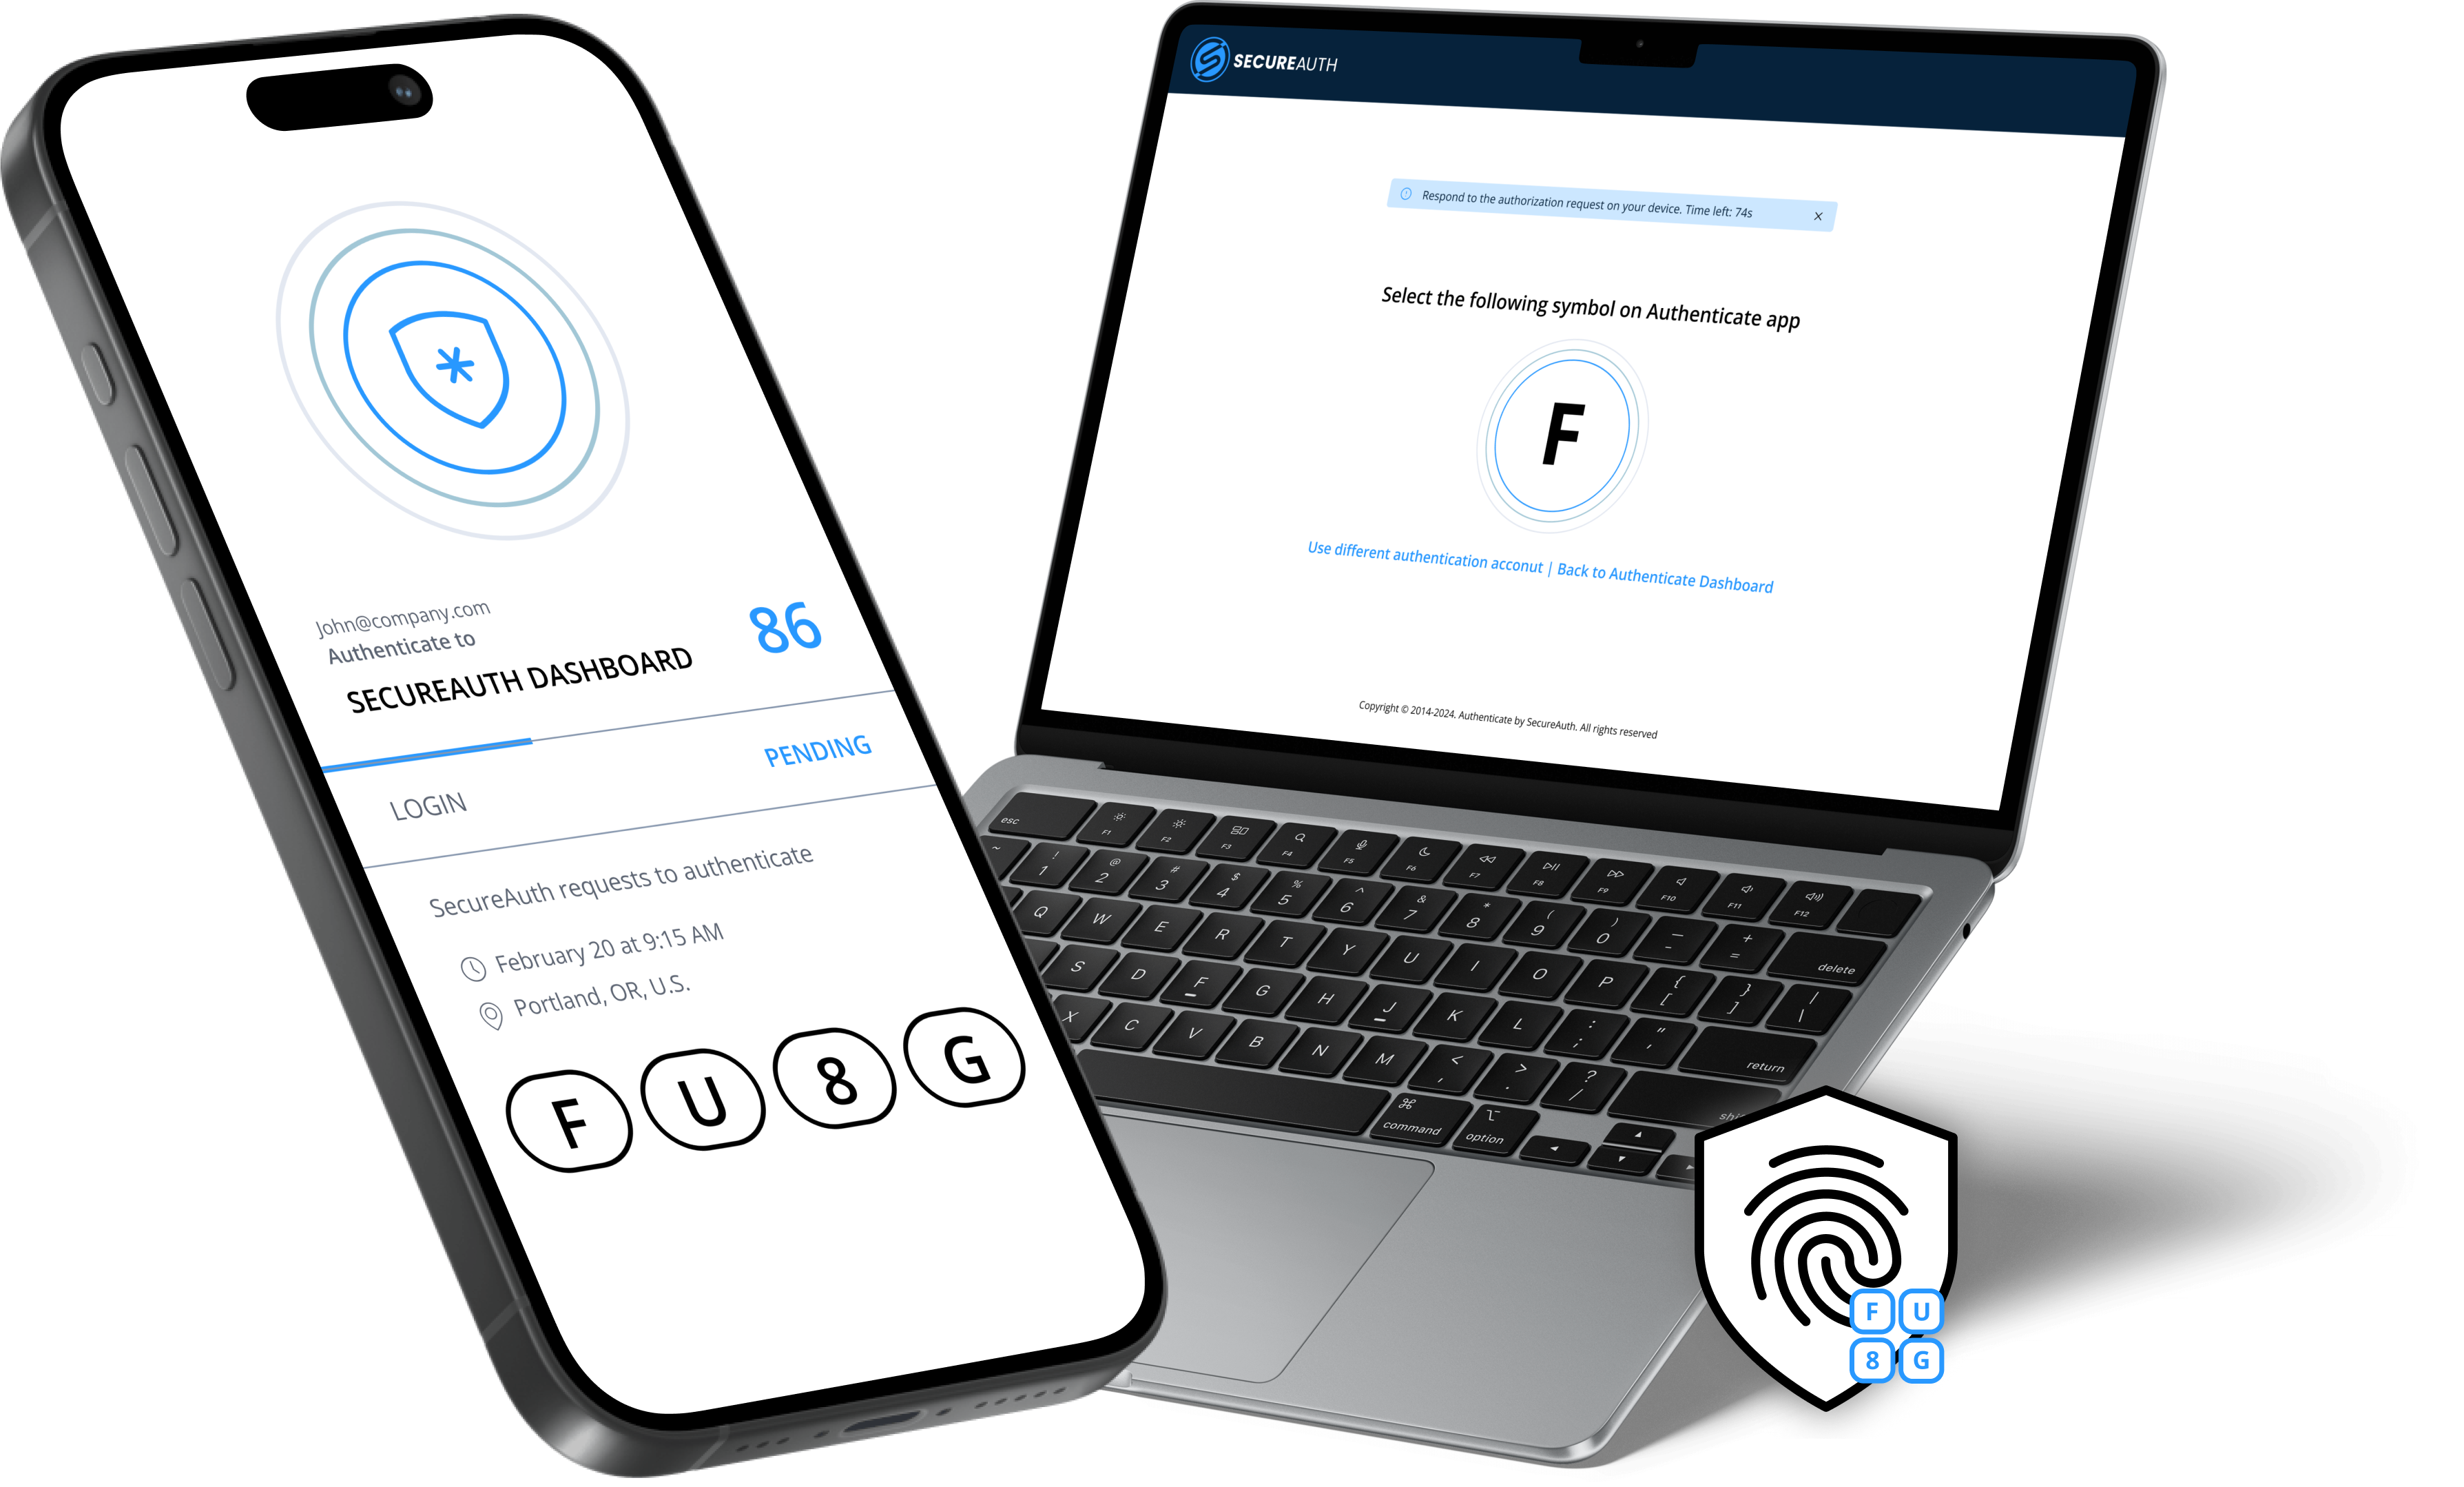 |
Symbol push login method
After you approve a request, the transaction appears under Recent Transactions on the Dashboard with a green confirmation status.
 |
Approved transaction on the Dashboard
App features
Dashboard
The Dashboard is the main screen of the Authenticate app. It has three sections:
Pending: Displays verification requests waiting for your action.
Web Codes: Displays offline passcodes you can use when your device does not have a network connection.
Recent Transactions: Displays a history of previous login attempts and their status.
|
Dashboard view
Multi-account support
If you have more than one account paired with Authenticate, use the account switcher at the top of the Dashboard to switch between accounts.
When a push notification arrives for a different account than the one currently selected, switch to that account to view and act on the request.
Offline codes
When you do not have a network connection, use the offline code displayed under Web Codes on the Dashboard. Enter this code on the login page to verify your identity.
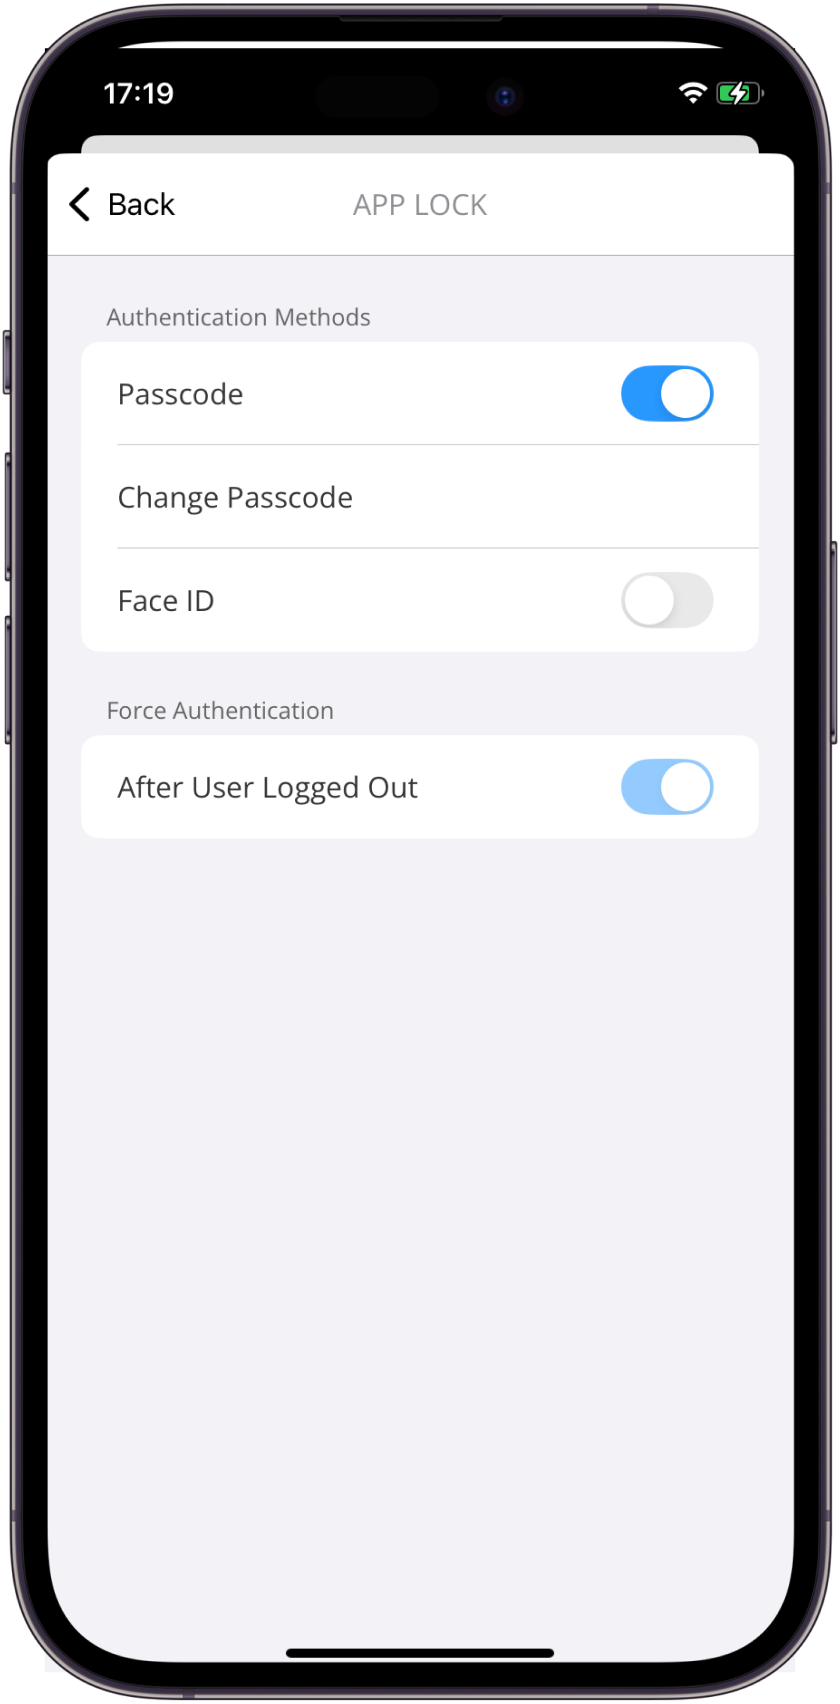
App Lock
App Lock adds a layer of security by requiring a passcode (PIN) or biometric verification (Face ID or fingerprint) before you can approve requests or view offline codes.
Required by your organization: If your administrator requires App Lock, you receive a prompt to set a passcode when you first open the app. Depending on your organization's settings, you set a 4, 6, 8, or 10-digit passcode.
Optional setup: To turn on App Lock yourself, go to Settings > App Lock and turn on Passcode. Set your PIN, then optionally turn on Face ID for biometric verification.
 |
App Lock set up screen
You must set up a passcode before you can turn on Face ID. The passcode is the fallback method if biometric verification is not available.
Note
Remember or securely store your passcode. If you forget your PIN, you need to pair your device again.
Delete this device
To unpair your device from your account, go to Settings and tap Delete This Device at the bottom of the screen. This removes all account data from the app. To use Authenticate again, you need to pair your device with a new enrollment.
Troubleshooting
- I have a new mobile device. How do I reconnect?
- Why do I see "Authenticate does not support modified devices"?
- How do I remove an account?
- How do I rename an offline authenticator?
- How do I remove an offline authenticator?
I have a new mobile device. How do I reconnect? | |
Follow these steps to connect your new mobile device to your account.
TipIf your computer requires MFA to log in, use an alternate verification method (such as SMS or email) until you finish pairing your new device. | |
Why do I see "Authenticate does not support modified devices"? | |
Authenticate has detected that your device is rooted or jailbroken. The app does not work on modified devices. Restore your device to its factory settings and try again. | |
How do I remove an account? | |
| |
How do I rename an offline authenticator? | |
| |
How do I remove an offline authenticator? | |
|