Manage tenant administrators
This topic covers how to manage administrators in your SecureAuth CIAM platform tenant.
Overview of administrator roles
An administrator is a user with privileges to perform one or more of the following actions:
Administer the entire tenant
Audit rights to the entire tenant
Administer specific workspaces only
Audit rights to specific workspaces only
You can allow administrators with tenant-level privileges to invite new administrators and manage existing administrators. You can assign administrator roles only to users stored in Identity Pools.
Note
The admin management feature is behind a feature flag. To activate this feature, contact Support.
Invite a new administrator
You must be a Tenant Admin to invite another tenant administrator. This process applies to newly created tenants.
At the top right, click the gear icon for Tenant Settings > Account.
Result: The Administrators page displays a list of administrators for the tenant. If a message redirects you to the admin workspace, see Advanced administrator management.
Click Invite Admin. Enter the following information.
Email
Email address for the administrator.
First / Last name
First and Last name of the administrator.
Tenant role
Set the administrator's role using the options below:
Member – Determines whether the admin can administer specific workspaces or organizations.
Result: Selecting Member lets you assign the workspace or organization they can manage.
Assigned workspace or organization – Choose the specific workspace or organization the admin is allowed to manage.
Role – Select one of the following roles:
Workspace Admin – Grants full access to workspace resources
Workspace Auditor – Grants read-only access to workspace resources
Auditor – Grants read-only access to tenant resources
Super Admin – Grants full access to tenant resources
Business Admin – Allows the admin to onboard and manage all organizations via the delegated admin portal.
Click Invite.
Result: The system sends an email to the admnistrator with a link to activate their account.
Assign a role
Assign a role to a tenant administrator.
At the top right, click the gear icon for Tenant Settings > Account.
From the list, select an administrator.
Result: The User Profile page displays.
In the Tenant role field, assign a role.
To learn more about roles, see Assigning Roles to SecureAuth Administrators.
Set login methods
Set login methods for tenant administrators.
At the top right, click the gear icon for Tenant Settings > Account.
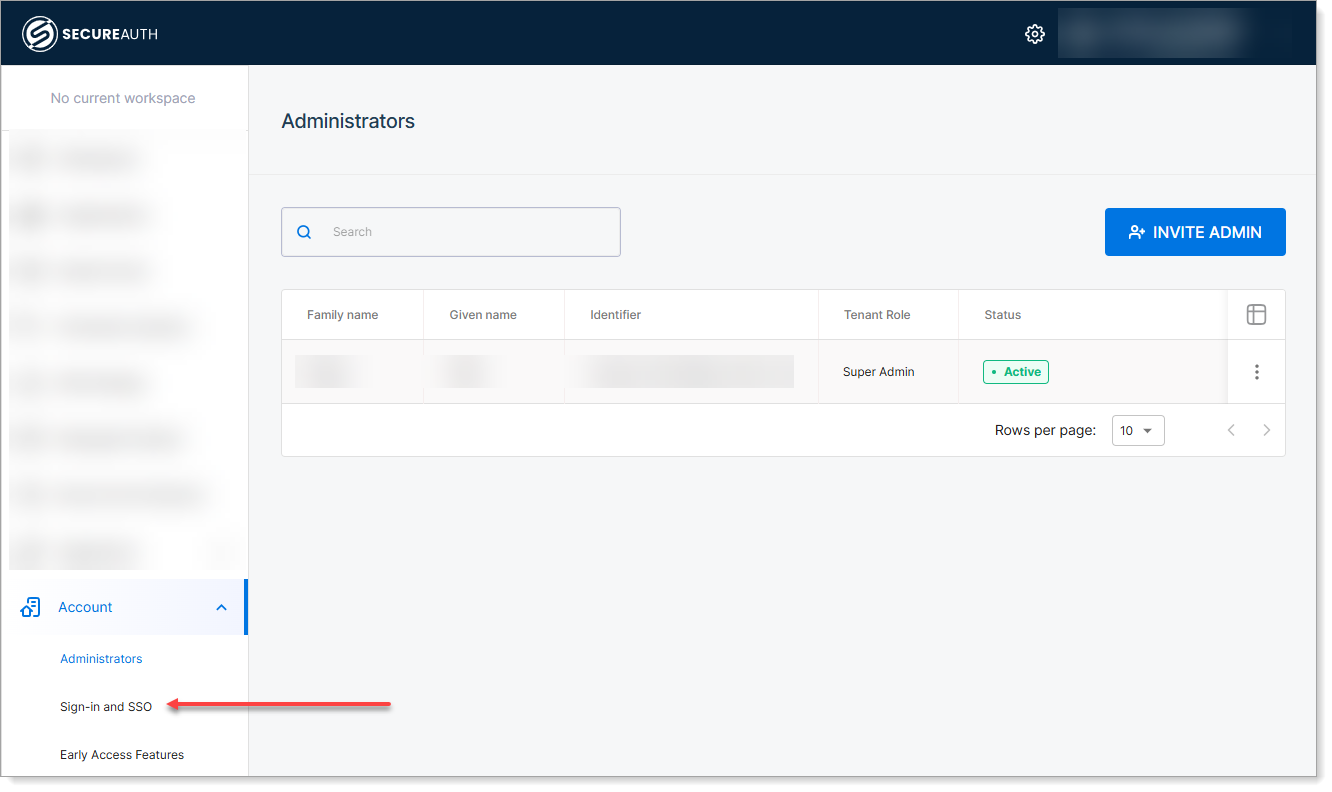
In the left sidebar, click Account > Sign-in and SSO.
Under SecureAuth, set the available login methods. Or, click the three dots next to SecureAuth to configure more login methods.
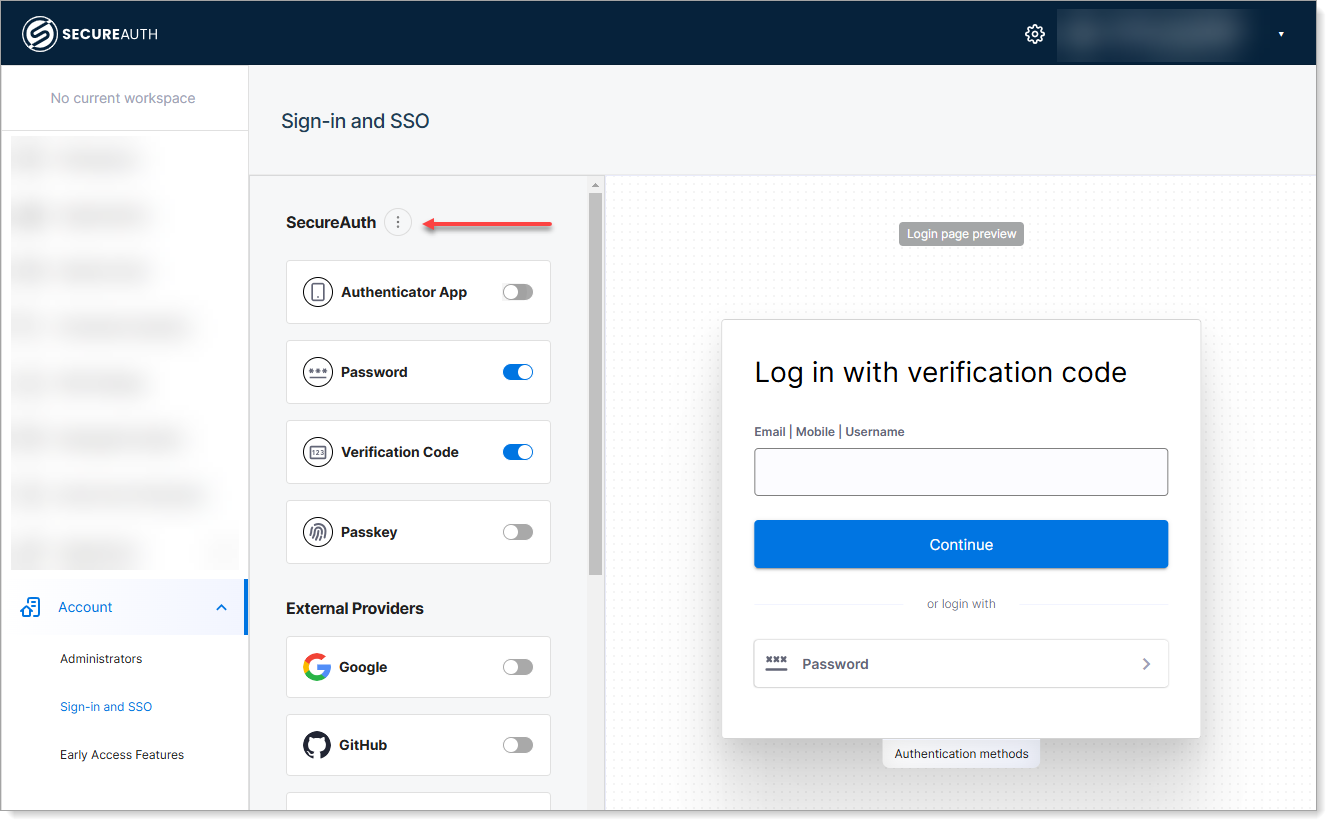
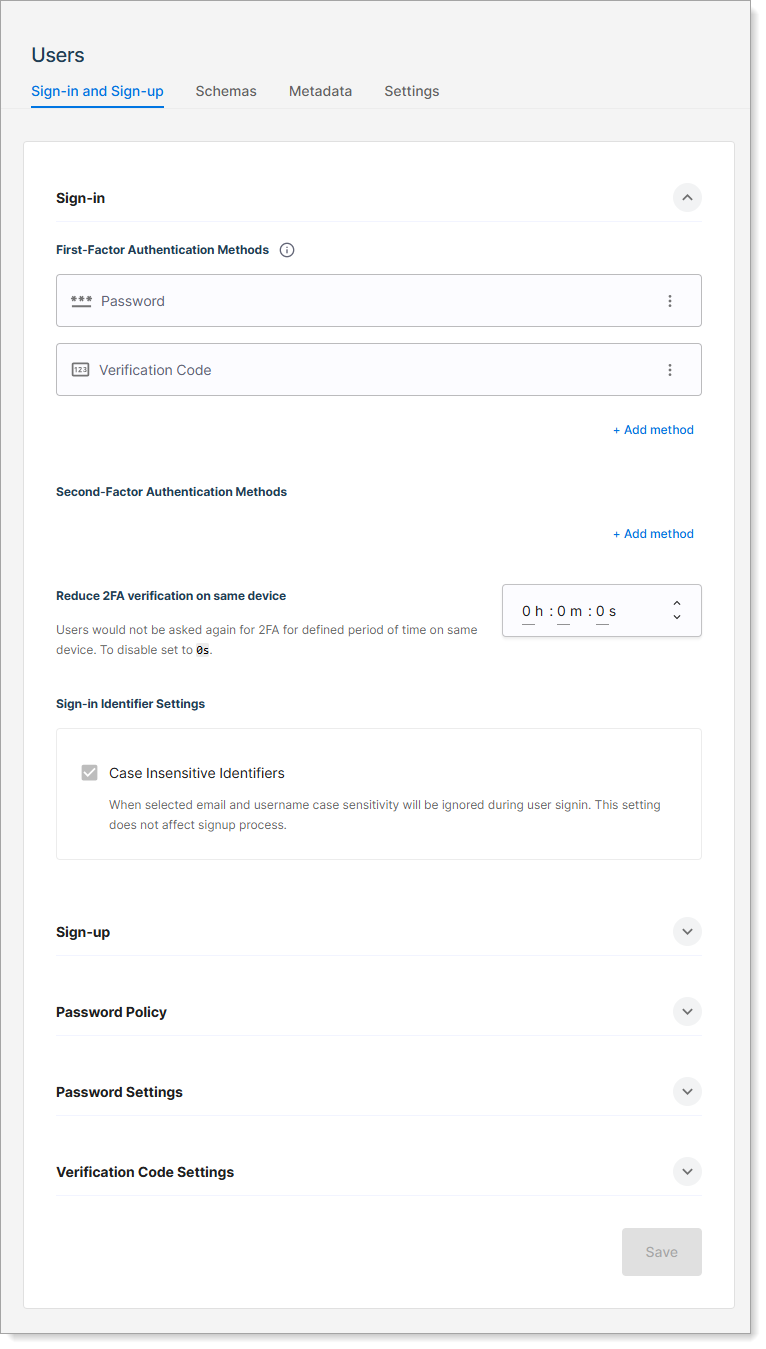
Result: Selecting the three dots > Configure displays the Users page with the Sign-in and Sign-up tab.
Configure and set up the preferred authentication methods for administrators in this tenant.
Set password policy
Set password policy for tenant administrators.
At the top right, click the gear icon for Tenant Settings > Account.
In the left sidebar, click Account > Sign-in and SSO.

Under SecureAuth, set the available login methods. Or, click the three dots next to SecureAuth to configure more login methods.

Result: Selecting the three dots > Configure displays the Users page with the Sign-in and Sign-up tab.
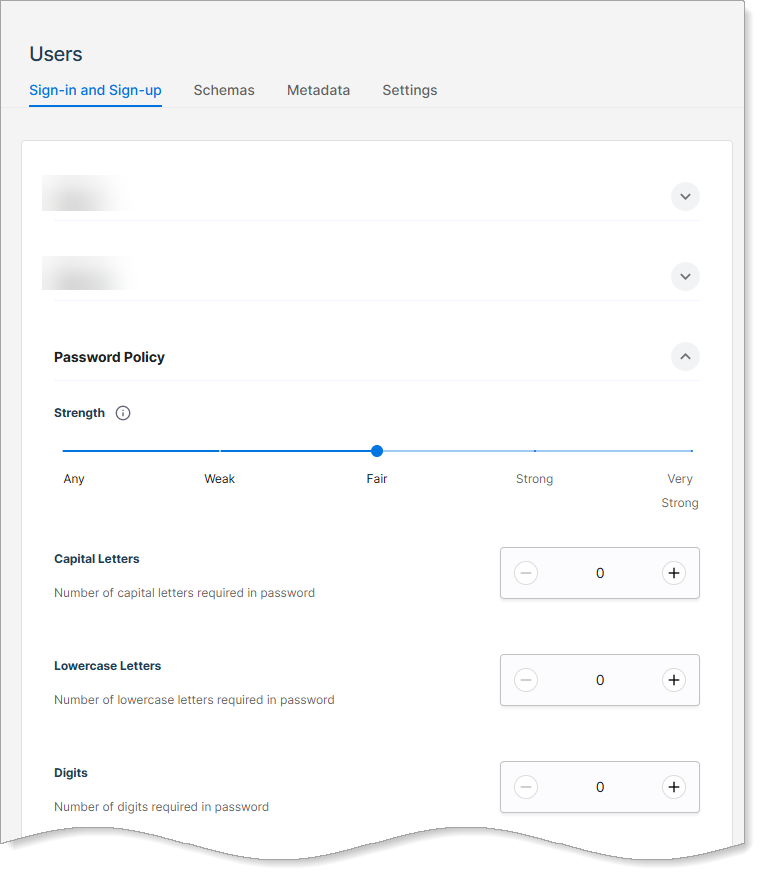
Scroll down and expand the Password Policy section. Set the required password strength and other parameters.
Set admin status
Set the status of a tenant administrator.
At the top right, click the gear icon for Tenant Settings > Account.
In the list, locate the administrator and click the three dots on the far right.
Result: A flyout menu displays.
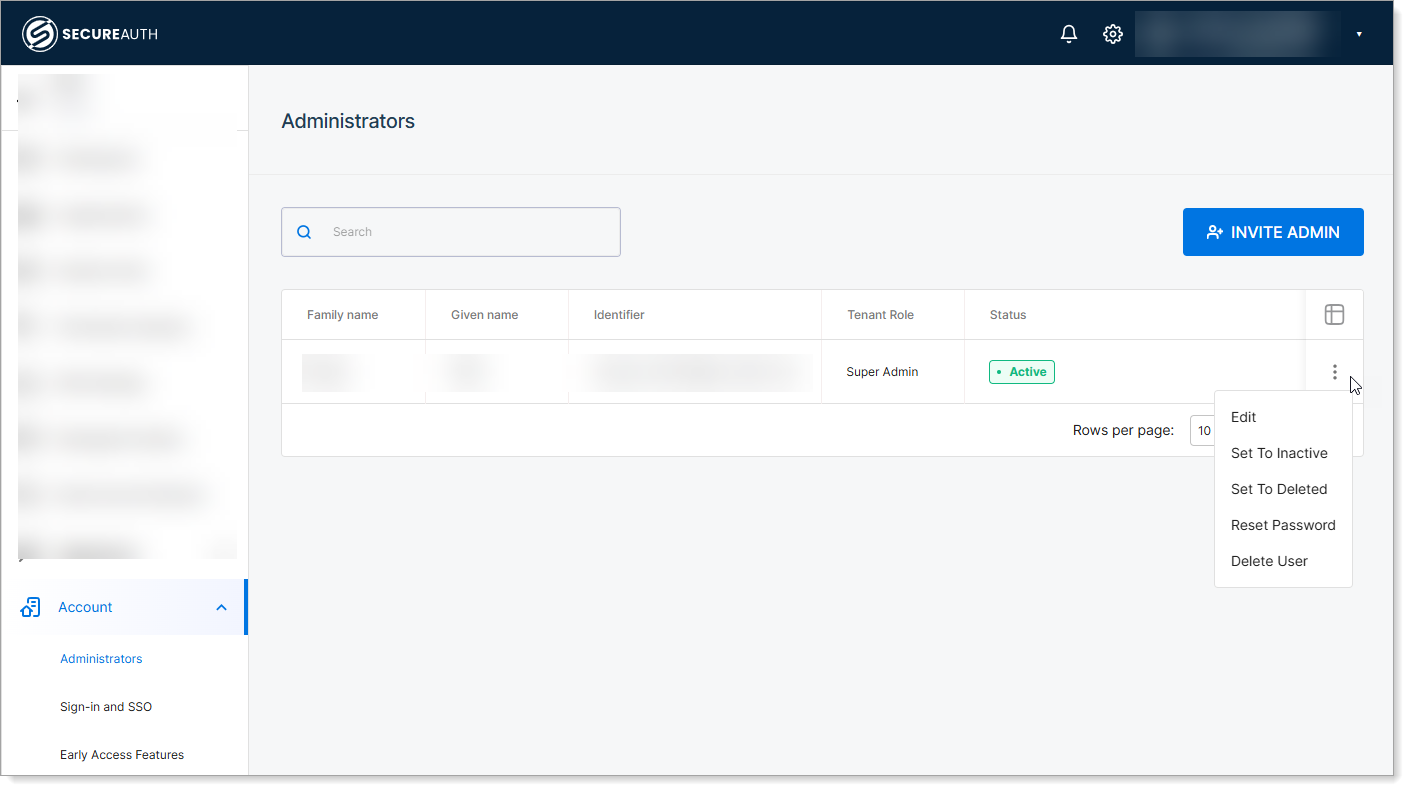
Set the administrator's status using one of these options:
Set to Inactive – When set to this, the tenant admin can no longer log in to the SecureAuth CIAM platform
Set to Deleted – Marks the record as deleted without permanently removing it, allowing for potential recovery. Useful for audit trails or when data might need to be restored.
Reset Password – Reset the password for the tenant admin user account.
Delete User – Permanently delete tenant admin user account from the SecureAuth CIAM platform. Use if retention is not required or data privacy rules demand permanent deletion.
Assign workspace administrators
Only tenant or workspace administrators can perform this action. You can assign a workspace role to tenant administrators, auditors, and members.
Open the target workspace and go to Settings. This page shows a list of users with Admin/Auditor rights in scope of this workspace.
On the Workspace Settings page, select the Administrators tab.
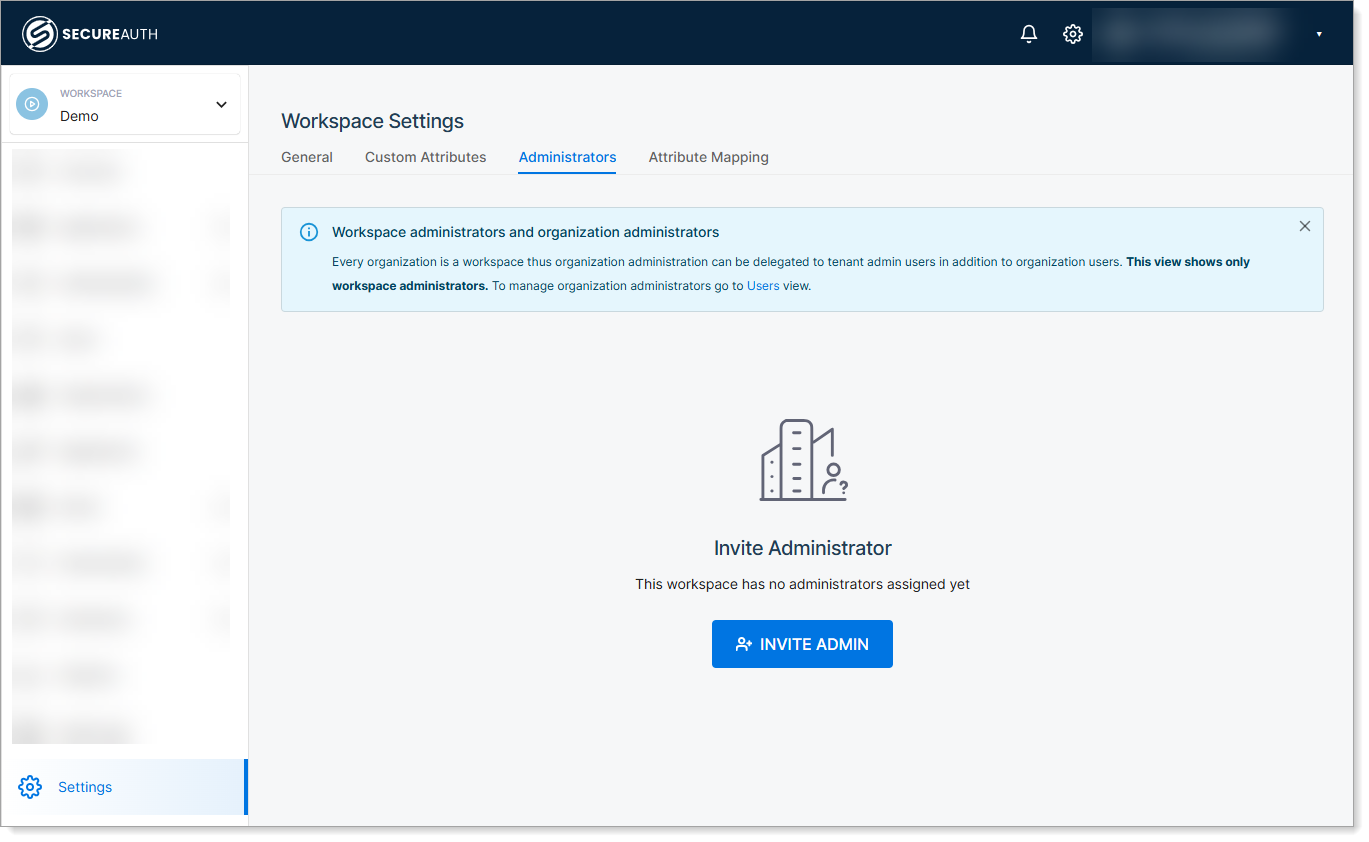
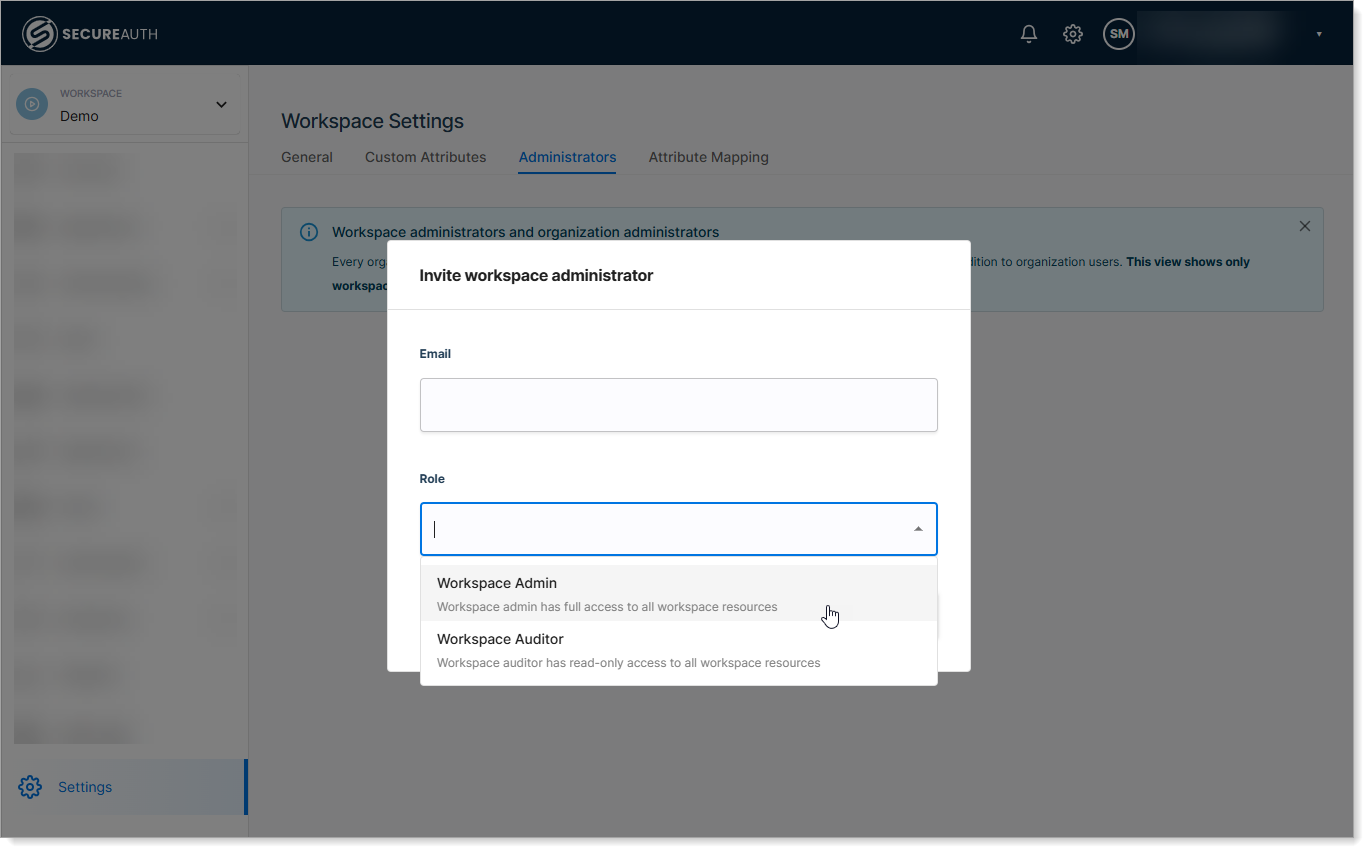
Click Invite Admin. Enter the admin email and set the user role to one of following options:
Workspace Admin – Grants full access to workspace resources
Workspace Auditor – Grants read-only access to workspace resources
Advanced administrator management
If your tenant has advace administrator management enabled, you must use the built-in administrative Identity Pool for management tasks. The system notifies you on the Administrators page if this feature is enabled.
Go to Tenant Settings > Account.
When prompted, click Open Admin Workspace. The system redirects you to the Identity Providers page in the Admin workspace.
Select the Built in Admin IDP.
On the IDP configuration page, click Manage Pool.
The system redirects you to the Identity Pools page, where you can access the Administrators Identity Pool.
Open the Identity Pools and go to the Users page.
You can now manage administrators with expanded options, including:
Assigning new Identifiers for authentication.
Adding new email addresses for OTP or email delivery.
Modifying the admin user schema under User Attributes.
Editing admin metadata under Metadata Attributes.
Managing user status, resetting passwords, or initiating OTP verification using the Manage button.