Integrate a React.js Application with SecureAuth for User Authentication
Learn how to set up a React.js application that lets users log in using SecureAuthd authentication experience. You'll use OpenID Connect(OIDC) protocol to handle user authentication securely.
Overview
React (also known as React.js or ReactJS) is a widely adopted JavaScript library for building user interfaces. In this tutorial, you'll create a React application that handles user login and logout. We'll use the OpenID Connect standard and the OAuth Authorization code flow with PKCE to securely identify users.
SecureAuth acts as your authentication provider. It offers built-in methods and can federate with social providers (Google, Facebook/Meta, X/Twitter, LinkedIn, Apple, Microsoft) and enterprise IdPs (Microsoft Entra ID, Okta, Auth0, Ping, etc.). SecureAuth abstracts the protocol and security complexity so your application simply uses open standards OIDC/OAuth 2.0 or SAML to integrate with SecureAuth.
Choose your path:
- Run the sample (fastest) — clone, install, start; configure later
- Build step by step — scaffold a new React app and wire up auth
Reference repository
Check out the complete source code for the reference application in this tutorial:
ReactJS OIDC Sample App →Prerequisites
- SecureAuth SaaS tenant
- Development environment:
Building React application
Initialize React application
Create a new React application by running this command in your terminal:
npx create-react-app oidc-auth-sample-app && cd oidc-auth-sample-app
Install packages
Install three packages that handle routing, authentication, and token decoding:
- react-router-dom - Handles page navigation in your app
- @cloudentity/auth - SecureAuth JS SDK that handles login flows and token management
- jwt-decode - Reads user information from authentication tokens
Install these packages:
npm install --save react-router-dom @cloudentity/auth jwt-decode
Define React components
Create a folder for your page components and make two basic pages:
Login.js - The page users see when they're not logged in
Profile.js - The page users see after they log in
-
Create the components folder:
mkdir src/components && cd src/components -
Create
Login.jswith this content:const Login = () => {
return (
<div>
<h1>Welcome!</h1>
<button>
Please log in.
</button>
</div>
);
}
export default Login; -
Create
Profile.jswith this content:const Profile = () => {
return (
<div>
<h1>Welcome, user!</h1>
<h3>
Your profile info:
</h3>
<div>
{/* We'll add user information here later */}
</div>
</div>
);
};
export default Profile;
Configure routing
Set up page navigation in your app. You'll have two pages:
- Home page (
/) - Shows the login page for visitors who aren't logged in - Profile page (
/profile) - Shows user information after login (we'll protect this page later)
Replace the content in src/App.js:
import {
  BrowserRouter,
  Routes,
  Route
} from 'react-router-dom';
import Login from './components/Login';
import Profile from './components/Profile';
import './App.css';

function App() {
  return (
    <div className="App">
      <BrowserRouter>
        <Routes>
          <Route index element={<Login />} />
          <Route path="profile" element={<Profile />} />
        </Routes>
      </BrowserRouter>
    </div>
  );
}

export default App;
Add some basic styling by updating src/App.css:
.App {
  min-height: 100vh;
  display: flex;
  flex-direction: column;
  align-items: center;
  justify-content: center;
  text-align: center;
}
Start development server
Start your application:
npm start
Open http://localhost:3000 to see the login page. Visit http://localhost:3000/profile to see the profile page.
What you'll see:
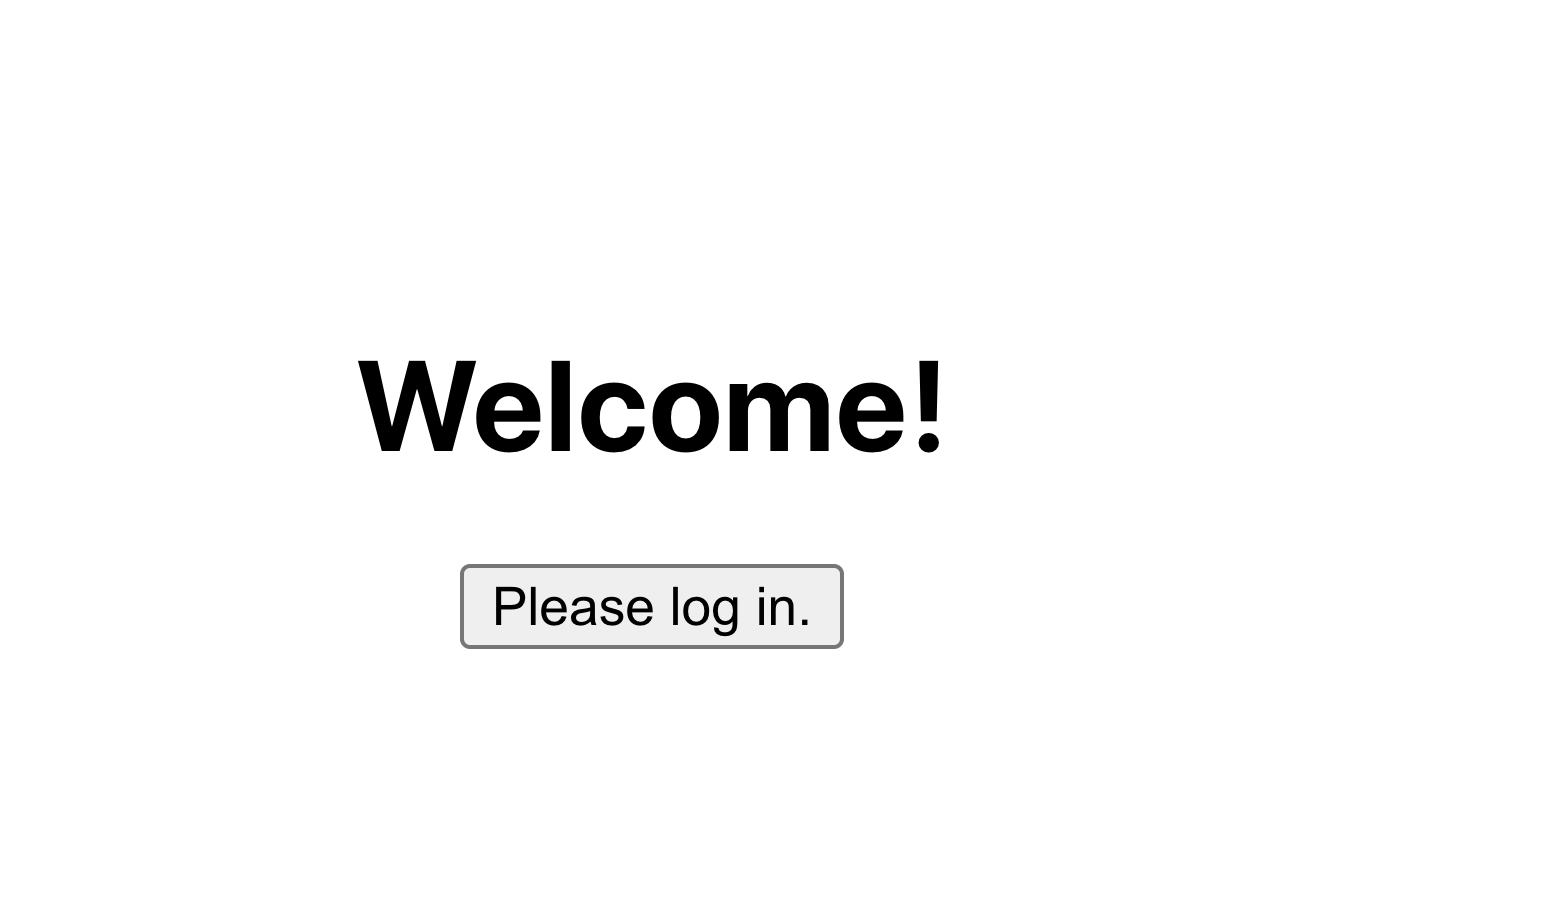 Login view
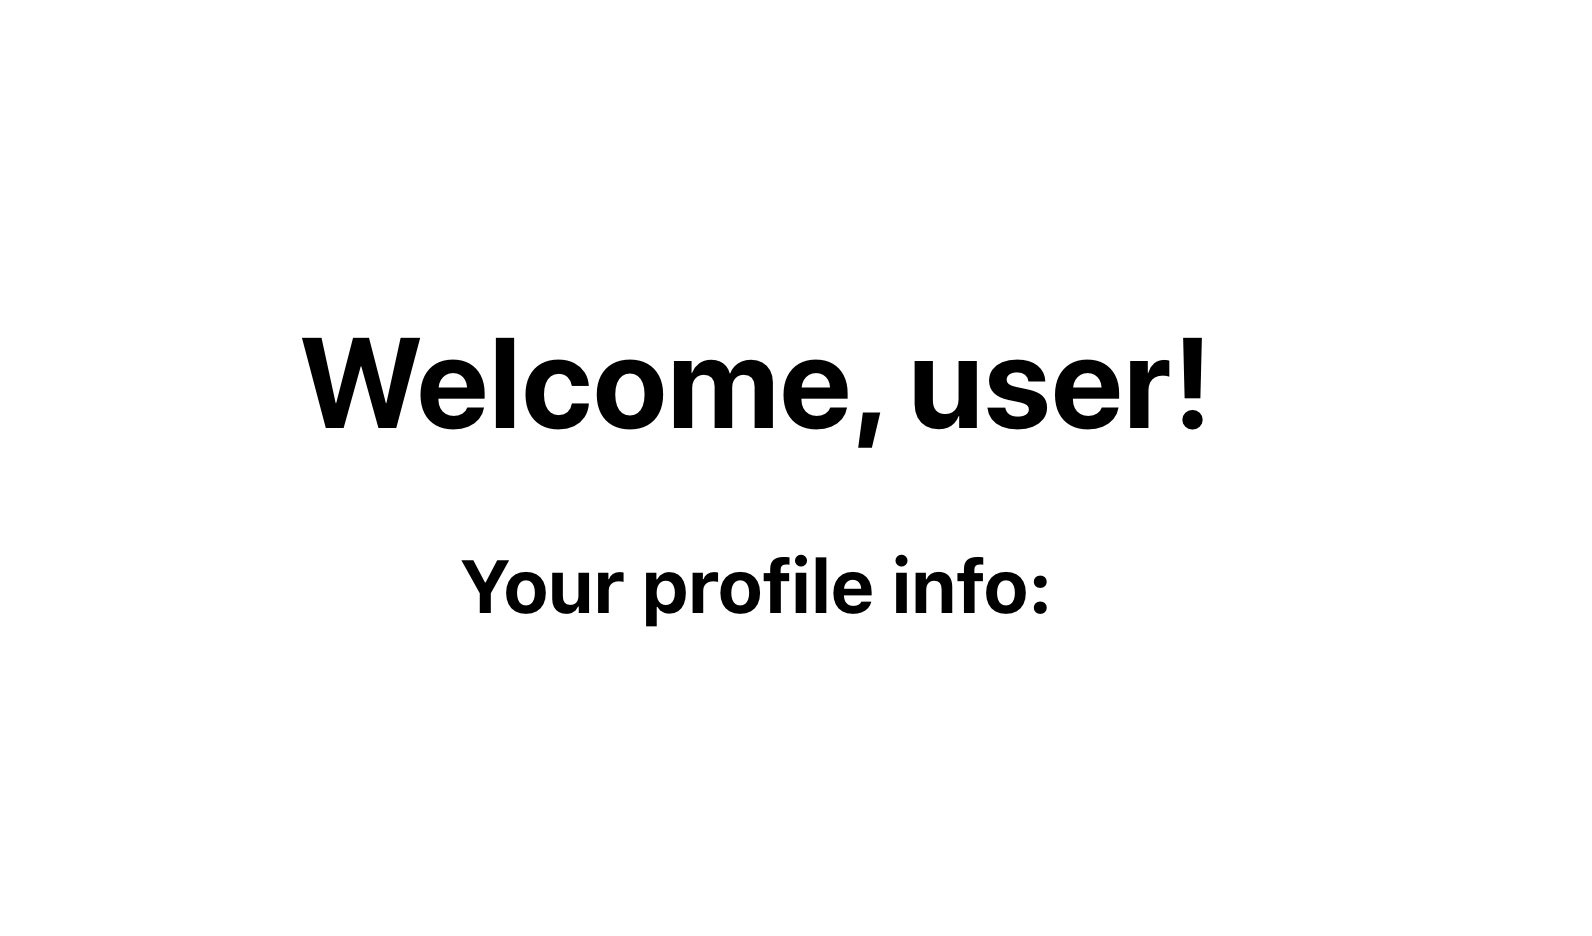 Profile view
Right now, anyone can visit both pages. Next, we'll add authentication to protect the profile page so only logged-in users can see it.
💡 What's happening
When users log in successfully, they get a special token that proves their identity. Your app checks for this token to know if someone is logged in.
Application configuration
Register OAuth client
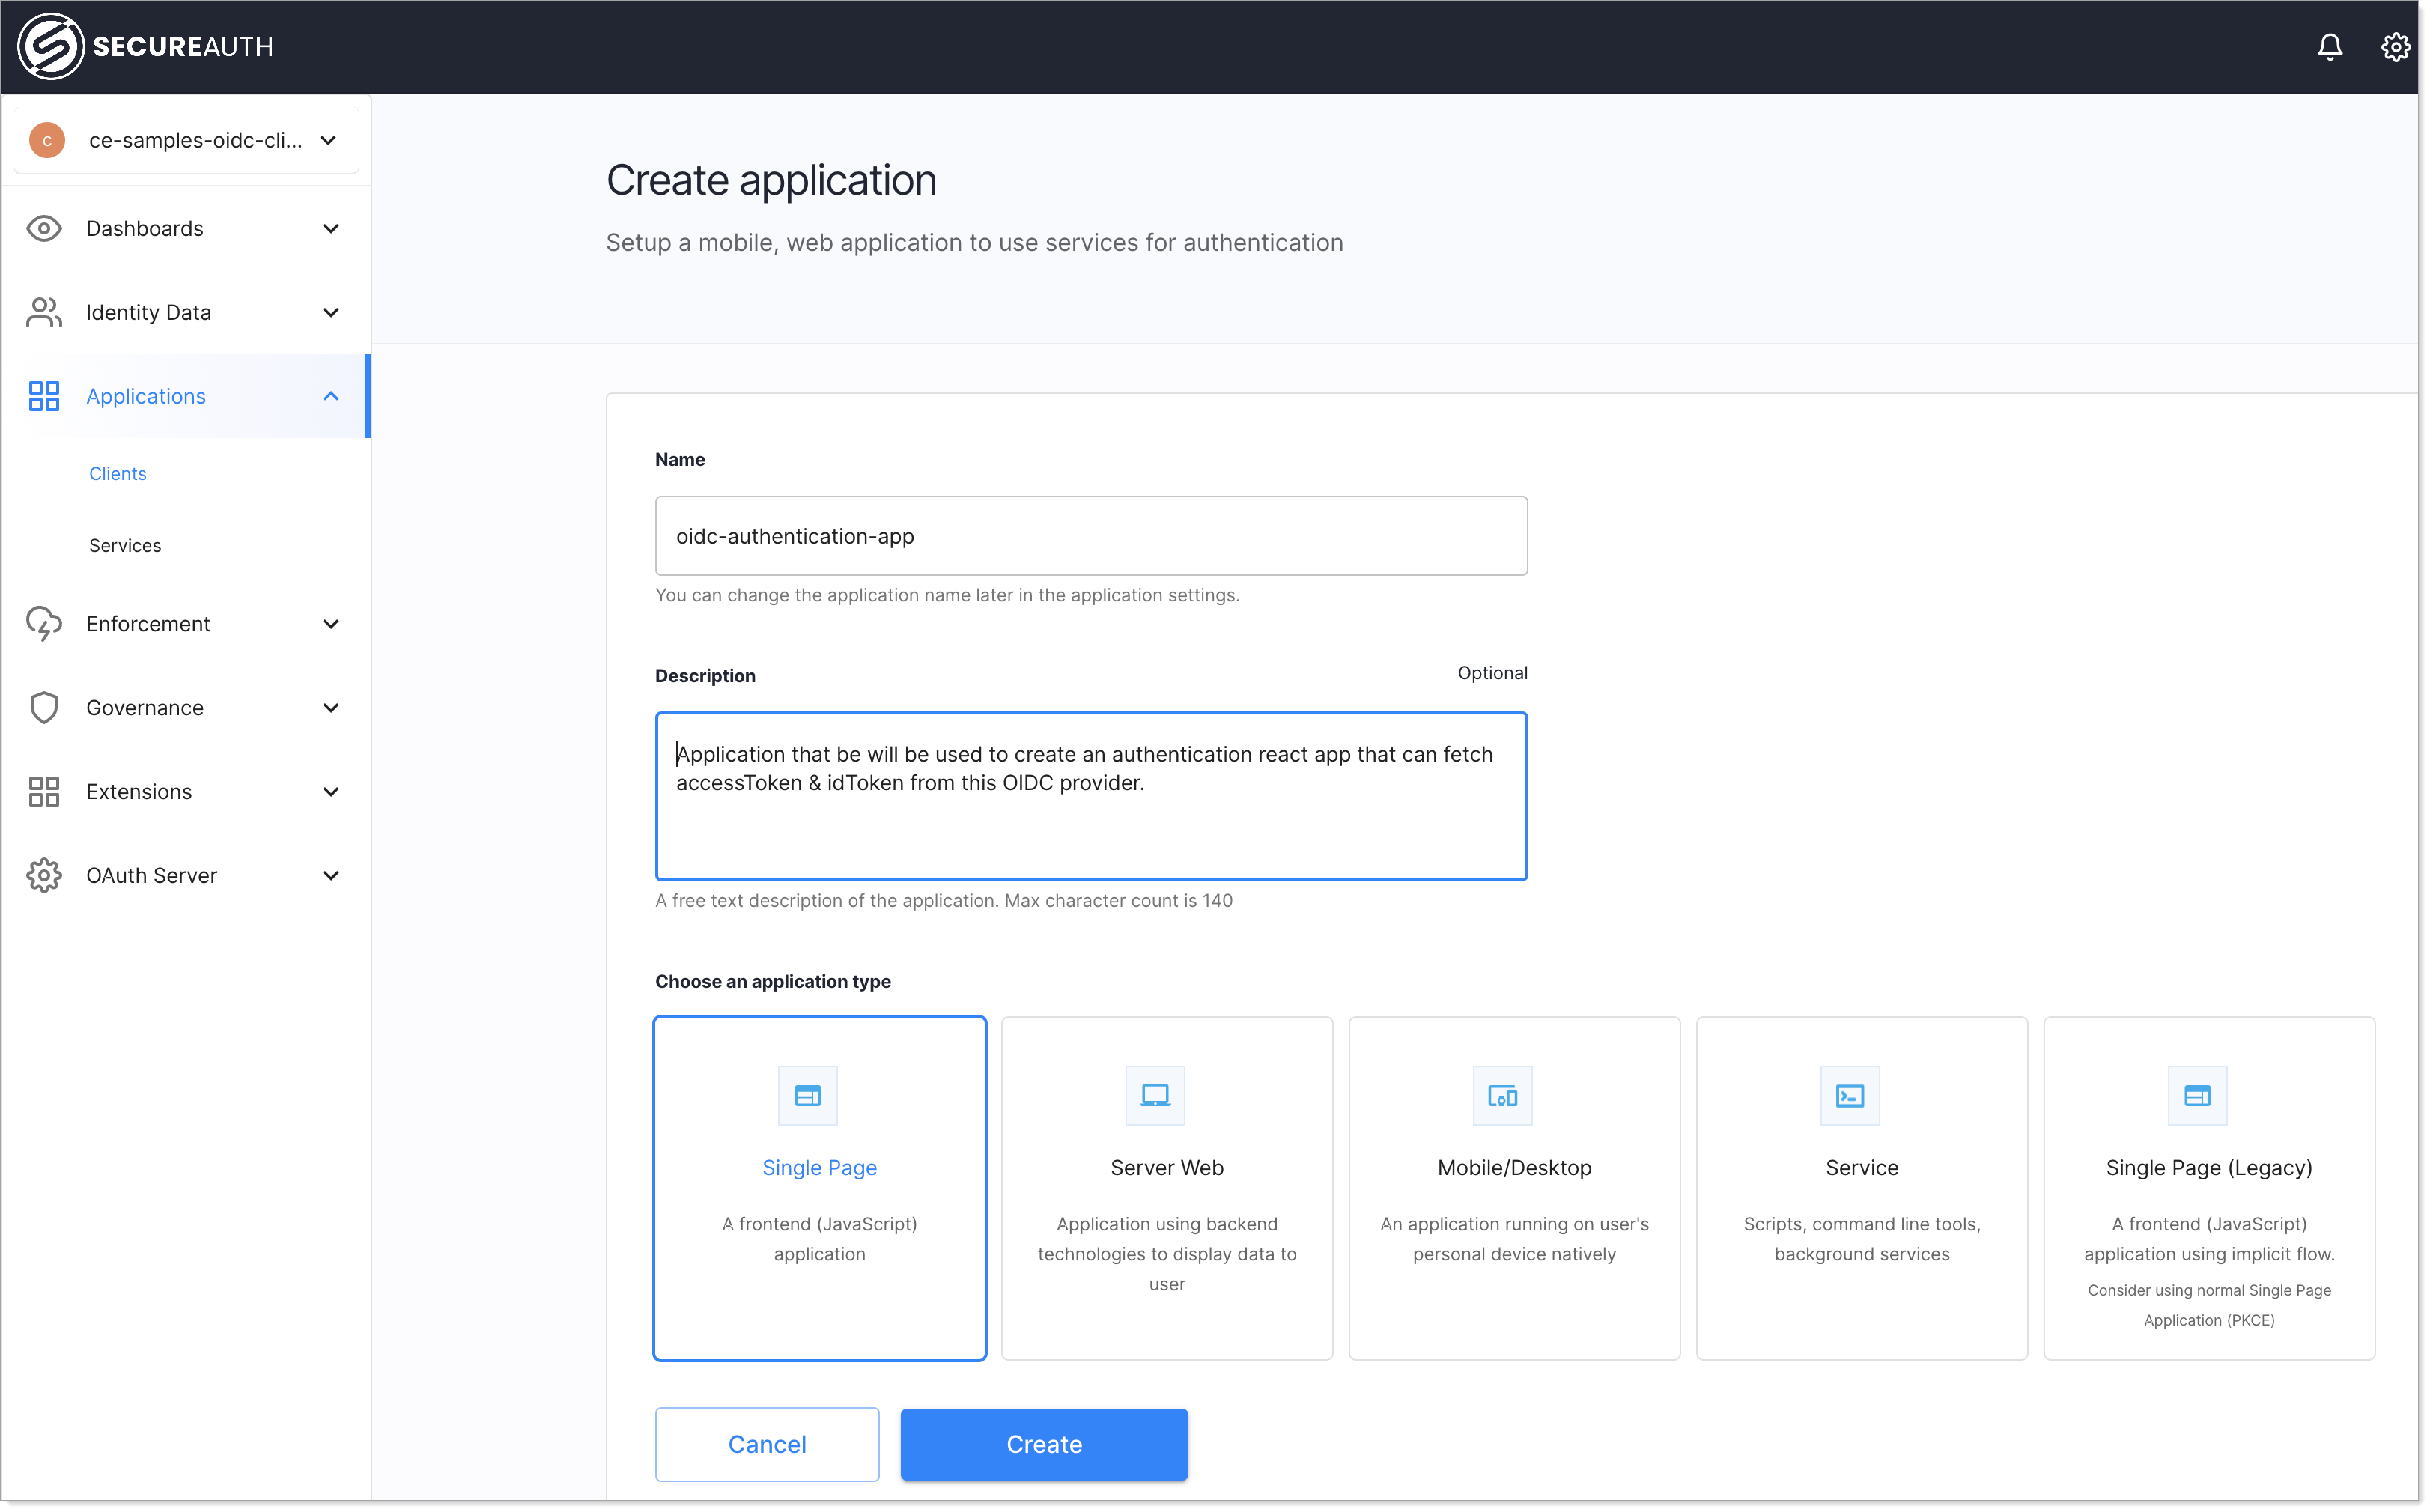
You need to register your React app with SecureAuth. We'll create a "public" application because React apps run in web browsers and can't securely store secret passwords.
-
Go to Applications > Clients in your SecureAuth console
-
Click + CREATE CLIENT
-
Enter an Application Name and select Single Page as the type:
-
Click Create
Add a redirect URL
Tell SecureAuth where to send users after they log in:
-
Find the REDIRECT URI section
-
Add
http://localhost:3000/(this is where your React app runs during development)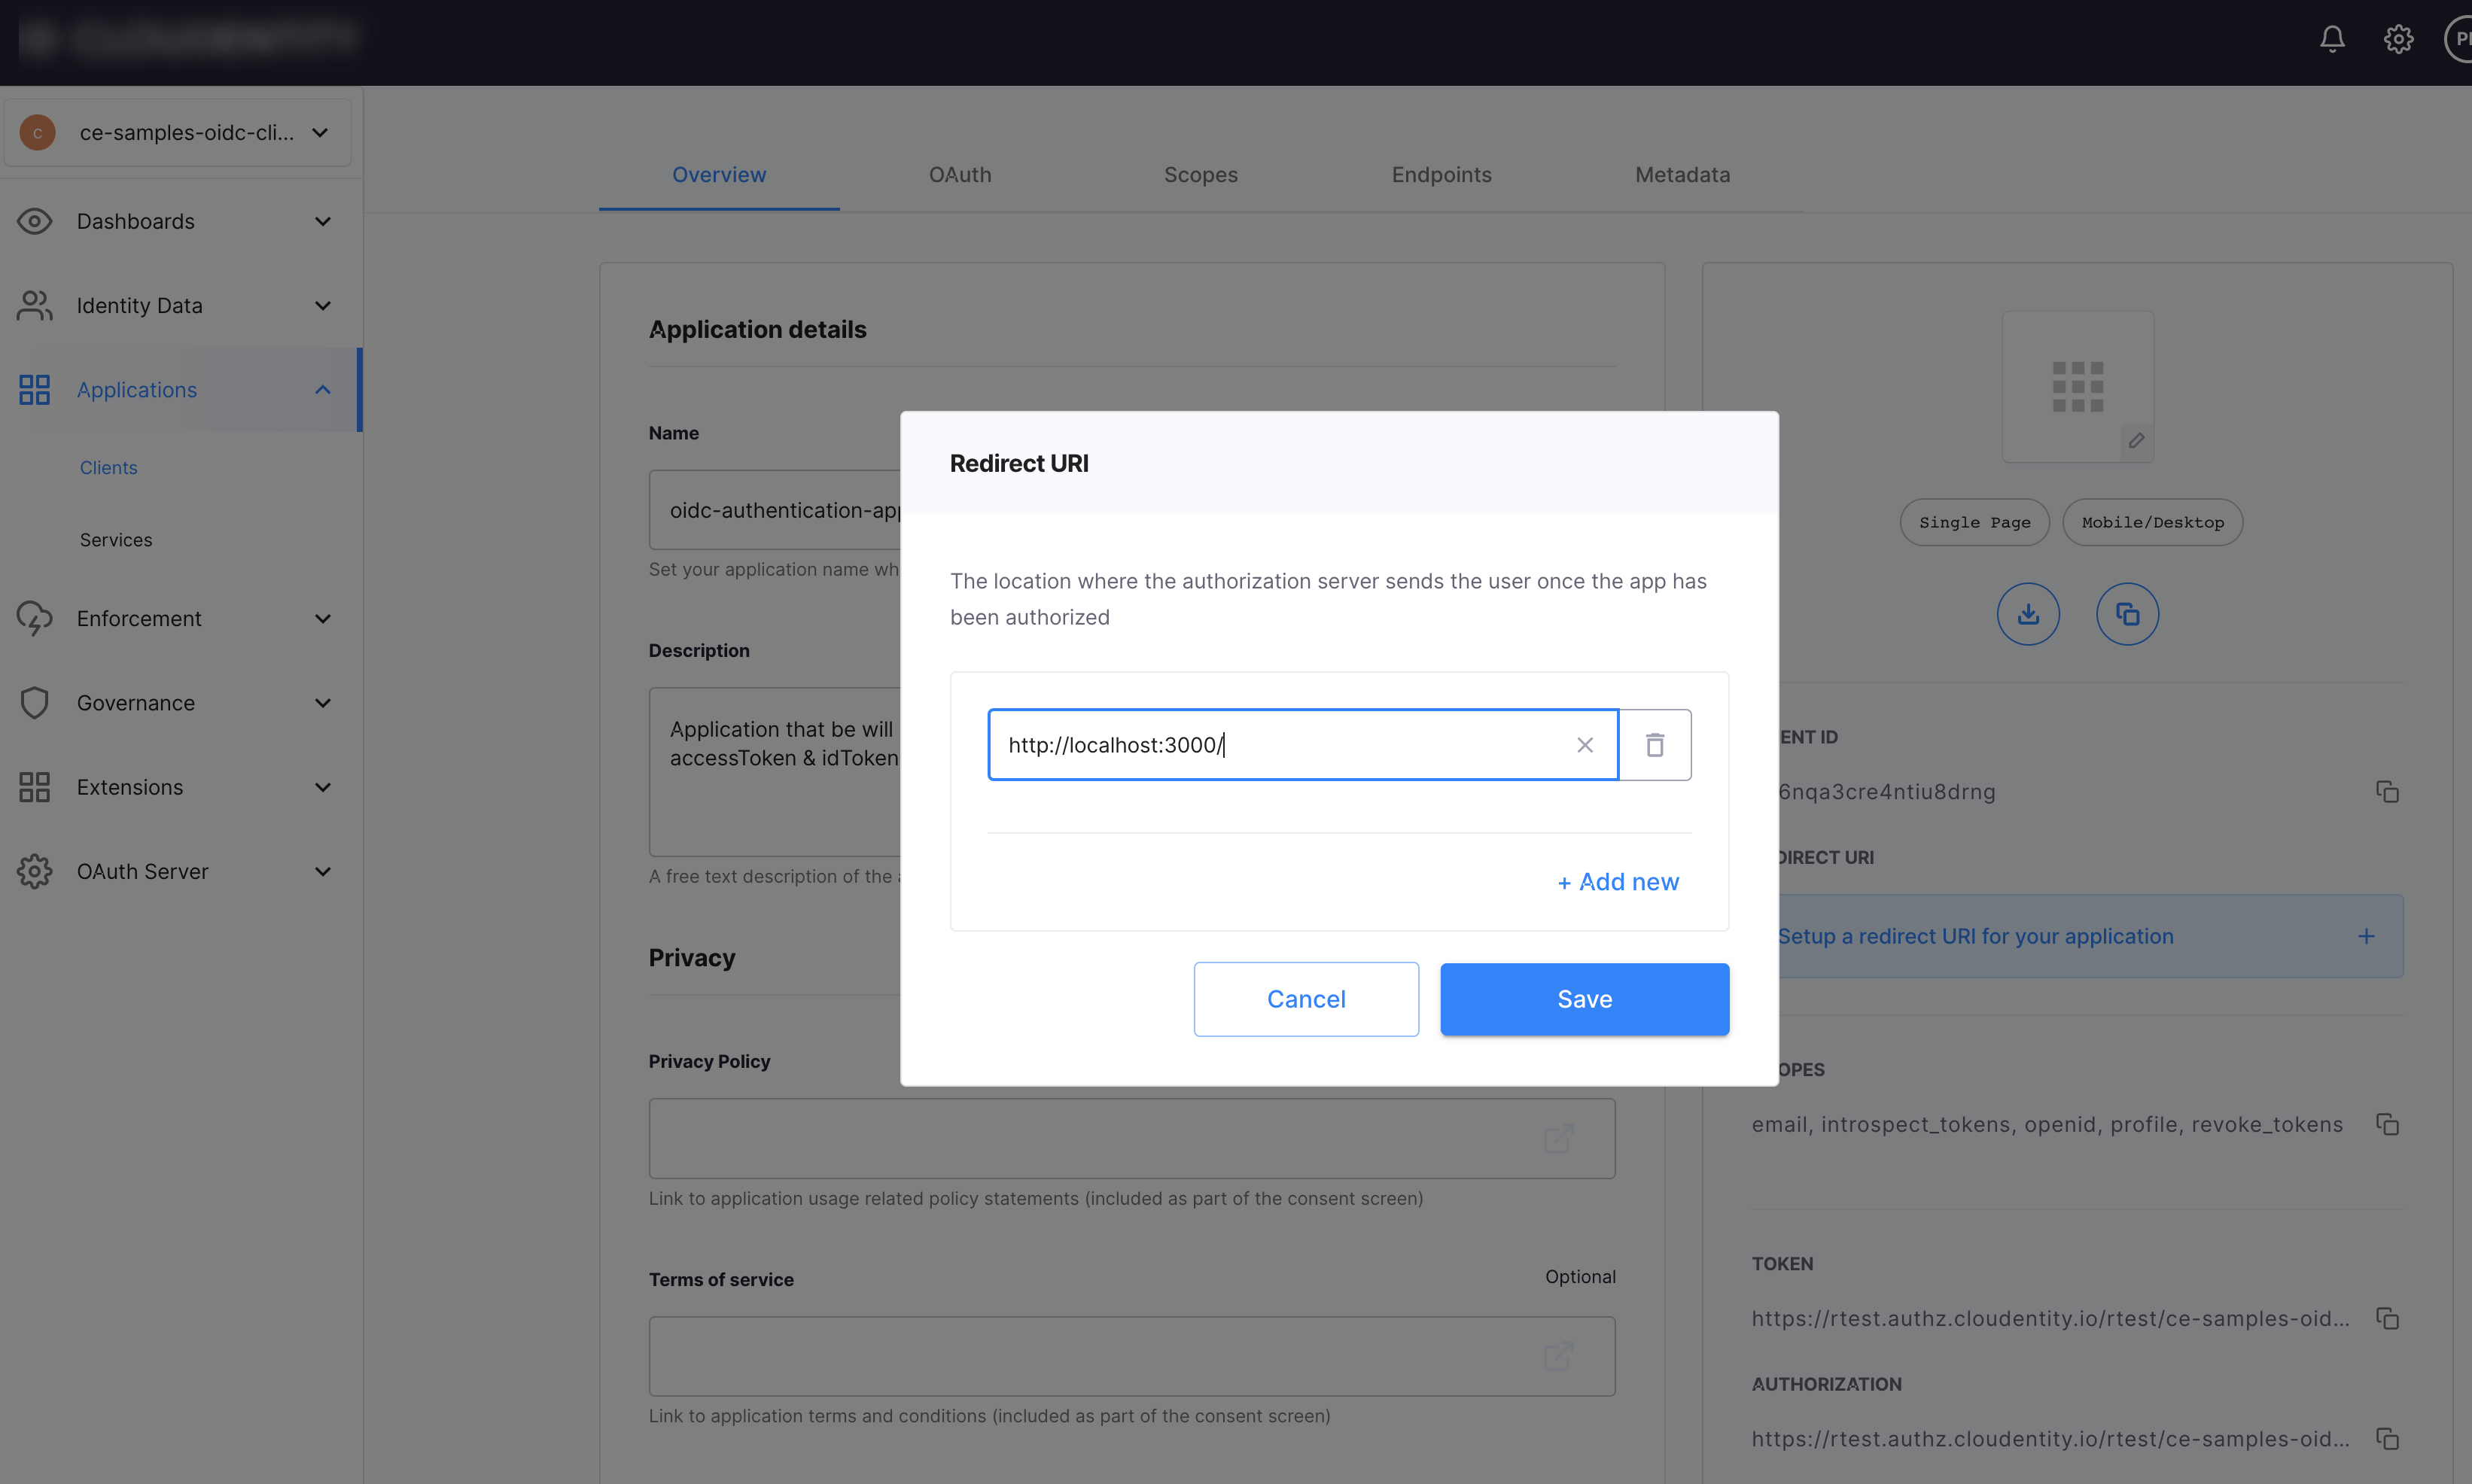
For production, you'll add your live website URL here instead.
Understand the settings
SecureAuth automatically configures your application with these security settings:
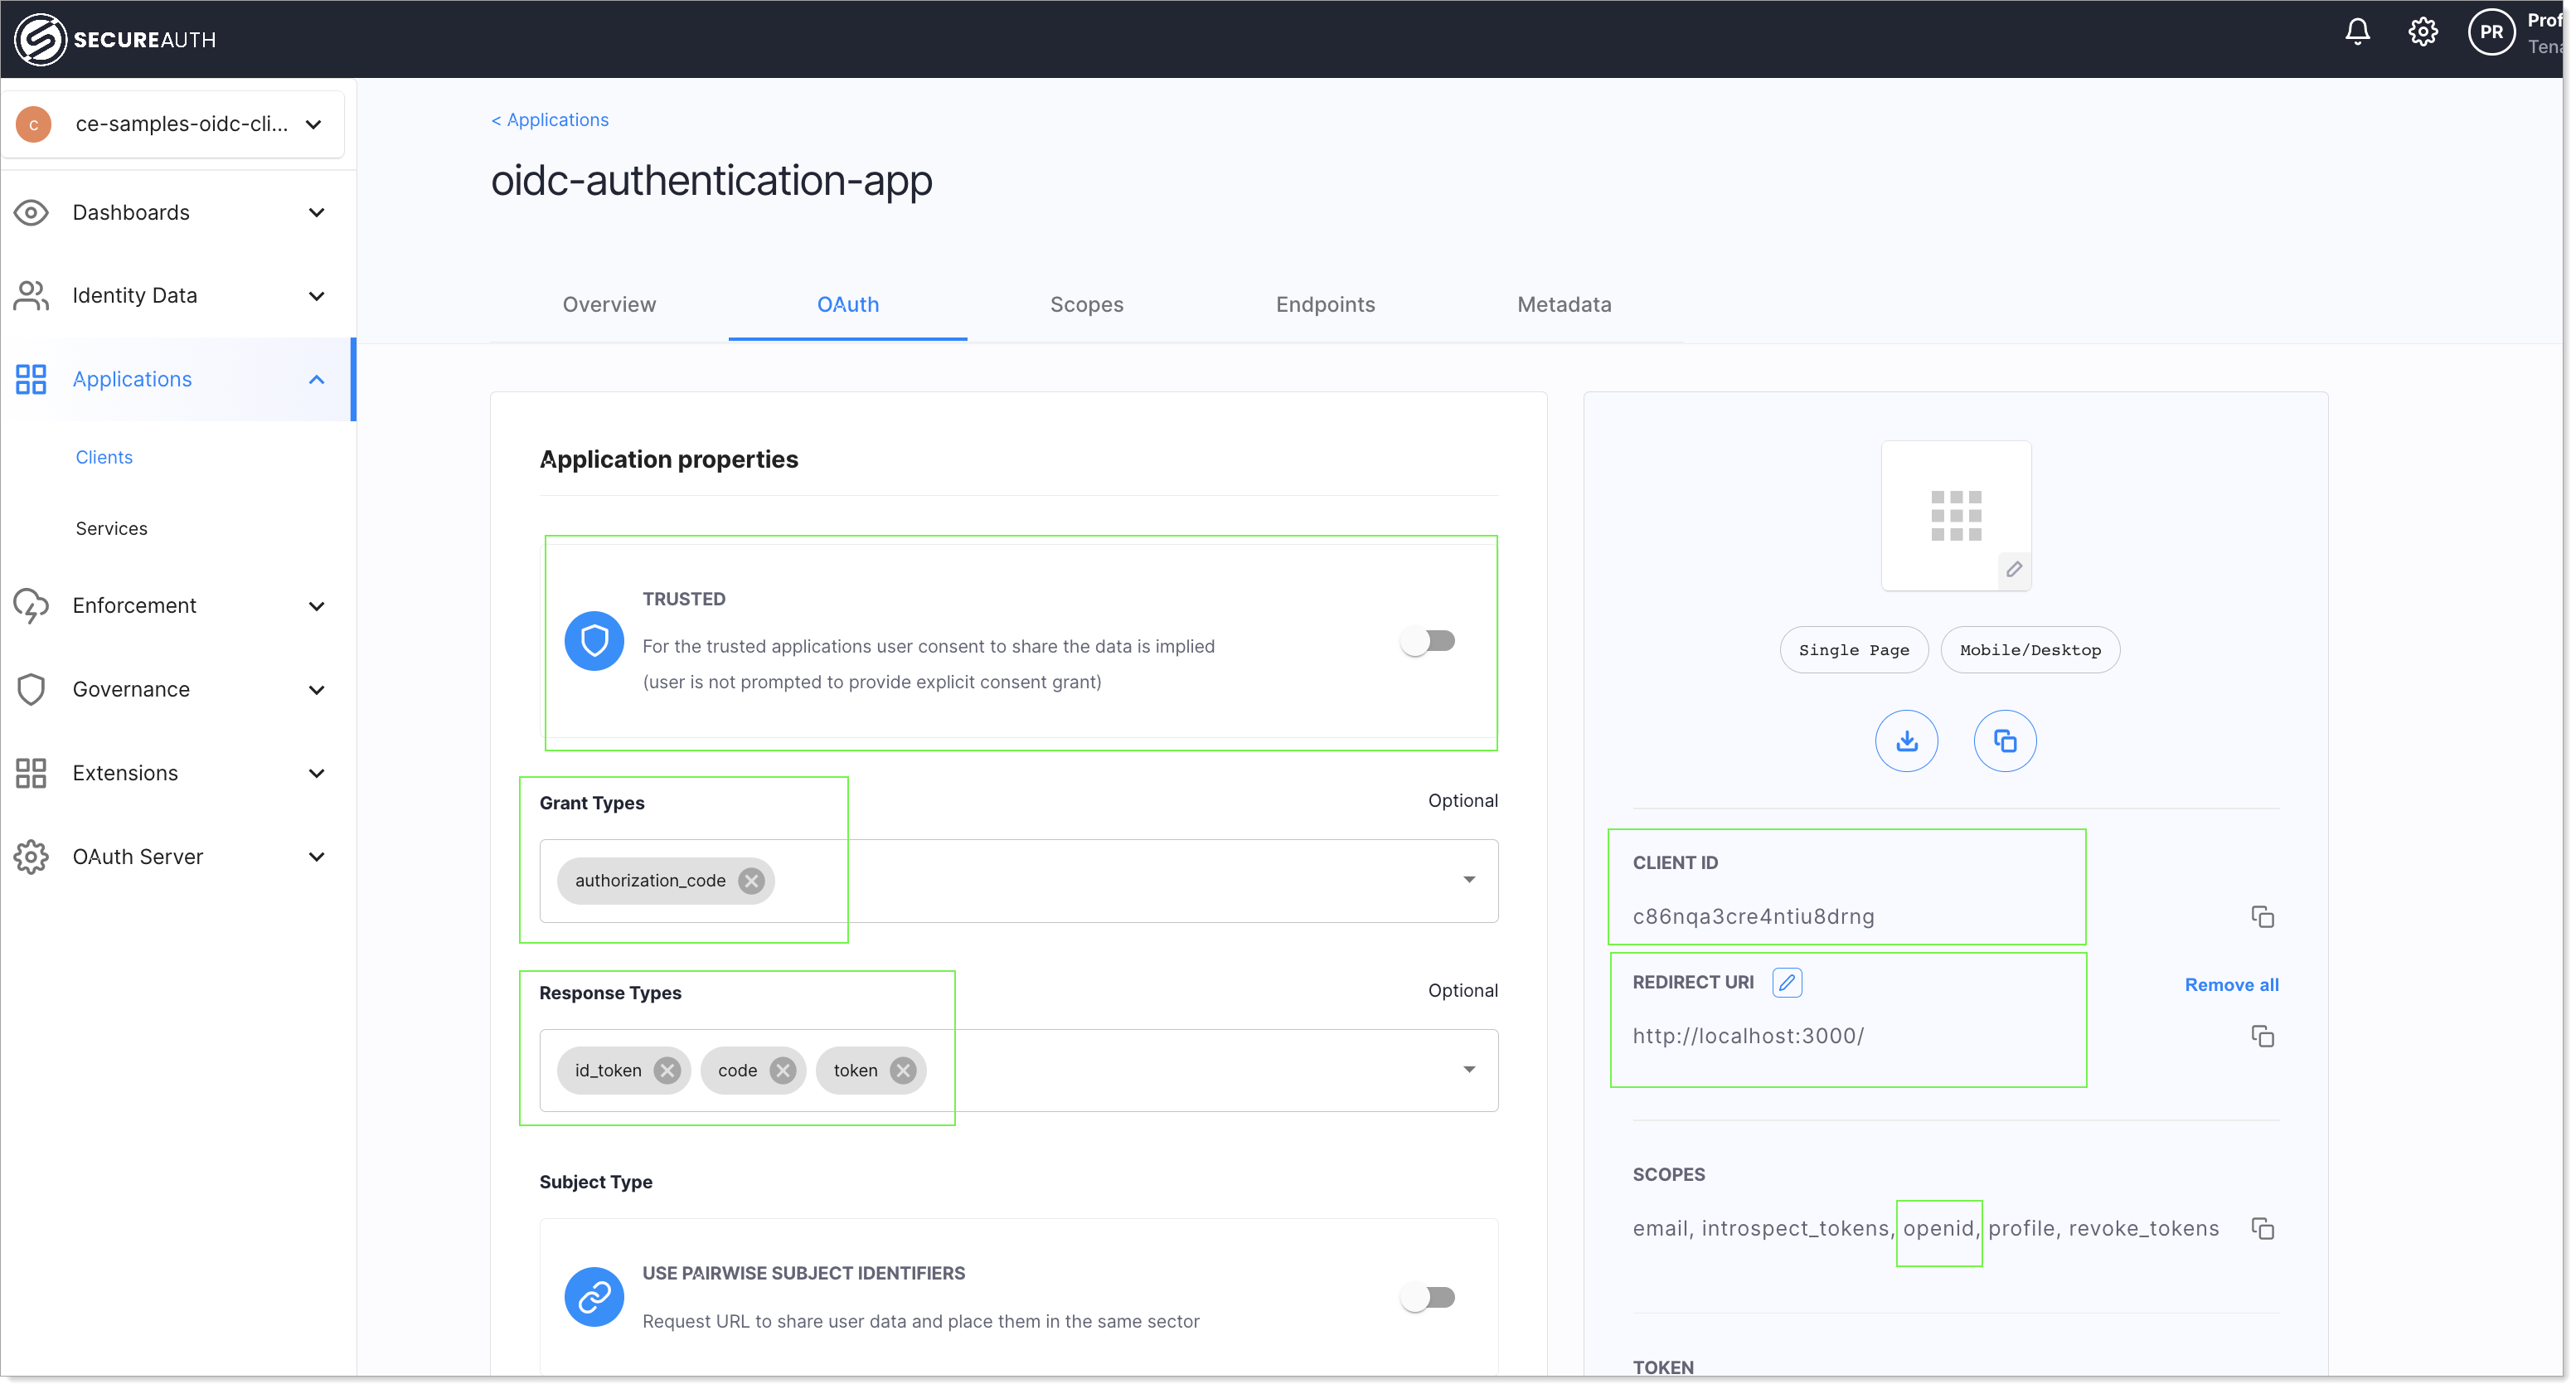
What these mean:
- Trusted app: Disabled (correct for browser-based apps)
- Grant type: Authorization code (the secure method we're using)
- Response type: Code (we get a temporary code first, then exchange it for tokens)
- Client ID: A unique identifier for your app
- Redirect URI: Where users return after logging in
- Scope: The user information we can access (we need
openidto identify users)
Configure React app with OAuth client
Now connect your React app to SecureAuth using the SDK. This library handles all the complex security details automatically.
Create a configuration file called src/authConfig.js. Replace the example values with your actual SecureAuth information:
const authConfig = {
    domain: 'mytenant.us.connect.secureauth.com', // Your SecureAuth domain
    tenantId: 'mytenant', // Your tenant name (from the URL)
    authorizationServerId: 'demo', // Your workspace name
    clientId: 'application-client-id-goes-here', // Copy this from SecureAuth
    redirectUri: 'http://localhost:3000/',
    scopes: ['profile', 'email', 'openid'], // User information we want
    accessTokenName: 'mytenant_demo_access_token', // Where to store tokens
    idTokenName: 'mytenant_demo_id_token',
 };

 export default authConfig;
Where to find these values:
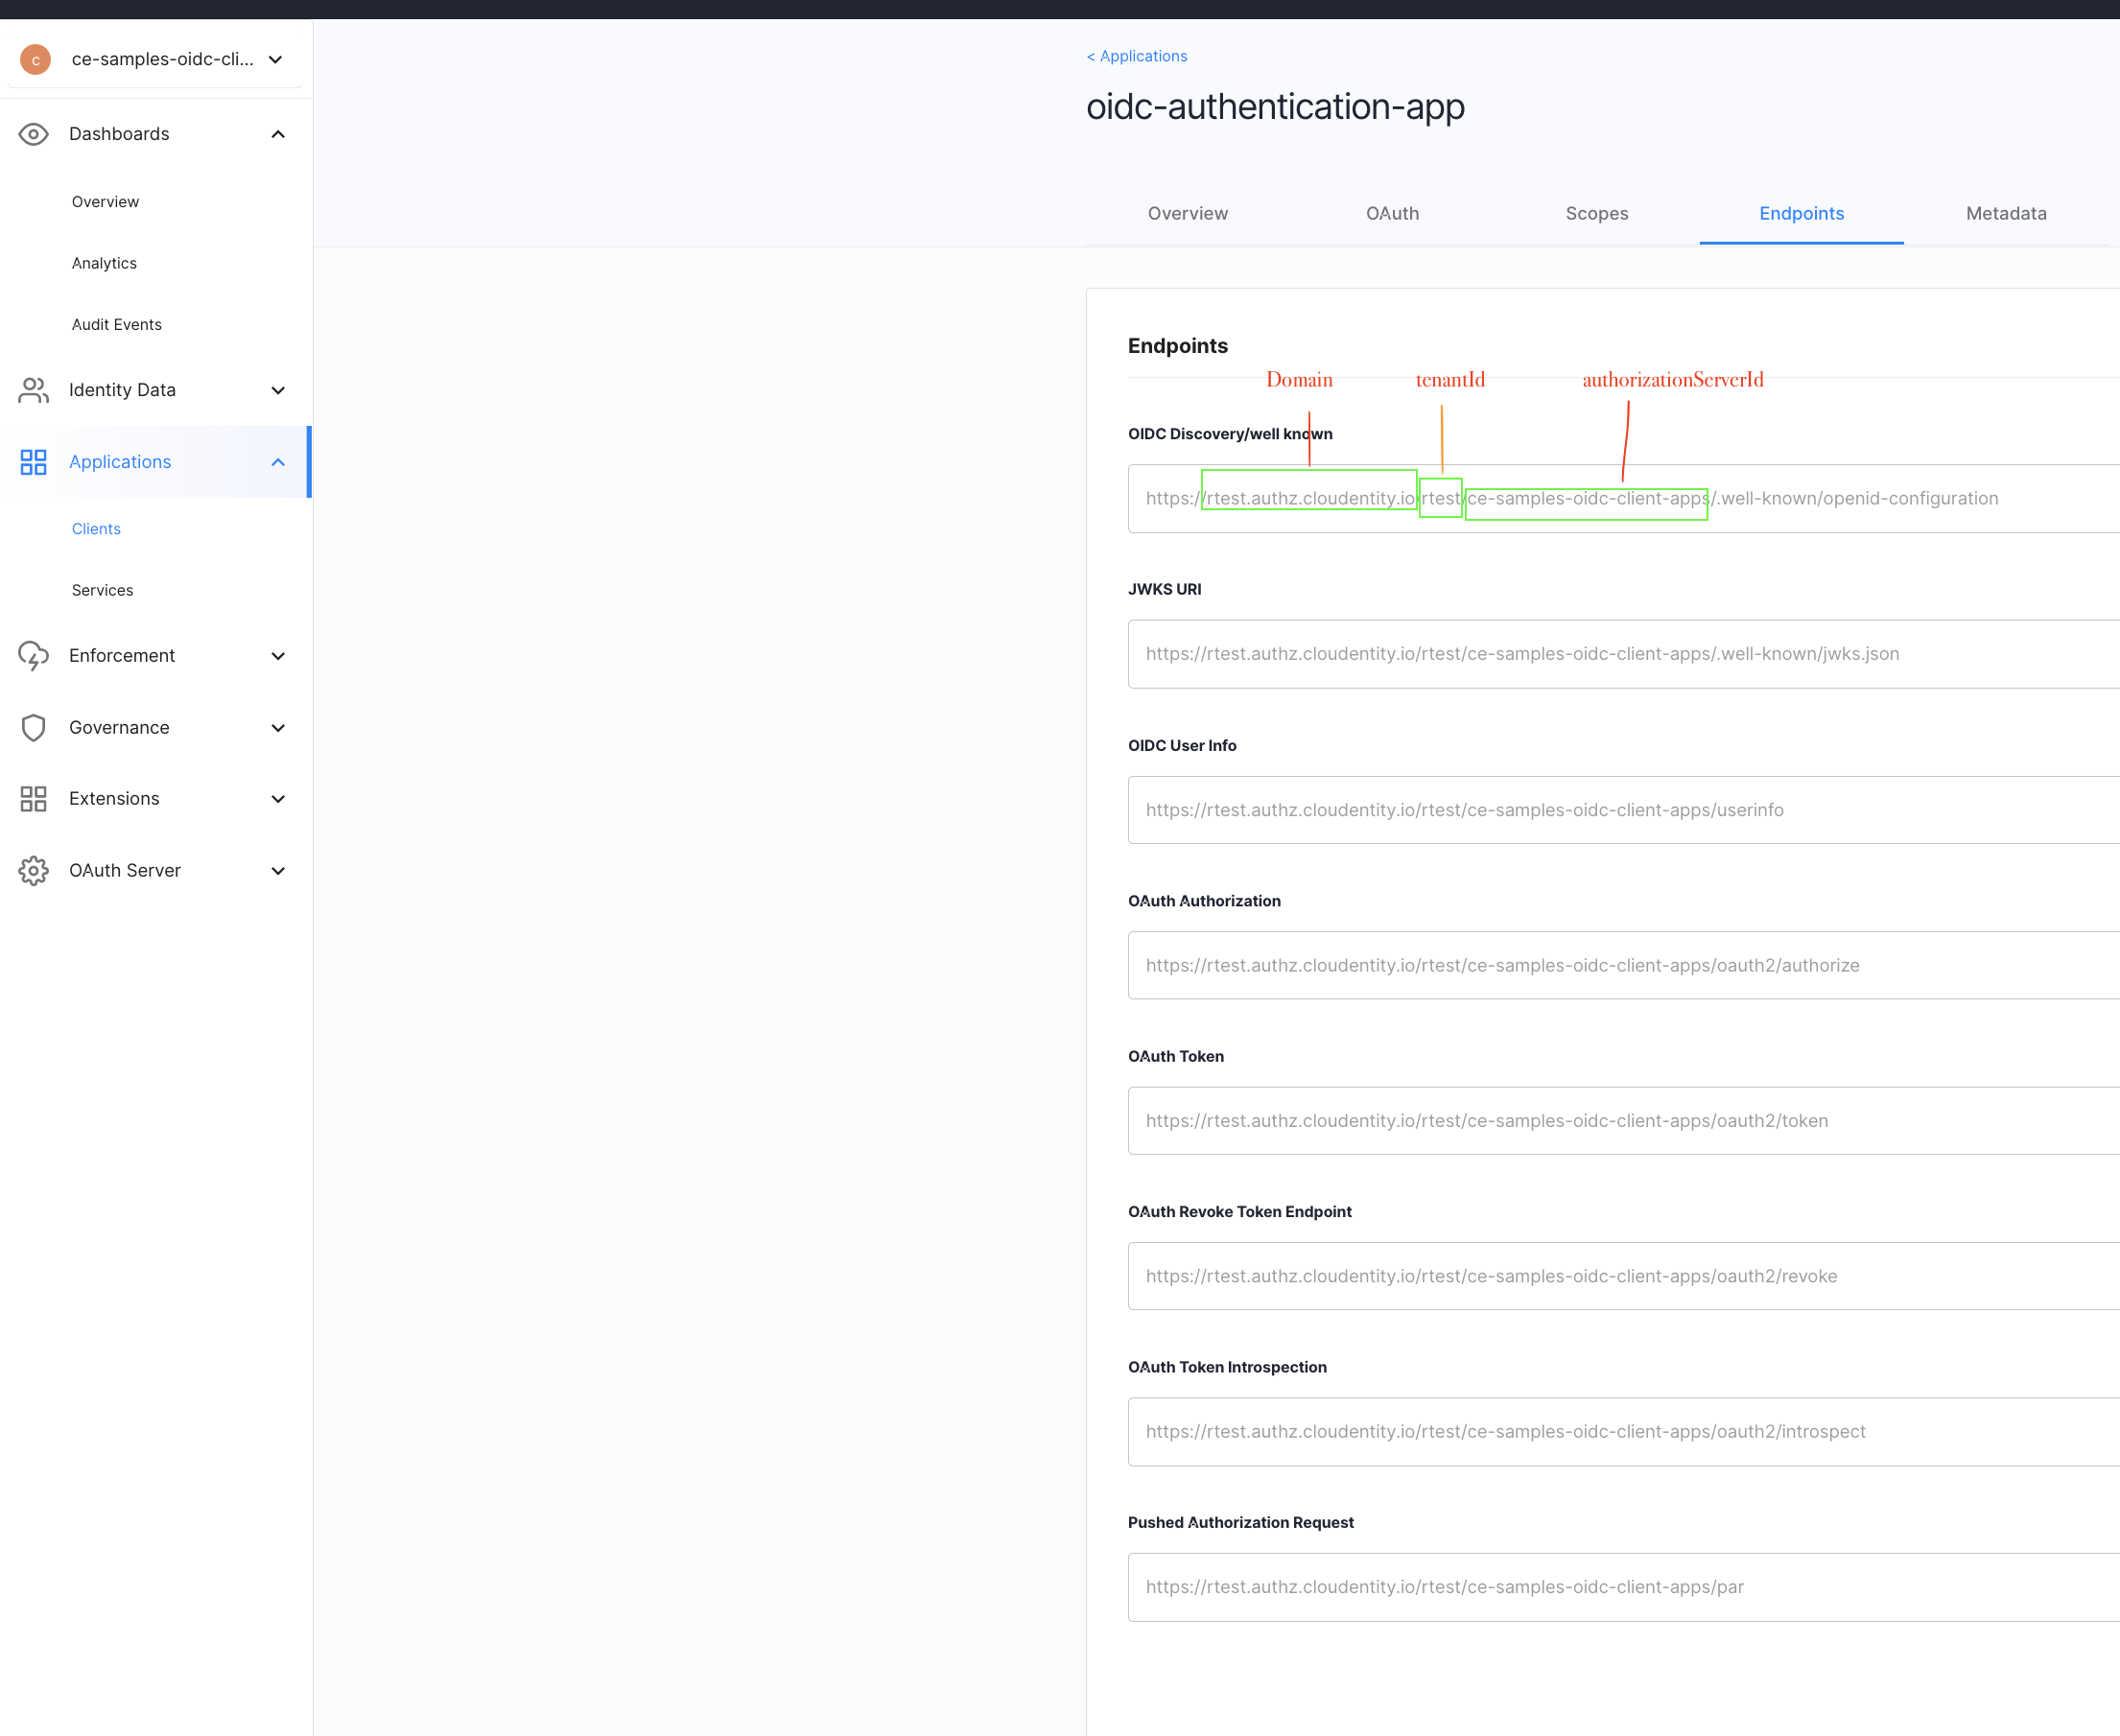
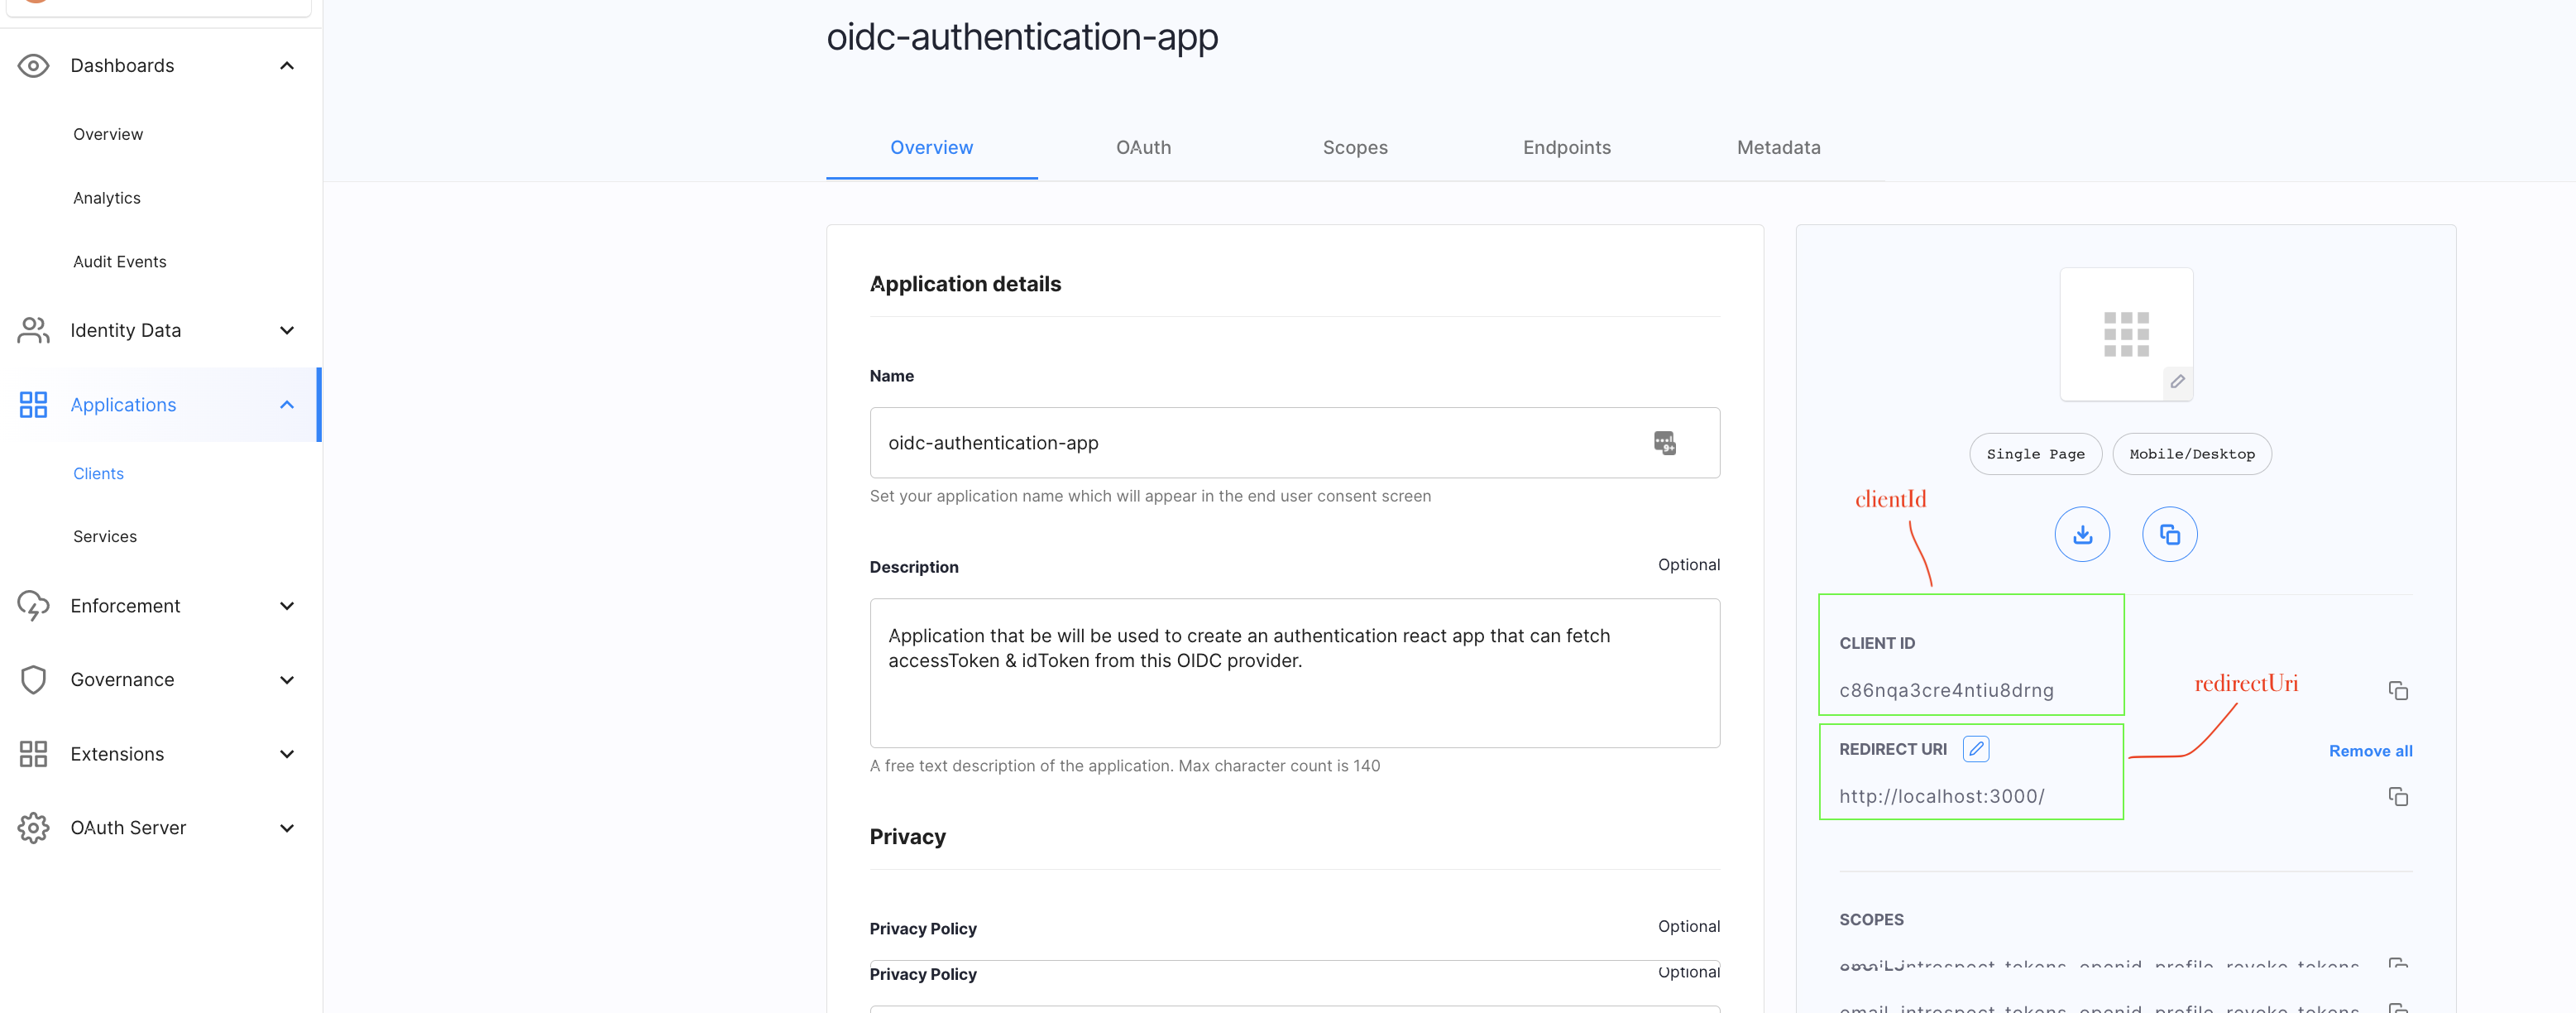
💡 How this works
This configuration tells the SecureAuth SDK how to connect to your SecureAuth setup. The SDK automatically handles the secure login process and manages user tokens.
React hook to maintain auth state
Create a React hook that checks whether users are logged in. This hook will track three states: checking, logged in, or logged out.
Create src/auth.js:
import {useState, useEffect} from 'react';

export const useAuth = (auth) => {
  const [authenticated, setAuthentication] = useState(null);

  function removeQueryString() {
    if (window.location.href.split('?').length > 1) {
      window.history.replaceState({}, document.title, window.location.href.replace(/\?.*$/, ''));
    }
  }

  useEffect(() => {
    auth.getAuth().then((res) => {
      if (res) {
        console.log('auth response:', JSON.stringify(res));
        removeQueryString();
      }
      setAuthentication(true);
    })
    .catch((_authErr) => {
      setAuthentication(false);
      if (window.location.href.split('?error').length > 1) {
        if (authenticated === false) {
          window.alert('The authorization server returned an error.');
        }
      } else {
        removeQueryString();
      }
    });
  });

  return [authenticated];
};
What this does:
- Checks if the user has valid login tokens
- Returns
nullwhile checking,trueif logged in,falseif not logged in - Cleans up the browser URL after login redirects
Add login and logout handlers
Update your main app file to handle login and logout. Replace src/App.js with:
import {
  BrowserRouter,
  Routes,
  Route
} from 'react-router-dom';
import Login from './components/Login';
import Profile from './components/Profile';
import './App.css';
import CloudentityAuth from '@cloudentity/auth';
import authConfig from './authConfig';
import { useAuth } from './auth';

function App() {
  const cloudentity = new CloudentityAuth(authConfig);
  const [authenticated] = useAuth(cloudentity);

  function authorize () {
    cloudentity.authorize();
  };

  function clearAuth () {
    cloudentity.revokeAuth()
      .then(() => {
        window.location.reload();
      })
      .catch(() => {
        window.location.reload();
      });
  };

  return (
    <div className="App">
      <BrowserRouter>
        <Routes>
          <Route index element={<Login auth={authenticated} handleLogin={authorize} />} />
          <Route path="profile" element={<Profile auth={authenticated} handleLogout={clearAuth} />} />
        </Routes>
      </BrowserRouter>
    </div>
  );
}

export default App;
What's new:
authorize()starts the login processclearAuth()logs the user out- Both functions are passed to your page components
Now update your Login component to handle the different authentication states. Replace src/components/Login.js:
import { Navigate } from 'react-router-dom';

const Login = ({auth, handleLogin}) => {
  return (
    <div>
      {auth === null && <div>Loading...</div>}
      {auth === false && (
        <div>
          <h1>Welcome!</h1>
          <button onClick={handleLogin}>
            Please log in.
          </button>
        </div>
      )}
      {auth && <Navigate to='/profile' />}
    </div>
  );
};

export default Login;
How this works:
- If checking authentication: Shows "Loading..."
- If not logged in: Shows login button
- If logged in: Automatically redirects to profile page
Display userinfo in profile view
Update the Profile component to show different content based on login status. Replace src/components/Profile.js:
import { Navigate } from 'react-router-dom';

const Profile = ({auth, handleLogout}) => {
  return (
    <div>
      {auth === null && <div>Loading...</div>}
      {auth === false && <Navigate to='/' />}
      {auth && (
        <div>
          <h1>Welcome, user!</h1>
          <h3>
            Your profile info:
          </h3>
          <div>
            {/* We'll add real user information here next */}
          </div>
          <button onClick={handleLogout} style={{marginTop: 20}}>
            Log out
          </button>
        </div>
      )}
    </div>
  );
};

export default Profile;
Why there are three states: Checking authentication happens in the background, so there's a brief moment when your app doesn't know if someone is logged in yet. The "Loading..." message covers this gap.
Now let's show real user information. When users log in, they get an ID token that contains their details. We'll decode this token to show their username, email, and last login time.
Replace src/components/Profile.js with this final version:
import { Navigate } from 'react-router-dom';
import jwt_decode from 'jwt-decode';
import authConfig from '../authConfig';

const Profile = ({auth, handleLogout}) => {
  const idToken = window.localStorage.getItem(authConfig.idTokenName);
  const idTokenData = idToken ? jwt_decode(idToken) : {};
  const lastLogin = idTokenData.iat ? (new Date(idTokenData.iat*1000)).toLocaleString() : 'N/A';

  console.log(idTokenData, lastLogin, idTokenData.iat);

  const profileItemStyle = {
    display: 'flex',
    justifyContent: 'space-between'
  };

  const profileLabelStyle = {
    fontWeight: 'bold'
  };

  return (
    <div>
      {auth === null && <div>Loading...</div>}
      {auth === false && <Navigate to='/' />}
      {auth && (
        <div>
          <h1>Welcome, {idTokenData.sub || 'user'}!</h1>
          <h3>
            Your profile info:
          </h3>

          <div style={profileItemStyle}>
            <span style={profileLabelStyle}>Username:</span>
            <span>{idTokenData.sub}</span>
          </div>

          <div style={profileItemStyle}>
            <span style={profileLabelStyle}>Email:</span>
            <span>{idTokenData.email || 'N/A'}</span>
          </div>

          <div style={profileItemStyle}>
            <span style={profileLabelStyle}>Last login:</span>
            <span>{lastLogin}</span>
          </div>

          <button onClick={handleLogout} style={{marginTop: 20}}>
            Log out
          </button>
        </div>
      )}
    </div>
  );
};

export default Profile;
What this shows:
- Username (from
subfield in the token) - Email address (if the user has one)
- Last login time (converted from a timestamp to readable date)
Verify
Test your complete authentication setup:
- Start your app:
npm start - Go to
http://localhost:3000 - Click the login button
- You'll be redirected to SecureAuth to log in
- After successful login, you'll return to your app and see the profile page
- Click "Log out" to return to the login page
Summary
You've built a complete React authentication application that:
- Has separate login and profile pages
- Connects to SecureAuth as your authentication provider
- Protects the profile page so only logged-in users can see it
- Shows user information from login tokens
- Handles login and logout properly
Your app now uses industry-standard security protocols to authenticate users safely. The authentication logic is handled by SecureAuth, so you can focus on building your application features instead of managing complex security code.