Get started with SecureAuth REST APIs
Use SecureAuth REST APIs to automate configuration, manage resources, and integrate with your applications.
In this article
-
Learn why SecureAuth APIs streamline development and what use cases they support.
-
Configure your Admin workspace or System workspace to enable API calls.
-
Acquire an access token to authenticate API requests.
-
Create a new authorization server using the Admin API.
-
Connect a static identity provider to your authorization server.
-
Update your identity provider configuration using the API.
SecureAuth APIs in a nutshell
SecureAuth APIs let you automate configuration, manage resources programmatically, and integrate authentication and authorization into your applications. Use the APIs to build scripts, perform bulk operations, and implement advanced customization.
With SecureAuth APIs, you can:
-
Automate sequences of configuration tasks using scripts.
-
Execute bulk operations like configuring multiple policies at once.
-
Update interdependent policies safely without manual configuration errors.
-
Implement advanced customizations beyond what the admin console provides.
See the API documentation for complete endpoint references, request/response schemas, and authentication requirements.
Prerequisites
-
SecureAuth account with administrator privileges.
-
Access to the Admin and System workspaces. Contact SecureAuth Support if you need these workspaces enabled.
Acquire access token
SecureAuth uses OAuth 2.0 access tokens to authenticate API requests.
To get an access token, configure your Admin workspace or System workspace, then call the token endpoint. Use the returned access token in the Authorization header for all API calls.
Preconfigure Admin workspace
Configure your Admin workspace to generate access tokens using the client credentials flow. This flow provides a client ID and client secret needed to call the token endpoint.
Log in to SecureAuth as an administrator, then follow the video instructions or step-by-step guide.
Video instruction
Step-by-step
-
Enable Client credentials as an allowed grant type by selecting OAuth > Authorization Server > Allowed grant types > Client credentials. Select Save changes.
-
Create an application in the same workspace. Select Server Web Application or Service Application to skip configuring the token endpoint authentication method in the next step.
-
Go to the OAuth view of your application.
-
Add
client_credentialsto Grant Types. -
If you selected an application type other than Server Web Application or Service Application, set Token Endpoint Authentication Method to Client Secret Post.
The Overview page displays the metadata needed to call the token endpoint:
- Token endpoint
- Client ID
- Client secret
-
-
Optional: Go to the Scopes view and enable any additional scopes your application needs. Scopes define what resources an application can access on behalf of the user.
To use System APIs, create a client application in the System workspace instead. See Preconfigure System workspace and the API documentation for required scopes.
Preconfigure System workspace
Create a client application in your System workspace to generate System API access tokens.
Configure the System workspace the same way as the Admin workspace. The main difference is the available scopes, which provide finer-grained access control.
Use System APIs whenever possible. SecureAuth continues migrating functionality from Admin APIs to System APIs.
For example, to use the Hub API endpoints for configuration management:
-
Create a client application in the System workspace following the step-by-step guide.
-
In the Scopes view of your System client application, select Management > manage_configuration and save your changes.
-
Acquire a System access token to call the Hub API endpoints.
Use separate System clients for different applications based on the scopes they need. For example, a login application needs different scopes than a configuration promotion application. Create focused clients that only have the scopes required for their specific functionality.
Call token endpoint
Use your client ID and client secret to request an access token. Access tokens have a time-to-live (TTL) and expire after the configured period. When a token expires, request a new one by calling the token endpoint again.
-
Gather the required information:
Token endpoint Copy from the Overview page of your application, or use the OAuth 2.0 token endpoint format:
https://{tid}.connect.secureauth.com/{tid}/{aid}/oauth2/token.Path parameters
tidis your tenant identifier. Find it in your SecureAuth URL:https://your-tenant-id.connect.secureauth.com/.aidis your authorization server identifier (workspace name).Headers
Content-Type: application/x-www-form-urlencodedRequest body parameters
grant_type=client_credentialsclient_idfrom your application's Overview page.client_secretfrom your application's Overview page. -
Run the following command in your terminal:
curl -X POST https://{tid}.connect.secureauth.com/{tid}/{aid}/oauth2/token \
--header "Content-Type: application/x-www-form-urlencoded" \
--data-raw "grant_type=client_credentials&client_id={use-your-new-client-id-here}&client_secret={use-your-new-client-secret-here}"
Example response:
{
   "access_token": "eyJhbGciOiJFUzI1NiIsImtpZCI6Ijg0MzEwMzc3OTQwMTM3MTkxMzU4MDI2ODIyODA3MzQzODMwMDE4IiwidHlwIjoiSldUIn0...",
   "expires_in": 1234,
   "scope": "introspect_tokens revoke_tokens",
   "token_type": "bearer"
}
Use the
access_tokenvalue in theAuthorizationheader for API calls.
Create authorization server
Create a new authorization server (workspace) using the Admin API.
-
Gather the required information from the createAuthorizationServer API reference:
Endpoint
POST https://{tid}.connect.secureauth.com/api/admin/{tid}/serversPath parameter
tid- your tenant identifierHeaders
Authorization: Bearer {access-token}(from Call token endpoint)Content-Type: application/jsonQuery parameter
with_demo_client- set totrueto include a demo applicationRequest body See the API reference for complete schema.
-
Run the following command:
Command example
curl --request POST 'https://{tid}.connect.secureauth.com/api/admin/{tid}/servers' \
--header 'Authorization: Bearer {enter-bearer-token-here}' \
--header 'Content-Type: application/json' \
--data-raw '{
    "tenant_id": "enter-your-tid-here",
    "id": "enter-id-here",
    "profile": "enter-workspace-profile-here",
    "name": "enter-workspace-name-for-UI-here",
    "type": "regular",
    "color": "#EC5348",
    "secret": "enter-secret-as-string-of-characters",
    "rotated_secrets": [],
    "access_token_strategy": "jwt",
    "key_type": "ecdsa",
    "logo_uri": "",
    "issuer_url": "",
    "dynamic_client_registration": {
        "enabled": false,
        "initial_access_token": {
            "required": false
        },
        "payload": {
            "format": "json",
            "jws_payload": {
                "jwks": {
                    "keys": null
                },
                "jwks_uri": ""
            }
        }
    },
    "grant_types": [
        "client_credentials",
        "authorization_code"
    ],
    "token_endpoint_authn_methods": [
        "none",
        "client_secret_basic",
        "client_secret_post",
        "client_secret_jwt",
        "private_key_jwt",
        "tls_client_auth",
        "self_signed_tls_client_auth"
    ],
    "access_token_ttl": "1h0m0s",
    "refresh_token_ttl": "720h0m0s",
    "authorization_code_ttl": "10m0s",
    "id_token_ttl": "1h0m0s",
    "cookie_max_age": "1h0m0s",
    "jwks": {
        "keys": [ ]
    },
    "enforce_pkce": false,
    "enforce_pkce_for_public_clients": false,
    "root_cas": "",
    "read_client_certificate_from_header": true,
    "client_certificate_header": "X-SSL-CERT",
    "subject_identifier_types": [
        "public",
        "pairwise"
    ],
    "subject_identifier_algorithm_salt": "enter-identifier-as-string-of-characters",
    "enable_trust_anchor": false,
    "trust_anchor_configuration": {
        "jwks": {
            "keys": null
        },
        "jwks_uri": ""
    },
    "enable_quick_access": false,
    "enable_idp_discovery": false,
    "enable_legacy_clients_with_no_software_statement": false,
    "dynamic_scope_separator": ".",
    "backchannel_token_delivery_modes_supported": null,
    "backchannel_user_code_parameter_supported": false
}'
Response example
{
        "tenant_id": "identifier-of-your-tenant-",
        "id": "identifier-of-your-new-workspace",
        "profile": "demo",
        "name": "your-new-workspace-name-visible-in-the-portal",
        "type": "regular",
        "color": "#EC5348",
        "secret": "string-of-characters",
        "rotated_secrets": [],
        "access_token_strategy": "jwt",
        "key_type": "ecdsa",
        "logo_uri": "",
        "issuer_url": "",
        "dynamic_client_registration": {
            "enabled": false,
            "initial_access_token": {
                "required": false
            },
            "payload": {
                "format": "json",
                "jws_payload": {
                    "jwks": {
                        "keys": null
                    },
                    "jwks_uri": ""
                }
            }
        },
        "grant_types": [
            "client_credentials",
            "authorization_code"
        ],
        "token_endpoint_authn_methods": [
            "none",
            "client_secret_basic",
            "client_secret_post",
            "client_secret_jwt",
            "private_key_jwt",
            "tls_client_auth",
            "self_signed_tls_client_auth"
        ],
        "access_token_ttl": "1h0m0s",
        "refresh_token_ttl": "720h0m0s",
        "authorization_code_ttl": "10m0s",
        "id_token_ttl": "1h0m0s",
        "cookie_max_age": "1h0m0s",
        "jwks": {
            "keys": [
                {
                    "use": "sig",
                    "kty": "EC",
                    "kid": "string-of-digits",
                    "crv": "P-256",
                    "alg": "ES256",
                    "x": "string-of-characters",
                    "y": "string-of-characters",
                    "d": "string-of-characters",
                    "x5c": [
                        "string-of-characters"
                    ],
                    "x5t": "string-of-characters",
                    "x5t#S256": "string-of-characters",
                    "created_at": "timestamp-for-creation",
                    "promoted_at": "timestamp-for-promotion",
                    "rotated_at": null,
                    "revoked_at": null
                },
                {
                    "use": "enc",
                    "kty": "RSA",
                    "kid": "string-of-characters",
                    "alg": "RSA-OAEP-256",
                    "n": "string-of-characters",
                    "e": "AQAB",
                    "d": "string-of-characters",
                    "p": "string-of-characters",
                    "q": "string-of-characters",
                    "dp": "string-of-characters",
                    "dq": "string-of-characters",
                    "qi": "string-of-characters",
                    "created_at": "timestamp-for-creation",
                    "promoted_at": "timestamp-for-promotion",
                    "rotated_at": null,
                    "revoked_at": null
                }
            ],
            "next_signing_key": {
                "use": "sig",
                "kty": "EC",
                "kid": "string-of-digits",
                "crv": "P-256",
                "alg": "ES256",
                "x": "string-of-characters",
                "y": "string-of-characters",
                "d": "string-of-characters",
                "x5c": [
                    "string-of-characters"
                ],
                "x5t": "string-of-characters",
                "x5t#S256": "string-of-characters",
                "created_at": "timestamp-for-creation",
                "promoted_at": null,
                "rotated_at": null,
                "revoked_at": null
            },
            "next_encryption_key": {
                "use": "enc",
                "kty": "RSA",
                "kid": "string-of-characters",
                "alg": "RSA-OAEP-256",
                "n": "string-of-characters",
                "e": "string-of-characters",
                "d": "string-of-characters",
                "p": "string-of-characters",
                "q": "string-of-characters",
                "dp": "string-of-characters",
                "dq": "string-of-characters",
                "qi": "string-of-characters",
                "created_at": "timestamp-for-creation",
                "promoted_at": null,
                "rotated_at": null,
                "revoked_at": null
            },
            "revoked_signing_keys": null,
            "revoked_encryption_keys": null,
            "rotated_keys_limit": 8,
            "revoked_keys_limit": 16
        },
        "enforce_pkce": false,
        "enforce_pkce_for_public_clients": false,
        "root_cas": "",
        "read_client_certificate_from_header": true,
        "client_certificate_header": "X-SSL-CERT",
        "subject_identifier_types": [
            "public",
            "pairwise"
        ],
        "subject_identifier_algorithm_salt": "string-of-characters",
        "enable_trust_anchor": false,
        "trust_anchor_configuration": {
            "jwks": {
                "keys": null
            },
            "jwks_uri": ""
        },
        "enable_quick_access": false,
        "enable_idp_discovery": false,
        "enable_legacy_clients_with_no_software_statement": false,
        "dynamic_scope_separator": ".",
        "backchannel_token_delivery_modes_supported": null,
        "backchannel_user_code_parameter_supported": false
    }
Your new authorization server appears as a workspace in SecureAuth. Call the list-authorization-servers endpoint to view your workspace configuration.
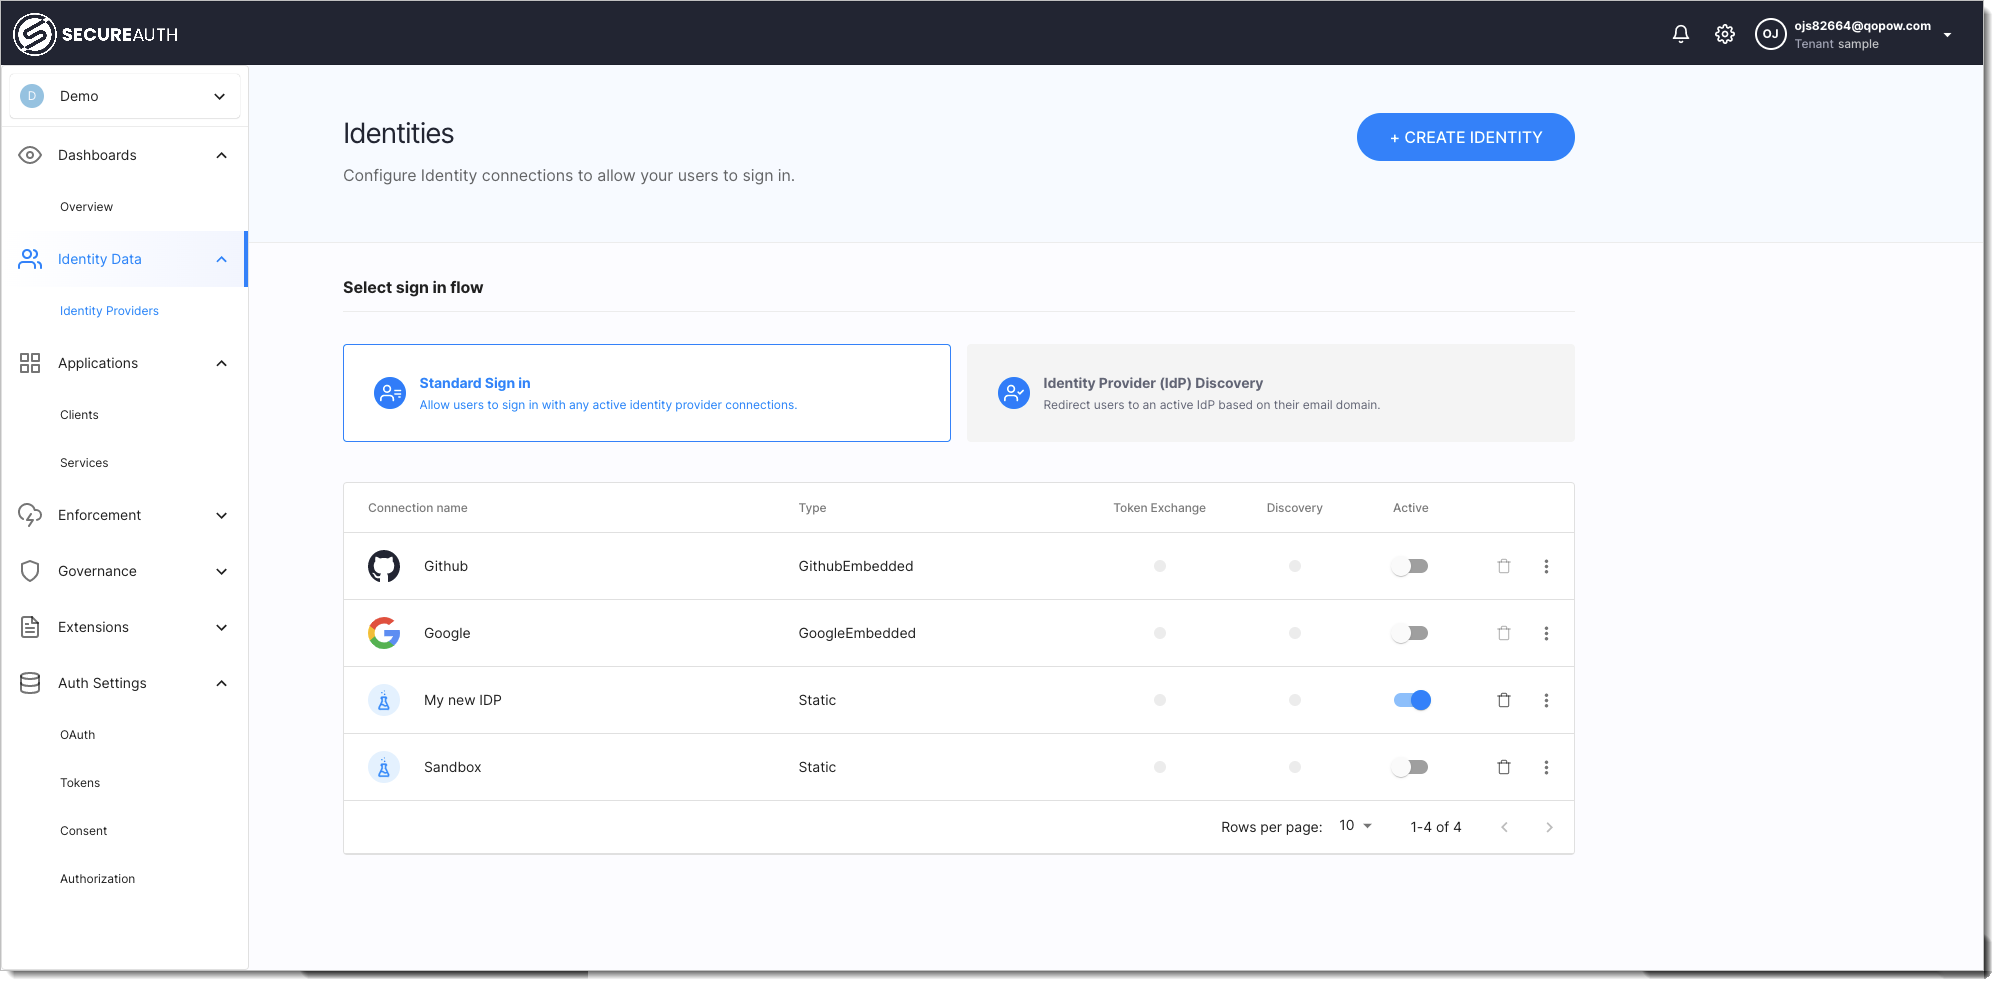
Connect identity provider
Connect a static identity provider to your authorization server for testing. Static identity providers let you configure mock users with authentication context data for testing purposes.
-
Gather the required information from the createStaticIDP API reference:
Endpoint
POST https://{tid}.connect.secureauth.com/api/admin/{tid}/servers/{aid}/idps/staticPath parameters
tid- your tenant identifieraid- authorization server ID (from the previous step)Headers
Authorization: Bearer {access-token}(from Call token endpoint)Content-Type: application/jsonRequest body
See the API reference for complete schema. -
Run the following command:
Command example
curl --request POST 'https://{tid}.connect.secureauth.com/api/admin/{tid}/servers/{aid}/idps/static' \
--header 'Content-Type: application/json' \
--header 'Authorization: Bearer {enter-bearer-token-here}' \
--data-raw '{
    "id": "enter-id-for-your-new-IDP-here",
    "tenant_id": "enter-your-tid-here",
    "authorization_server_id": "enter-your-aid-here",
    "client_id": null,
    "name": "enter-IDP-name-for-UI-here",
    "disabled": false,
    "method": "static",
    "attributes": null,
    "mappings": [
        {
            "source": ".",
            "target": ".",
            "type": "any",
            "allow_weak_decoding": false
        }
    ],
    "static_amr": [],
    "transformer": {
        "enabled": false,
        "script": ""
    },
    "config": {
        "enable_stateful_ctx": false,
        "stateful_ctx_duration": "0s"
    },
    "domains": [],
    "settings": {
        "hint": false
    },
    "credentials": {
        "users": [
            {
                "username": "enter-username-for-end-user-login",
                "password": "enter-password-for-end-user-login",
                "authentication_context": {
                    "name": "user1"
                }
            }
        ]
    }
}'
Response example
{
        "id": "test-idp",
        "tenant_id": "acp-john-doe",
        "authorization_server_id": "admin",
        "client_id": null,
        "name": "Test",
        "disabled": false,
        "method": "static",
        "attributes": null,
        "mappings": [
            {
                "source": ".",
                "target": ".",
                "type": "any",
                "allow_weak_decoding": false
            }
        ],
        "static_amr": [],
        "transformer": {
            "enabled": false,
            "script": ""
        },
        "config": {
            "enable_stateful_ctx": false,
            "stateful_ctx_duration": "0s"
        },
        "domains": [],
        "settings": {
            "hint": false
        },
        "credentials": {
            "users": [
                {
                    "username": "un1",
                    "password": "pass1",
                    "authentication_context": {
                        "name": "user1"
                    }
                }
            ]
        }
    }
Your new static identity provider appears in SecureAuth within your workspace.
Update identity provider configuration
Update your identity provider configuration using the updateStaticIDP API.
Rate limiting
Rate limiting controls the number of API requests allowed within a specific time period to protect against abuse and excessive load.
SecureAuth applies rate limiting to all APIs to prevent rapid configuration changes, aggressive polling, and sustained high load. Each tenant has configured burst limits and rolling averages to balance security with normal usage patterns.
Rate limits vary by tenant tier. Free tier tenants have lower limits than paid tiers. Rate limits also serve as a licensing enforcement mechanism. If you frequently hit rate limits, consider upgrading to a paid license.
API rate limits
All SecureAuth APIs have rate limiting. Limits vary by API type (Admin, Developer, OAuth2, System).
When you exceed the rate limit, the API returns an HTTP 429 error with the message Too many requests. Wait for the time specified in the Retry-After response header before making additional requests. See HTTP response headers for rate limits for details.
HTTP response headers for rate limits
X-RateLimit-Limit
Maximum number of requests allowed instantaneously. For example, if a rate limiter allows 10 requests per second, the limit is always 10.
X-RateLimit-Remaining
Maximum number of requests that can be made immediately in the current state. For example, if the rate limiter allows 10 requests per second and has received 6 requests, Remaining is 4.
X-Ratelimit-Reset
Time until the rate limiter returns to its initial state. For example, if a rate limiter manages requests per second and received a request 200ms ago, ResetAfter returns 800ms.
Retry-After
Time to wait before making the next request. This header appears when an HTTP 429 error occurs.
View response headers in your browser's developer tools Network tab, or add the -v flag to your curl command.
Free tier rate limits
Free tier rate limits per minute:
| API group | Time period (minutes) | Rate | Burst |
|---|---|---|---|
| Admin | 1 | 300 | 50 |
| Developer | 1 | 600 | 50 |
| Public | 1 | 3000 | 500 |
| OAuth2 | 1 | 3000 | 500 |
| OpenBanking | 1 | 600 | 100 |
| Web | 1 | 3000 | 1000 |
| System | 1 | 3000 | 100 |
| Audit events | 1 | 6000 | 2000 |
| Identity (Admin) | 1 | 300 | 50 |
| Identity (Self-service) | 1 | 300 | 50 |
SecureAuth may change free tier rate limits at any time. Check response headers for current rate limit information.
OTP rate limits
The send test OTP message endpoint is rate limited to prevent email spam and abuse. You can send one request per minute with a burst of one.