Add New Identity and Authorization Workspaces
Create workspaces to organize and manage different applications with their own OAuth authorization servers.
What are workspaces?
Workspaces let you create separate authorization servers within your SecureAuth tenant. Each workspace has its own OAuth settings, applications, and users. This helps you organize different use cases like employee applications, customer applications, or partner integrations.
You can create as many workspaces as you need. For example, you might create one workspace for internal employee apps and another for external customer applications that need stricter compliance requirements.
Available workspace types
SecureAuth provides templates that automatically configure OAuth settings for different use cases. Each template sets up the appropriate security settings, grant types, and authentication methods.
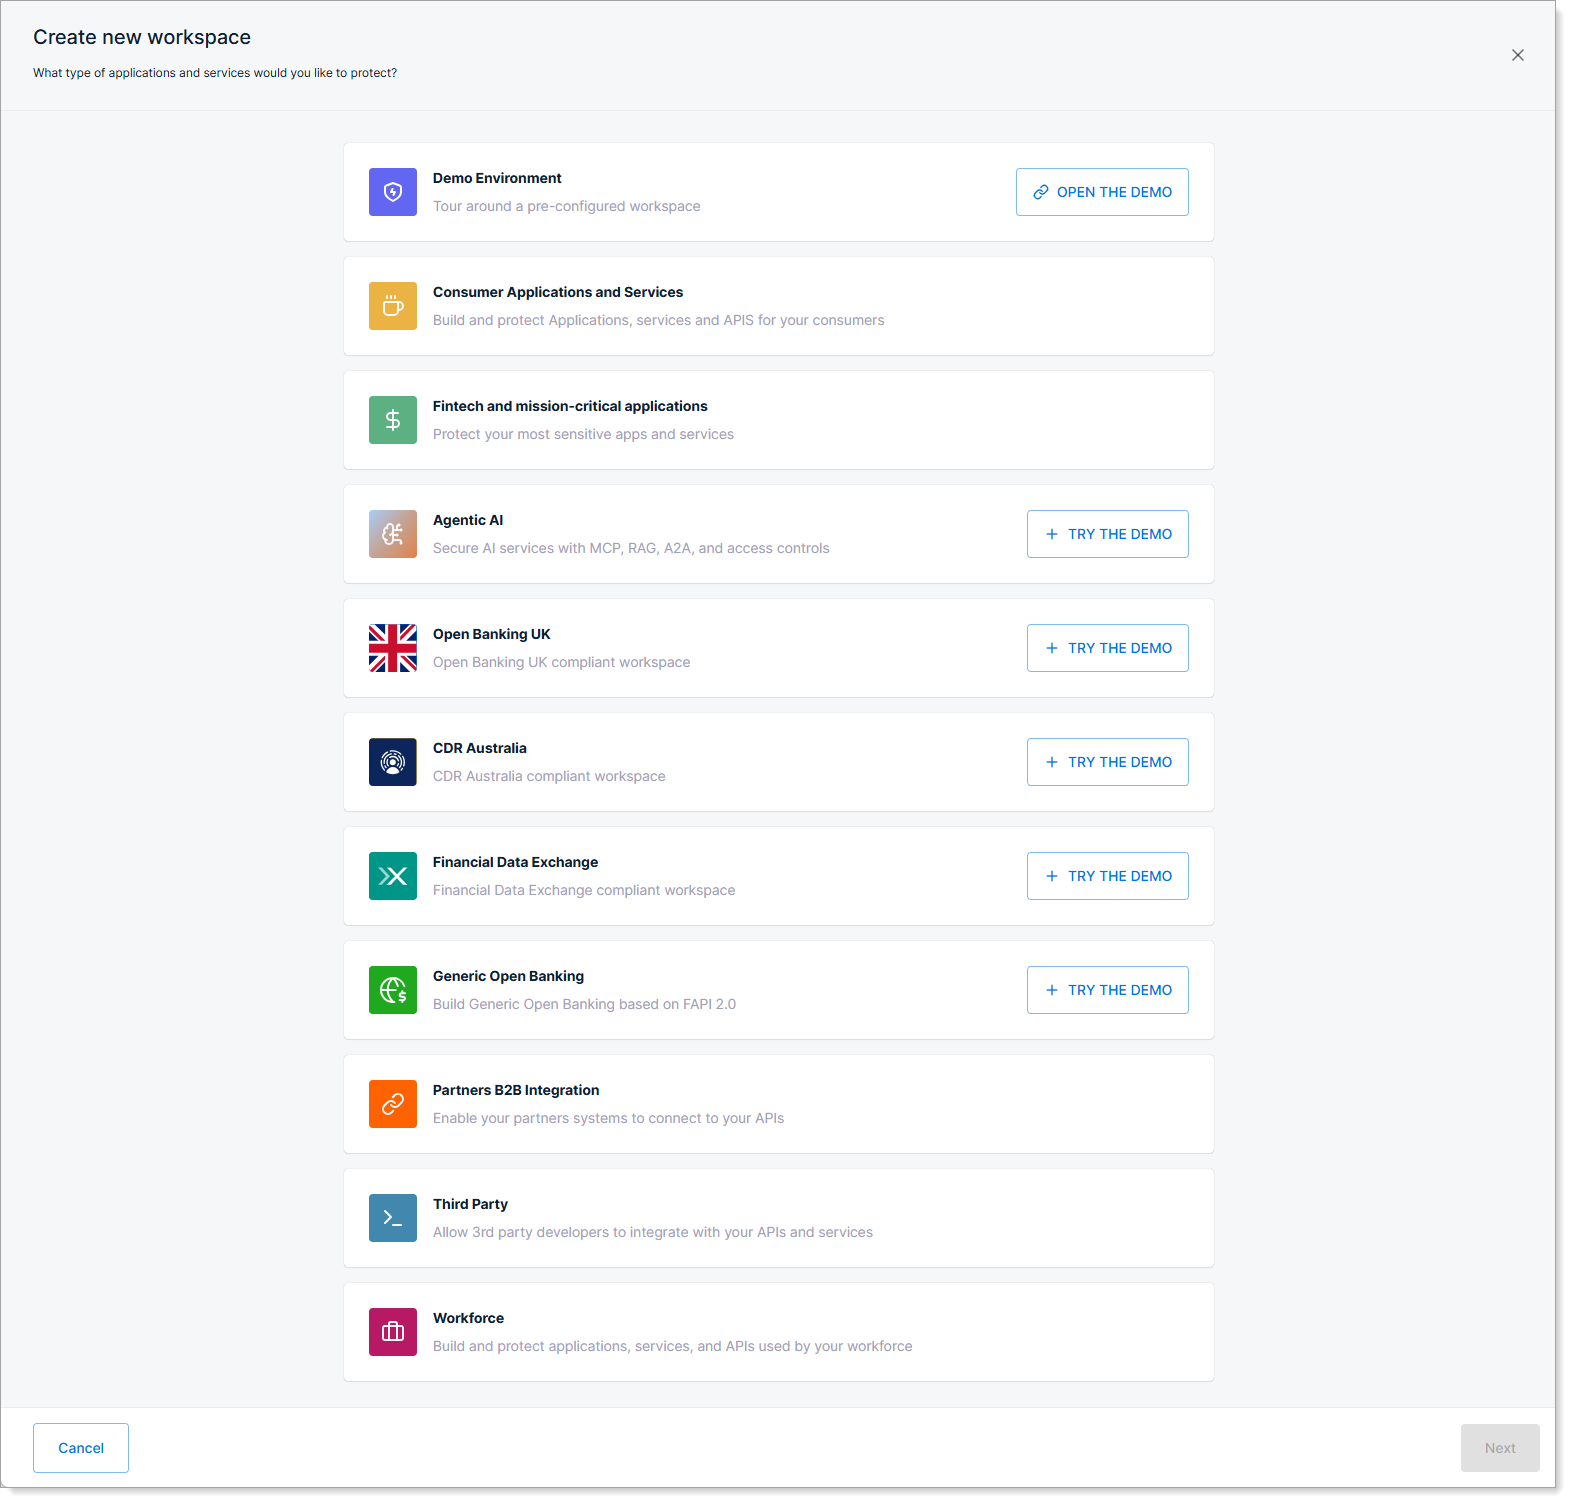
Featured workspace types
These four use cases cover most SecureAuth Connect deployments. Each one maps to a specific template tile on the workspace creation screen.
Consumer access (B2C)
- For public-facing applications with self-service sign-up, social login, passkeys, and MFA.
- Template tile: Consumer applications and services.
- See Consumer access quickstart.
B2B SaaS access
- For SaaS applications serving multiple business customers, with one workspace and per-customer organizations.
- Template tile: Partners B2B Integration.
- See B2B SaaS access quickstart.
Partner access
- For external partner companies (vendors, brokers, distributors, channel resellers) with scoped, time-bounded access.
- Template tile: Partners B2B Integration (the same template B2B SaaS uses, configured per partner organization).
- See Partner access quickstart.
Agentic AI access
- For governing AI agent access to tools and services. Pairs with the SecureAuth Agent Authority for Model Context Protocol (MCP) authentication and fine-grained policy.
- Template tile: Agentic AI Workspace.
- See Agentic AI access.
More workspace types
Workforce
- For employee applications and internal systems.
- Active Directory integration and mobile app authentication.
- Pre-configured for enterprise SSO requirements.
Consumer Data Right (CDR)
- For Australian Consumer Data Right compliance.
- FAPI-certified authorization server.
- Supports banking, energy, and telecommunications sectors.
Financial Data Exchange (FDX)
- For FDX compliance in financial services.
- FAPI 1.0 Advanced profile configuration.
- Includes financial data cluster permissions.
Generic Open Banking
- Build Generic Open Banking based on FAPI 2.0.
- Standards-compliant open banking implementation.
- Flexible configuration for various jurisdictions.
How to create a workspace
-
You can create a workspace in two ways:
-
In the Tenant Settings:
- Go to Workspaces.
- Click Create New.
-
From any Workspace:
- Click the workspace name at the top to open the menu.
- Select View all workspaces.
- Click Create New.
-
-
Select a workspace type and click Next.
-
Complete the workspace configuration fields.
Setting Description Display Name Enter a name for your workspace. Workspace ID Change the automatically generated ID if needed. Color Select a color for your workspace theme. Enable Demo application Toggle to include a demo app for testing. 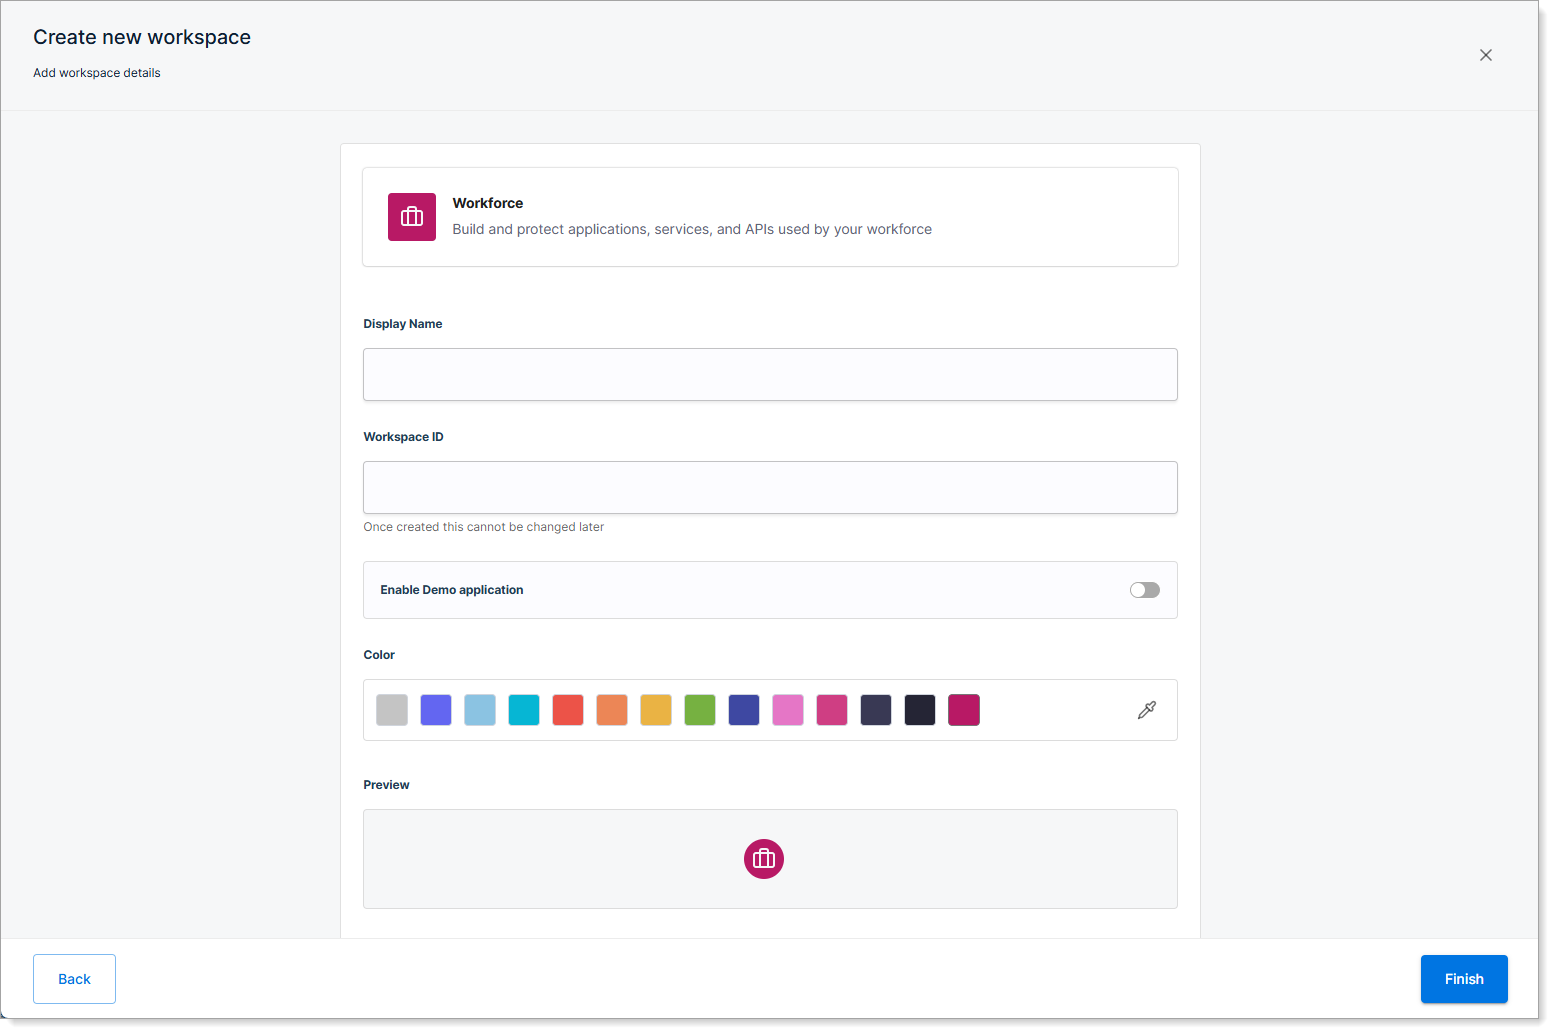
Next steps
Your workspace is now ready to use. You can:
- Integrate identity providers to connect your authentication system
- Review the OAuth settings applied by your chosen template
- Create a developer portal if you want external developers to register applications