Use SecureAuth as a SAML Identity Provider (IdP) for SSO
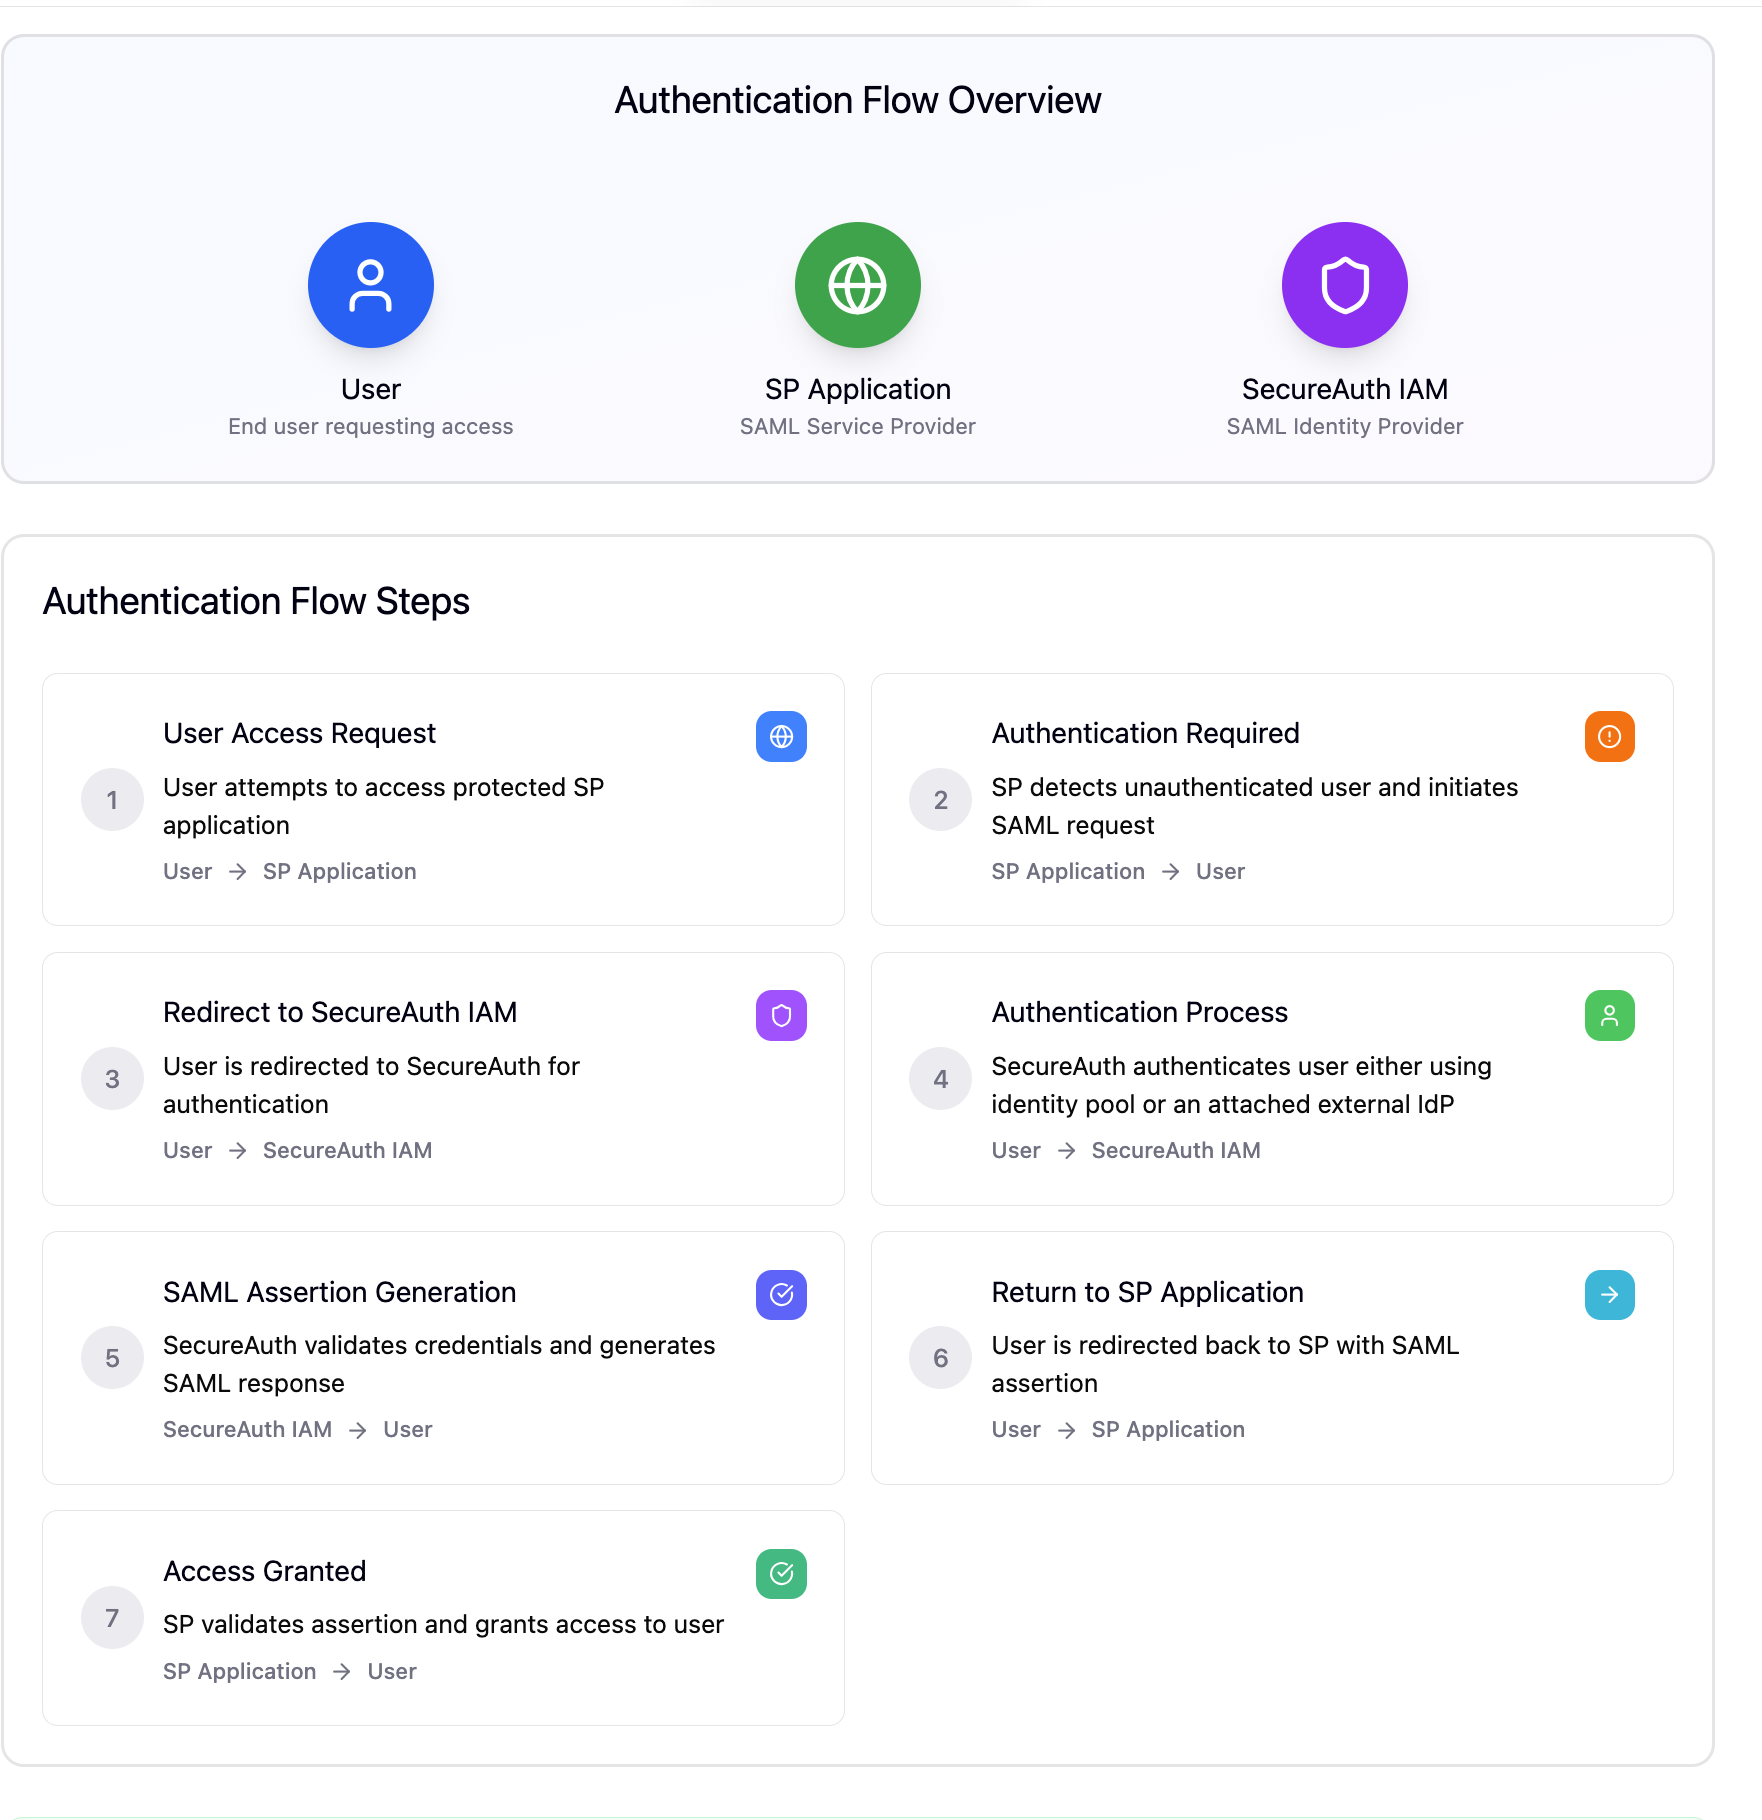
This quickstart walks you through configuring SecureAuth to act as a SAML Identity Provider, enabling authentication for external Service Providers (SPs) using the SAML 2.0 protocol.

1. Register a SAML Application
Create a new application that represents the SP (Service Provider):
- Go to Tenant Settings → Applications
- Click Add Application
- Choose:
- Client Type:
SAML - Application Type:
SAML SP
- Client Type:
- Provide:
- Application Name (e.g.,
MySAMLApp) - ACS (Assertion Consumer Service) URL from the SP
- Entity ID (also known as Audience URI)
- Application Name (e.g.,
You can register multiple ACS URLs to support dev, test, and production environments.
2. Configure Identity Providers
Determine how users will authenticate before SecureAuth issues a SAML assertion:
3. Customize SAML Assertion
Define what SecureAuth includes in the SAML response:
- Set the NameID format (e.g., email, username)
- Map user attributes to SAML claims
- Enable signature, encryption, or audience validation settings
To modify claim mappings and assertion behavior, go to the application's Claim Mapping and SAML Settings sections.
4. Retrieve IdP Metadata
Provide the Service Provider with SecureAuth’s metadata so it can validate SAML assertions.
- Metadata URL:
https://{tenant-domain}/{workspace}/saml-idp/metadata
Share this metadata XML file with the SP administrator.
5. Test the Login Flow
- From the SP, initiate a SAML authentication request
- SecureAuth prompts the user to log in
- SecureAuth sends a signed SAML assertion to the SP’s ACS URL
The SP validates the assertion and logs the user in.