Add server-side web application
Add a server-side web application to securely handle user authentication on the server.
Server-side applications keep sensitive credentials (like client secrets) secure on your server rather than exposing them in the browser.
Before you begin
You'll need:
- Access to your workspace in SecureAuth
- The redirect URI where users should land after logging in (your application's callback URL)
- Access to your application's server configuration
Add the application
-
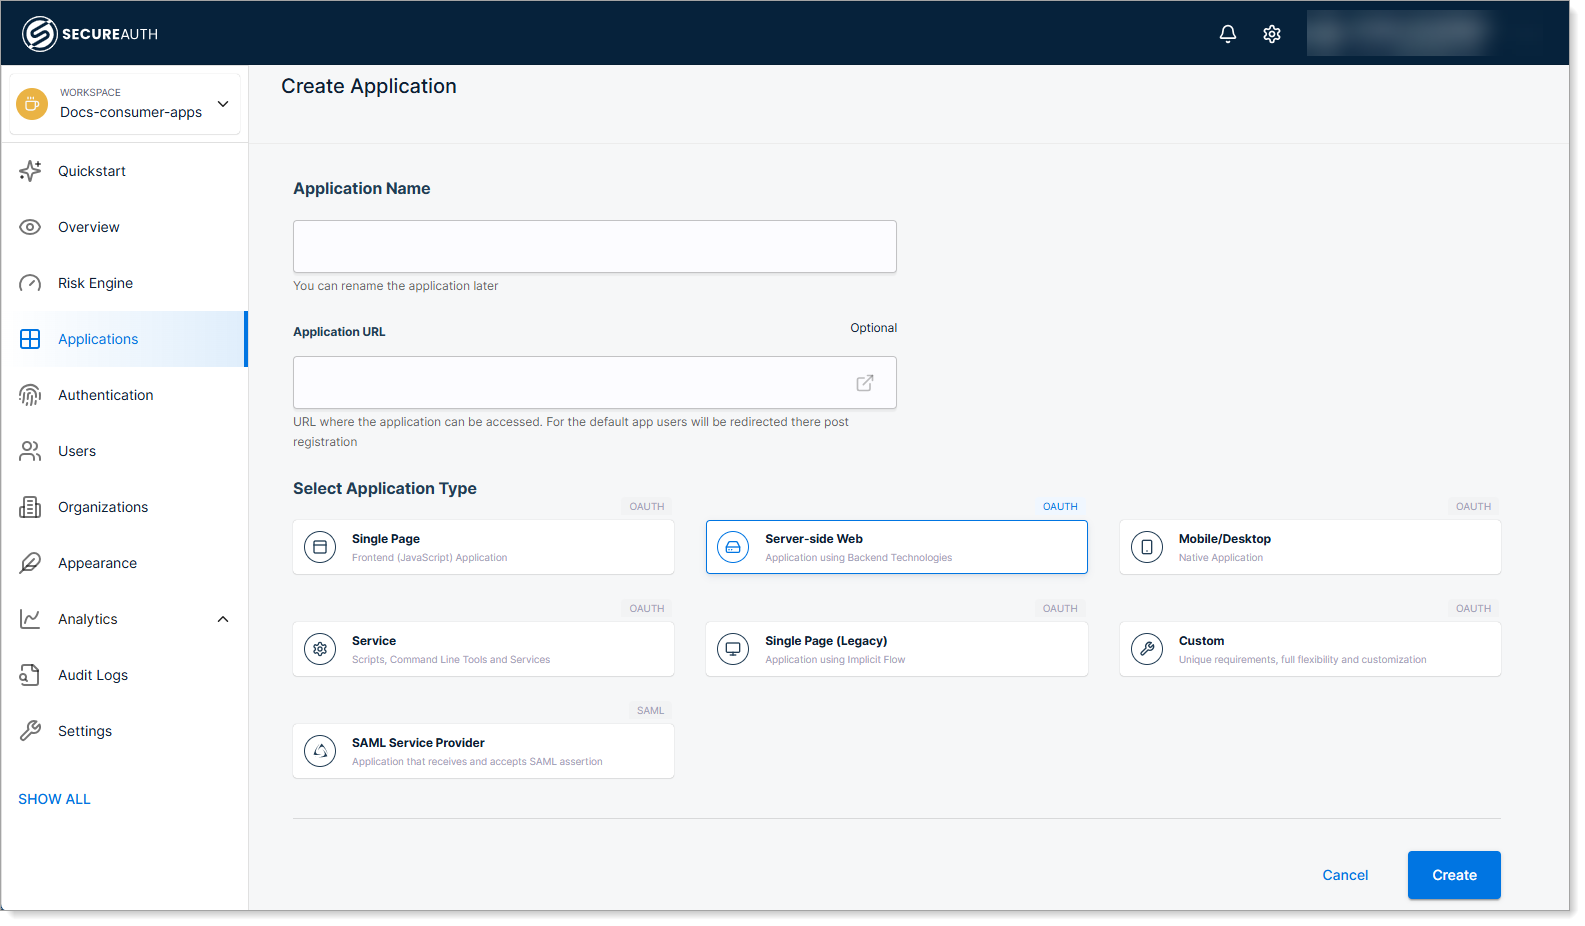
In your workspace, select Applications > Clients > Create client.
-
Enter a name for your application, select Server-side Web, and click Create.

-
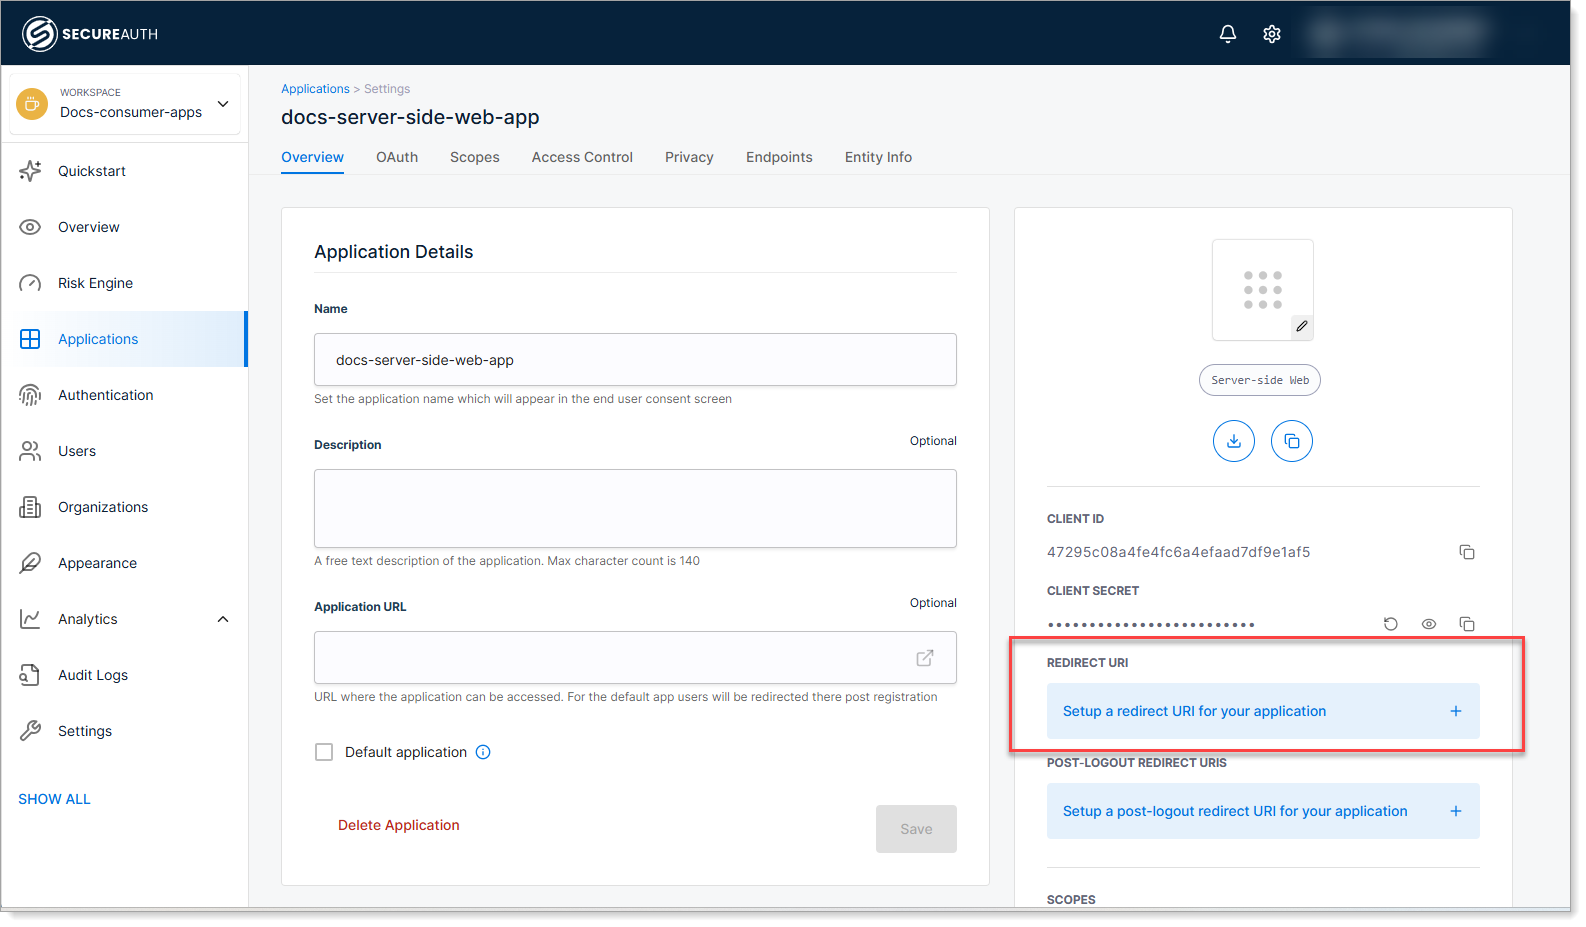
Configure the Redirect URI for your application.
The redirect URI is the URL where SecureAuth sends users after they log in. This must match the callback URL configured in your application code.

-
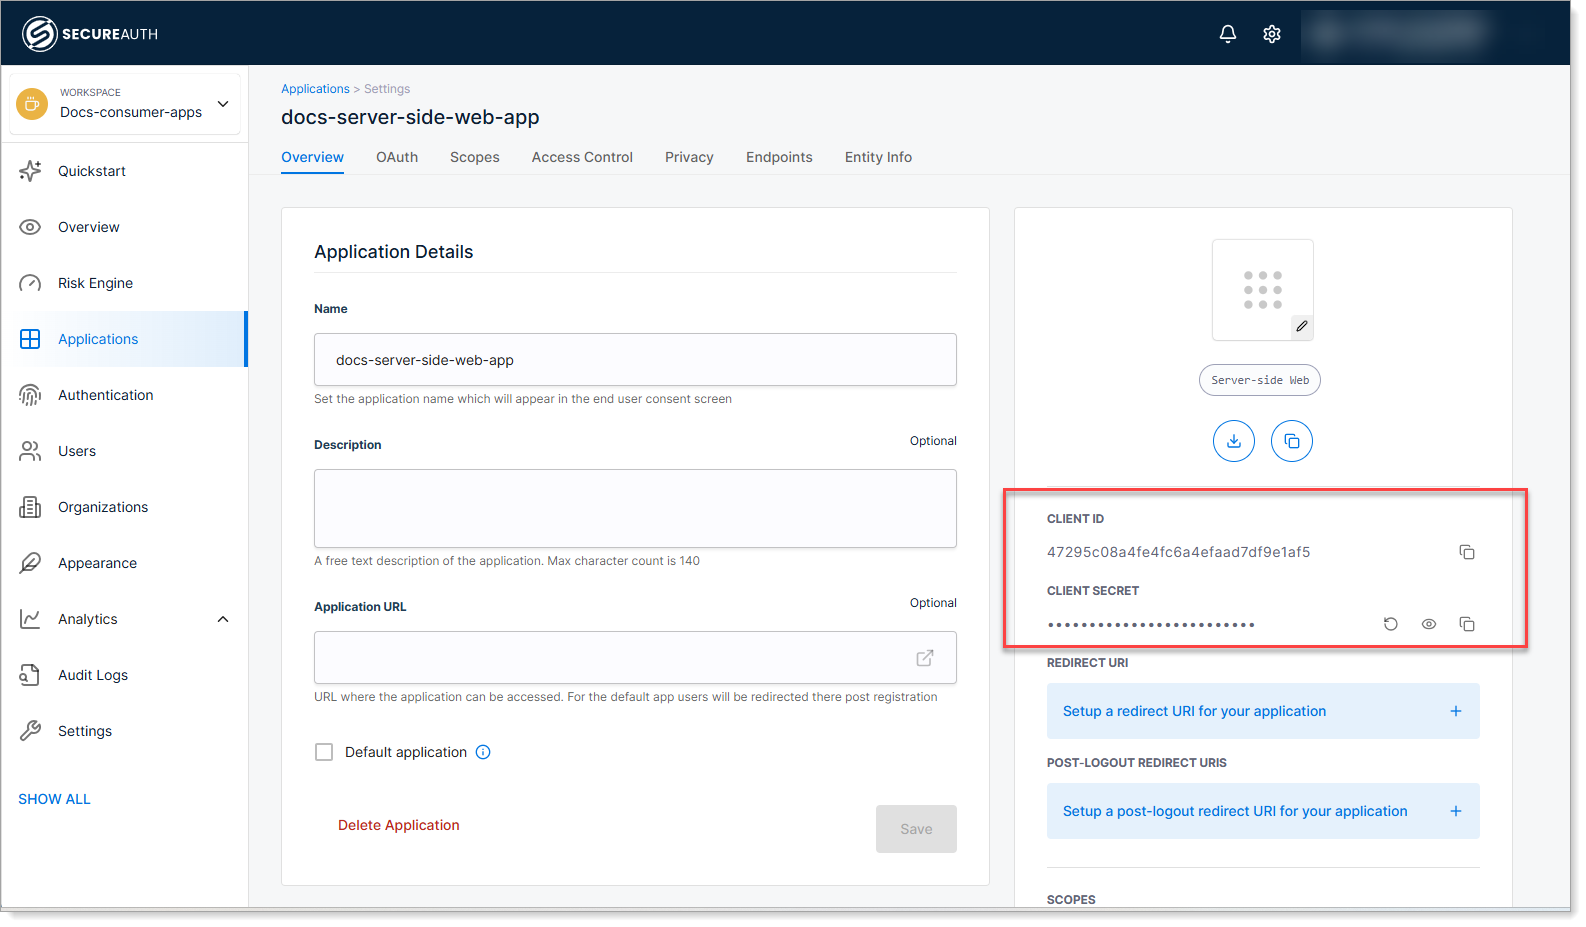
Copy the Client ID and Client Secret, then save the configuration.
You'll need both values to connect your application code to SecureAuth. Keep the client secret secure - treat it like a password.

Integrate with your application
After creating the client in SecureAuth, integrate it with your server-side application code using an OAuth/OIDC library.
Example: Node.js with Next.js
// Install NextAuth.js: npm install next-auth
import NextAuth, { NextAuthOptions } from "next-auth"

export const authOptions: NextAuthOptions = {
  secret: "your-secret-key",
  providers: [
    {
      id: "secureauth",
      name: "SecureAuth",
      type: "oauth",
      version: "2.0",
      wellKnown: "https://your-tenant.region.connect.secureauth.com/your-tenant/your-workspace/.well-known/openid-configuration",
      clientId: "paste-your-client-id-here",
      clientSecret: "paste-your-client-secret-here",
      authorization: {params: {scopes: ["openid", "profile", "email"]}},
      profile(profile) {
        return {
          id: profile.sub,
          name: profile.name,
          email: profile.email
        }
      }
    }
  ],
  callbacks: {
    async jwt({ token }) {
      return token
    },
  },
}

export default NextAuth(authOptions)
Example: Node.js with Passport and OIDC
// Install dependencies: npm install passport passport-openidconnect
const passport = require('passport');
const OpenIDConnectStrategy = require('passport-openidconnect');

passport.use(new OpenIDConnectStrategy({
  issuer: 'https://your-tenant.region.connect.secureauth.com/your-tenant/your-workspace',
  authorizationURL: 'https://your-tenant.region.connect.secureauth.com/your-tenant/your-workspace/oauth2/authorize',
  tokenURL: 'https://your-tenant.region.connect.secureauth.com/your-tenant/your-workspace/oauth2/token',
  userInfoURL: 'https://your-tenant.region.connect.secureauth.com/your-tenant/your-workspace/userinfo',
  clientID: "paste-your-client-id-here",
  clientSecret: "paste-your-client-secret-here",
  callbackURL: '/api/auth/callback',
  scope: ['profile', 'email', 'openid']
}, function verify(issuer, profile, cb) {
  return cb(null, profile);
}));

router.get('/api/auth/callback', passport.authenticate('openidconnect', {
  successReturnToOrRedirect: '/',
  failureRedirect: '/login'
}));
You can use any OAuth/OIDC library that supports the Authorization Code flow.
Test the integration
- Start your application server.
- Navigate to the login page.
- Verify that users are redirected to SecureAuth for authentication.
- After logging in, confirm users are redirected back to your application.
Next steps
- Restrict access with user policies to control who can use the application
- Set up single sign-on (SSO) by connecting external identity providers
- Skip the consent screen for your own applications
- Enable passwordless authentication for a better user experience