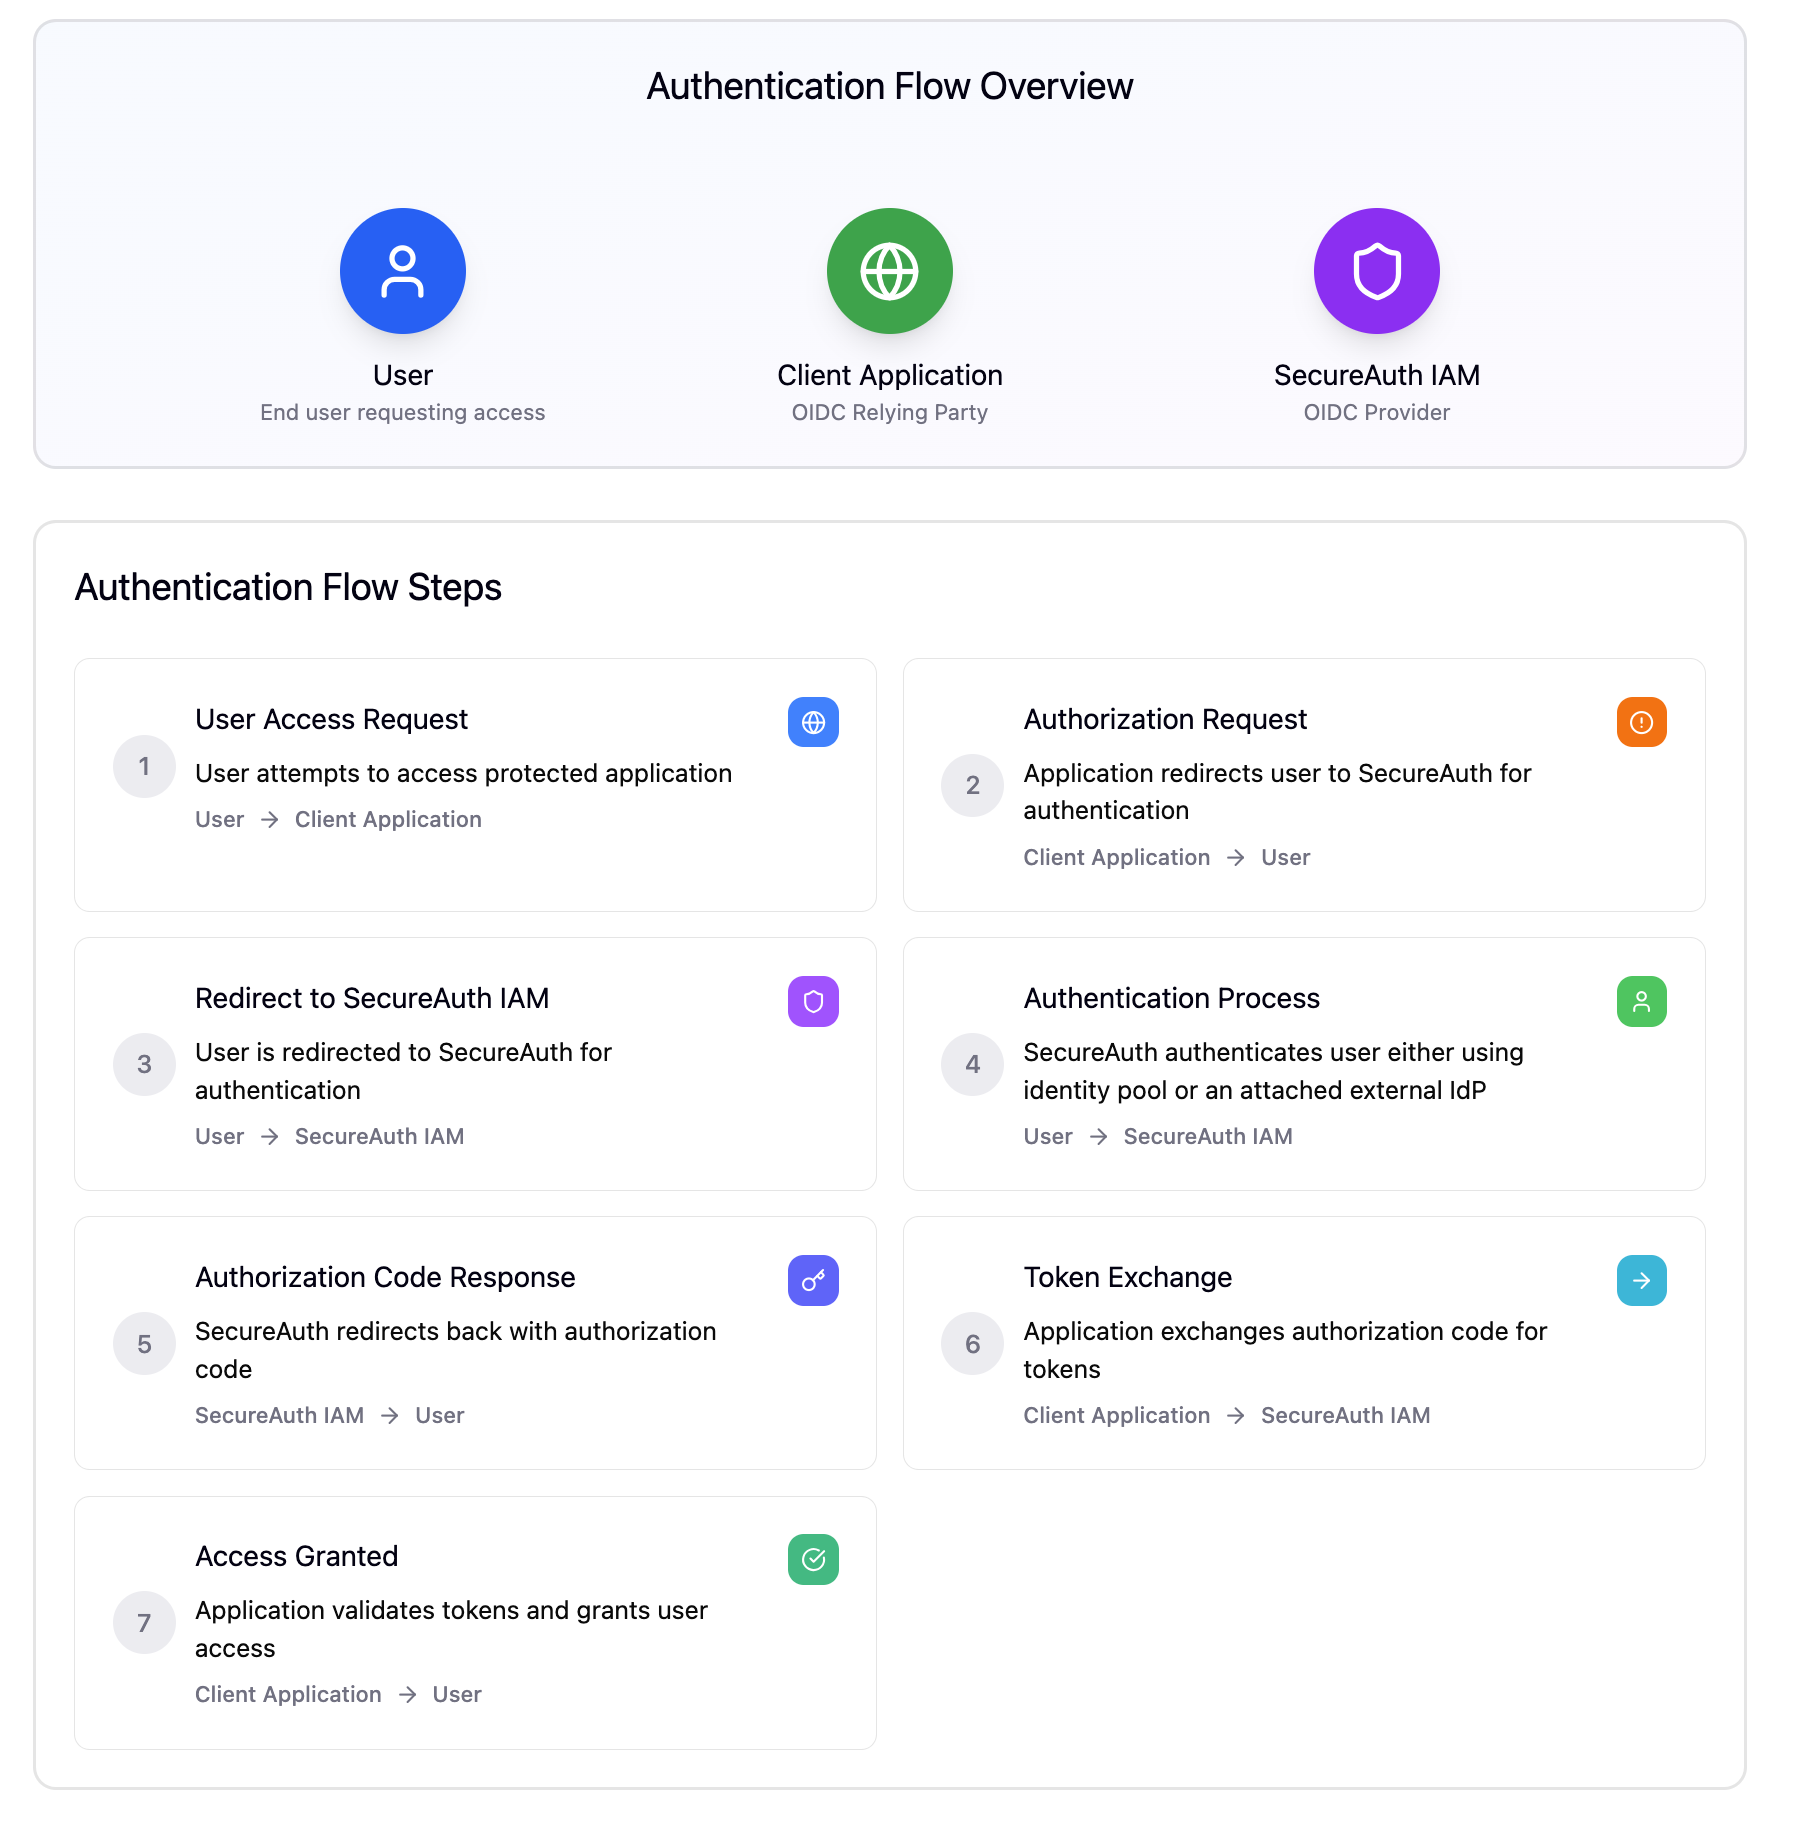
Use SecureAuth as an OpenID Connect (OIDC) Provider
This guide walks you through configuring SecureAuth as an OIDC-compliant Identity Provider (OP).

1. Register an OIDC Client
- Go to Tenant Settings → Applications
- Click Add Application
- Choose client type (Confidential or Public), application type (Web, SPA, or Native), and set redirect URI.
- Enable Authorization Code grant and add scopes like
openid,profile,email.
2. Connect Identity Sources
Let users authenticate through:
3. Redirect to Authorize Endpoint
Construct the following URL to initiate login:
https://{tenant-domain}/{workspace}/oauth2/authorize?
client_id={CLIENT_ID}&response_type=code&
redirect_uri={REDIRECT_URI}&scope=openid profile email&
state={STATE}&code_challenge={PKCE_CHALLENGE}&code_challenge_method=S256
4. Exchange Code for Tokens
Send a POST request to the token endpoint:
POST https://{tenant-domain}/system/oauth2/token
Content-Type: application/x-www-form-urlencoded

    grant_type=authorization_code&
    client_id={CLIENT_ID}&
    client_secret={CLIENT_SECRET}&
    code={AUTH_CODE}&
    redirect_uri={REDIRECT_URI}&
    code_verifier={PKCE_VERIFIER}
5. Validate the ID Token
Use a JWT library to validate:
iss,aud, andexpclaims- signature using JWKS from the metadata URL
Metadata URL:
https://{tenant-domain}/{workspace}/.well-known/openid-configuration