Add machine-to-machine (M2M) application
Add a machine-to-machine (M2M) application for automated API access without user login.
Use M2M applications when you need services, scheduled jobs, or backend systems to call APIs without a person logging in.
Before you begin
You'll need:
- Access to the appropriate workspace in SecureAuth
- Access to your backend service or application code
Select the workspace
Choose the workspace based on which APIs you need to call:
For SecureAuth platform APIs:
- Admin workspace - To call tenant-level Admin APIs for managing workspaces, users, and configuration
- System workspace - To call system-level APIs for advanced platform management
The Admin and System workspaces are special administrative workspaces. If you need access to these workspaces, contact Support.
For your own APIs:
- Your workspace - To call custom APIs protected by an Authorizer in your workspace. Create the M2M client in the same workspace where your APIs and Authorizer are configured.
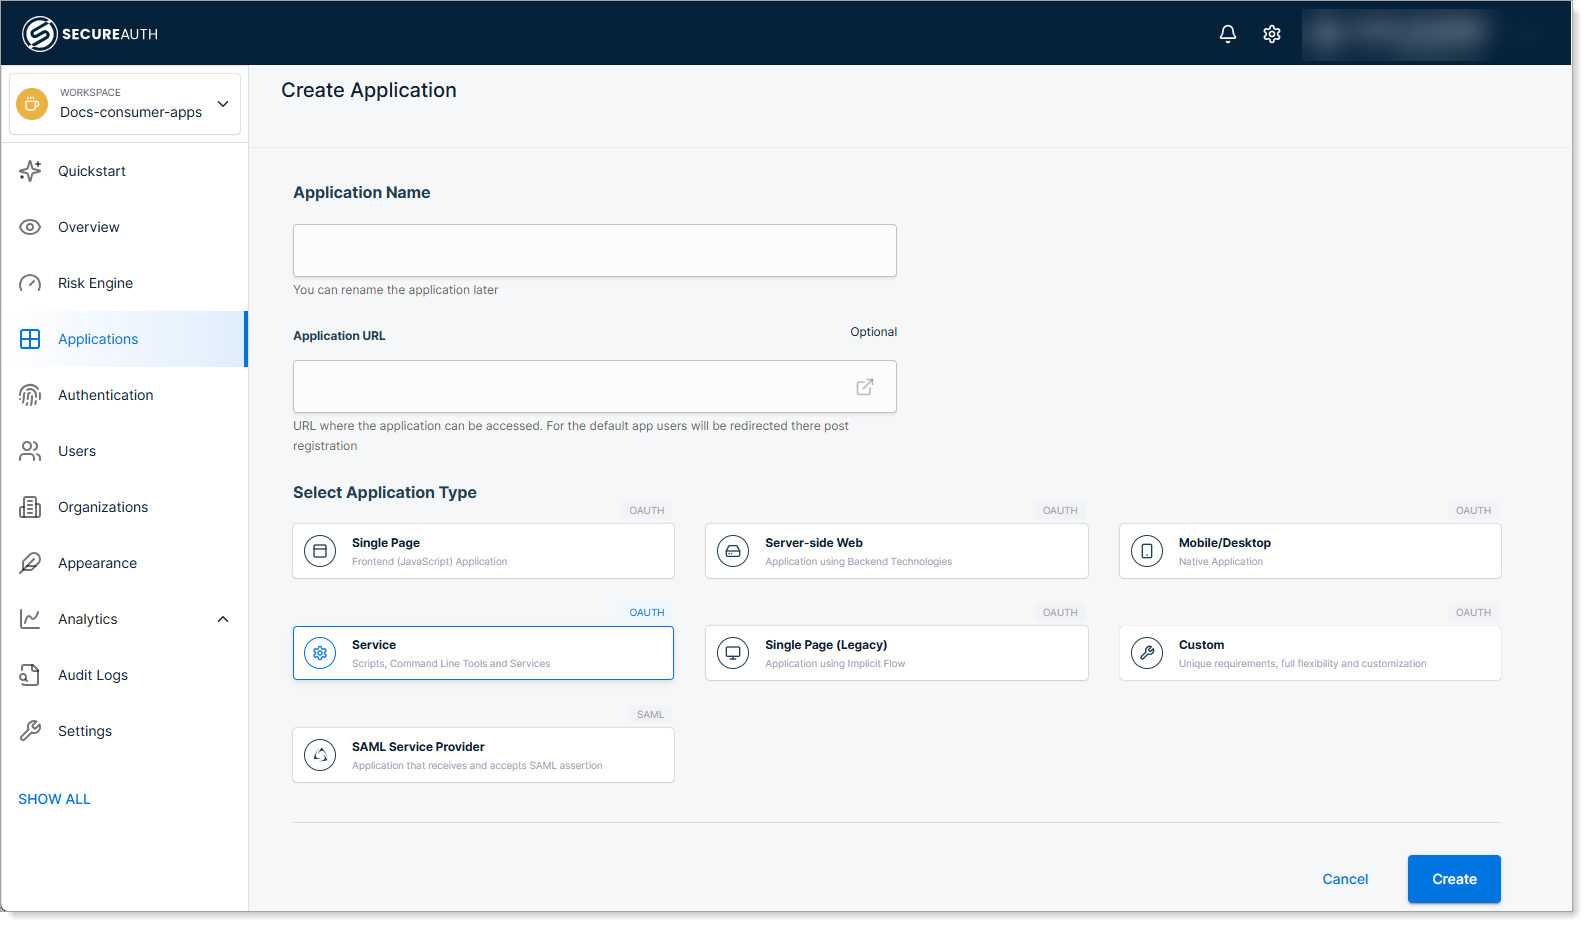
Add the application
-
In your workspace, select Applications > Clients > Create client.
-
Enter a name for your application, select the Service type, and click Create.
-
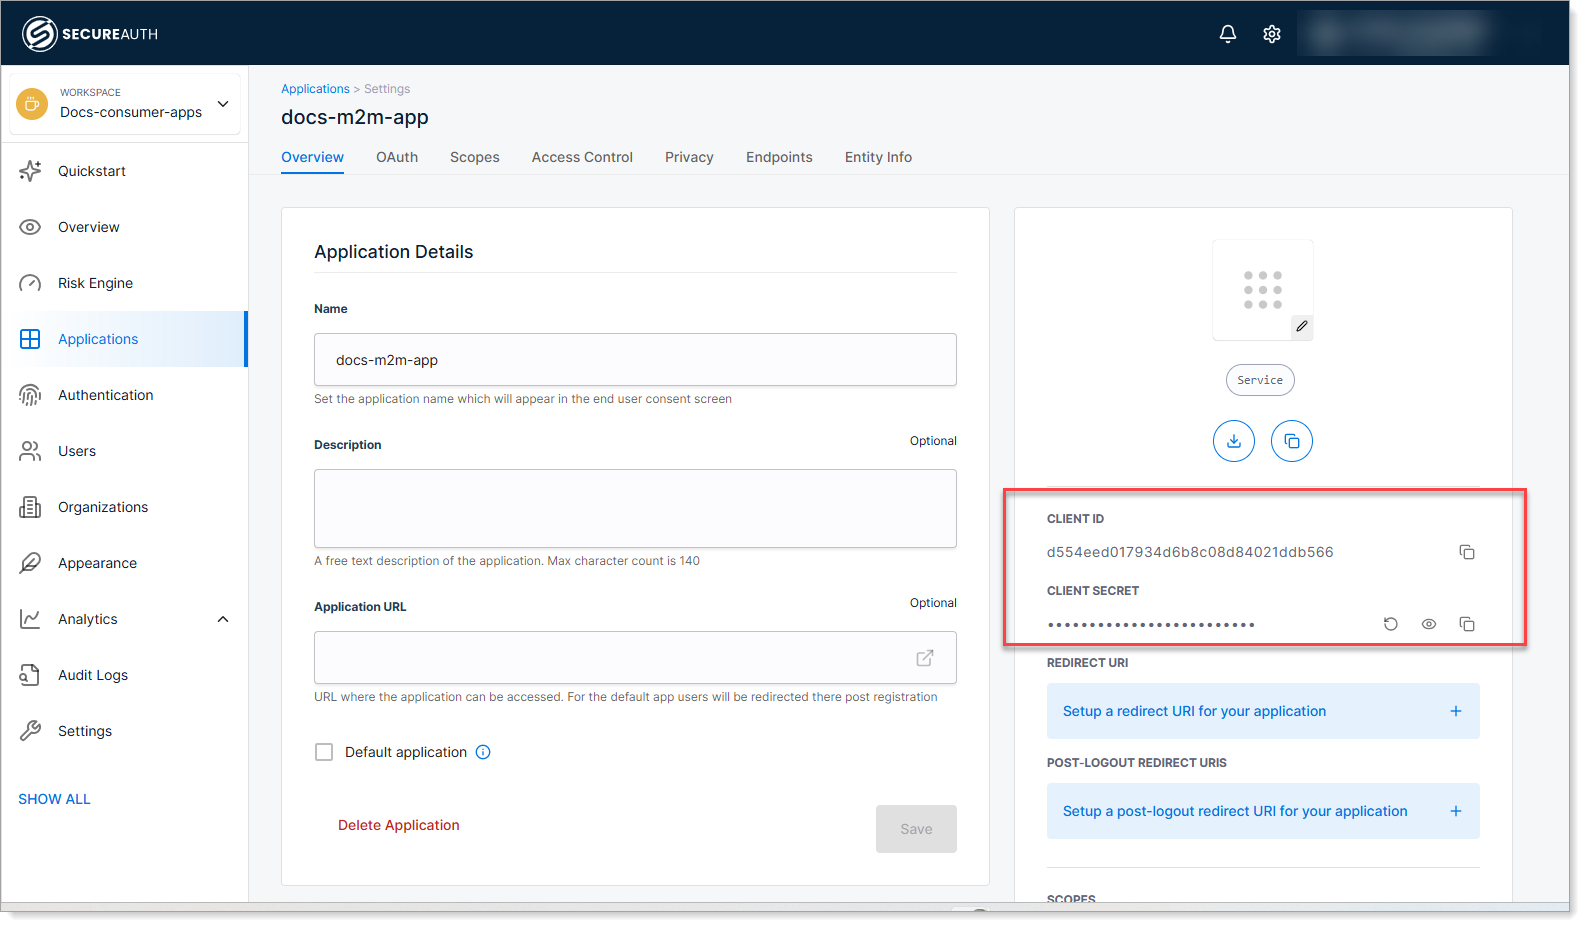
Copy the Client ID and Client Secret, then save the configuration.
You'll need both values in your service code. Keep the client secret secure - treat it like a password.
-
Copy the Token Endpoint URL.
Your service will use this endpoint to request access tokens.

Integrate with your service
Use the client credentials you copied to authenticate your service and request access tokens.
M2M applications use the client credentials flow to obtain access tokens. The examples below show the client_secret_post authentication method.
Example: Using cURL
curl -X POST https://YOUR_TENANT.YOUR_REGION.connect.secureauth.com/YOUR_TENANT/YOUR_WORKSPACE/oauth2/token \
  --header "Content-Type: application/x-www-form-urlencoded" \
  --data-raw "grant_type=client_credentials&client_id=YOUR_CLIENT_ID&client_secret=YOUR_CLIENT_SECRET"
Replace the placeholders:
YOUR_TENANT- Your tenant IDYOUR_REGION- Your region (e.g.,us,eu)YOUR_WORKSPACE- Your workspace IDYOUR_CLIENT_ID- The client ID you copiedYOUR_CLIENT_SECRET- The client secret you copied
Example: Using Node.js
const fetch = require('node-fetch');

const tokenUrl = 'https://YOUR_TENANT.YOUR_REGION.connect.secureauth.com/YOUR_TENANT/YOUR_WORKSPACE/oauth2/token';
const clientId = 'YOUR_CLIENT_ID';
const clientSecret = 'YOUR_CLIENT_SECRET';

async function getAccessToken() {
  const response = await fetch(tokenUrl, {
    method: 'POST',
    headers: {
      'Content-Type': 'application/x-www-form-urlencoded'
    },
    body: `grant_type=client_credentials&client_id=${clientId}&client_secret=${clientSecret}`
  });

  const data = await response.json();
  return data.access_token;
}

// Use the token to call your API
const token = await getAccessToken();
Example: Using Python
import requests

token_url = 'https://YOUR_TENANT.YOUR_REGION.connect.secureauth.com/YOUR_TENANT/YOUR_WORKSPACE/oauth2/token'
client_id = 'YOUR_CLIENT_ID'
client_secret = 'YOUR_CLIENT_SECRET'

response = requests.post(
    token_url,
    headers={'Content-Type': 'application/x-www-form-urlencoded'},
    data={
        'grant_type': 'client_credentials',
        'client_id': client_id,
        'client_secret': client_secret
    }
)

access_token = response.json()['access_token']
You can use any OAuth library that supports the client credentials flow.
Test the integration
- Run your service or script.
- Verify it successfully receives an access token.
- Test calling your protected API with the token.
Next steps
- Configure OAuth settings for advanced use cases
- Enable mTLS authentication for stronger security
- Add services and APIs to protect with access tokens
- Restrict access with policies to control which services can access which APIs