Configure Organization details
Add custom fields to store organization information like address, phone number, and branch names.
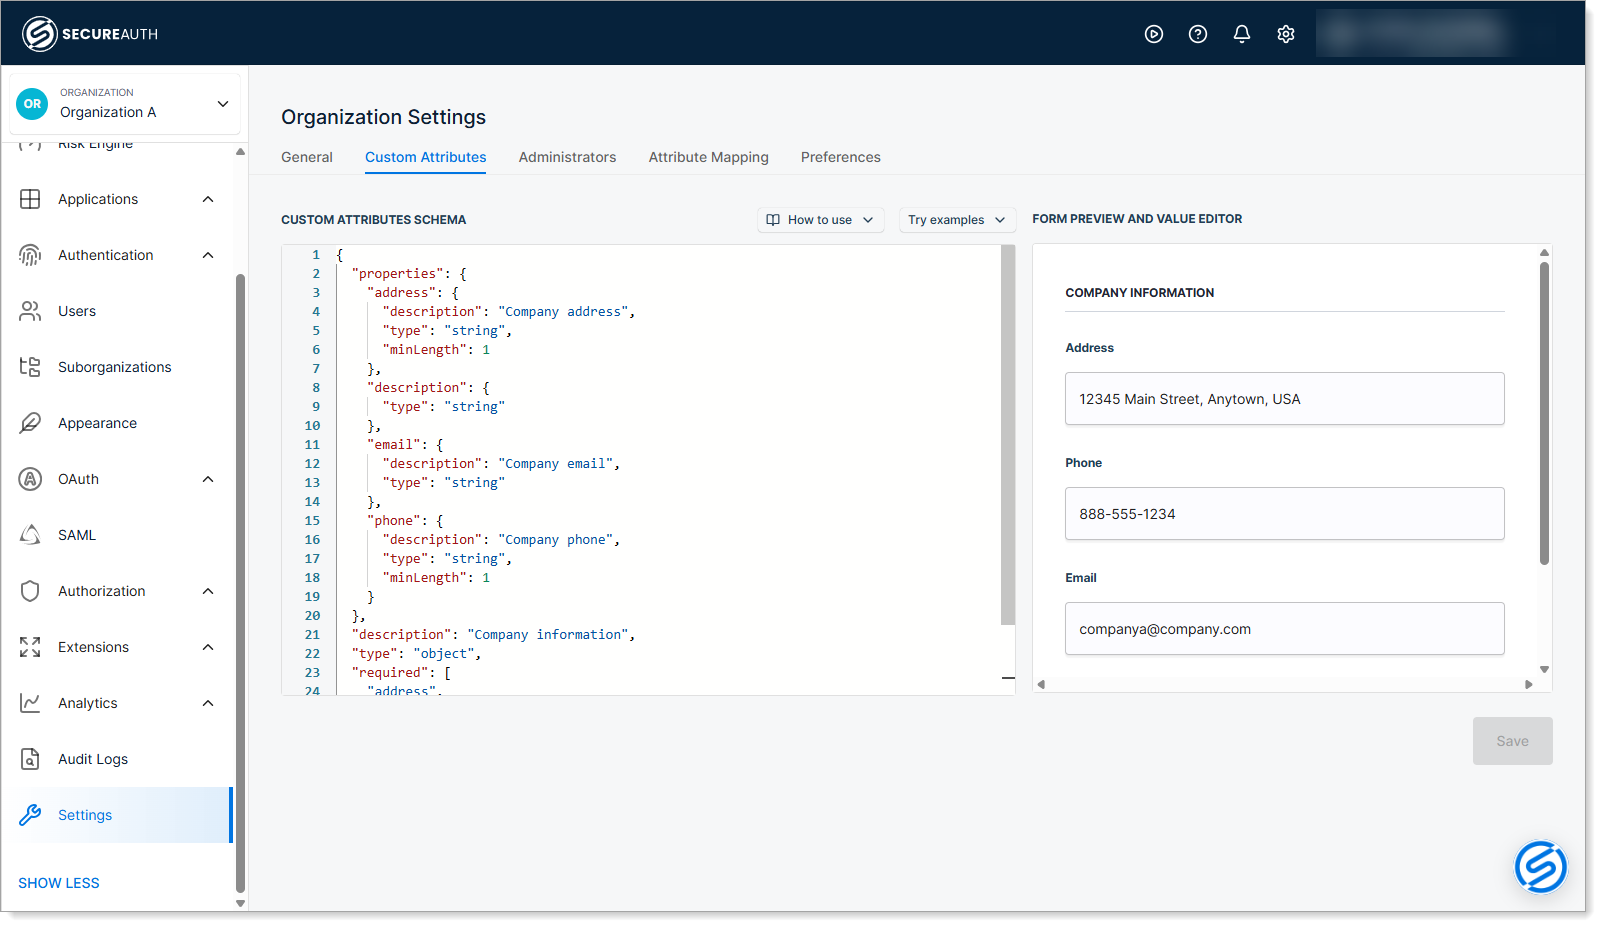
Define schema for Organization details
-
Navigate to Settings > Custom Attributes in your Organization view.
-
Define a JSON-based schema for organization details using the Custom Attributes Schema editor.
Create a schema to capture business information about each organization. For example, you might store address, phone, email, and branch names.
Add the business information fields your organization needs, such as address, phone number, region, and branch name. To see schema examples, click the Try examples drop-down link.
Use these JSON keywords to define your schema:
Keyword Purpose Example $schemaSpecifies which JSON Schema standard version your schema follows. http://json-schema.org/schema$idSets a unique identifier (URI) for the schema. https://example.com/organization-schemadescriptionDescribes what the schema is for. "Company information"typeDefines the data type. Use "object"for organization details."object"propertiesDefines the individual fields (attributes) for the organization. See example below. requiredLists which fields must be filled in. ["address", "phone", "email"]For each field in
properties, use:Keyword Purpose Example titleA human-readable name for the field. Appears in forms and dialogs. "Company Address"typeThe data type for the field. "string","number"descriptionExplains what the field is for. "The company's primary address"minLengthSets a minimum character requirement. 1(field must have at least 1 character)The editor has a built-in validator giving you real-time feedback about any potential errors.
Sample rich Organization attributes schema
{
     "properties": {
       "address": {
         "description": "Company address",
         "type": "string",
         "minLength": 1
       },
       "phone": {
         "description": "Company phone",
         "type": "string",
         "minLength": 1
       },
       "email": {
         "description": "Company email",
         "type": "string"
       },
       "description": {
         "type": "string"
       },
       "administrative-area": {
         "description": "Administrative Area Code",
         "type": "string",
         "minLength": 1
       },
       "branch-name": {
         "description": "Branch Name",
         "type": "string",
         "minLength": 1
       }
     },
     "description": "Company information",
     "type": "object",
     "required": [
       "address",
       "phone",
       "email"
     ]
} -
Fill in the required organization details in the Form Preview and Value Editor
-
Save your changes.
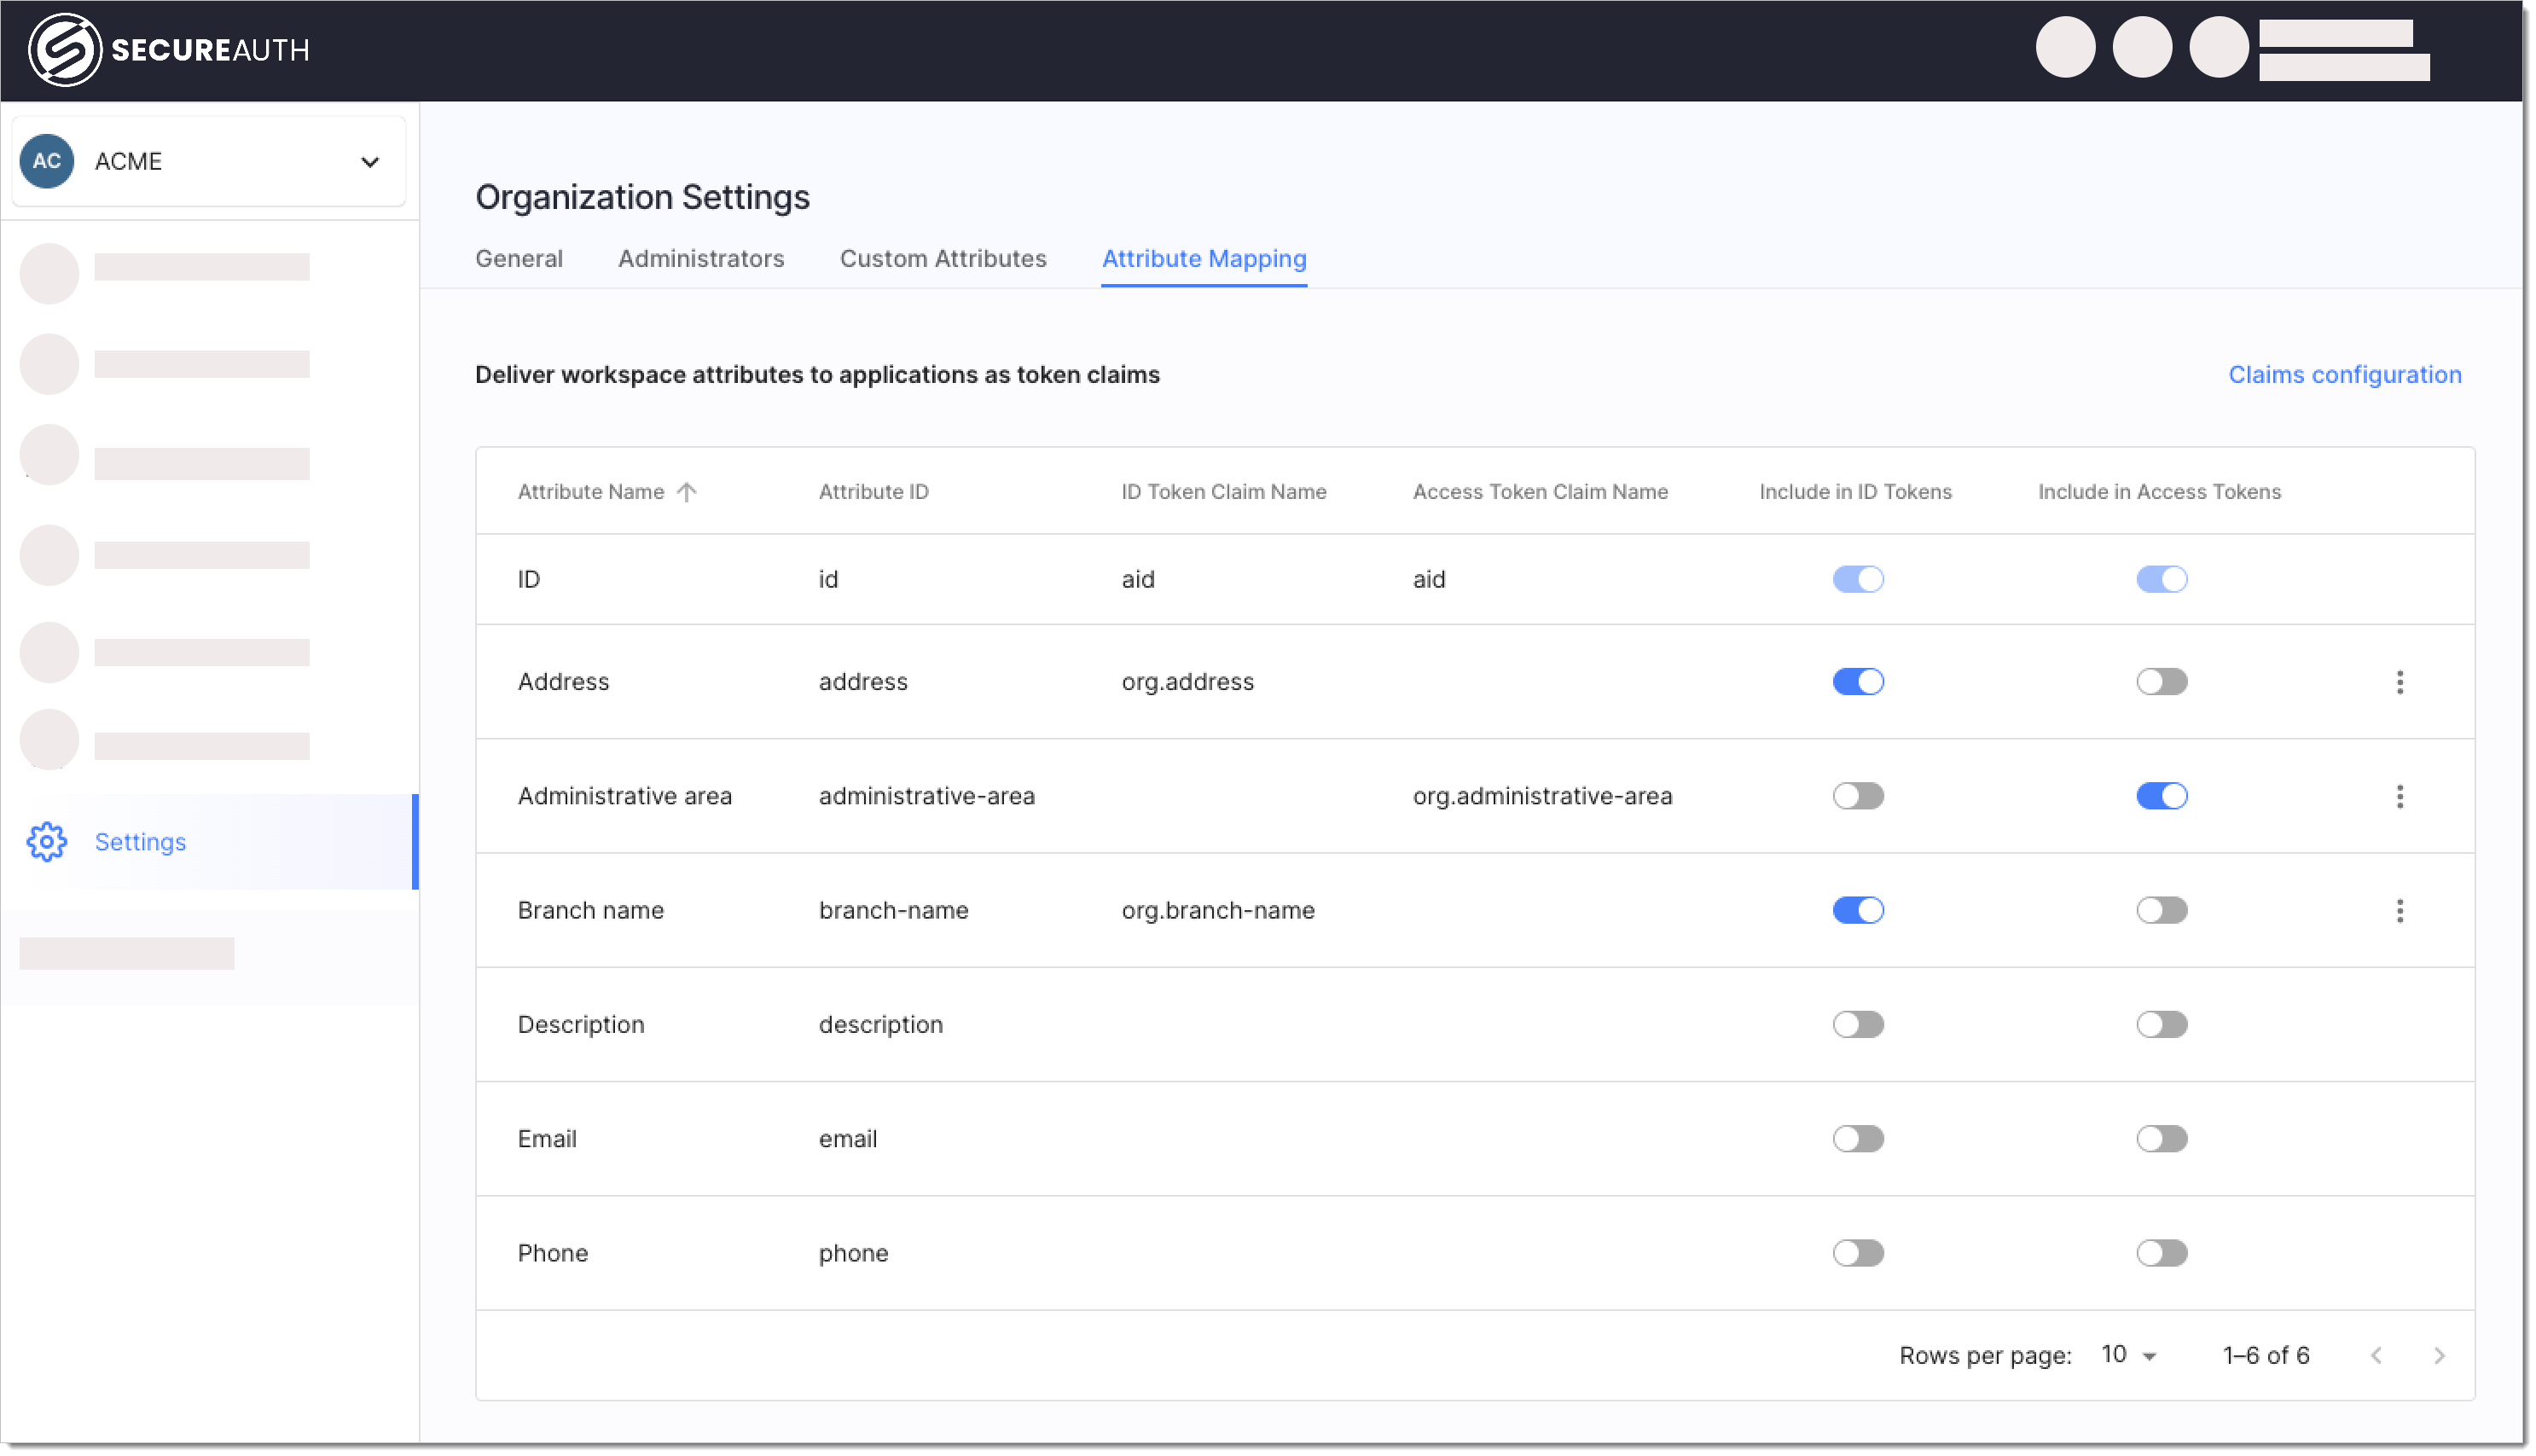
Include organization information in access tokens
Map organization details to access tokens so you can control access based on organization information. For example, you can create authorization rules that grant different permissions to different branches of the same organization. For more information, see Why you need organization details.
-
Select Settings > Attribute Mapping in your organization.
-
Enable organization attributes in the Include in ID Tokens or Include in Access Tokens columns that you want to include in tokens issued by SecureAuth.
-
Optionally click the three dots next to an attribute to customize its name in the token.
See also
- Create organizations and suborganizations - Set up organizations with custom fields
- Organization details - Understand why and how to use organization metadata
- Manage organizations - Edit and scale your organizations