Automated user provisioning
Automatically create users from third-party identity providers in identity pools when they sign in for the first time. SecureAuth provisions the user account instantly during the authentication flow, so there is no manual onboarding step.
Why use automated provisioning
If your users sign in through third-party identity providers, automated provisioning gives you:
- Unified user view. See all users in one place, whether they sign in locally or through external providers.
- Attribute enrichment. Add permissions, roles, and relationships to accounts from external providers for better authorization decisions.
- Activity tracking. Capture operational data like last sign-in time, even for externally authenticated users.
- Hybrid authentication. Use external providers for the first factor, then handle the second factor locally for stronger MFA control.
You can enable provisioning per identity provider in Authentication > Providers.
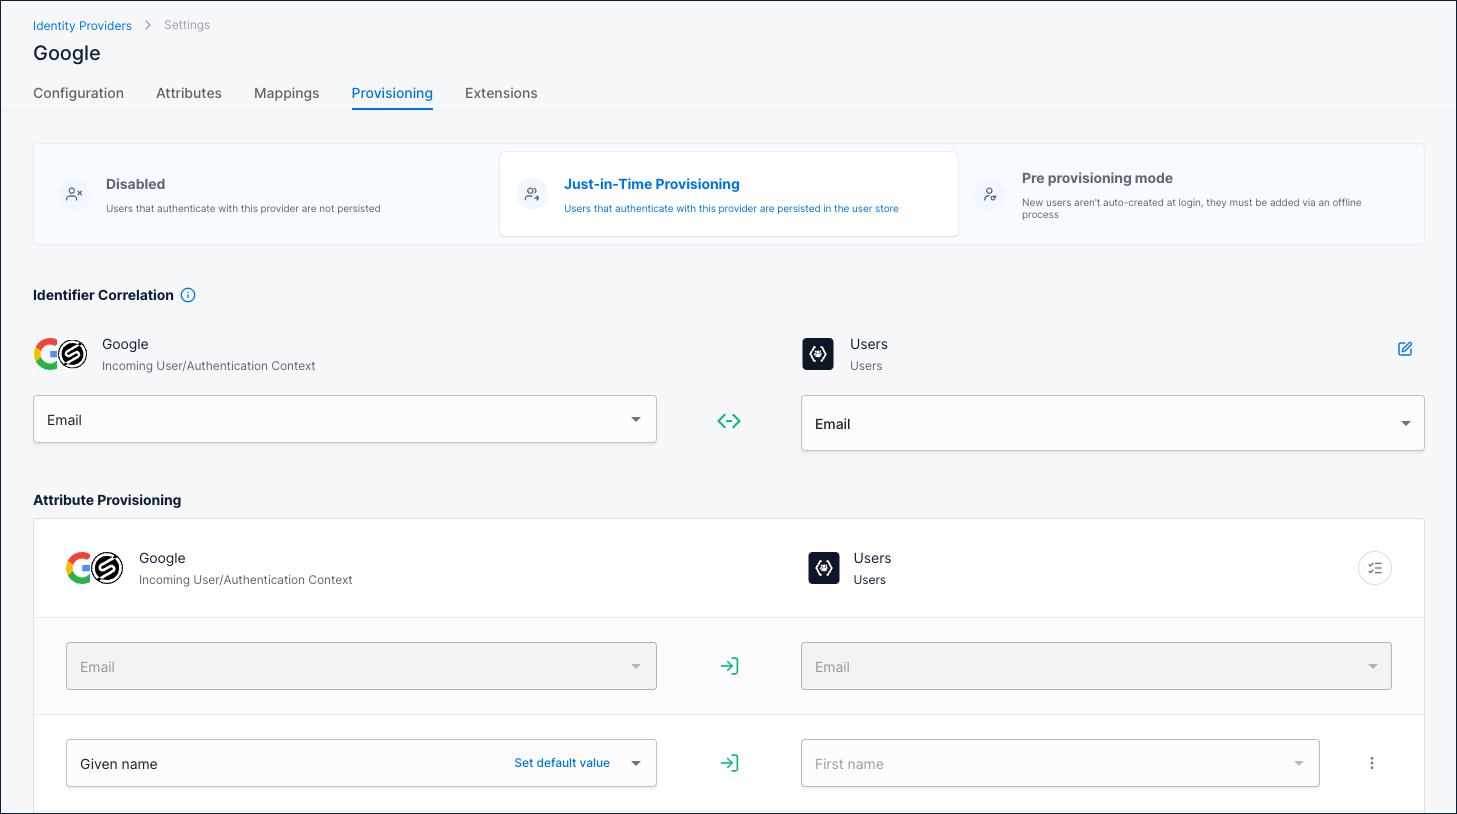
How automated user provisioning works
When a user signs in through a third-party identity provider for the first time, SecureAuth automatically provisions their account in the configured identity pool.
Authentication and provisioning steps
-
User accesses application. The user opens the application and clicks sign in. The application can be the SecureAuth platform itself.
-
Application sends OAuth request. The application calls the SecureAuth OAuth /authorize endpoint.
-
SecureAuth shows the login page. The user sees the sign-in page with available identity providers.
-
User authenticates externally. The user selects a third-party identity provider and signs in.
-
SecureAuth redirects the user back. After authentication, SecureAuth redirects the user back to the application.
-
User lookup by federation identifier. SecureAuth looks up the user by a federation identifier, a SHA-256 hash of the identity provider ID and the user's subject claim. After the first sign-in, subsequent lookups are direct because the federation identifier already exists.
-
Update existing user. If SecureAuth finds the user, it updates their provisioned attributes.
-
Check for matching accounts. If SecureAuth does not find the user by federation identifier, it searches by correlation identifier (typically email) to prevent duplicates. If a match is found, SecureAuth links the accounts by adding the new federation identifier to the existing user.
-
Create new user. If no match is found, SecureAuth creates a new user account in the configured identity pool.
-
Log the event. SecureAuth records an audit event for user creation, update, account linking, or provisioning failure.
Email and phone verification
When provisioning creates a user in an identity pool, email and phone numbers may need verification. The following excerpt from the Create User API shows the verifiable_addresses structure:
"verifiable_addresses": [
   {
      "address": "string",
      "address_lc": "string",
      "created_at": "2019-08-24T14:15:22Z",
      "id": "string",
      "preferred_contact_method": "sms",
      "status": "active",
      "tenant_id": "default",
      "type": "mobile",
      "updated_at": "2019-08-24T14:15:22Z",
      "user_id": "string",
      "user_pool_id": "default",
      "verified": true,
      "verified_at": "2019-08-24T14:15:22Z"
   }
]
Each user has an array of verifiable_addresses, where each address is a separate JSON object. You can configure provisioned attributes to control whether email or phone gets added to the user's verifiable_addresses object and how verification is handled.
| Option | Verification behavior | Use case |
|---|---|---|
| Email/Phone verified | Takes value from authentication, sets verified flag to true. | Trusted identity providers. |
| Email/Phone unverified | Takes value from authentication, sets verified flag to false. | Requires local verification. |
| Email/Phone OIDC Discovery | Takes value from authentication, gets verified flag from OIDC standard claim (email_verified or phone_number_verified). | OIDC-based identity providers with standard claims. |