Connect Microsoft Entra ID
Connect your existing Microsoft Entra ID to SecureAuth Connect to enable secure authentication for your workforce. This integration connects SecureAuth Connect to your Microsoft Entra ID directory for workforce authentication.
Prerequisites
Before connecting Microsoft Entra ID, complete the configuration steps in the Microsoft Entra ID configuration guide.
You will need these values from your Entra ID admin center portal configuration:
- Directory Tenant ID - Your Microsoft Entra tenant ID
- Client ID - The application (client) ID from your Microsoft Entra ID app registration
- Client Secret - The client secret associated with your Microsoft Entra ID application
- Entra ID Tenant Domain - Contact Support to add domains associated with your Entra ID directories
Connect Microsoft Entra ID
Step 1: Create new directory
- In your Workforce workspace, go to Authentication > User Stores.
- Click Create New Directory.
- Select Microsoft Entra ID.
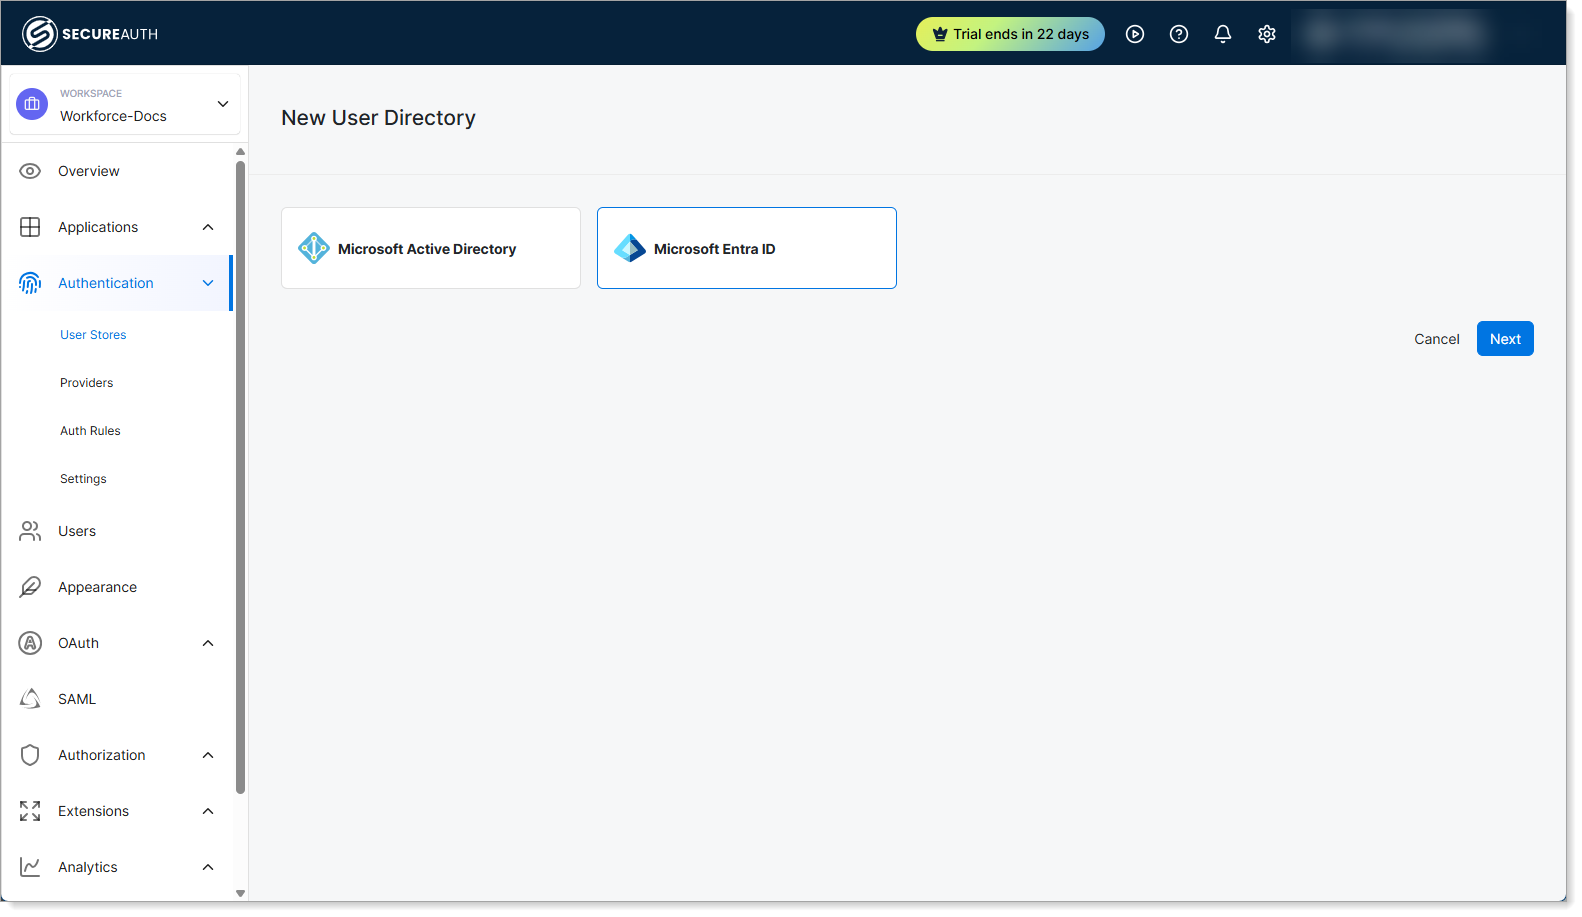
- Click Next.
Step 2: Configure basic settings
Give your connection a name and specify which domains to authenticate users against.
-
Name – Enter a descriptive and unique name for your Microsoft Entra ID connection. Example:
Corporate Entra ID. -
Domains – Select one or more domains from the list. The available domains are those that Support has added to your account (see Prerequisites). Example:
company.com,company.onmicrosoft.com.

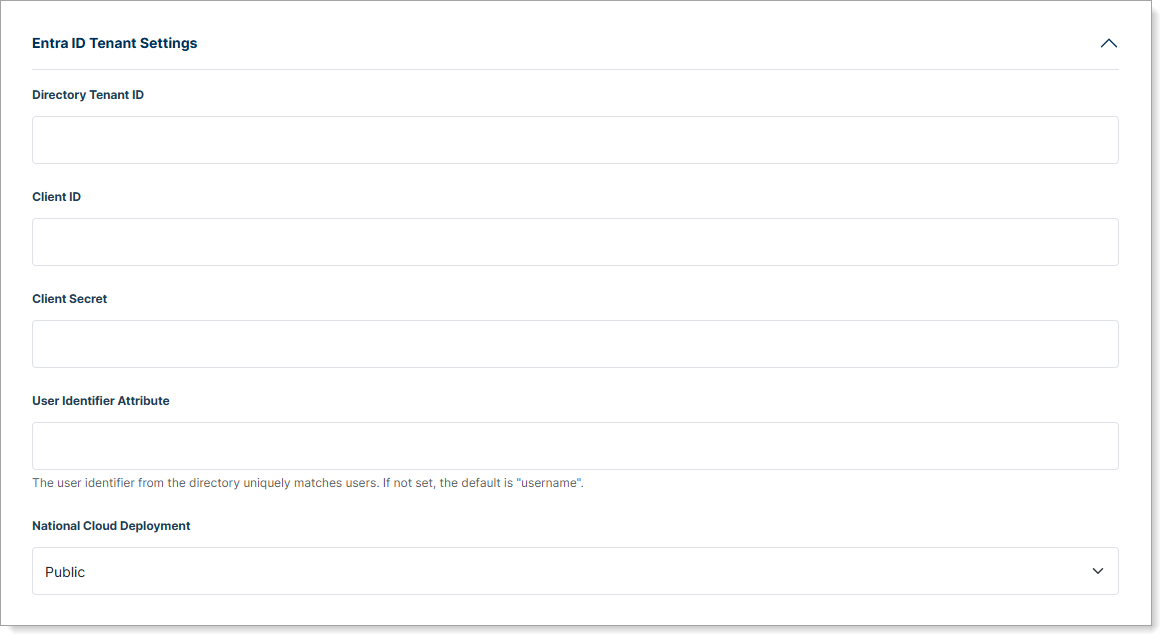
Step 3: Configure Microsoft Entra ID tenant settings
Expand Entra ID Tenant Settings to configure your Entra ID credentials.
-
Directory Tenant ID – Enter your Entra ID tenant ID. This is a unique identifier (GUID) found in your Entra ID admin center under Tenant information.
-
Client ID – Enter the application ID from your Entra ID app registration.
-
Client Secret – Paste the client secret credential from your Entra ID app registration.
-
User Identifier Attribute – Select which Entra ID attribute identifies users (email, username, etc.). Default:
username. Alternatives:mail,mailNickname. -
National Cloud Deployment – Choose the regional instance where your Entra ID tenant is hosted. Options: Public (default), China, Germany, US Government.
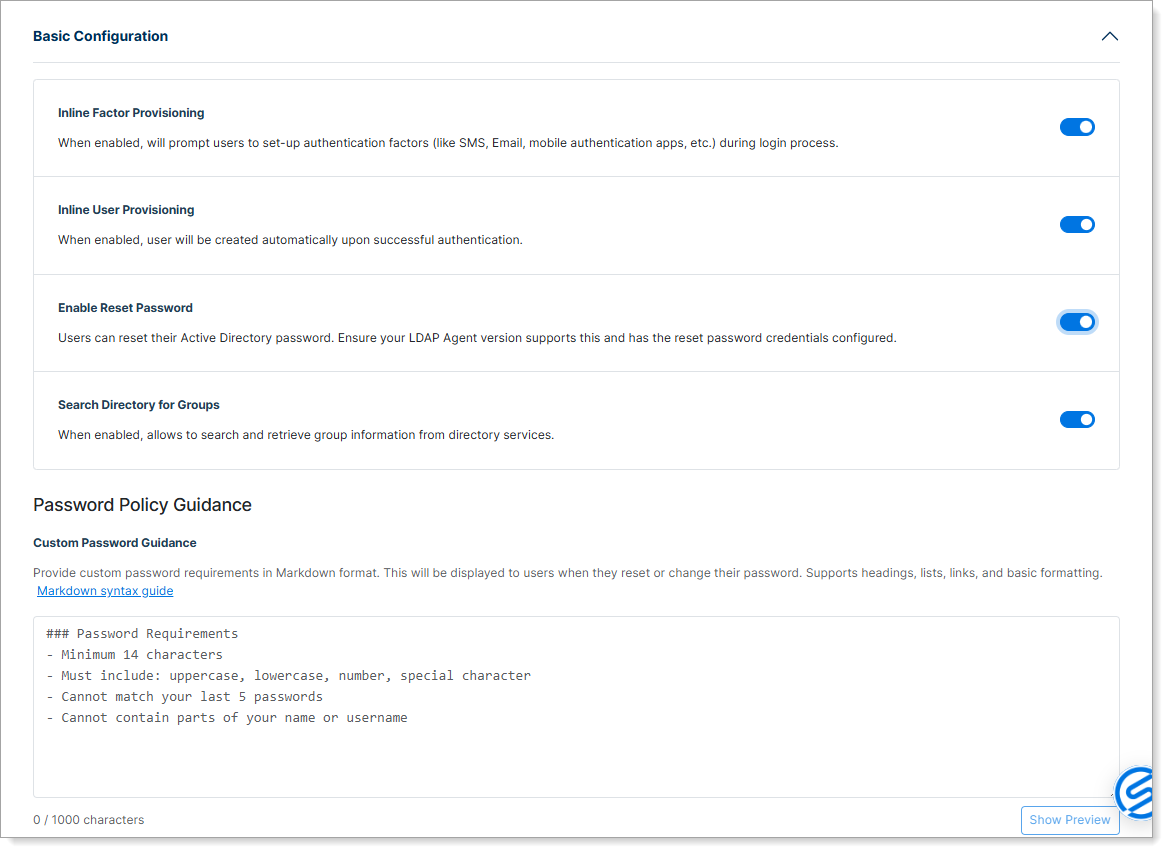
Step 4: Basic configuration and provisioning settings
Expand Basic Configuration and configure user provisioning and optional features for password reset and group management.
-
Inline Factor Provisioning – When enabled, prompts users to set up authentication factors (like SMS, email, mobile authentication apps) during the login process.
-
Inline User Provisioning – When enabled, creates users automatically upon successful authentication.
-
Enable Reset Password – When enabled, allows users to reset their Active Directory password and displays a Password Policy Guidance section where you can provide custom password requirements in Markdown format.
Requires the LDAP Agent to be configured with reset password credentials (see LDAP Agent Deployment Guide for setup details).
-
Search Directory for Groups – When enabled, looks up user group membership directly from the directory during authentication for policy enforcement.
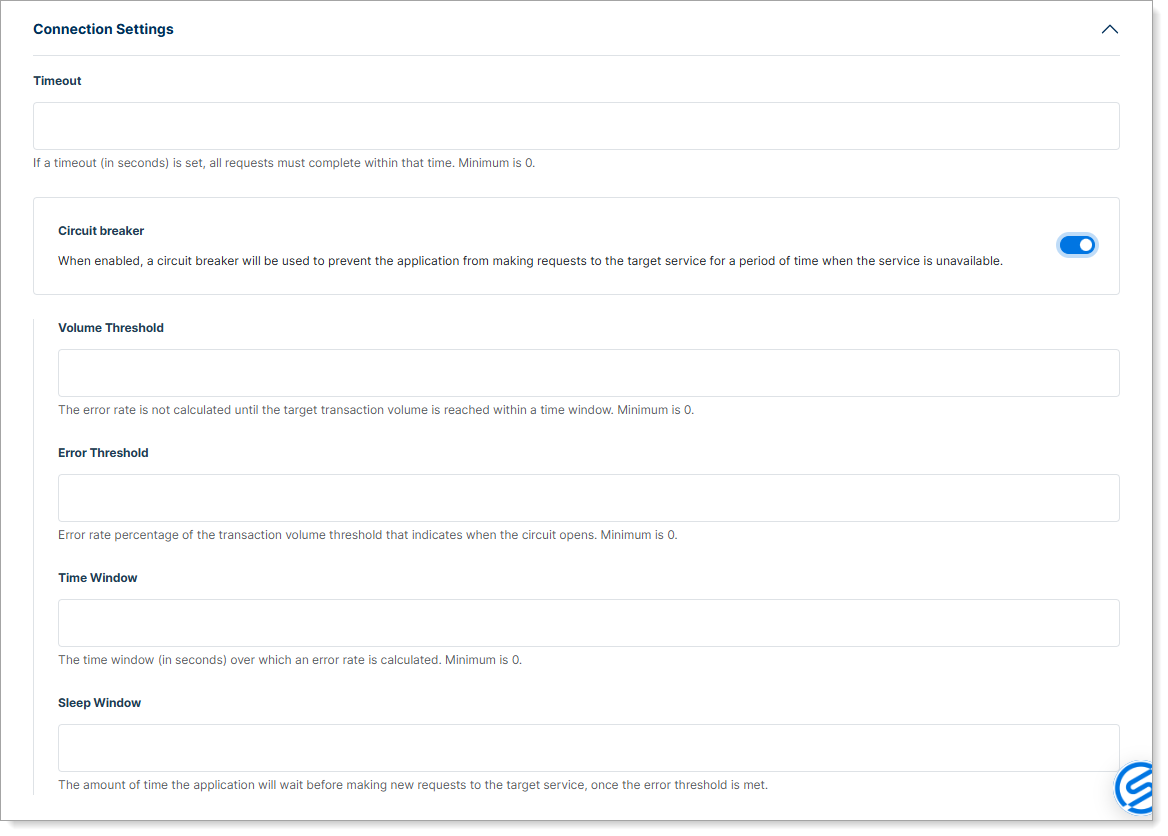
Step 5: Configure connection settings
Expand Connection Settings to configure timeout and circuit breaker settings.
- Timeout – Set the maximum time (in seconds) SecureAuth Connect waits for a response from Entra ID. Default: 30 seconds
Enable optional performance features:
-
Circuit breaker – When enabled, automatically pauses requests to Entra ID if it detects repeated errors. This prevents constant retries when Entra ID is temporarily unavailable.
- Volume Threshold – Minimum number of requests within the time window required before evaluating the error rate.
- Error Threshold – Percentage of failed requests that triggers the breaker to activate.
- Time Window – Duration (in seconds) over which to measure the error rate.
- Sleep Window – Duration (in seconds) the system pauses before attempting requests again after the breaker activates.
Verify Microsoft Entra ID connection
After configuration, verify that the Directory Information panel displays the directory as online. This confirms the connection is working.
Default directory behavior
When you have multiple user directories (Active Directory, Microsoft Entra ID, Identity Pools, etc.), SecureAuth authenticates users as follows:
- Domain matching – When a user logs in (for example,
jsmith@acme.com), SecureAuth matches the domain (acme.com) to the corresponding directory. - Default directory – If the domain doesn't match any directory, SecureAuth uses the one marked as default.
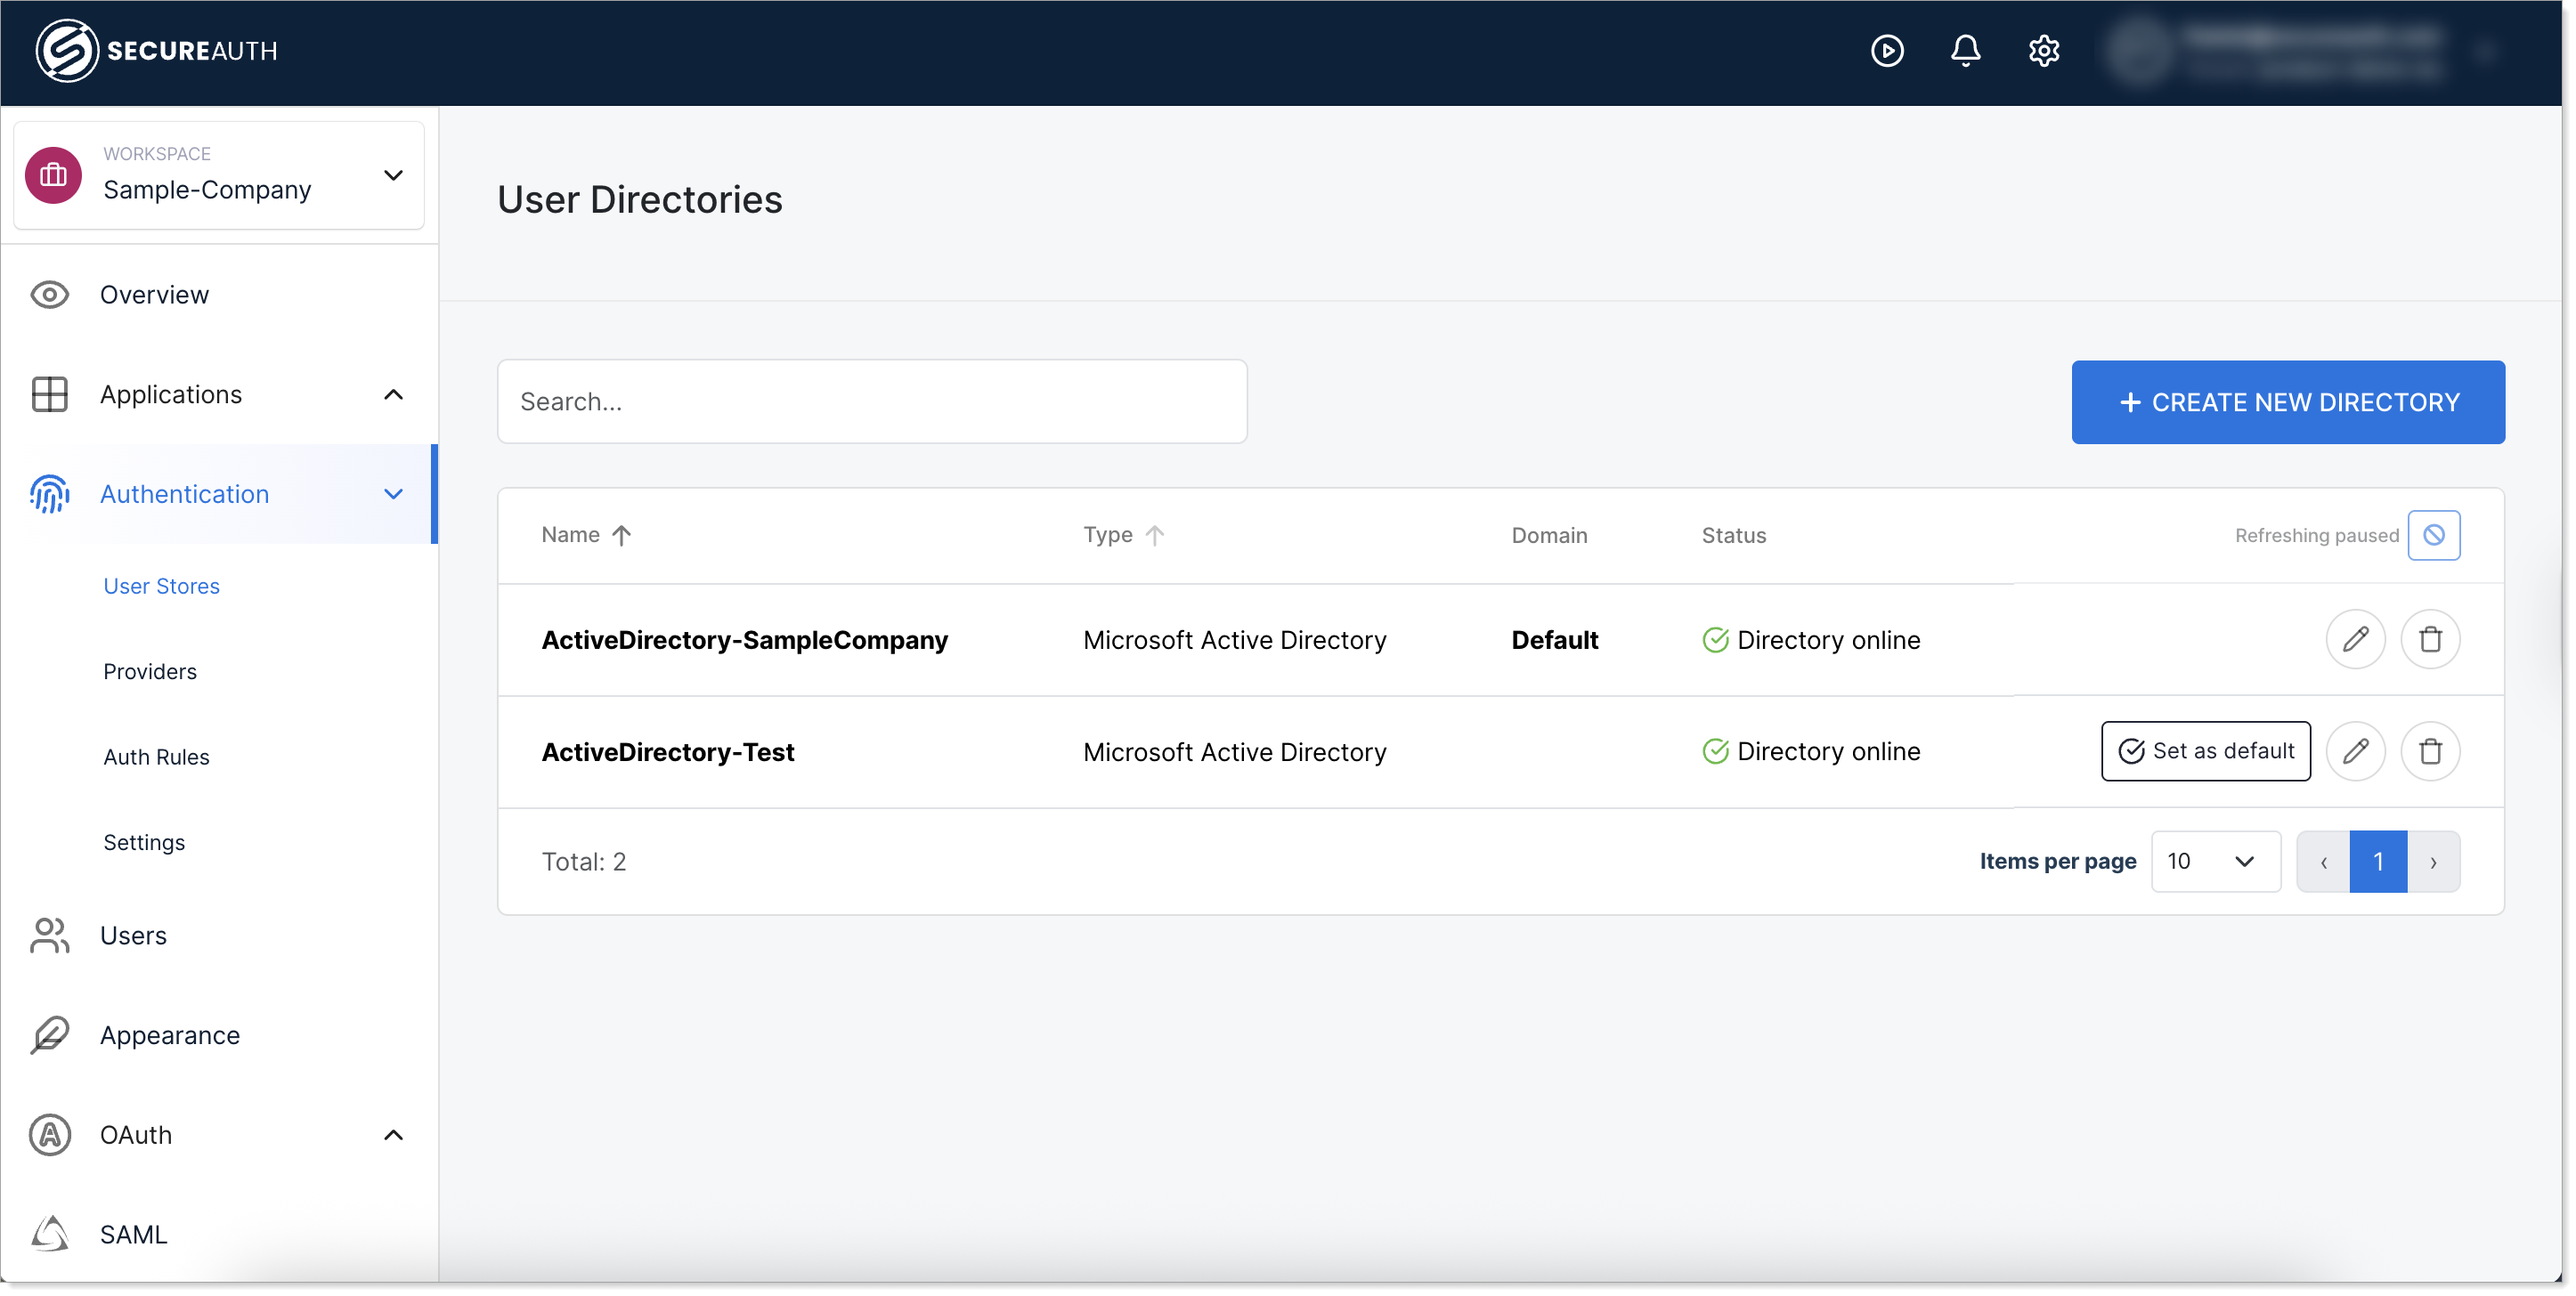
Set a directory as default
To change which directory serves as the default:
- In your Workforce workspace, go to Authentication > User Stores.
- Find the directory you want to set as default.
- Click Set as default.
Important considerations:
- Only one directory can be marked as default at a time.
- If you create users directly in your workspace with the same domain as your connected directory, domain matching may prevent those users from being recognized. To avoid this, use the connected directory for user creation, or use a different domain for workspace-created users.
- The default directory is used only when the user's domain doesn't match any connected directory.
Next steps
After connecting Microsoft Entra ID:
- Configure authentication rules for your workforce
- Set up additional applications for SSO