Provision users from third-party identity providers
Configure Just-in-Time (JIT) provisioning to automatically create user accounts in identity pools when users sign in through a third-party identity provider. For background on how the provisioning flow works, see Automated user provisioning.
Prerequisites
- A third-party identity provider connected and configured in your workspace. If you are provisioning users who sign in to web applications, connect the identity provider in the same workspace as the application. If you are provisioning users who administer your SecureAuth tenant, connect the identity provider in the Admin workspace.
- An identity pool to store the provisioned users. You can create a dedicated pool or reuse an existing one.
Enable Just-in-Time provisioning
- Go to Authentication > Providers and select the identity provider you want to provision users from.
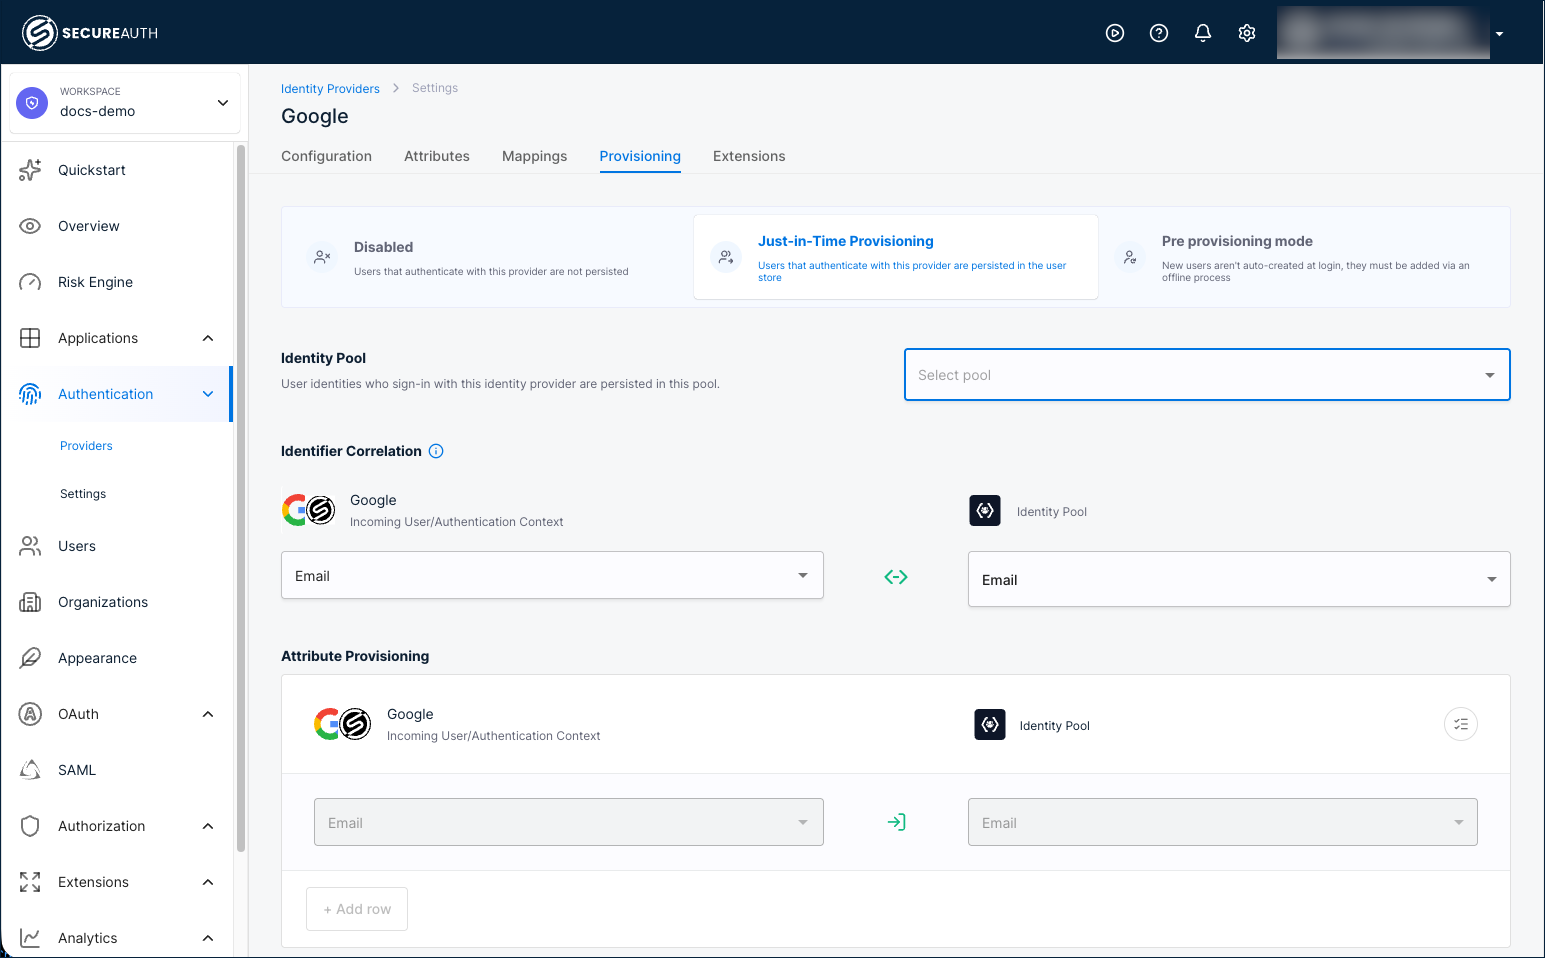
- Select the Provisioning tab.
- Select the Just-in-Time Provisioning card.
- Select the identity pool where provisioned users will be stored.
- Click Save.
After you save, users who sign in through this identity provider are automatically created in the selected identity pool on first login.
Try it with the demo workspace
The fastest way to test provisioning end-to-end is with the demo workspace, which comes with an embedded Google identity provider and a demo application.
-
Create a demo workspace with the demo application enabled.
-
Create an identity pool or reuse an existing one.
-
Enable JIT provisioning for the Google identity provider and select your identity pool.
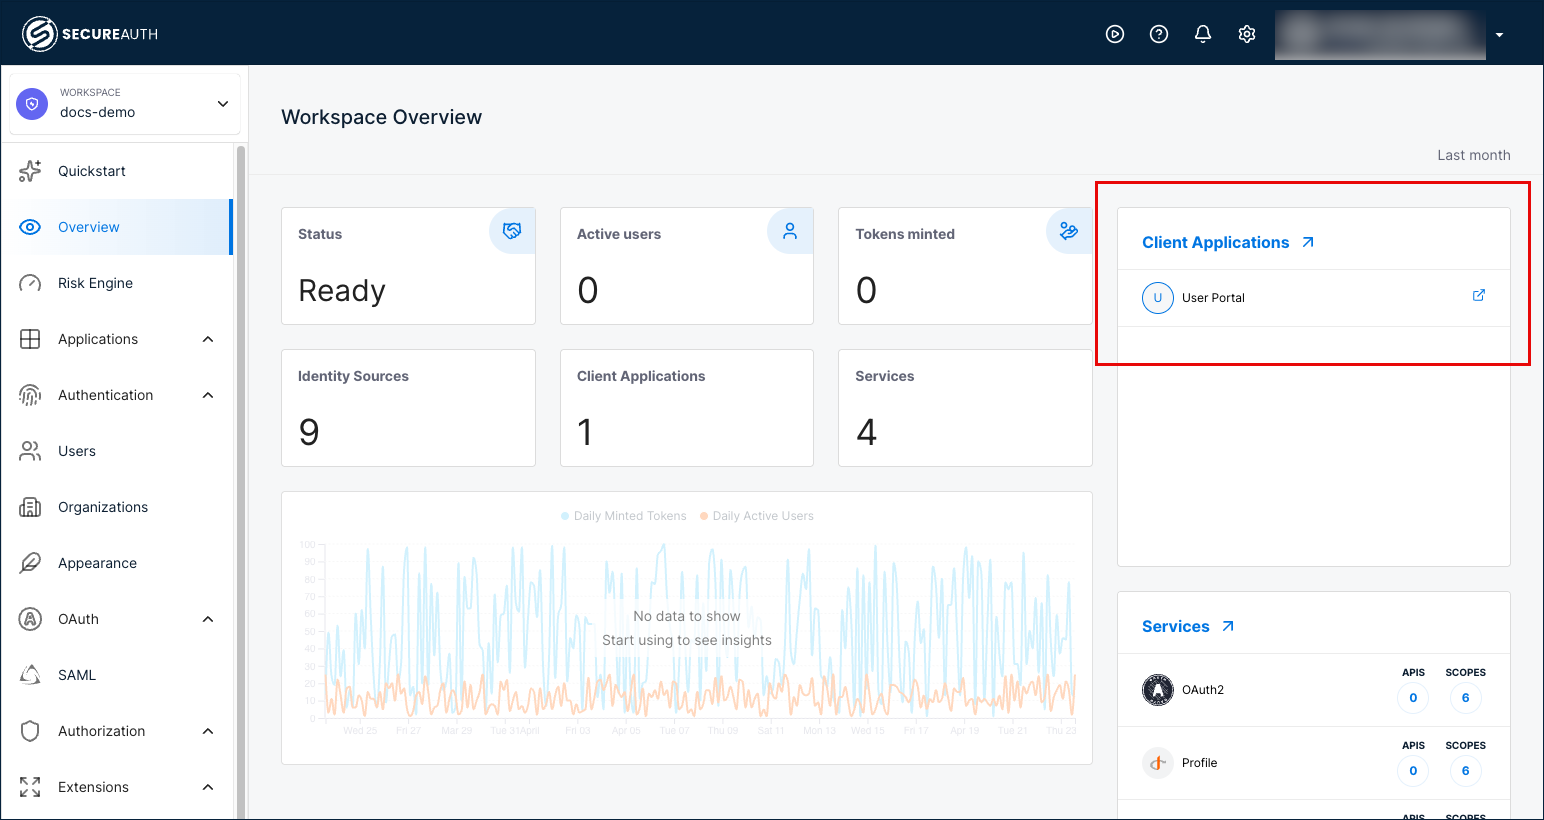
-
Go to Overview and launch the User Portal.
-
Sign in with the Google identity provider.
-
Go back to the identity pool you configured and verify the provisioned user appears.

Configure identifier correlation
Identifier correlation maps an incoming identity provider attribute to an identity pool attribute so SecureAuth can match returning users to existing accounts. The default correlation maps the identity provider email to the identity pool email.
- Go to the identity provider's Provisioning tab.
- Under Identifier Correlation, select the incoming attribute from the identity provider (for example,
Email). - Select the matching identity pool attribute (for example,
Email). - Click Save.
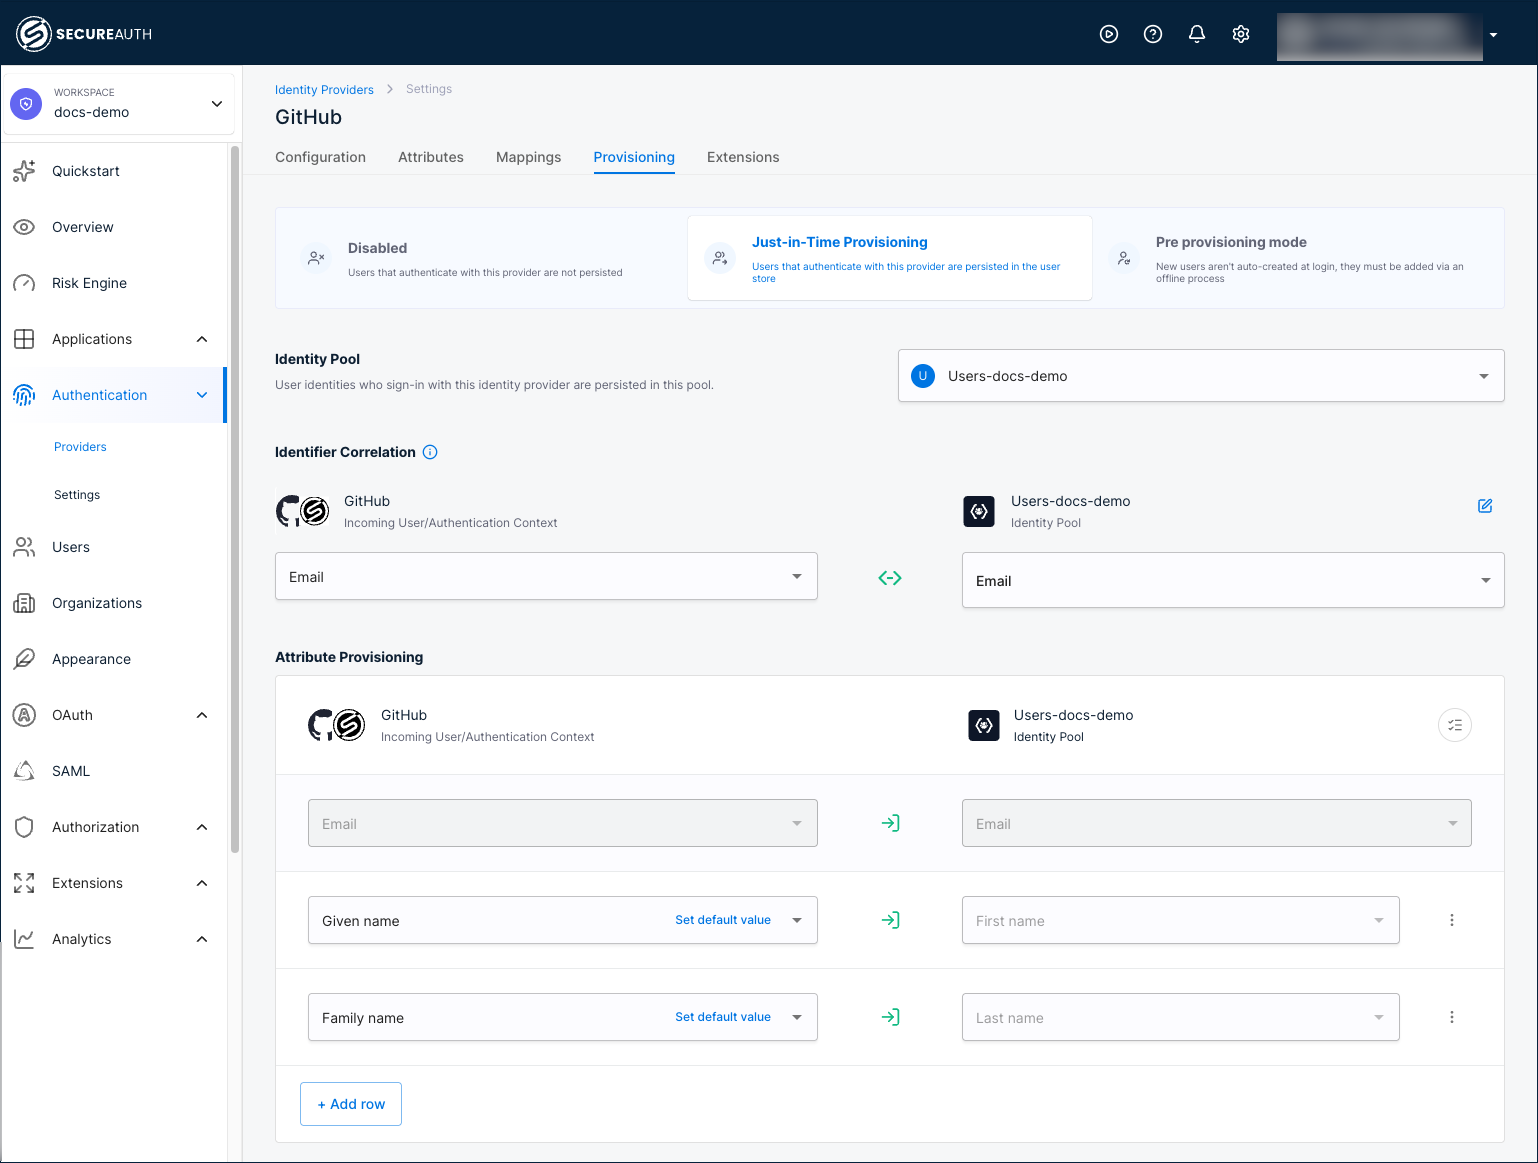
Configure attribute provisioning
Attribute provisioning maps identity provider attributes to identity pool user profile fields. SecureAuth includes default mappings (email, first name, last name) and you can add custom mappings.
-
Go to the identity provider's Provisioning tab. The default attribute mappings are displayed.
-
Click Add row to define additional mappings.
-
Select the incoming attribute from the identity provider's authentication context.
-
Select the target identity pool attribute. You can map to:
- Schema attributes (both payload and metadata fields).
- Identity pool addresses and identifiers. See email and phone verification for how verification is handled.
To set a fallback value for an attribute, click Set default value next to the mapping row. The default value is used when the identity provider does not return the attribute.
noteYou can only provision attributes that exist in the user's authentication context. If you do not see an expected attribute, verify that you added it when connecting the identity provider and mapped it to the authentication context.
-
Click the three-dot menu next to a row to delete the mapping or enable/disable attribute updates on each sign-in.
-
Click Save.