Connect Active Directory
This guide covers Active Directory setup through the Authentication > User Stores flow in Workforce workspaces. For the Authentication > Providers flow used in B2B, enterprise, and partner workspaces, see Set up Active Directory for authentication.
Connect your existing Active Directory (AD) to SecureAuth Connect to enable secure authentication for your workforce. This integration uses the SecureAuth LDAP Agent to create a secure connection between SecureAuth and your on-premises AD.
Prerequisites
Before you begin, confirm the following:
- AD administrative credentials and a service account with read access to AD.
- AD user accounts have
userPrincipalName,first_name, andlast_namepopulated. Accounts missing these attributes do not sync. - Network connectivity between the planned LDAP Agent location and your domain controllers.
- A virtual server or machine to host the LDAP Agent (or an existing LDAP Agent ready to deploy). You can configure the agent host after creating the AD connection. For the deployment process, see the LDAP Agent deployment guide.
- You have administrative access to the Workforce workspace where you want to add AD as a user store.
Connect Active Directory
Step 1: Create new directory
-
In your Workforce workspace, go to Authentication > User Stores.
-
Click Create New Directory.
Result: The New User Directory page opens.
-
Select Microsoft Active Directory.
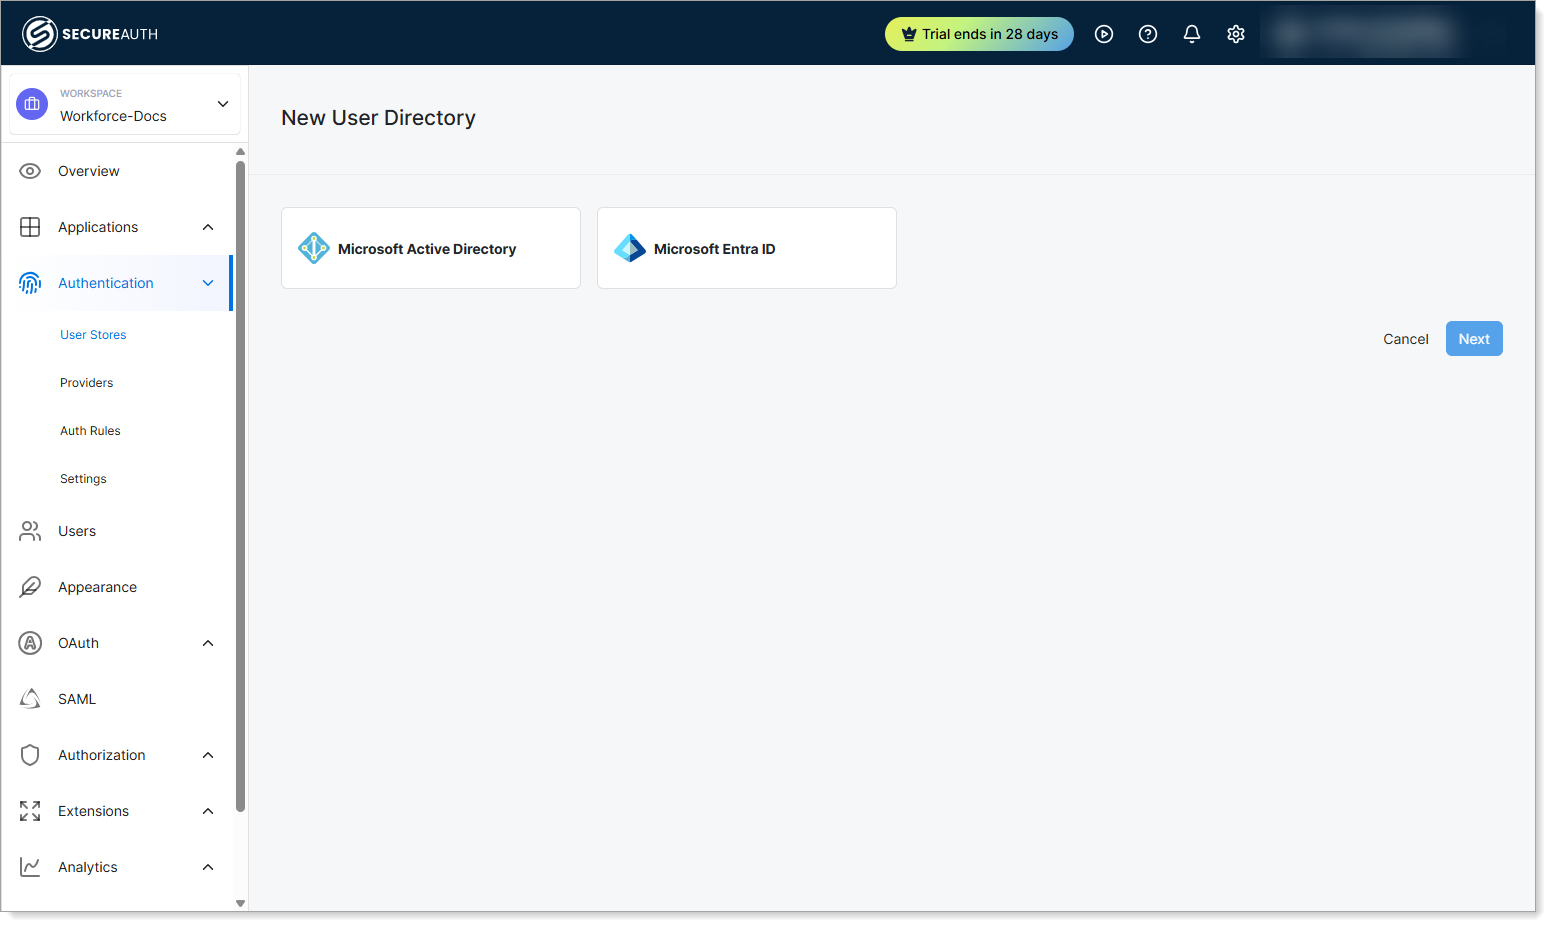
-
Click Next.
Step 2: Configure connection details
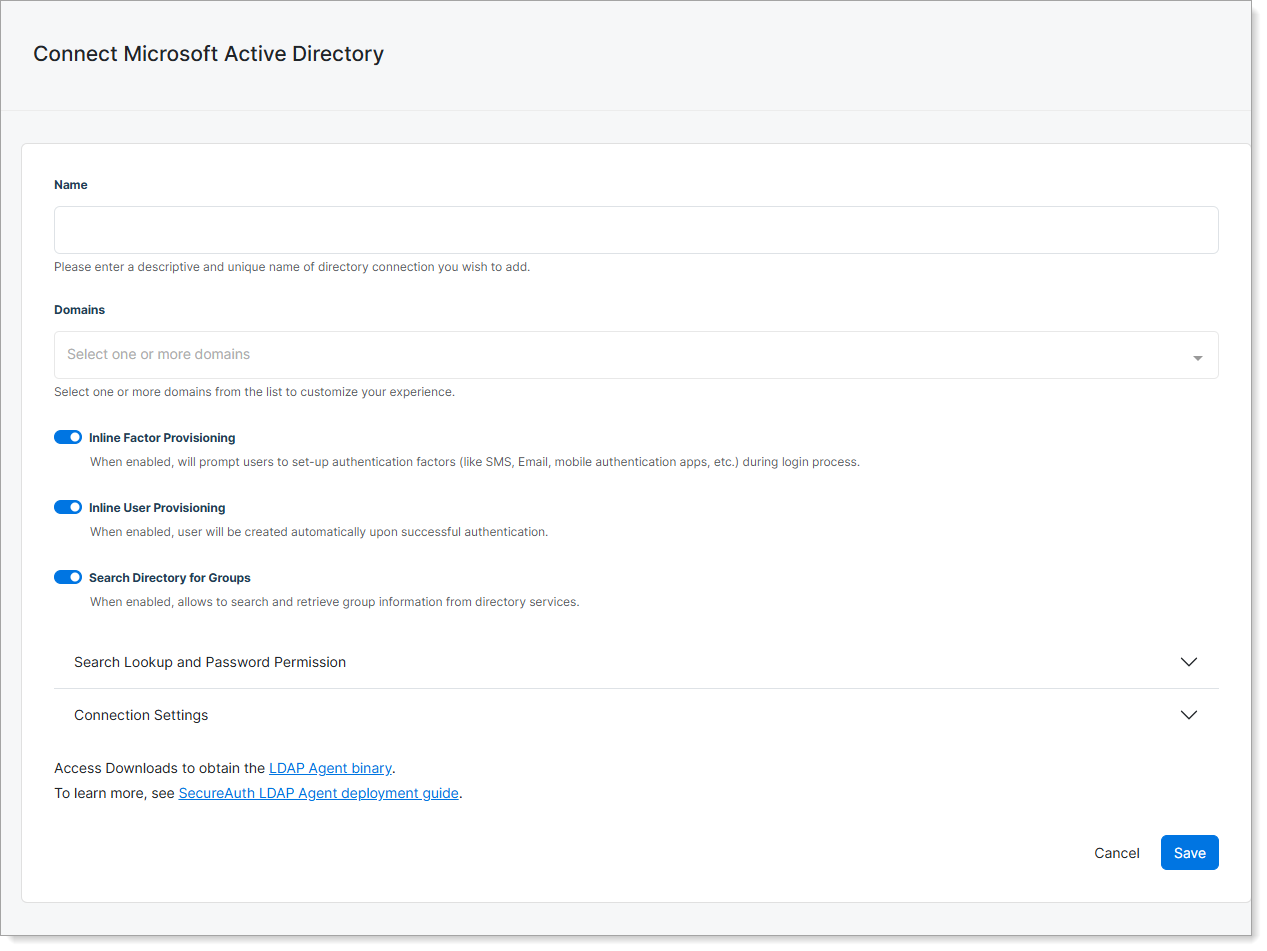
Complete the basic connection settings.
| Setting | Description |
|---|---|
| Name | Descriptive and unique name for the connection. Example: Corporate Active Directory. |
| Domains | Select one or more domains from the list. Example: company.com, hr.company.com. |
| Inline Factor Provisioning | Prompts users to set up authentication factors (like SMS, email, mobile authentication apps) during the login process. |
| Inline User Provisioning | Creates users automatically upon successful authentication. |
| Search Directory for Groups | Search and retrieve group information from directory services. |
Step 3: Configure search and password settings
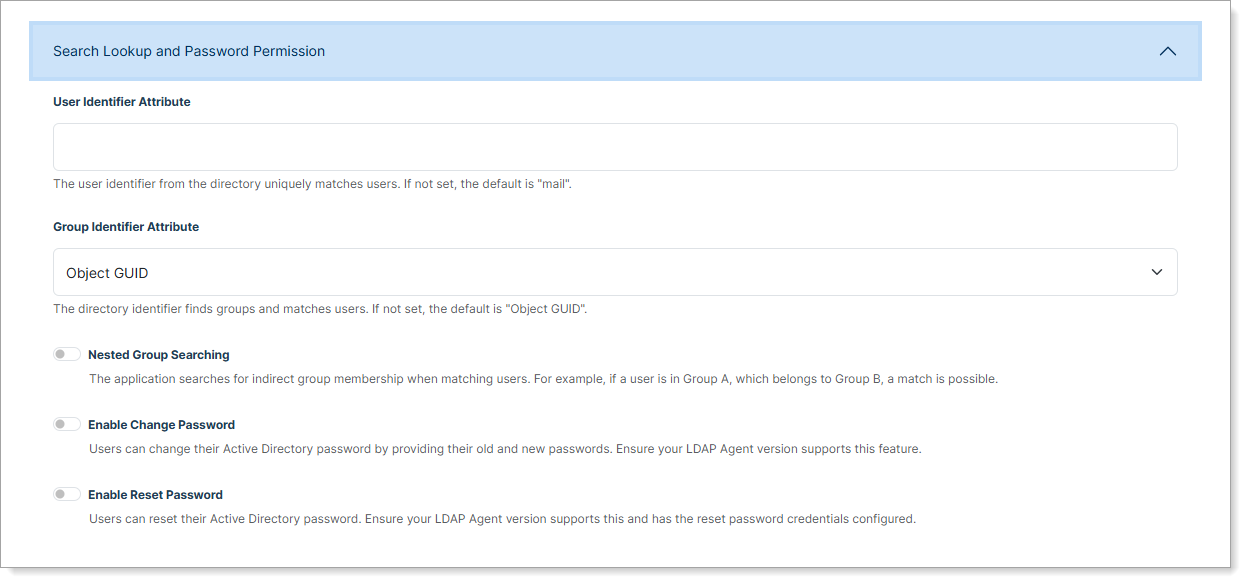
Expand Search Lookup and Password Permission to configure user and group attributes.
| Setting | Description |
|---|---|
| User Identifier Attribute | User identifier from the directory. Make sure the value is unique for each user. Default: mail. Alternatives: sAMAccountName, userPrincipalName. |
| Group Identifier Attribute | Directory attribute used to find groups and match users. Default: Object GUID. Alternative: distinguishedName. |
| Nested Group Searching | Match users to groups through nested (indirect) membership. If a user is in Group A and Group A is a member of Group B, the user matches Group B. |
| Enable Change Password | Allow users to change their AD password by entering their current password and a new one. Requires an LDAP Agent version with password change support. |
| Enable Reset Password | Allow users to reset their AD password through a password reset flow. Requires an LDAP Agent version with password reset support and bind credentials configured. |
Step 4: Configure connection settings
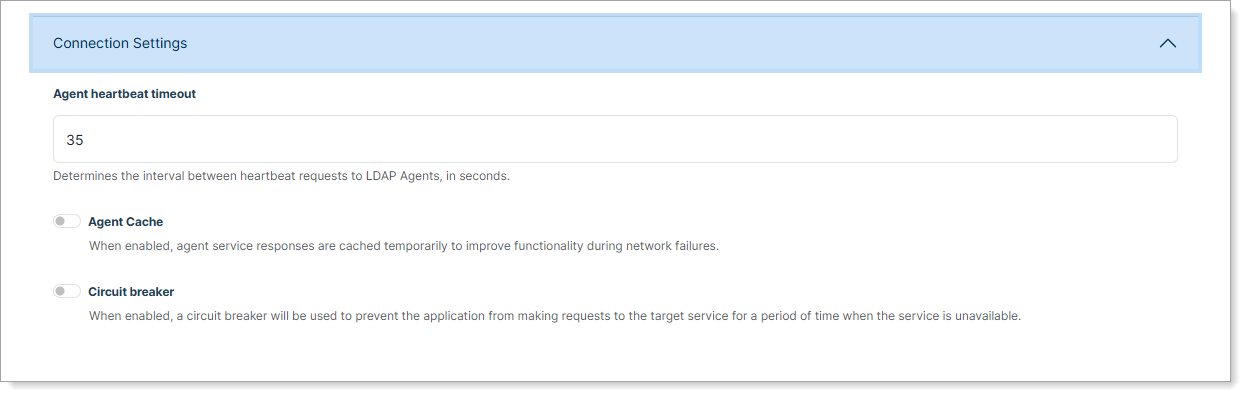
Expand Connection Settings to configure agent communication.
| Setting | Description |
|---|---|
| Agent heartbeat timeout | Interval between heartbeat requests to LDAP Agents, in seconds. Default: 35. |
| Agent Cache | Cache agent service responses temporarily to maintain functionality during network failures. |
| Agent Cache Duration | (When Agent Cache is enabled.) How long cached agent service responses remain valid. Enter values in hours and minutes. Default: 25 hours (supports daily user logins). |
| Circuit breaker | Prevent the application from sending requests to the target service for a period when the service is unavailable. |
| Volume Threshold | (When Circuit breaker is enabled.) Minimum transaction volume in a time window before the error rate is calculated. Minimum: 0. Default: 10. |
| Error Threshold | (When Circuit breaker is enabled.) Error rate percentage of the transaction volume that triggers the circuit to open. Minimum: 0. Default: 50. |
| Time Window | (When Circuit breaker is enabled.) Time window in seconds over which the error rate is calculated. Minimum: 0. Default: 30. |
| Sleep Window | (When Circuit breaker is enabled.) Time the application waits, in seconds, before sending new requests to the target service after the error threshold is met. Default: 300. |
Step 5: Complete setup
- Click Save.
- Scroll down the page and download the LDAP Agent binary from the provided link.
- Follow the LDAP Agent deployment guide to complete the installation.
Verify Active Directory connection
After configuration, confirm the Directory Information panel shows the directory as online and check the Directory Details.
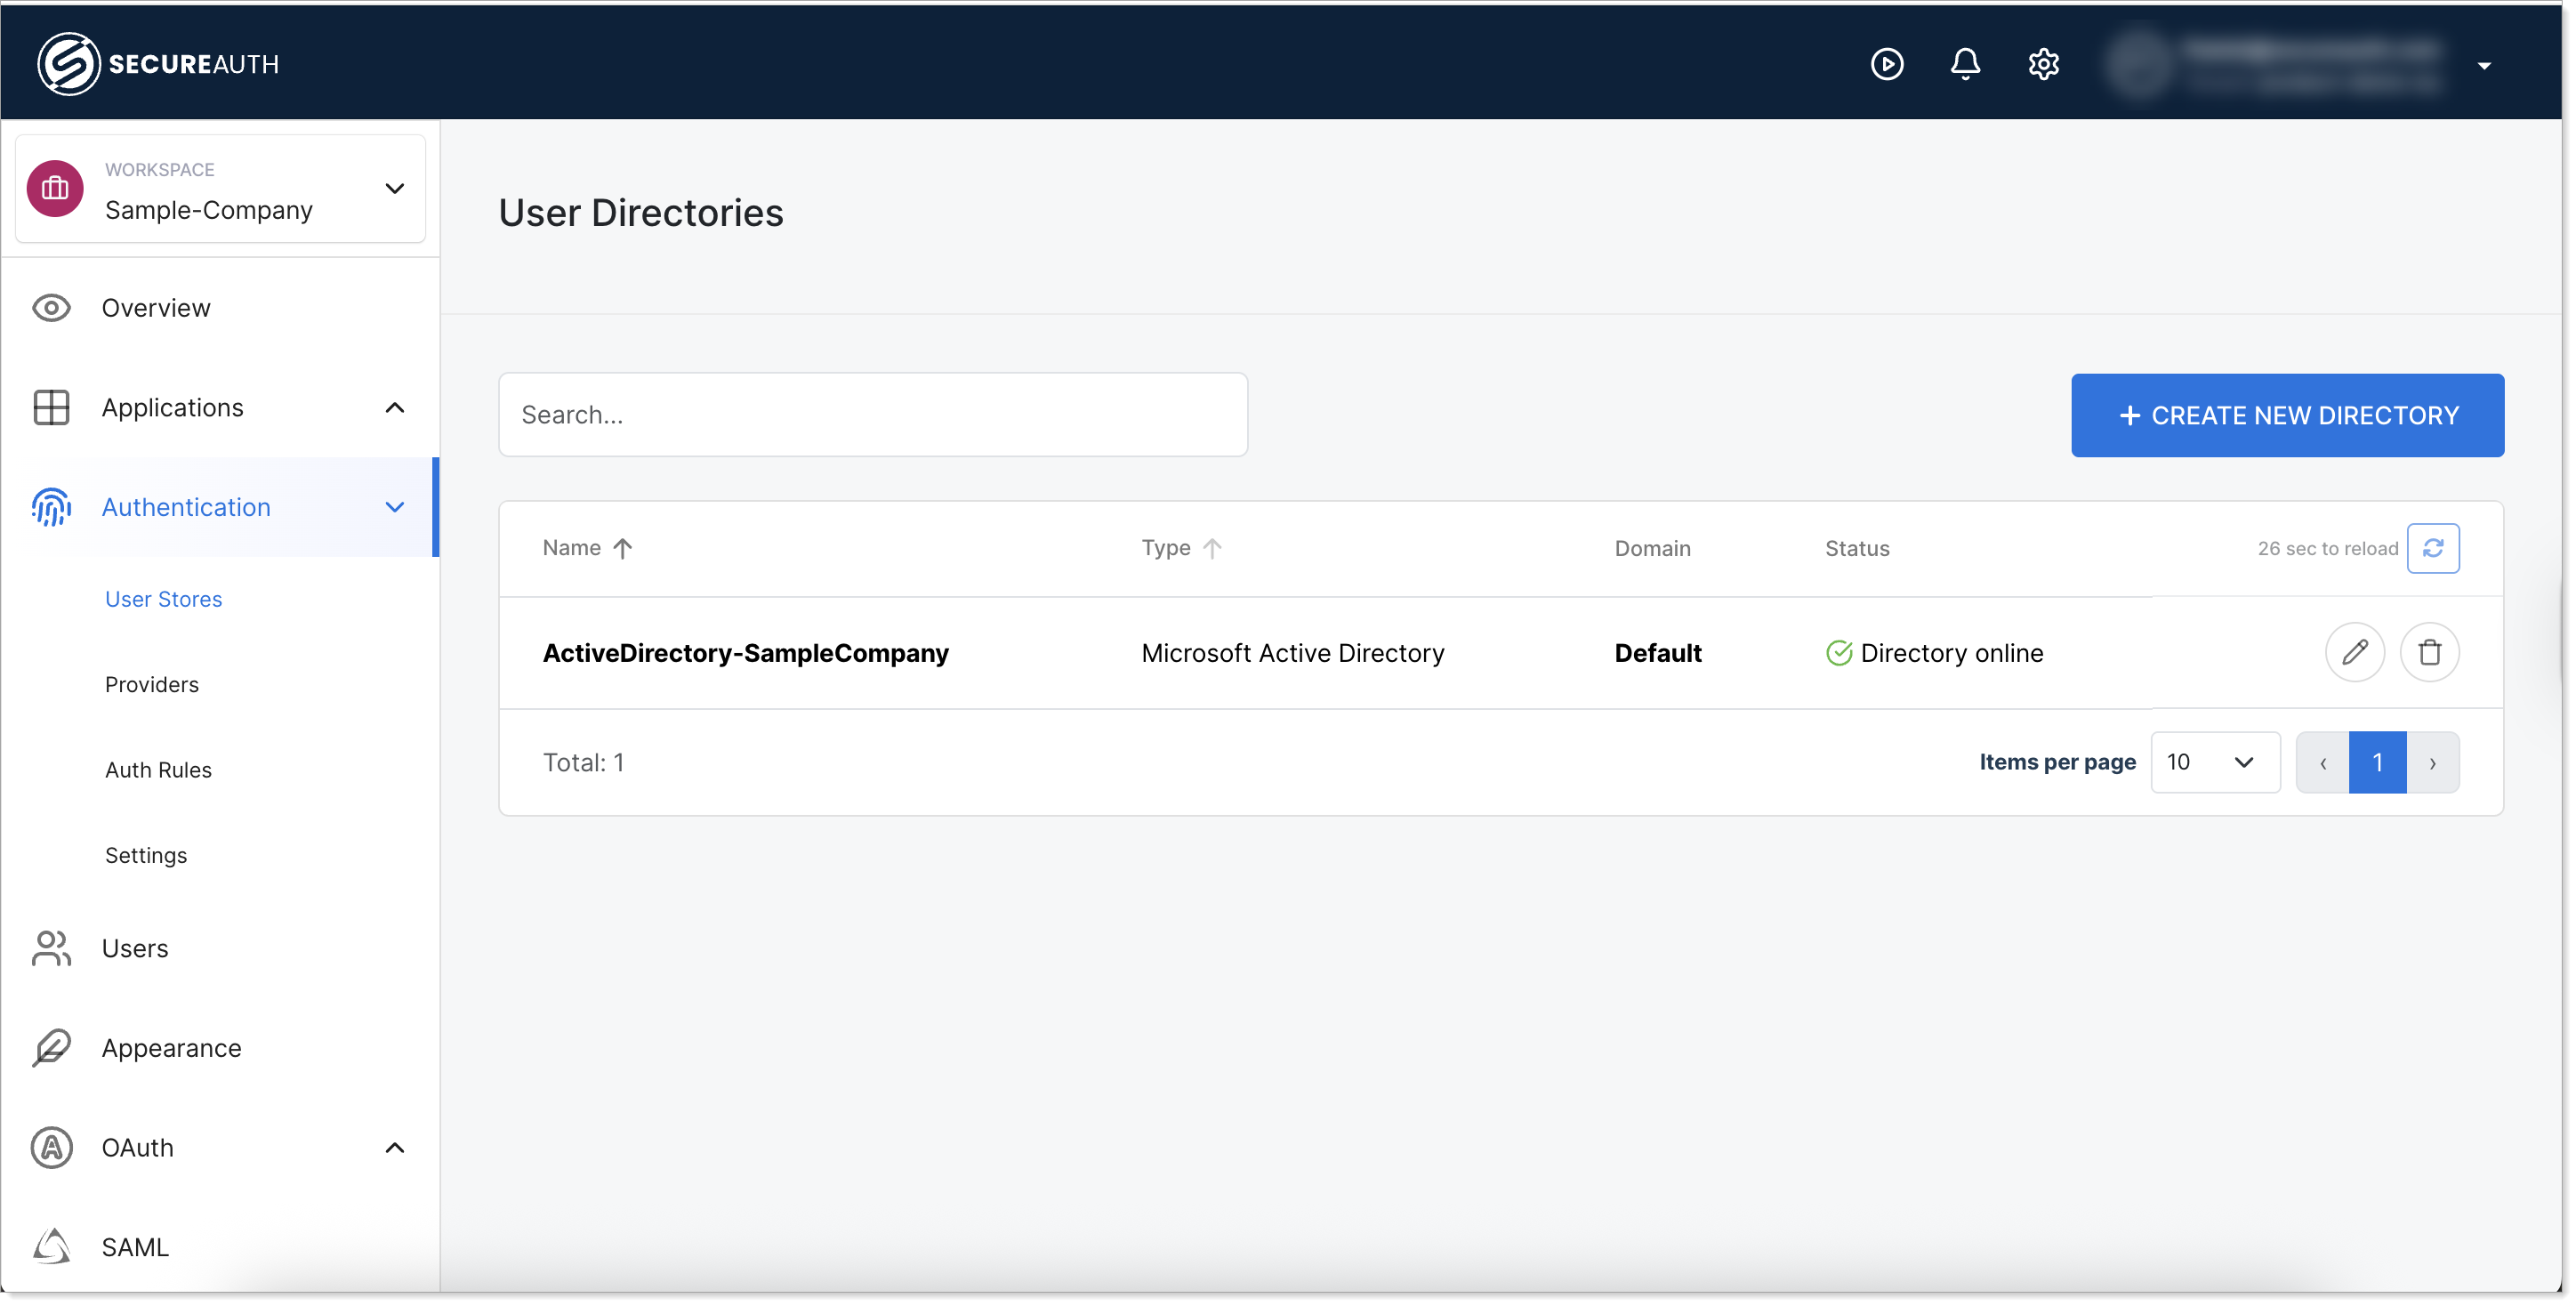 Active Directory status in the User Directories list
 Active Directory status in edit mode
Log locations
- Windows:
C:\Program Files\SecureAuth\LDAP Agent\logs - Linux:
/var/log/secureauth-ldap-agent
Default directory behavior
When you have multiple user directories (Active Directory, Microsoft Entra ID, identity pools, etc.), SecureAuth uses domain matching to determine which directory to authenticate users against:
-
Domain matching — When a user signs in (for example,
jsmith@acme.com), SecureAuth looks for a directory that matches the domain part after@(likeacme.com). -
Default fallback — If no matching domain is found, SecureAuth uses the directory marked as default.
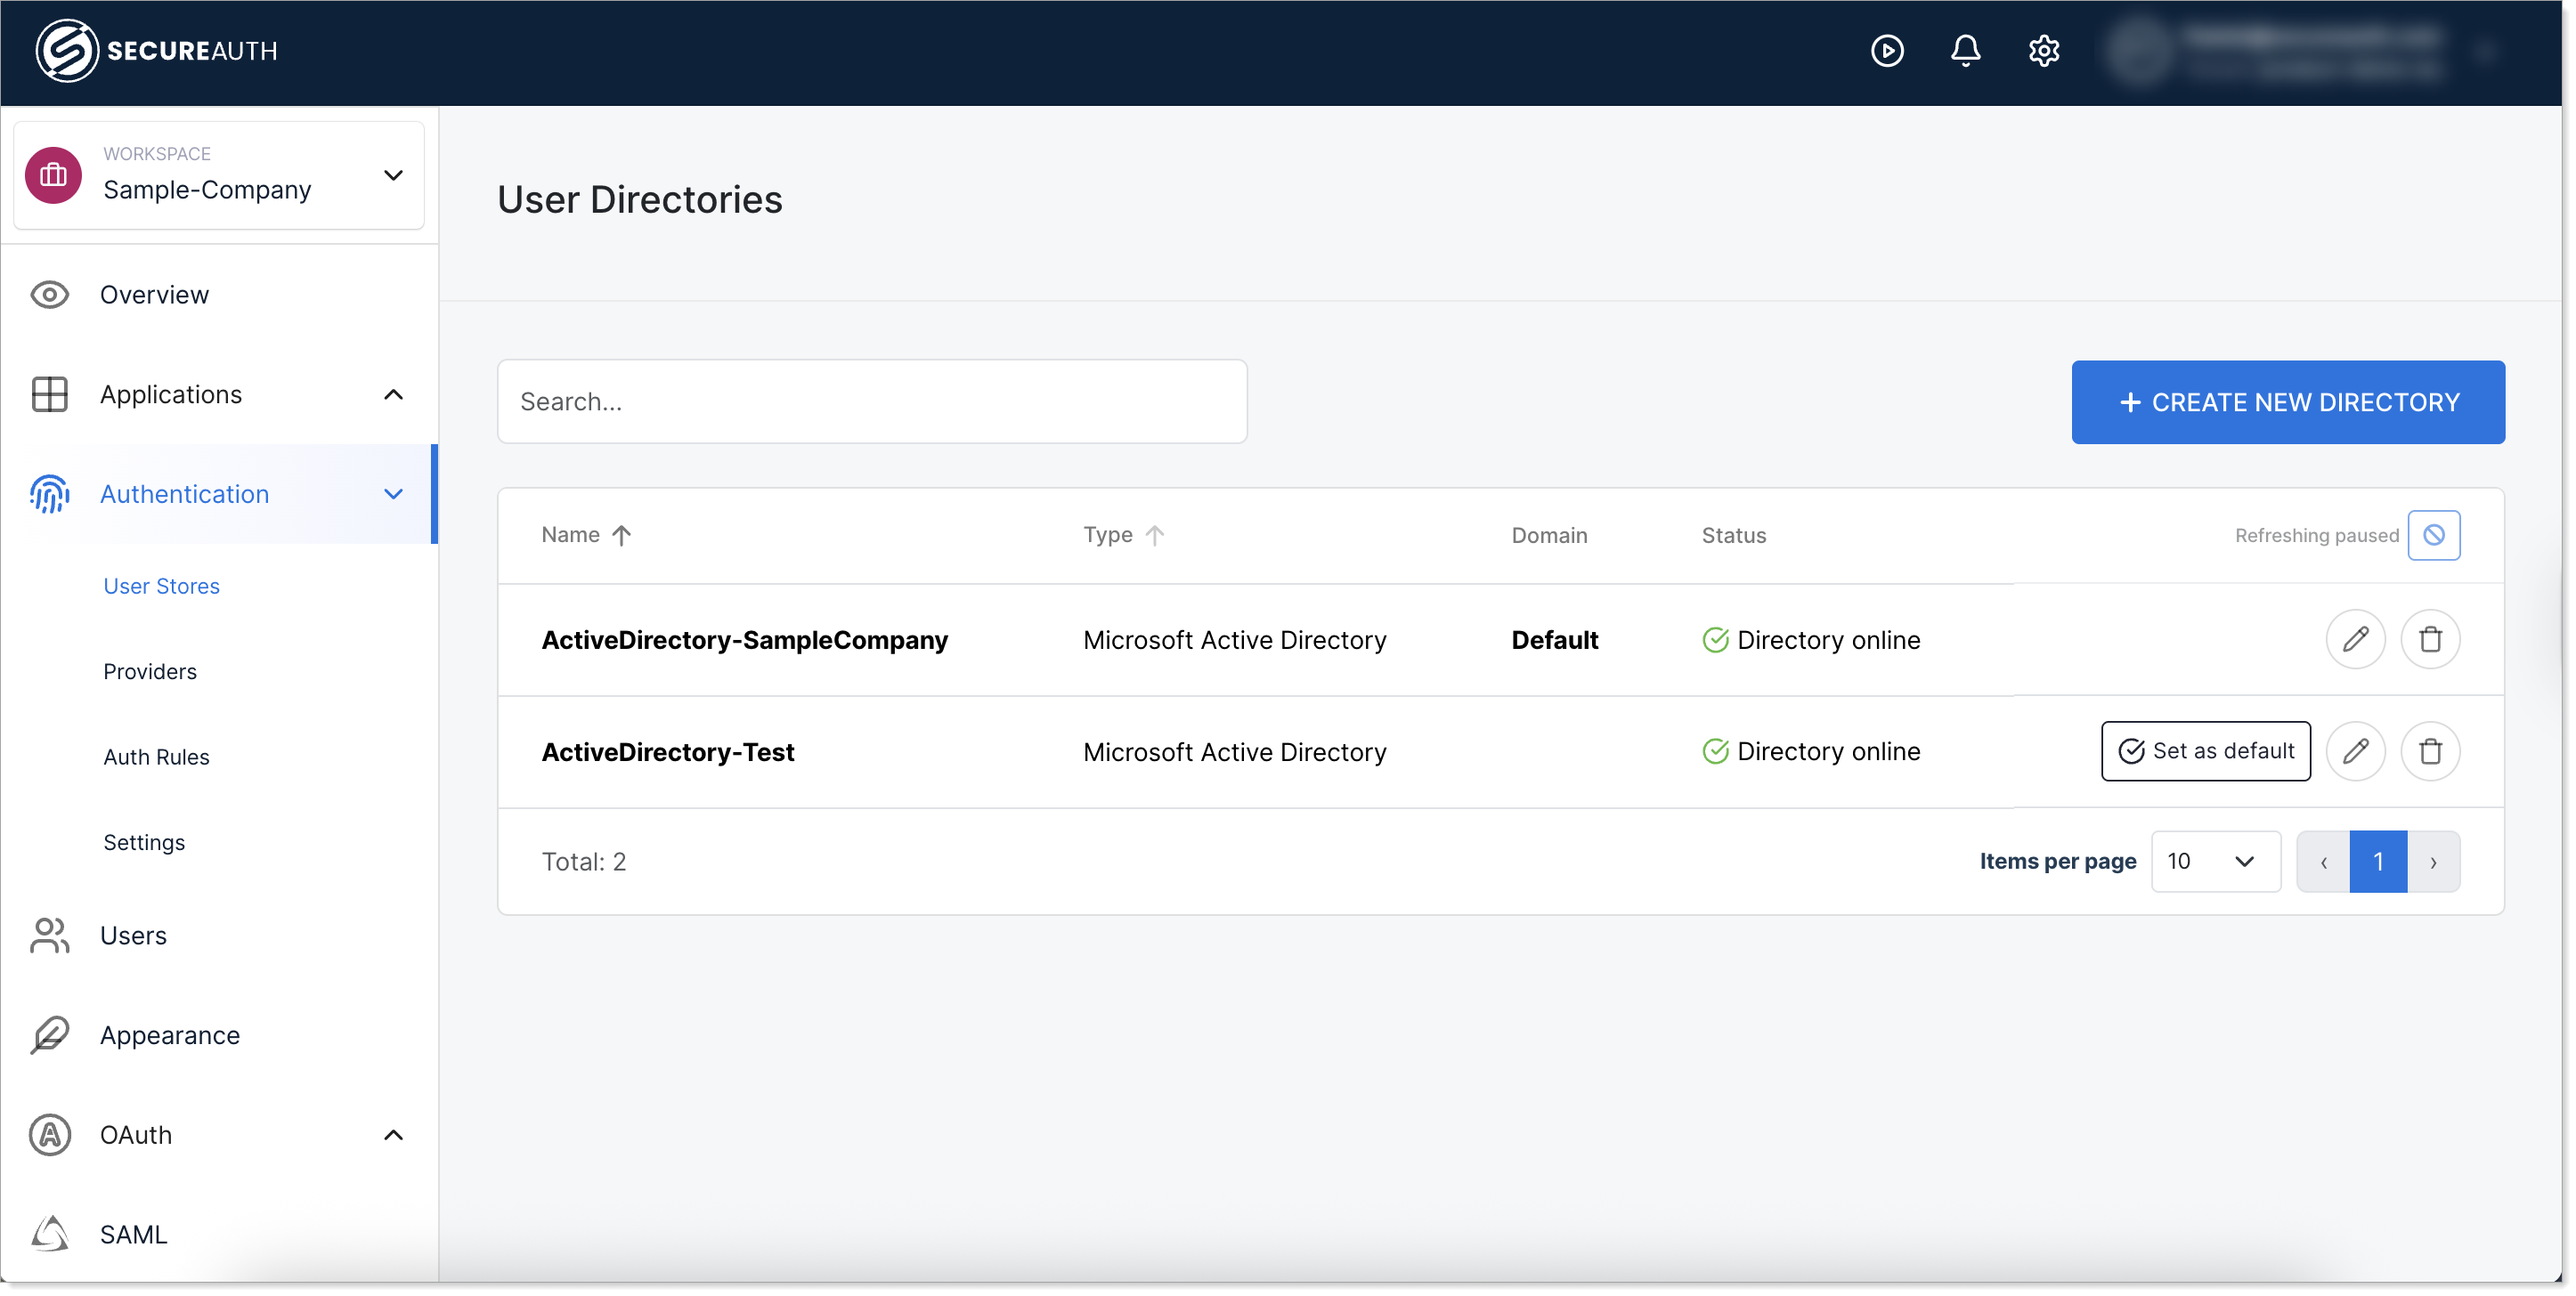
Set a directory as default
To change which directory serves as the default:
- In your Workforce workspace, go to Authentication > User Stores.
- Find the directory you want to set as default.
- Click Set as default.
Important considerations:
- Only one directory can be marked as default at a time.
- Users created directly in the workspace with the same domain name as your AD will not be found if domain matching takes precedence.
- The default directory is used when no domain match is found during authentication.
See also
- LDAP Agent deployment guide
- Set up Active Directory for authentication — B2B, enterprise, and partner workspace equivalent
- Configure authentication policies — control how Workforce users authenticate
- Add a single-page application — SSO setup for additional apps