Creating and Configuring Dynamic Scopes
Instructions on how to configure dynamic scopes and use them as an authorization asset, for example, in the transactional authorization.
Prerequisites
Add Scope
-
In the workspace, select Applications > Services from the sidebar.
-
In the Services view, select a service that you want to set up a scope for and go to Scopes.
-
In the Scopes page, select ADD SCOPE.
-
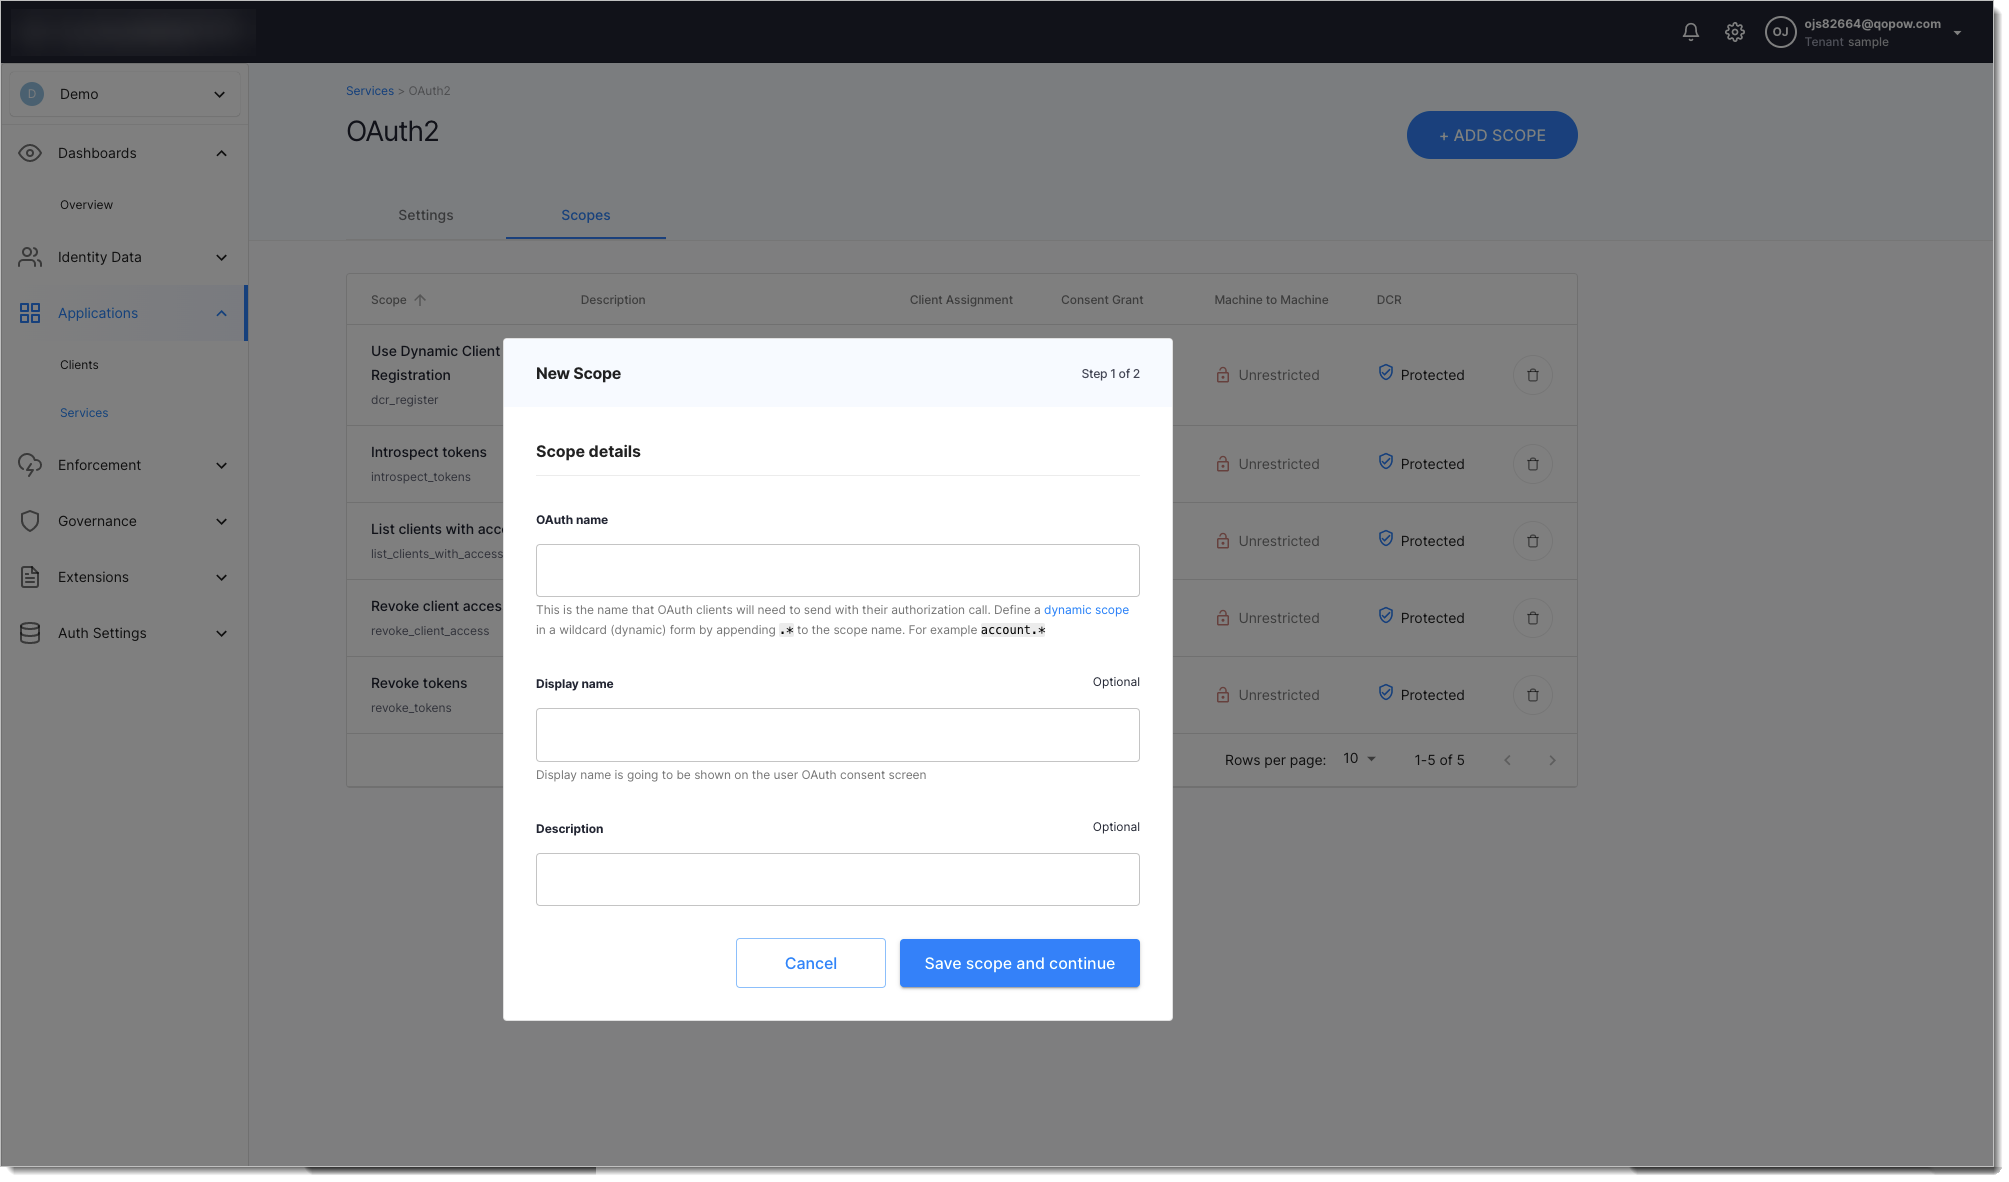
In step 1 of the New Scope view, enter an OAuth name and a display name for your scope. Next, select Save scope and continue to proceed.

-
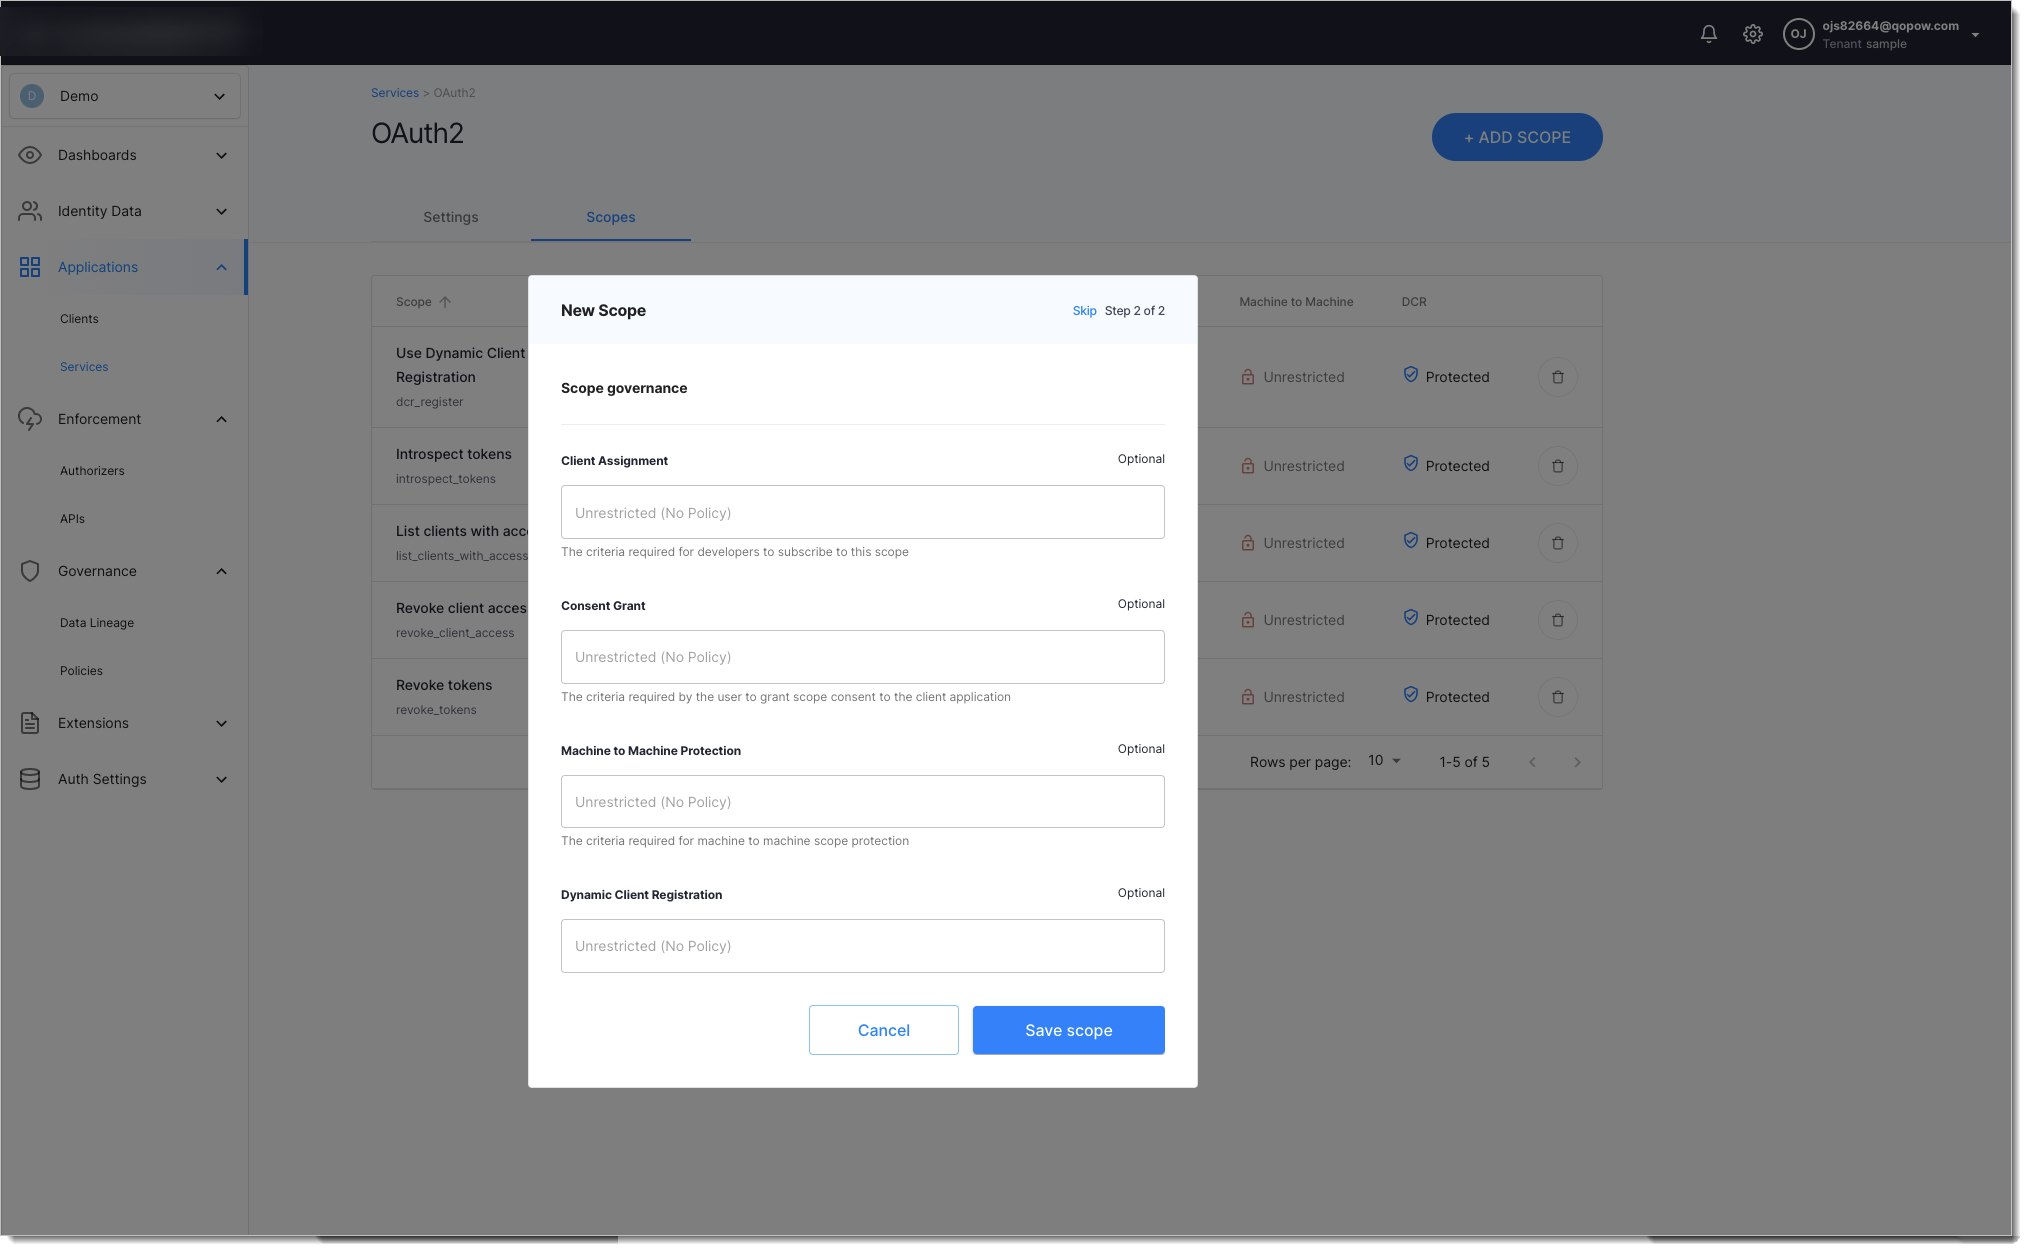
In step 2 of the New Scope view
-
Either select policies to set up criteria for client assignment, consent grant, and machine-to-machine protection and close the wizard with Save scope

-
Or select Skip to omit this step and proceed to the list of scopes with your new scope already included.
-
Enable Scope for App
-
In the workspace, go to Applications > Clients.
-
In the Clients view, select an application that you want to enable the scope for.
-
In your application view, select the Scopes tab.
-
In the Scopes tab, select the service that you want to configure and enable your new dynamic scope using the toggle switch.
Check if it Works
To test your new dynamic-scope setup
-
Make sure that your application has a dynamic scope (for example,
account.*) enabled. -
Make your application request a specific instance of your dynamic scope, for example
account.1.For example, make an authorization call to:
https://localhost:8443/default/default/oauth2/authorize?client_id=bu27qd10vc42d9kkisp0&redirect_uri=https://example.com&response_type=token&scope=email%20account.1 -
Log in to the application.
Result: The consent page opens and shows the application requesting access to dynamic scope
account.*resolved toaccount.1.