Add IdP realms
In this task, you'll add information for configured Identity Platform realms to enable use with SecureAuth RADIUS. This sets up the communication between SecureAuth RADIUS and the SecureAuth® Identity Platform.
For Identity Platform configuration steps, see Configure Identity Platform for SecureAuth RADIUS.
Add IdP realm
Note
Before adding a realm, ensure that the SecureAuth Identity Platform API can connect to User properties.
For more information, see the Configure API section of Configure Identity Platform for SecureAuth RADIUS.
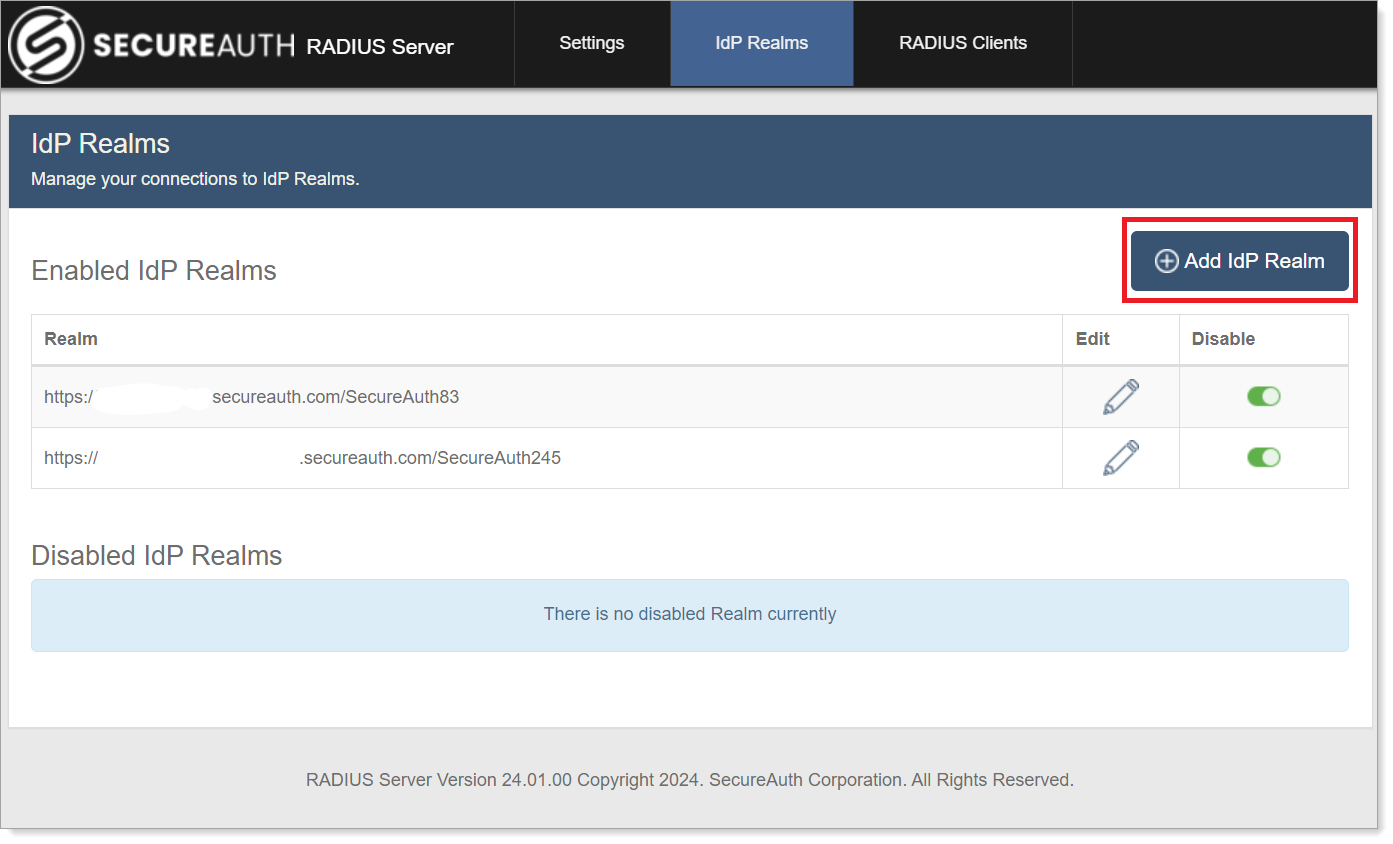
In the SecureAuth RADIUS admin console, select the IdP Realms tab and click Add IdP Realm.
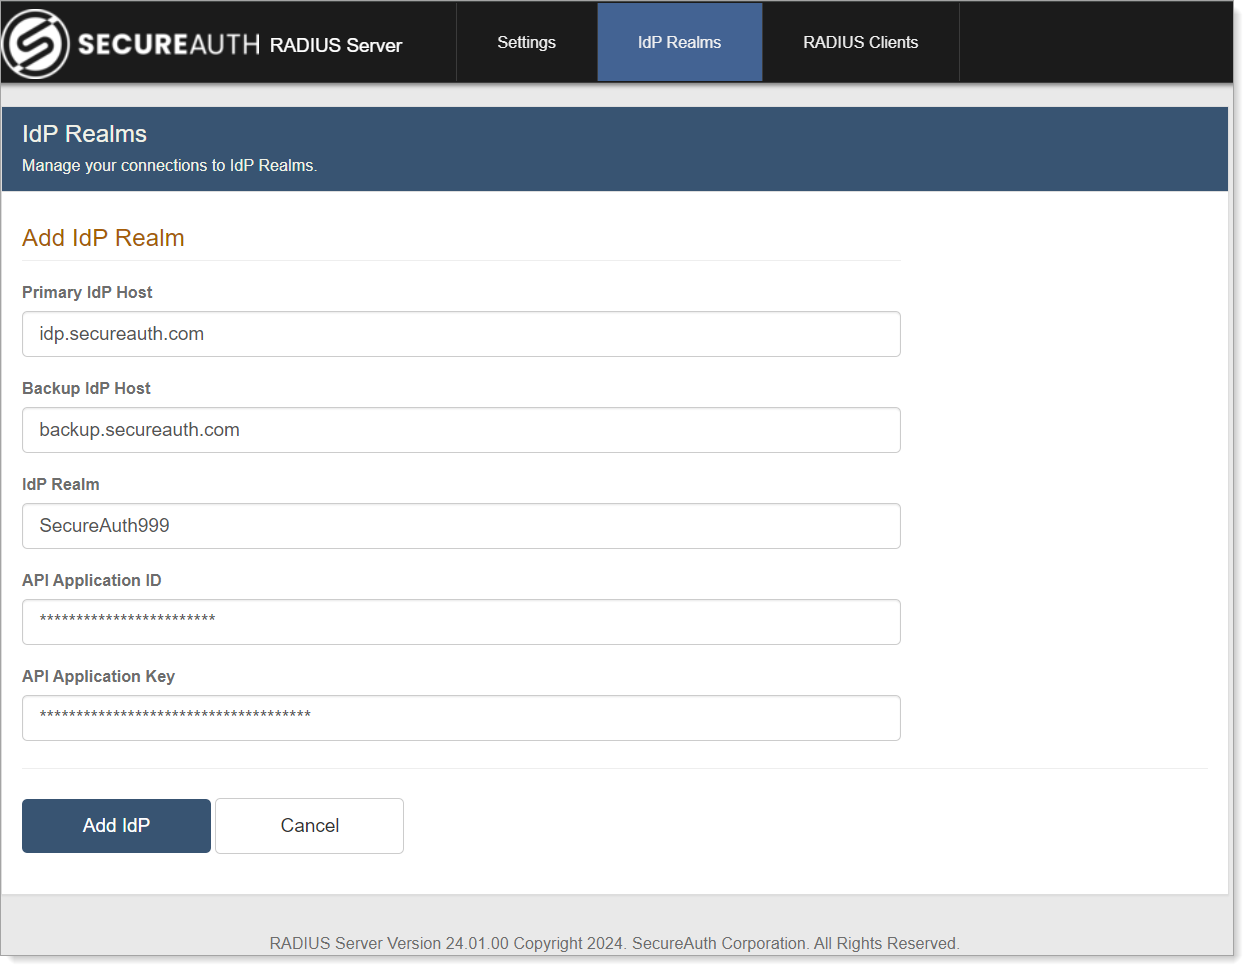
In the Add IdP Realm section, set the following:
Primary IdP Host
By default, localhost is set. If the realm is hosted on a different SecureAuth Identity Platform than the one hosting this RADIUS Server, enter the Identity Platform host name or the IP address of the Identity Platform realm to be used with this RADIUS Server.
For example, hostname.secureauth.com or XXX.XXX.XXX.XXX, where X represents a number in the IP address.
Backup IdP Host
Set to the host name or IP address of each SecureAuth Identity Platform appliance to use for failover functionality, with each entry separated by a comma.
For example, backuphost.secureauth.com.
Failover to a backup server can occur in these scenarios:
Communications are faulty with the target SecureAuth Identity Platform.
SecureAuth RADIUS Server receives no response.
SecureAuth RADIUS Server receives errors from SecureAuth Identity Platform.
During failover, end users can log on to the VPN without disruption.
To learn more, see View sample logs for failover scenarios.
IdP Realm
Set to the Identity Platform realm name and number.
For example, secureauth53 or SecureAuth84.
API Application ID
Enter the realm Application ID generated in the Identity Platform.
See Authentication API guide for steps on generating the Application ID in the API Key section of the API tab.
API Application Key
Enter the realm Application Key generated in the Identity Platform.
See Authentication API guide for steps on generating the Application Key in the API Key section of the API tab.
Click Add IdP to enable the realm for use with the RADIUS server.
Edit IdP Realm
Select the IdP Realms tab.
Click the pencil icon next to the IdP realm you want to edit.
Update any information that has changed on the realm and click Save Changes.
Disable or remove IdP Realm
Select the IdP Realms tab.
Slide the toggle next to the realm you want to disable to Off.
This action moves the realm to the Disabled IdP Realms list where you can enable it again later.
To permanently remove a realm, click the pencil icon next to the disabled realm. Click Remove Realm.
To re-enable the realm, slide the toggle next to the disabled realm to On.
This action removes the realm from the Disabled IdP Realms list and includes it in the IdP Realm URL list.
Edit the IdP Web Config file (IdP 9.2-9.3 only)
A default setting in the Web Config file for SecureAuth IdP versions 9.2-9.3 causes RADIUS client end user logins to fail for certain 2FA methods. To ensure end users can log in using any 2FA method, remove the SecureAuth IdP Profile Property in the SecureAuth IdP Web Admin configuration.
In the Identity Platform, go to the realm that you added to SecureAuth RADIUS.
Select the System Info tab.
In the Links section, click Click to edit Web Config file.
In the Web Config Editor section, remove the following line under
<appSettings>:<add key="OTPFieldMapping"value="<SecureAuth IdP Profile Property>"/>
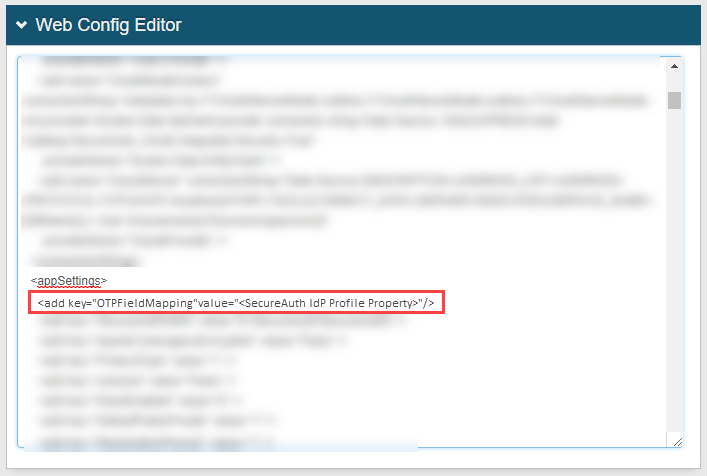
Click Save.