SecureAuth IdP and Arculix integration
Set up SecureAuth® Identity Platform as an IdP factor to enable intelligent MFA with Arculix. When you combine SecureAuth IdP and Arculix, you can improve your security posture with a passwordless continuous authentication solution.
The end user login to an application starts in SecureAuth IdP to verify their identity. Then, it redirects the authentication process to Arculix for intelligent authentication. After verifying the user, it sends them back through SecureAuth IdP to access an application.
Prerequisites
Available in the following SecureAuth IdP product releases:
SecureAuth IdP releases 22.12 or later
SecureAuth IdP release 22.02 with hotfix 22.02-2 or later
SecureAuth IdP release 21.04 with hotfix 21.04-9 or later
SecureAuth IdP release 20.06 with hotfix 20.06-14 or later
SecureAuth IdP release 19.07.01 with hotfix 19.07.01-36 or later
Have an Active Directory data store integrated in SecureAuth IdP
Have MFA authentication policy set up in SecureAuth IdP
Have an application integrated in SecureAuth IdP
Have a configured Arculix instance and user account with administrative privileges for Arculix
Have an Identity Provider created in Arculix
Have a policy set up in Arculix
Base URL for your Arculix account
Note
You'll need to know the base URL to the SSO landing page for your Arculix account in this format:
https://sso.arculix.com/<yourorganization>
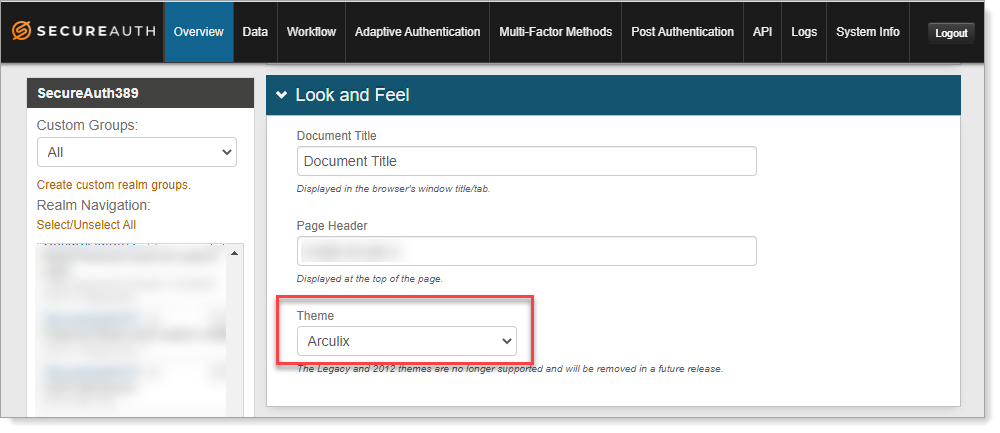
Arculix theme
A new Arculix theme is available for the end user login pages. In SecureAuth IdP, go to the Advanced Settings > Overview tab to set the Arculix theme.
Theme is available only in SecureAuth IdP release 22.12 or later.
 |
Task A: Configure your data store
In SecureAuth IdP settings for the data store, set the connection and mapping values.
In SecureAuth IdP, go to the data store settings.
This might be in the New Experience or the Advanced Settings (formerly Classic Experience), depending on where you initially added this data store.
In the connection settings for the data store, set the appropriate Search Filter.
For example, set your search attribute to use
userPrincipalName,mail, or if you have Active Directory, use(&(|(samAccountName=%v)(userPrincipalName=%v))).Note
Arculix expects the
username@domainformat when connecting to SecureAuth IdP.Make sure the domain in the email attribute is the same as the domain set up in the data store connection setting.
The following screenshots are examples of data store settings in the New Experience and Advanced Settings.
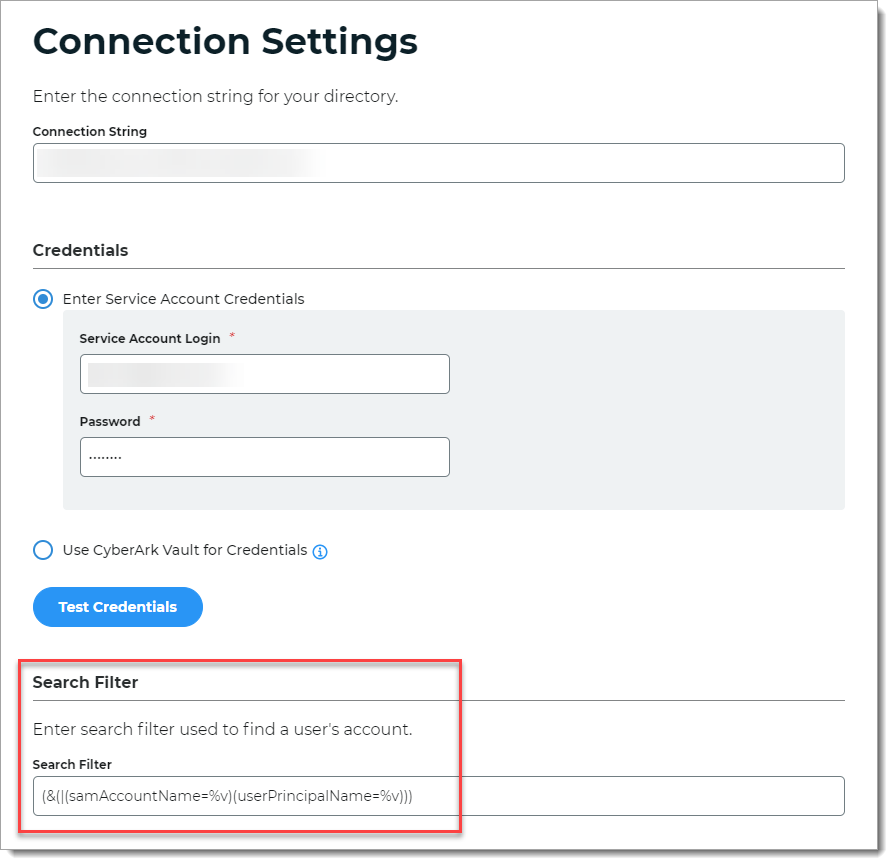
Data store setting in the New Experience
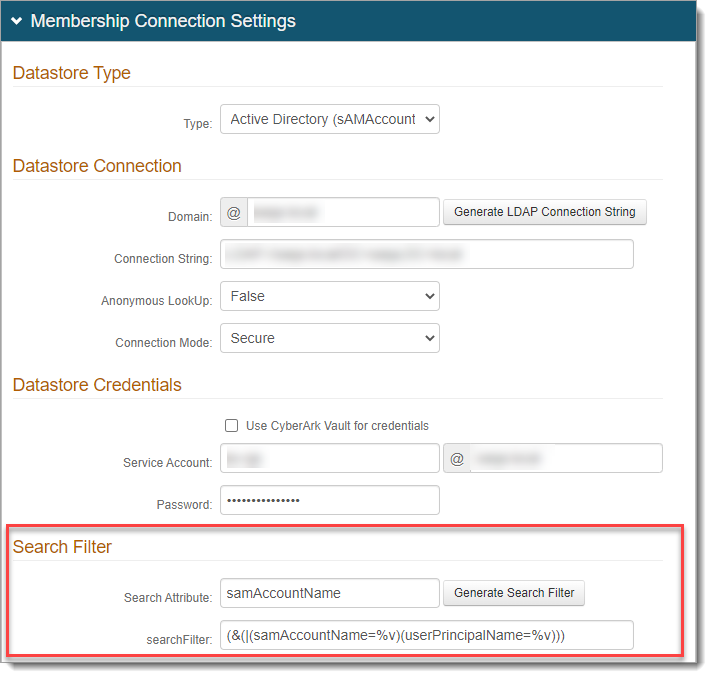
Data store setting in the Advanced Settings
In the data store profile property settings, map the Search Attribute from the data store to an available Aux ID field and clear the Writable check box.
For example, map UserPrincipalName to Aux ID 9.
The following screenshots are examples of data store settings in the New Experience and Advanced Settings.
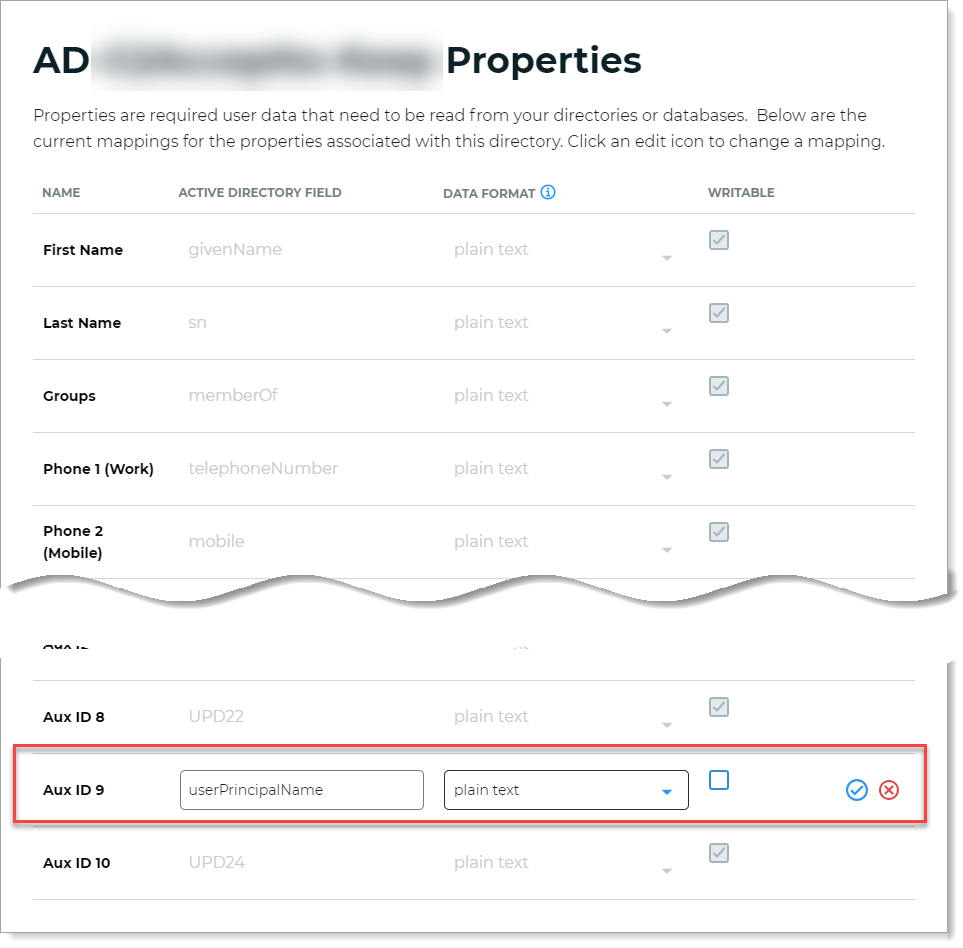
Data store properties in the New Experience
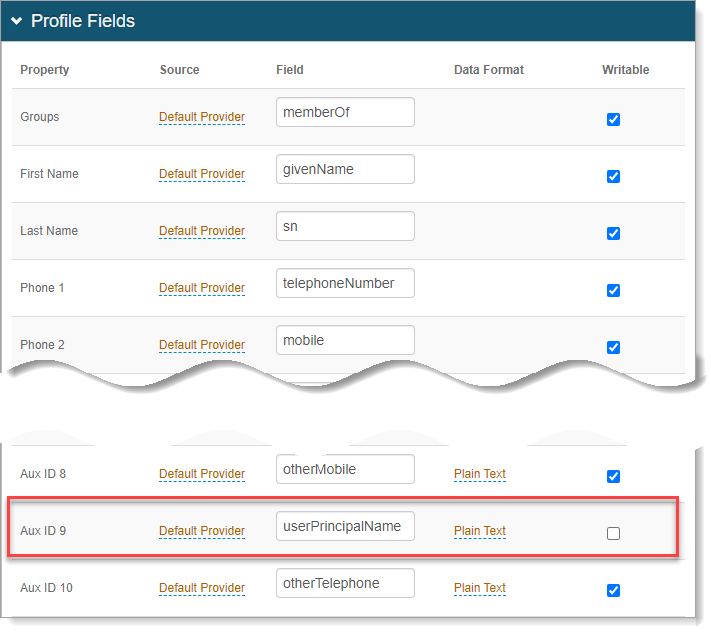
Data store properties in the Advanced Settings
Save your changes.
Task B: Set up SAML Consumer configuration
In SecureAuth IdP, set up the SAML Consumer configuration for the Arculix side as an IdP factor.
For an application in SecureAuth IdP, do one of the following:
In the New Experience, in the application settings (Application Manager or Internal Application Manager), click the Go to Advanced Settings to configure this integration with Arculix link.
Note: This link is available only in SecureAuth IdP release 21.04 or later.
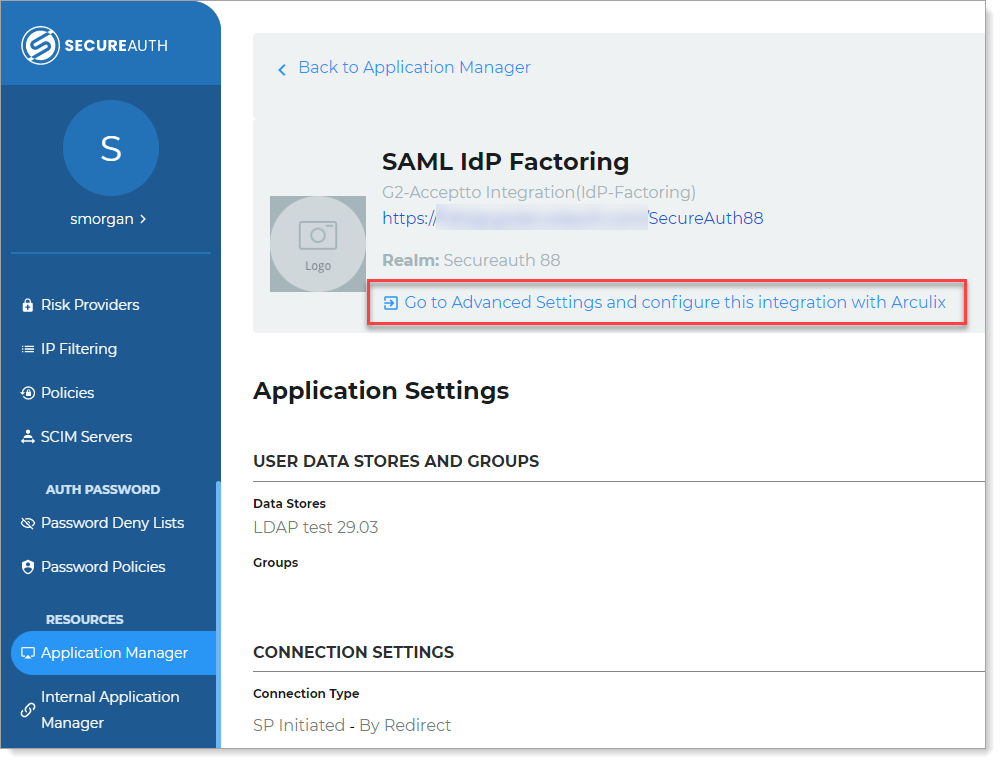
Link in the Application Manager
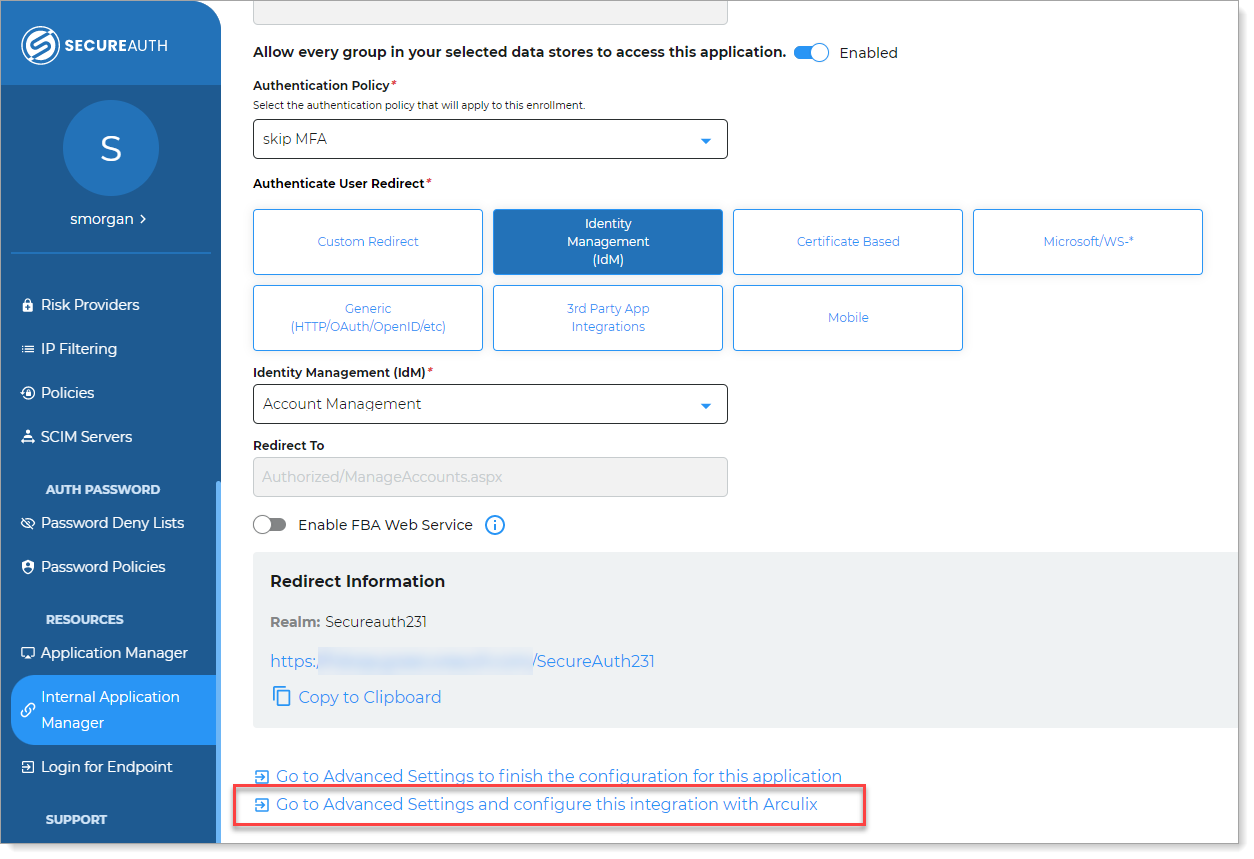
Link in the Internal Application Manager
In the Advanced Settings for the selected application, select the Workflow tab.
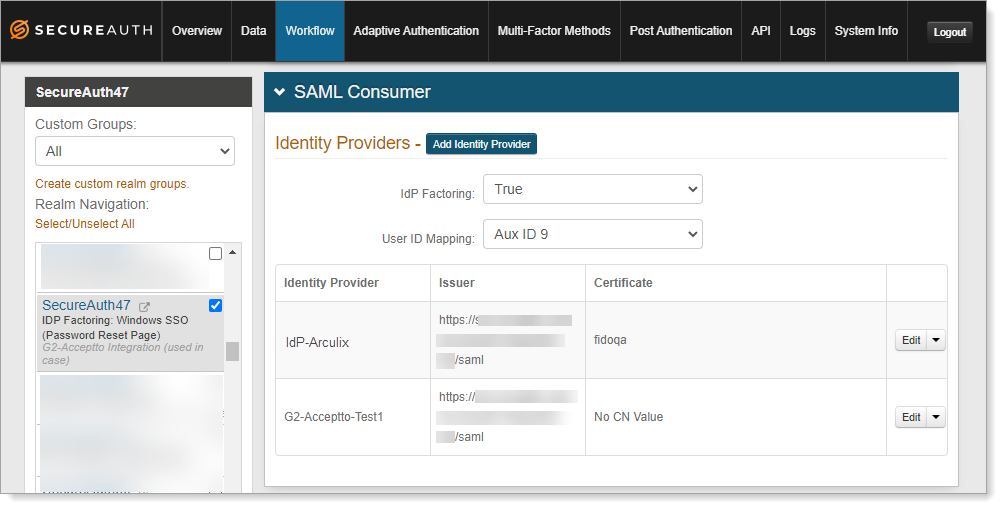
Scroll down to the SAML Consumer section and set the following configurations.
IdP Factoring
For this Arculix to SecureAuth IdP integration, set to True.
True – SecureAuth IdP validates the user login.
False – Arculix validates the user login.
User ID Mapping
Set it to where you mapped the Search Attribute like userPrincipalName, in the data store profile properties.
For example, Aux ID 9.
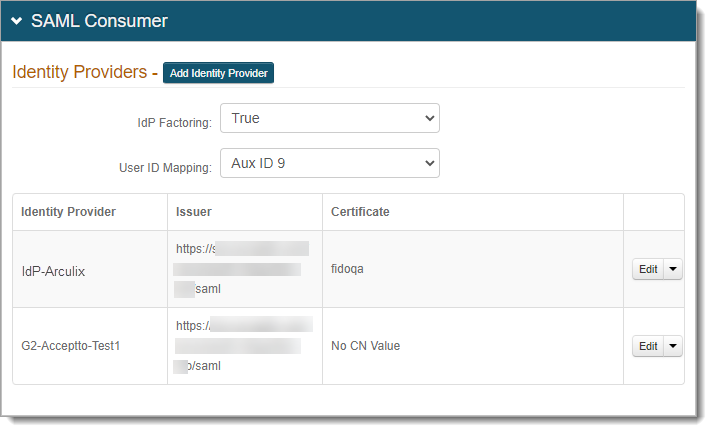
Click Add Identity Provider and set the following configurations.
Identity Provider Name
Provide a descriptive name that identifies Arculix as the identity provider.
This name also displays in the SAML Consumer table.
For example, IdP-Arculix
SAML Issuer
Enter the SAML Issuer information for your organization on the Arculix side. This is your Arculix base URL followed by
/saml.For example,
https://sso.arculix.com/<your-organization>/saml.SAML Audience
Provide a descriptive name that identifies Arculix (you can use the same name as the Identity Provider Name, above).
For example, IdP-Arculix
IdP Login URL
Enter the login URL for your organization on the Arculix side. This is your Arculix base URL followed by
/saml/idp_factor.For example,
https://sso.arculix.com/<your-organization>/saml/idp_factor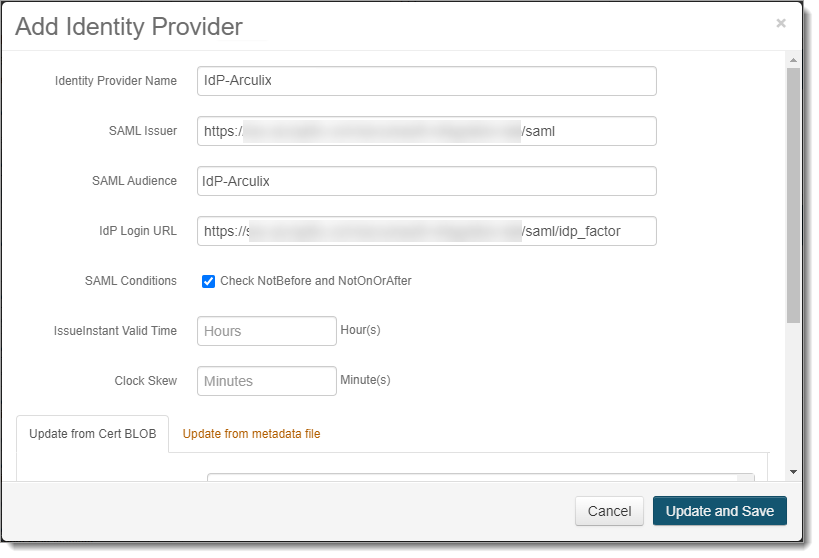
Save your changes.
Task C: Download SecureAuth IdP SAML metadata
You'll need to download SecureAuth IdP SAML metadata for the Arculix side.
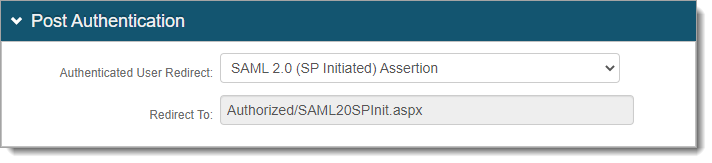
In SecureAuth IdP Advanced Settings (formerly Classic Experience), select the Post Authentication tab.
In the Post Authentication section, set Authenticated User Redirect to any SAML option like SAML 2.0 (SP Initiated) Assertion.
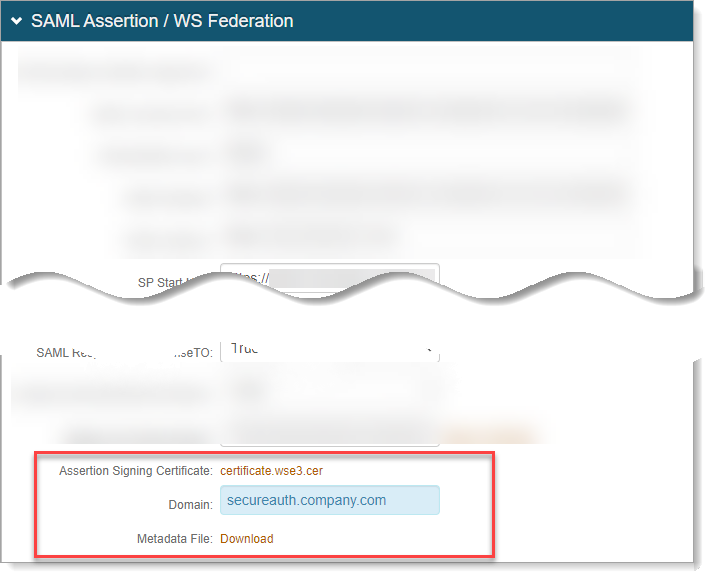
In the SAML Assertion / WS Federation section, scroll down to enter the name of the Domain and click the Metadata File Download link.
For example, in the Domain field, enter the FQDN of SecureAuth IdP instance, like
secureauth.company.comYou will need this metadata for the Arculix side of the configuration.
Task D: Arculix SAML configuration as an identity provider (IdP)
In Arculix, you'll add an application for SecureAuth IdP and set the SAML configuration settings. This will be the identity provider (IdP) side of the configuration.
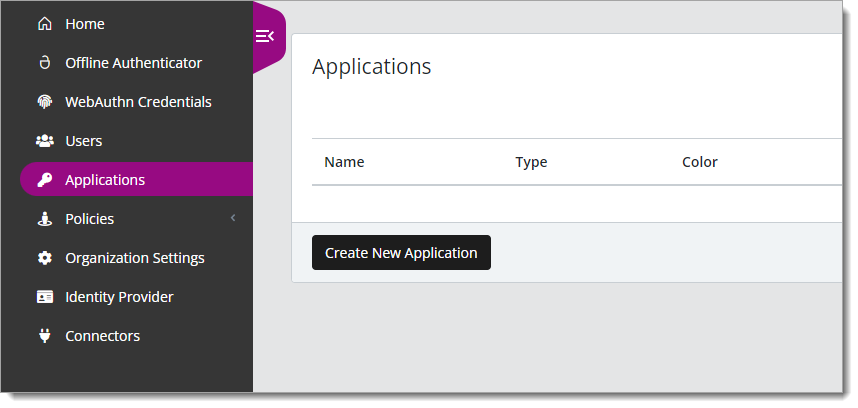
Log in to Arculix with an administrative account and go to Applications.
Click Create New Application.
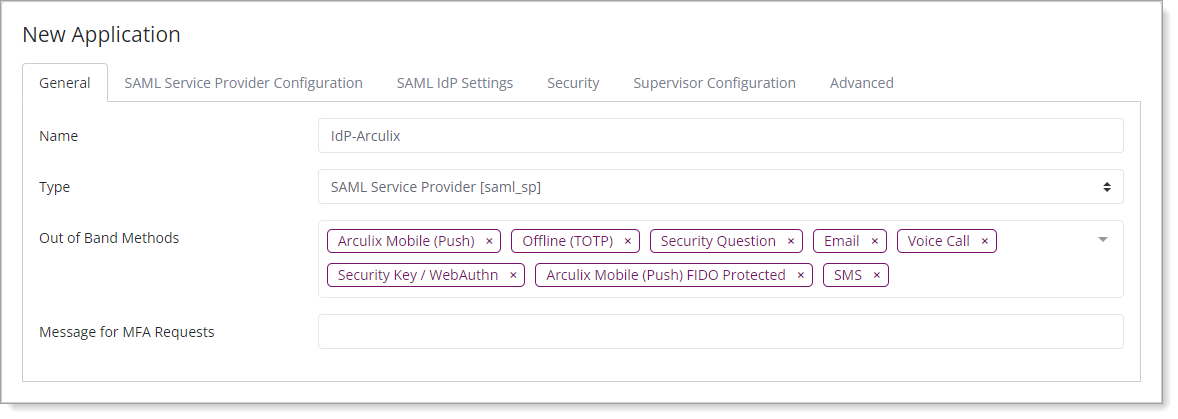
In the New Application form, on the General tab, set the following configurations.
Name
Use the same Identity Provider Name that you set up in SecureAuth IdP in the SAML Consumer section in Task B: Set up SAML Consumer configuration.
This is the name to display for push notifications, in the Admin panel, Application portal, and audit logs.
For example, IdP-Arculix
Type
Set to SAML Service Provider.
Out of Band Methods
Select the allowed authentication methods end users can choose to approve MFA requests.
For example, Arculix Mobile app (push notifications), SMS, security key, and so on.
Message for MFA Requests
(Optional) Type a message displayed to end users when sending an MFA request via push notification, SMS, or email.
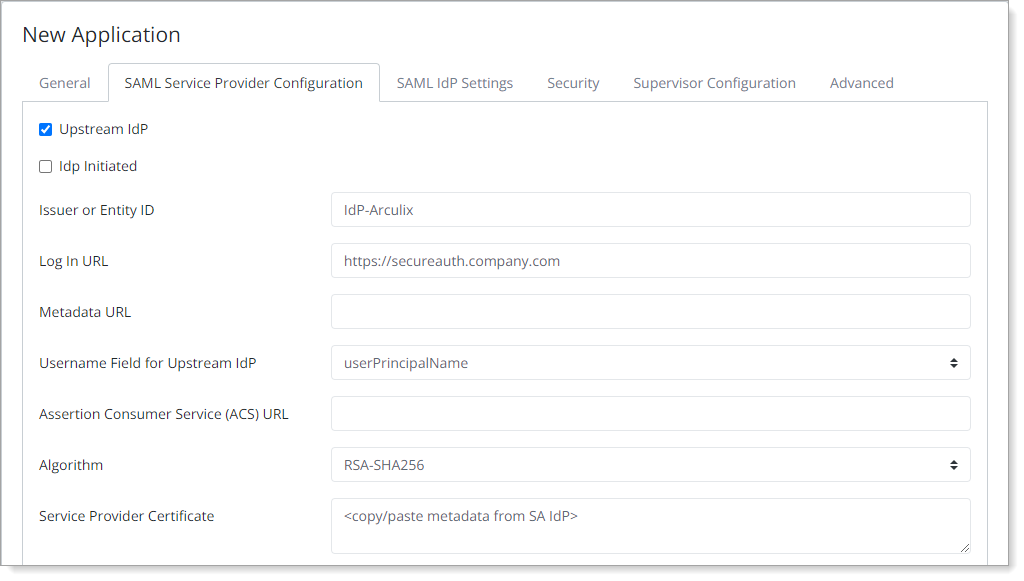
Select the SAML Service Provider Configuration tab, and set the following configurations.
Upstream IdP
Select this check box to use SecureAuth IdP for the initial authentication and only use Arculix to handle the multi-factor authentication.
Issuer or Entity ID
Use the same Identity Provider Name that you set up in SecureAuth IdP in the SAML Consumer section in Task B: Set up SAML Consumer configuration.
For example, IdP-Arculix
Log in URL
Enter the login URL of your SecureAuth IdP server.
For example,
https://secureauth.company.comUsername Field for Upstream IdP
Set to userPrincipalName.
Assertion Consumer Services (ACS) URL
Leave this field blank.
Certificate
Open the SecureAuth IdP metadata file you downloaded in Task C: Download SecureAuth IdP SAML metadata, in a text editor like Notepad.
Copy the certificate blob from the
<X509Certificate>attribute. You only need to copy the certificate blob betweends:X509Certificateand</dsX509Certificate>, like the yellow highlighted section in the following example.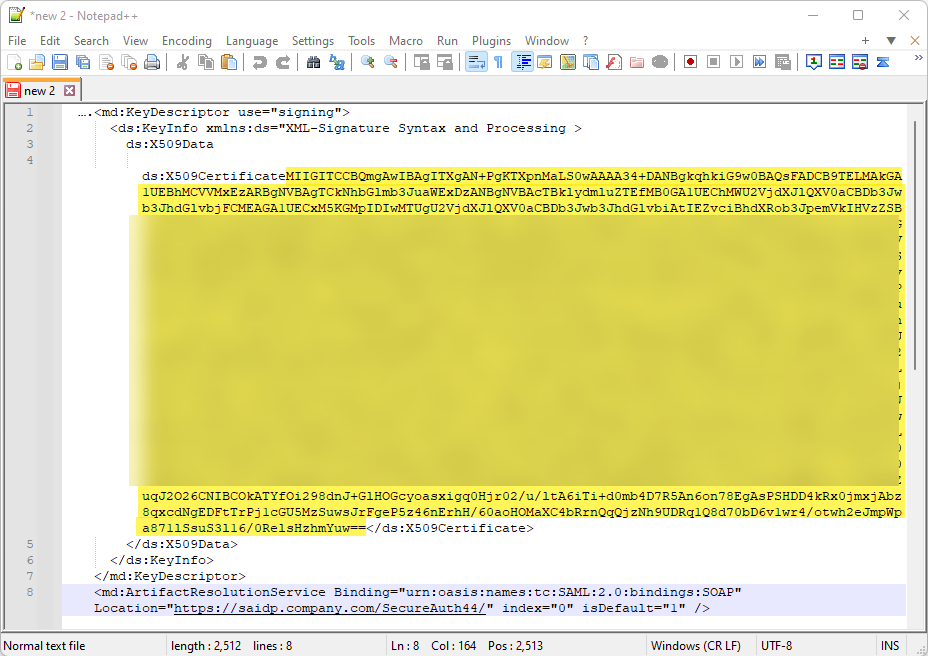
Paste the certificate X.509 blob into the Service Provider Certificate field.
Prepend the certificate with
-----BEGIN CERTIFICATE-----and postpend with-----END CERTIFICATE-----like the following example.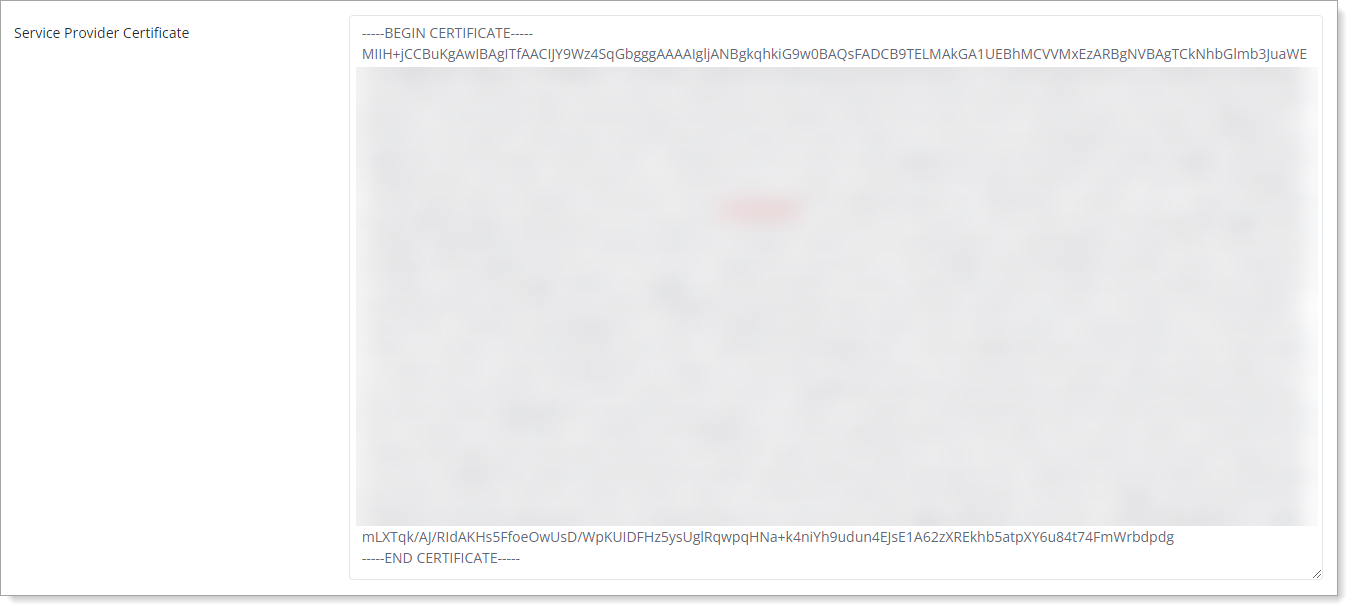
Select the SAML IdP Settings tab and click Download Certificate.
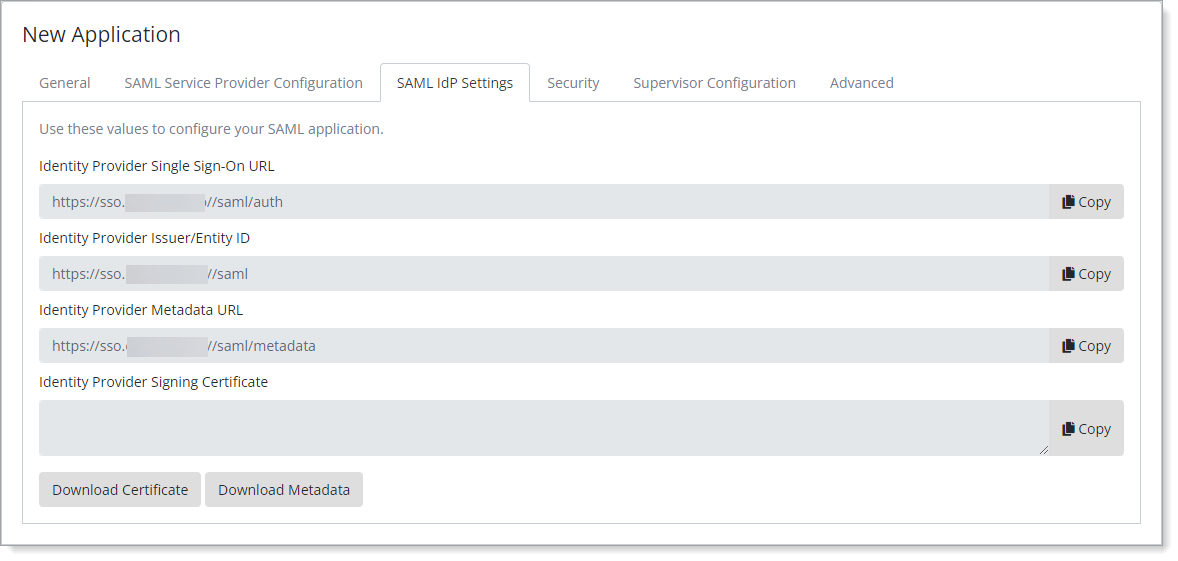
Save your changes.
Task E: Upload Arculix certificate to SecureAuth IdP
For the certificate file you downloaded in Task D: Arculix SAML configuration as an identity provider (IdP), open it in a text editor like Notepad.
Copy the certificate blob between the lines
-----BEGIN CERTIFICATE-----and-----END CERTIFICATE-----.In SecureAuth IdP, go back to the SAML Consumer section.
In the SAML Consumer table, click Edit for Arculix as an IdP (for example, IdP-Arculix).
In the Signing Certificate field, paste the certificate blob from Arculix.
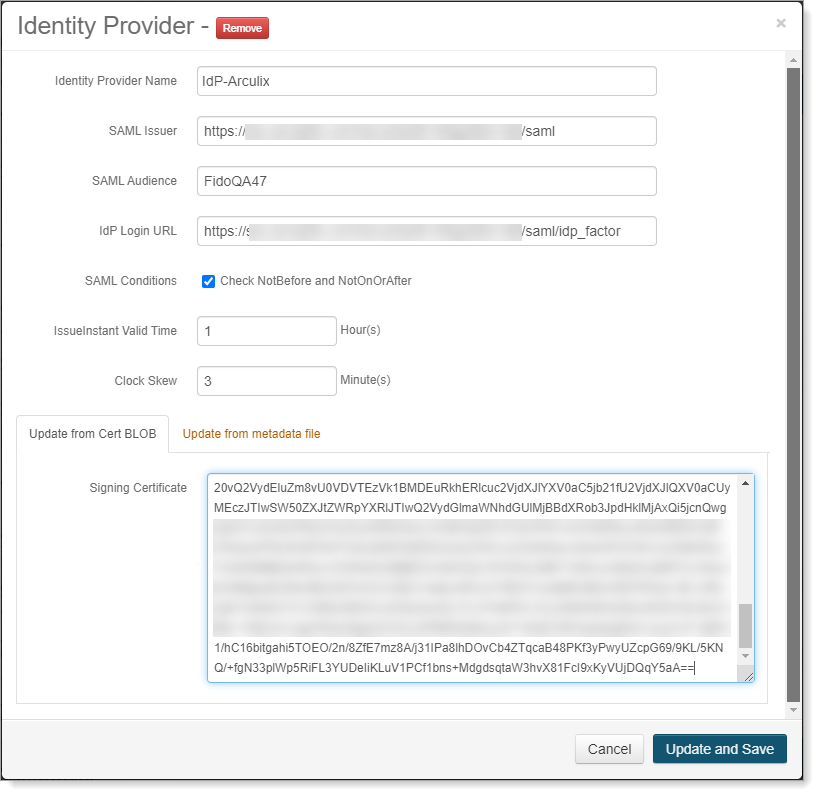
Save your changes.