Configure Intelligent Discovery
Intelligent Discovery automatically routes users to the correct authentication provider based on their identifier (email or username). This is the recommended mode for most deployments, especially B2B and multi-tenant environments.
Prerequisites
- Access to SecureAuth Connect
- At least one identity provider configured in your workspace
- Email domains or user directory set up for matching
How Intelligent Discovery works
- User enters their identifier (email or username)
- SecureAuth Connect checks configured rules (email domains, user lookup)
- System displays matching providers
- If exactly one provider matches and instant redirect is enabled, user is automatically logged in
- If multiple providers match, user sees a list to select from
- If no providers match and a fallback provider is configured, the fallback is displayed
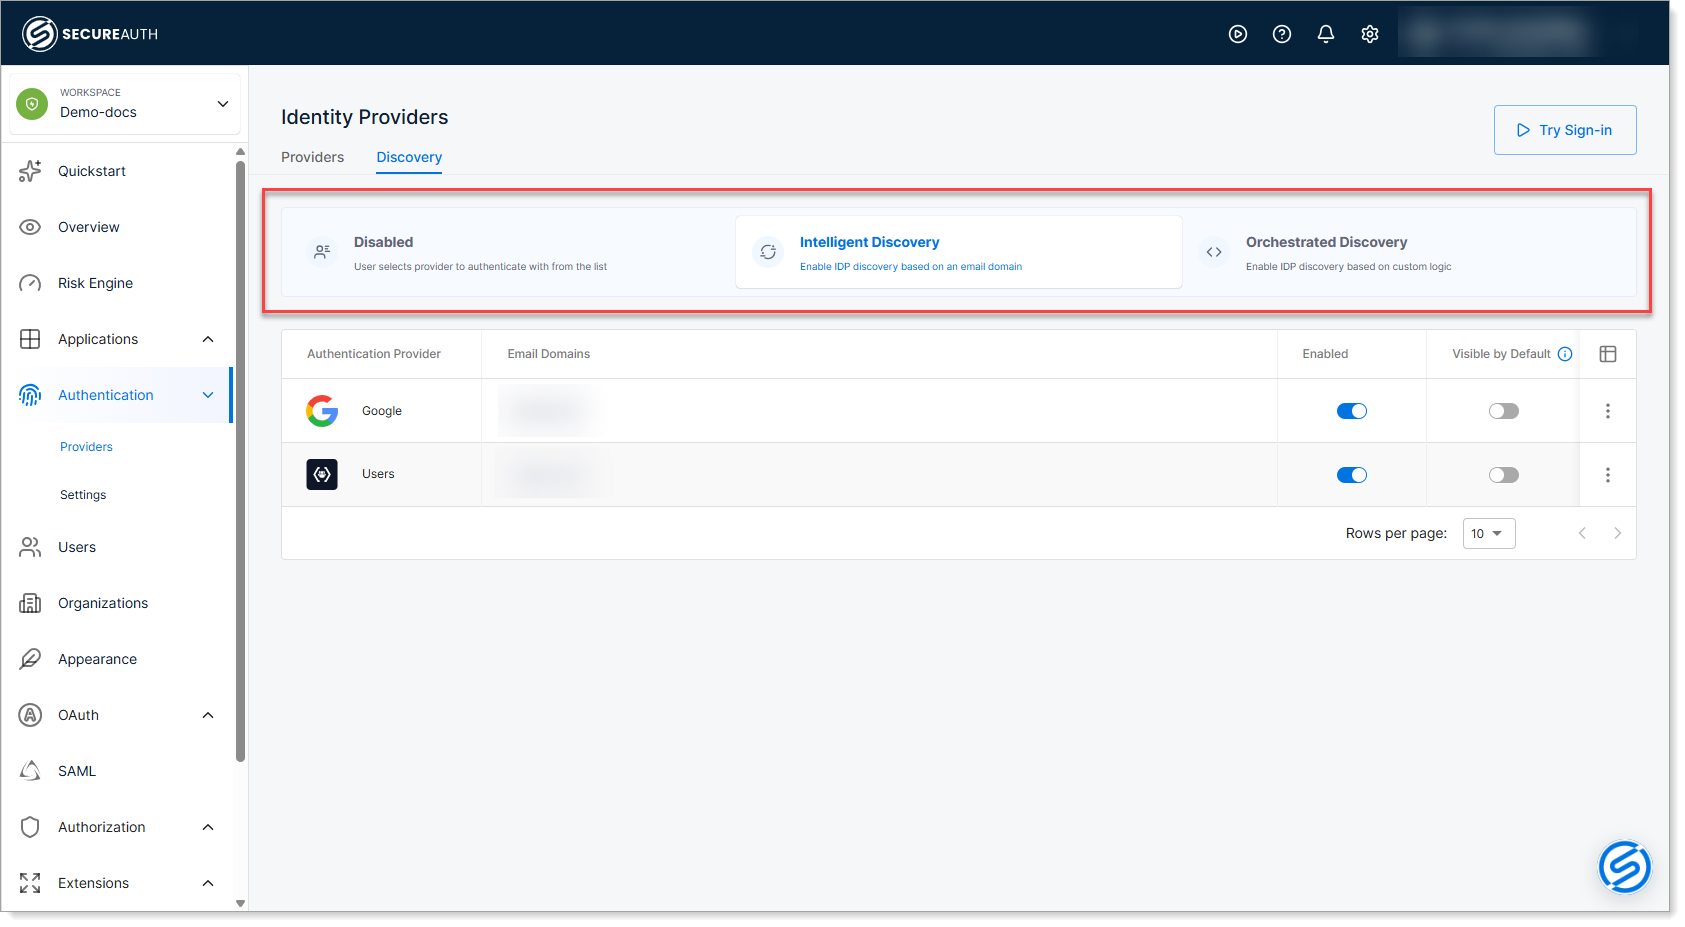
Enable Intelligent Discovery
-
In SecureAuth Connect, go to Authentication > Providers.
-
Click the Discovery tab.
-
Select the Intelligent Discovery option.
Step 1: Configure email domain-based discovery
Email domain discovery is the most straightforward method. You configure which email domains map to which providers.
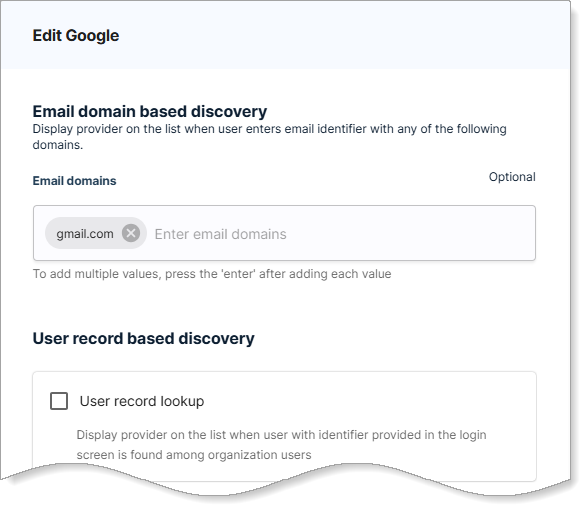
Add email domains to a provider
-
From the Intelligent Discovery view, locate the provider you want to configure.
-
Click the provider row or the three-dot menu and select Edit
-
Under Email domain based discovery, enter the email domains that map to this provider.
-
Enter one domain per line (example:
gmail.com,company.com) -
Press Enter after each domain to add it
-
-
Save your changes.
How it works
When a user enters an identifier ending with one of your configured domains, this provider is automatically matched. For example:
- If you configure
gmail.comfor the Google provider - And a user enters
johndoe@gmail.com - Google is automatically presented or used based on other discovery settings
Best practices
- Use domains you own or manage
- Map corporate domains to enterprise providers (Azure AD, Okta, etc.)
- Map social domains to social providers (gmail.com to Google, icloud.com to Apple)
- Avoid duplicate domains across providers - each domain should map to only one provider
Step 2: Enable user record lookup
User record lookup allows the system to search your organization's user directory to determine which provider a user belongs to. This is useful when users have multiple email domains or when you can't predict all domains in advance.
- From the Edit provider page, scroll to User record based discovery.
- Select the User record lookup check box.
- Save your changes.
How it works
When a user enters their identifier, SecureAuth Connect checks if that user exists in your directory. If found, the provider is presented as an option.
When to use
- Customers using many different email domains
- Directory-based matching instead of domain-only detection
- You want safer discovery than domain-only detection
- Multi-tenant environments where users from different organizations have different domains
Best practices
- Enable for at least one provider to serve as a fallback lookup
- Test with various user identifiers to ensure matching works correctly
- Combine with email domain matching for best results
Step 3: Configure "Visible use by default"
This option ensures a provider is always visible on the login page during initial load, even before the user enters their identifier.
- From the Edit provider page, scroll to Other options.
- Select the Visible use by default check box.
- Save your changes.
When to use
- Local authentication (users stored in SecureAuth Connect identity pool)
- Social login providers that should always be available
- Backup providers for users whose identifiers don't match any discovery rules
Best practices
- Enable for 1-2 providers maximum to avoid cluttering the login page
- Combine with fallback provider for comprehensive coverage
Step 4: Enable instant redirect (optional)
Instant redirect automatically routes users when only one provider matches their identifier, eliminating an extra click.
- From the Edit provider page, under Other options, select the Instant redirect check box.
- Save your changes.
How it works
- User enters their identifier
- Discovery identifies exactly one matching provider
- User is immediately redirected to that provider
- User never sees a provider selection page
Example scenario
A user enters johndoe@gmail.com:
- Email domain matching identifies Google as the only matching provider
- With instant redirect enabled, user is immediately sent to Google authentication
- Without instant redirect, user sees a list with Google as the only option (extra click)
Best practices
- Enable for providers with predictable, non-overlapping email domains
- Test thoroughly to ensure only one provider matches before enabling
- Combine with email domain discovery for best results
Step 5: Configure fallback provider (optional)
A fallback provider is displayed when intelligent discovery doesn't match any configured rules. This serves both security and user experience purposes.
- From the Edit provider page, scroll to Other options.
- Select the Fallback provider check box.
- Save your changes.
Why use a fallback provider
Security: Prevents username and domain enumeration attacks. By always displaying a provider (instead of showing "no match found"), attackers cannot determine which email domains or usernames are valid in your system. Both valid and invalid identifiers receive the same response.
User experience: Ensures users always have an authentication path. Users whose identifiers don't match discovery rules aren't blocked by an error—they can still attempt authentication with the fallback provider.
Important
Only one fallback provider can be configured per workspace. Choose the fallback provider based on your security and UX needs:
- Local authentication - For internal workspaces where unmatched users should authenticate locally
- Primary enterprise provider (like Azure AD) - For enterprise workspaces where most users should fall back to your main identity system
- Social provider - For customer-facing applications as a catch-all option
How it works
- User enters an identifier
- Intelligent discovery checks configured email domains and user records
- If no match is found and a fallback provider is configured:
- The fallback provider is displayed
- User can authenticate with the fallback
- If no match is found and NO fallback provider is configured:
- All enabled providers are shown
- User must manually select
Best practices
- Configure exactly one fallback provider - Required for optimal security and UX
- Choose strategically - Pick a provider that makes sense for unmatched users in your use case
- Test with multiple scenarios - Test with recognized domains, unrecognized domains, and edge cases
- Document your choice - Communicate to users what the fallback represents
Step 6: Review your configuration
Verify that your Intelligent Discovery setup is complete and functioning correctly.
- Go to Authentication > Providers.
- Click the Discovery tab.
- Review the configured providers and verify:
- Authentication Provider column shows all your providers
- Email Domains column shows your configured domains
- Enabled toggle is ON for providers you want to use
- Visible by Default column shows correct visibility settings
The provider table should display:
- Providers with configured email domains
- Status toggles for enabled/disabled
- Visual indicators for special settings (instant redirect, fallback provider, visible by default)
Testing your configuration
Test your Intelligent Discovery setup with different user identifiers to ensure correct routing:
Test email domain matching
- Enter an identifier with a configured domain (e.g.,
user@gmail.com) - Verify the correct provider is presented or instant redirect occurs
- Complete authentication to confirm the provider is working
Test user lookup
If you enabled user record lookup:
- Enter identifiers from your user directory
- Verify they route to the correct provider
- Test with identifiers not in any configured domain
Test fallback
- Enter an identifier that doesn't match any configured domains
- Verify a fallback provider is presented (if configured)
- Confirm users can still authenticate with the fallback
Test with different scenarios
- Try identifiers from different organizations
- Try identifiers from different domains
- Try identifiers with unusual formats
- Test on different devices or networks if applicable
Troubleshooting
Discovery not working - users see all providers regardless of identifier
Possible causes:
- Intelligent Discovery not enabled
- Email domains not configured correctly
- User Record Lookup not enabled when needed
Solution:
- Verify Intelligent Discovery is selected in the Discovery tab
- Check that email domains are correctly entered for providers
- Enable User Record Lookup if using directory-based matching
- Confirm all providers show Enabled toggle as ON
Instant redirect not working - users see provider list instead of redirecting
Possible causes:
- Instant redirect not enabled for the provider
- Multiple providers match the user identifier
- Duplicate domain configurations
Solution:
- Verify Instant Redirect is checked for the provider
- Test with an identifier that should match only one provider
- If multiple providers have the same domain, remove duplicate domain configurations
- Check logs to see which providers are matching
Users stuck when no matching provider found
Possible causes:
- No fallback provider configured
- Fallback provider is disabled
Solution:
- Configure a fallback provider as described in Step 5
- Ensure the fallback provider is marked as Active
Next steps
- To use custom logic for advanced routing, see Configure Orchestrated Discovery
- To control how users select providers, see Control Login Flow
- For provider-specific setup instructions, see Supported providers