Enable single sign-on (SSO)
Enable single sign-on to allow users to authenticate once and access all applications in your workspace without reauthenticating.
Enable SSO
-
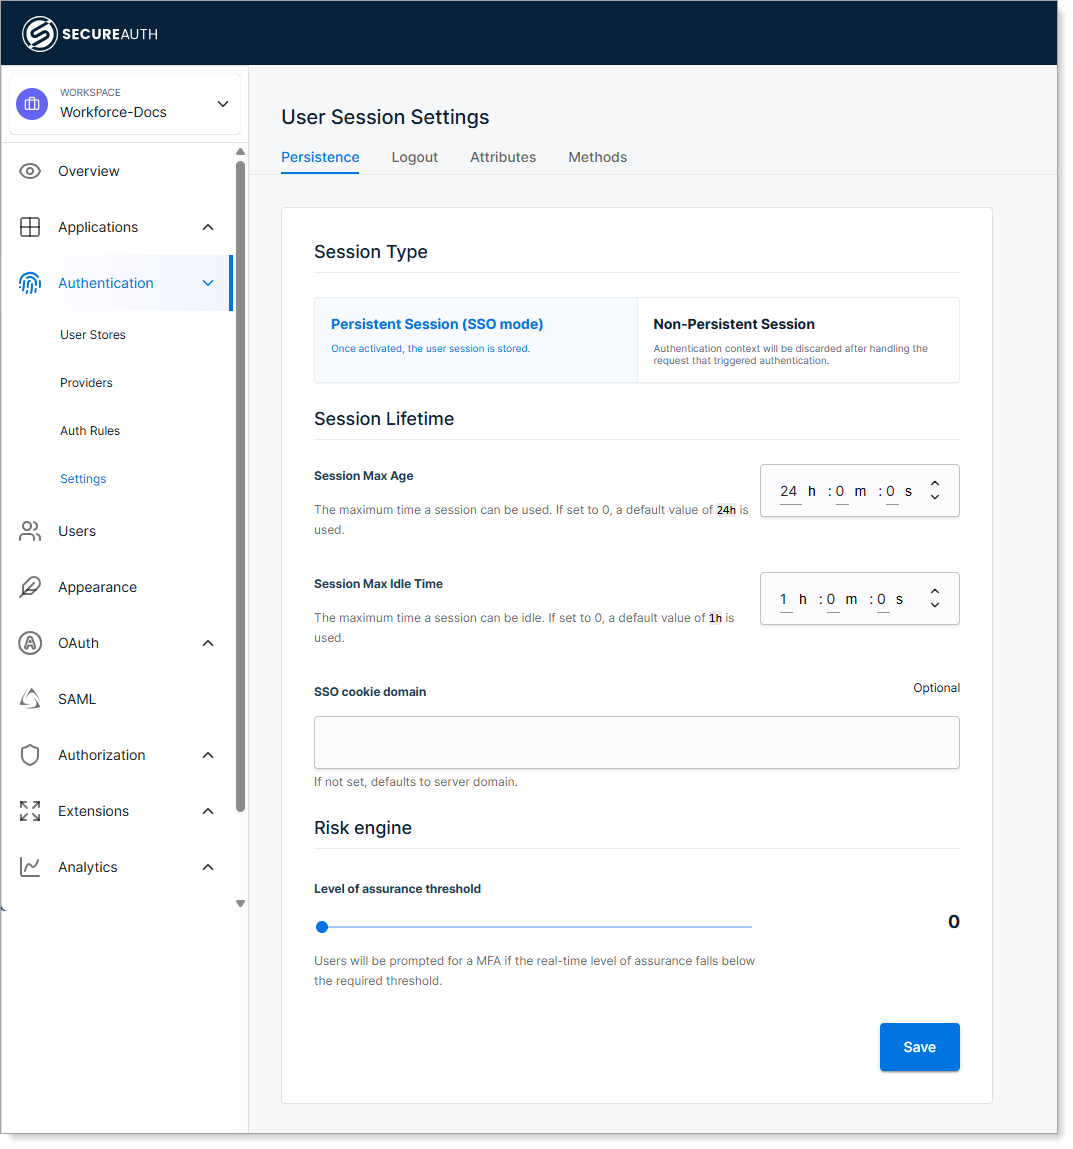
In the target workspace, from the left sidebar, go to Authentication > Settings > Persistence.
-
Select the Persistent Session (SSO mode) option.

-
Configure the following settings:
Setting Description Session Max Age Set the time after which a user's session expires, requiring reauthentication. Session Max Idle Time Define the time after which an inactive session expires, requiring reauthentication. SSO cookie domain Set the domain for the SSO cookie to enable SSO across multiple subdomains.
For example, setting.company.comallows SSO to work acrossapp.company.com,portal.company.com, and other subdomains.
If empty, it uses the authorization server's domain. When set, this domain is also allowed for logout redirects.Level of assurance threshold Set the minimum confidence level required for authentication. If a user's LOA falls below this threshold, they must verify their identity with a second factor.
See Configure the Level of Assurance (LOA) threshold for guidance on choosing a threshold level.
Result: After logging into an application through SecureAuth, users can access all workspace applications without reauthenticating, as long as the session remains valid.
Configure logout settings
Control where users can be redirected after logout to prevent open redirect attacks.
For more about logout security and use cases, see Persistent user sessions.
-
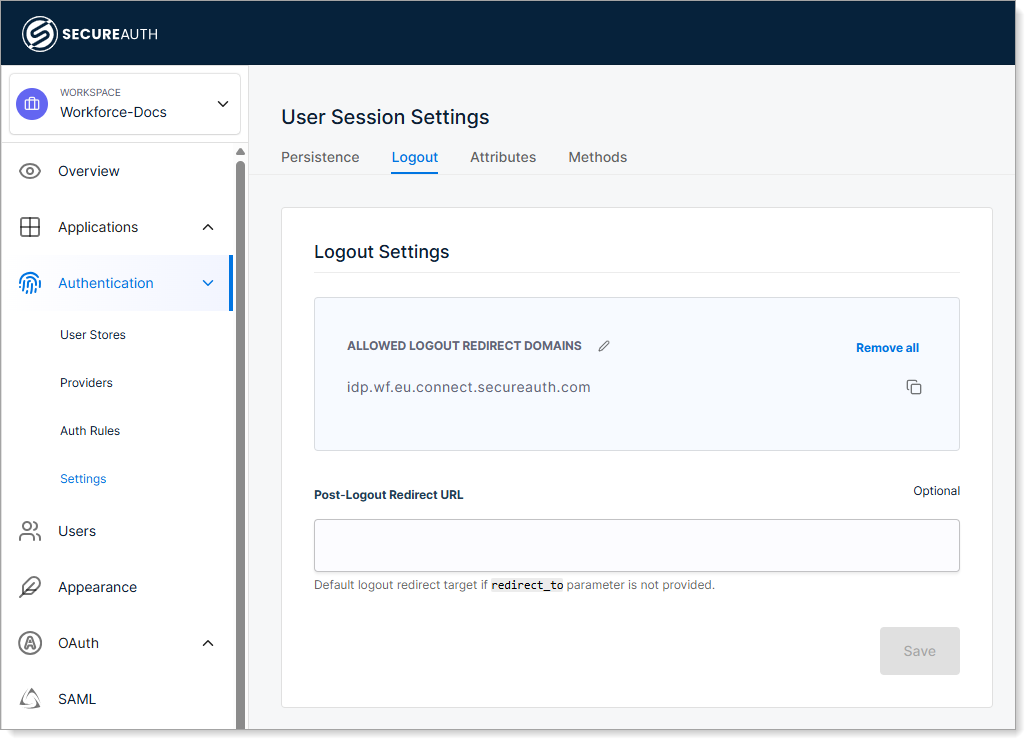
In Authentication > Settings, select the Logout tab.

-
Configure the following settings:
Setting Description Allowed Logout Redirect Domains List domains where applications can redirect users after logout. These domains are valid only if the redirect_toparameter is included in a request to the/authorizeendpoint.Post-Logout Redirect URL Set a default URL to redirect users after logout if the application request doesn't include a redirect_toparameter.