Add ASP.NET data store
In the SecureAuth® Identity Platform, you can add a ASP.NET database to the data store to assert or manage user identity information.
Prerequisites
Identity Platform release 23.07 or later
For Identity Platform cloud deployments, have the SecureAuth Connector installed and connected
ASP.NET database. See ASP.NET database configuration
Process
There are two parts to adding a data store in the Identity Platform — (1) adding the data store and (2) mapping the data store properties.
Step 1: Add an ASP.NET data store
The first part of adding an ASP.NET data store is configuring the data store name, connections, credentials, and search attributes.
On the left side of the Identity Platform page, click Data Stores.
Select the Data Stores tab.
Click Add a Data Store.
On the Add a Data Store page, start with the following configurations, depending on your deployment type.
Settings in hybrid deployments
Settings in cloud deployments
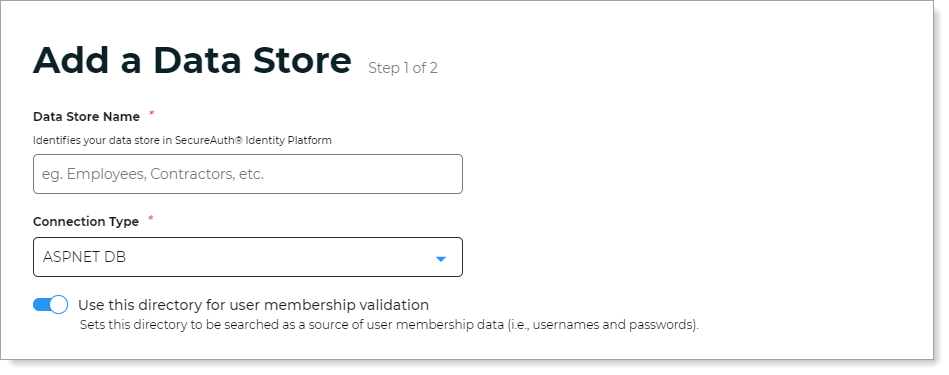
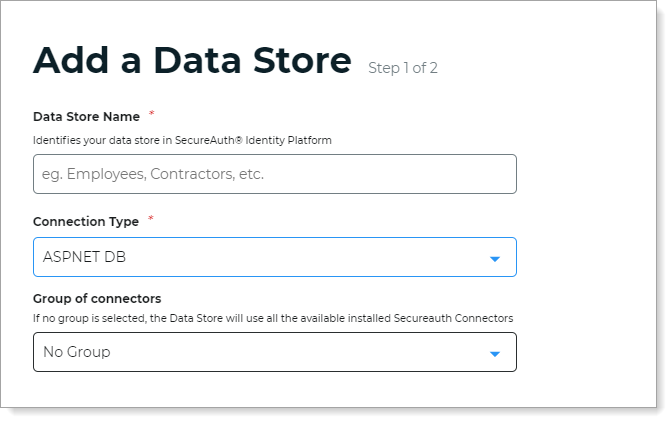
Data Store Name
Set the name of the data store.
Connection Type
Set to ASPNET DB.
Use this directory for user membership validation
Appears only in hybrid deployments
Use one of the following options:
On – Enable membership validation; use the directory to search for the user's membership in a user group.
This means the directory is a Membership Store, containing the password to validate with the username.
After the data store is saved, this field is the Membership Store label shown on the View Summary.

A common use case for a Membership Store would be to have a directory with username and password information (and maybe some profile information), and then have a second directory or database used to store and access data that the Identity Platform writes to the directory (such as device recognition, device enrollment, push notification tokens, and so on).
Off – Disable membership validation; use the directory to search only for the user profile information.
This means the directory is only used to find the username and profile information (such as phone number, email address, device recognition profiles, OATH tokens, and so on).
Group of connectors
Appears only in cloud deployments
Assign this data store to a SecureAuth Connector group.
To learn more about Connector groups, see Manage SecureAuth Connector groups.
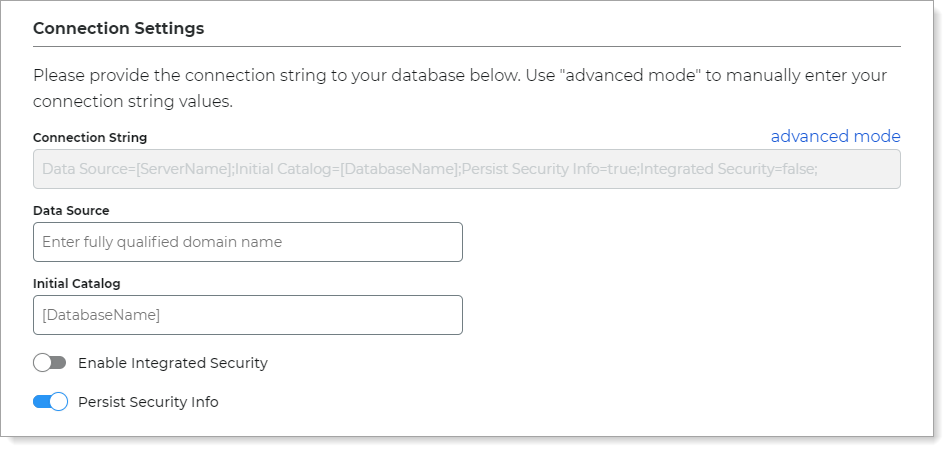
In the Connection String section, set the connection string to the ASP.NET data store.
Connection String
By default, the values in the Data Source and Initial Catalog fields auto-populate this Connection String.
advanced mode
To manually enter the connection string, click the advanced mode link.
The format for the connection string is:
Data Source=[ServerName];Initial Catalog=[DatabaseName];Persist Security Info=true;Integrated Security=false;Data Source
Fully qualified domain name or IP address of the ASP.NET database instance to which to connect.
For example, 111.22.33.444\aspnetdb.
Initial Catalog
The initial catalog name (or database name).
For example, aspnetdb.
Enable Integrated Security
Move the slider to indicate whether to enable integrated security for a secure connection.
Persist Security Info
Move the slider to indicate whether to persist security information such as the password in the connection string.
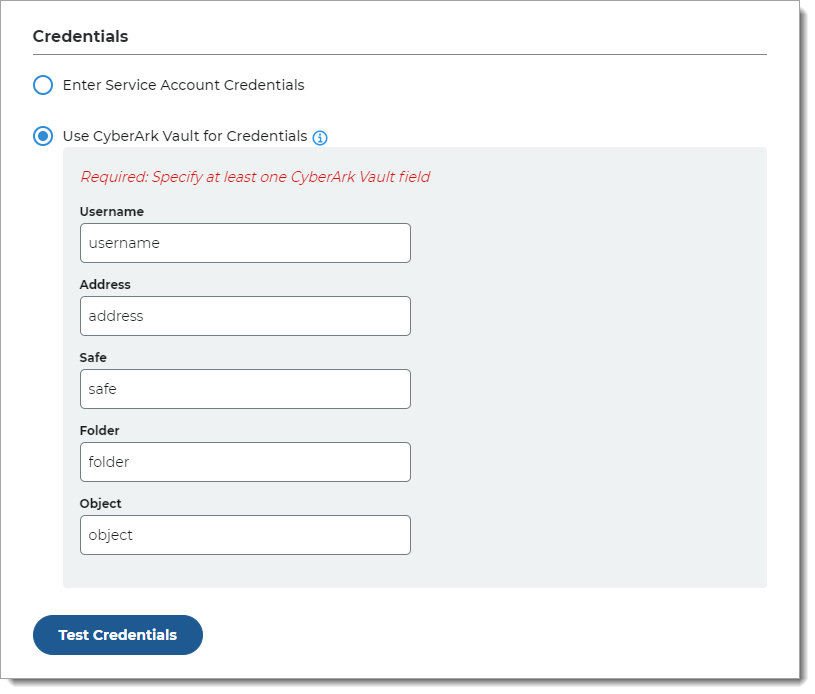
In the Credentials section, provide the user ID and password to log in credentials to access the ASP.NET data store.
Enter Service Account Credentials
If you select this option, enter the following fields:
User ID – ASP.NET user ID for the service account login
Password – Password for the service account login
Test the data store connection by clicking Test Credentials.
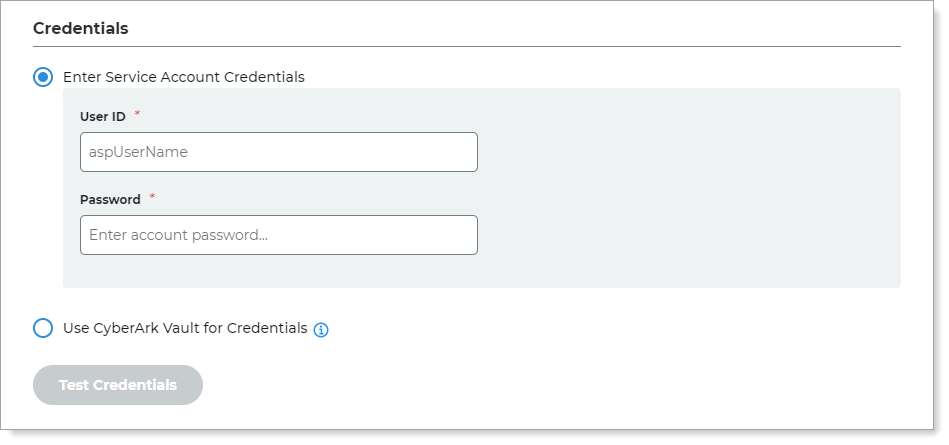
Use CyberArk Vault for Credentials
If you select this option, enter at least one field for the service account login:
Username – User name of machine to be scanned by CyberArk Application Identity Manger (AIM). This information appears on the Account Details page of the CyberArk Password Vault Web Access (PVWA) Admin Console.
Address – Address of machine to be scanned by AIM.
Safe – Name of Access Control Safe where credentials are stored.
Folder – Name of folder where account resides (by default, it is the root folder).
Object – Unique identifier Object name for the account.
Test the data store connection by clicking Test Credentials.
In the Advanced Settings section, set the the application name as defined in the ASP.NET database configuration.
For example, /SecureAuth

Click Continue.
The Map Data Store Properties page opens.
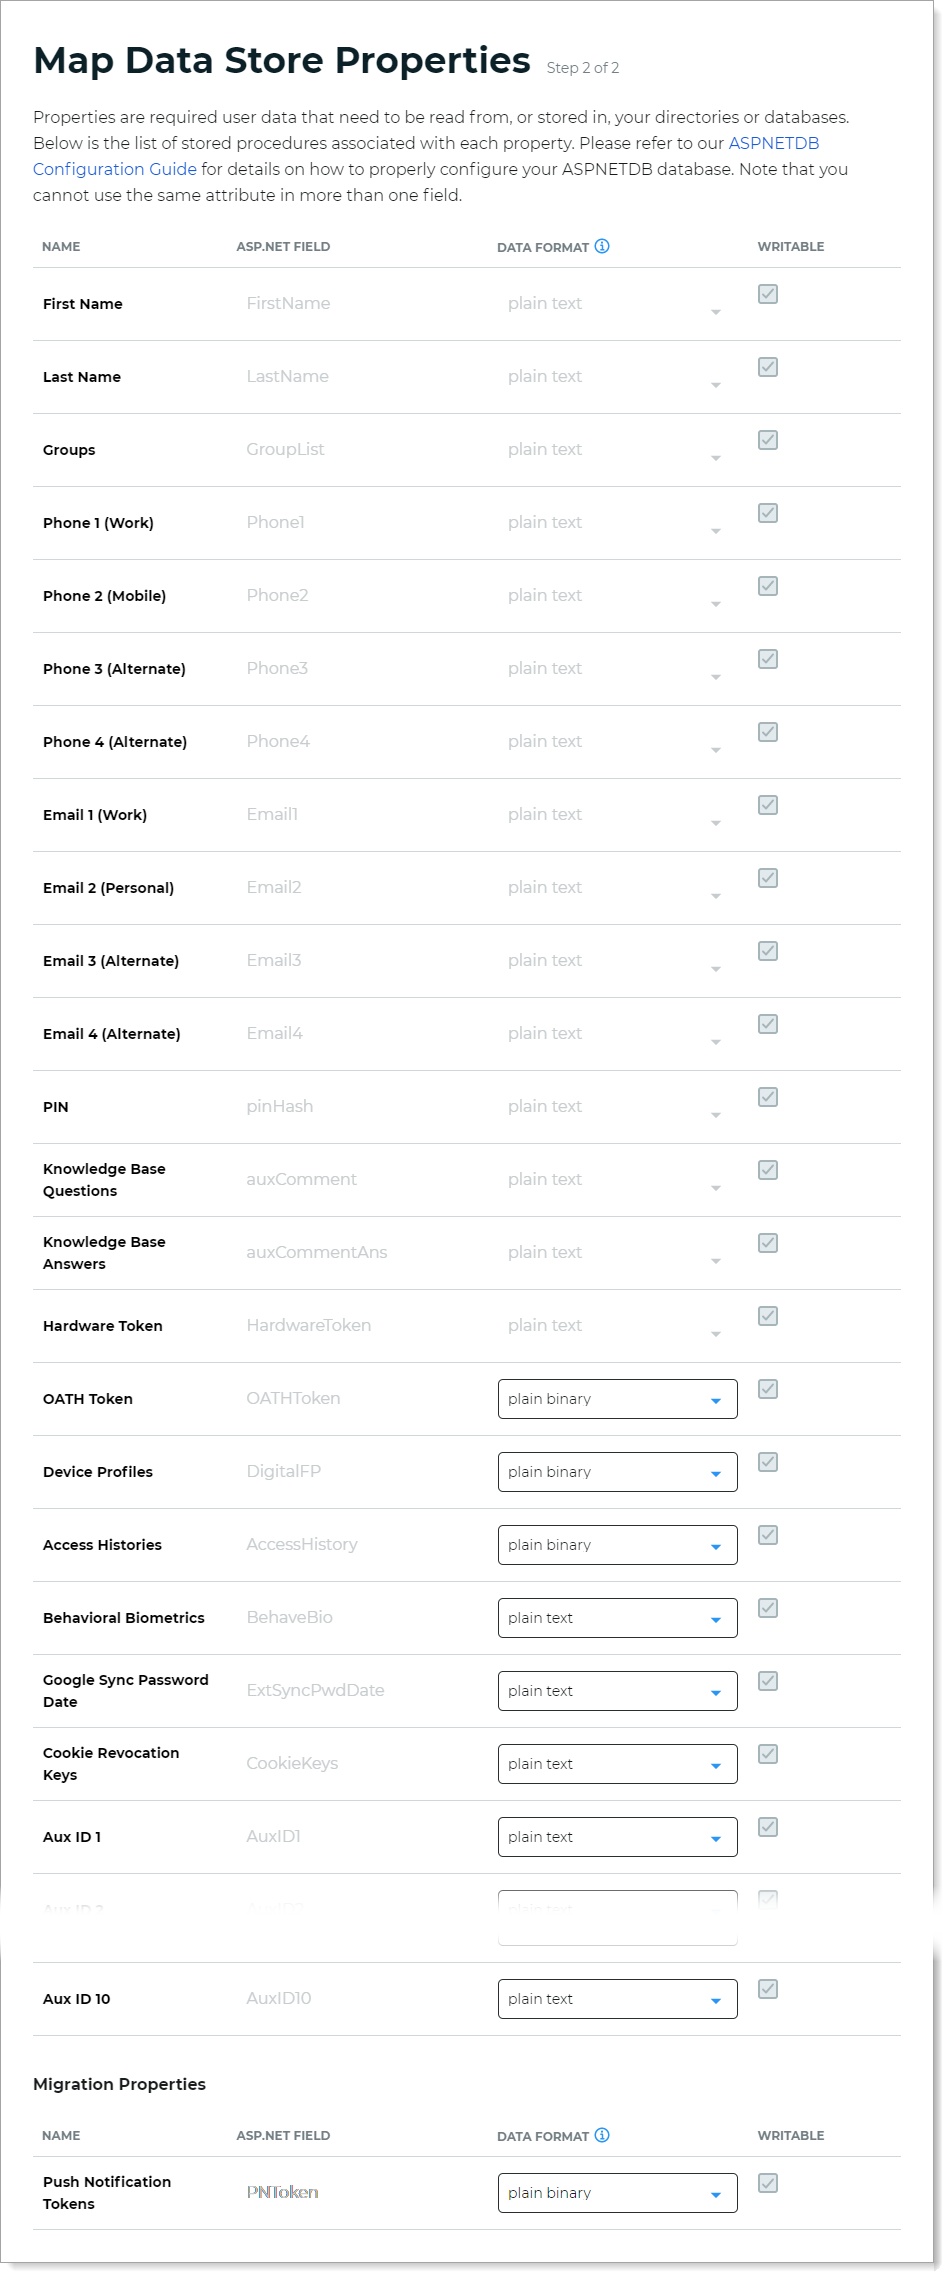
Step 2: Map the ASP.NET data store properties
The second part of adding an ASP.NET data store is mapping the data store properties.
Each user is uniquely identified by profile data that is read from or stored in your directories and databases.
The Identity Platform does not store user profiles, so your ASP.NET data store attributes must be mapped to Identity Platform profile properties to be read and updated in the directory by the Identity Platform. The directory attribute mapped to the property is retrieved only when required for authentication or assertion purposes.
You cannot modify the Writable properties for the ASP.NET data store on the Identity Platform UI. Refer to your database provider for this configuration.
For more information about how data store profile properties are stored for on-premises, hybrid, or cloud Identity Platform deployments, see List of stored profile field properties.
For mapped profile properties (for example, Push Notification Tokens, Behavioral Biometrics, and Device Profiles), specify the Data Format to define how data is encrypted and stored in the directory.
For cloud deployments, certain profile properties (for example, Push Notification Tokens, Behavioral Biometrics, and Device Profiles) are generated and used by SecureAuth, and stored in the SecureAuth cloud database.
The selection options are listed below (options vary depending on your Identity Platform deployment)
plain text – store data as regular, readable text (default)
standard encryption – store and encrypt data using RSA encryption
advanced encryption – store and encrypt data using AES encryption
standard hash – store and encrypt data using SHA-256 hash
Click Save Data Store.
The ASP.NET data store you just added appears in the User Data Stores list.