YubiKey OATH HOTP device provisioning configuration (Self-service)
Use this guide to configure a Self-service Account Update page that allows an end user to self-provision their OATH HOTP YubiKey device.
Once an OATH HOTP YubiKey device is provisioned, the end user can use a OATH HOTP YubiKey to generate a event-based one-time passcode to authenticate their log in to a resource.
Prerequisites
SecureAuth® Identity Platform release 23.07 or later
Data store added to the Identity Platform
Configured user authentication policy
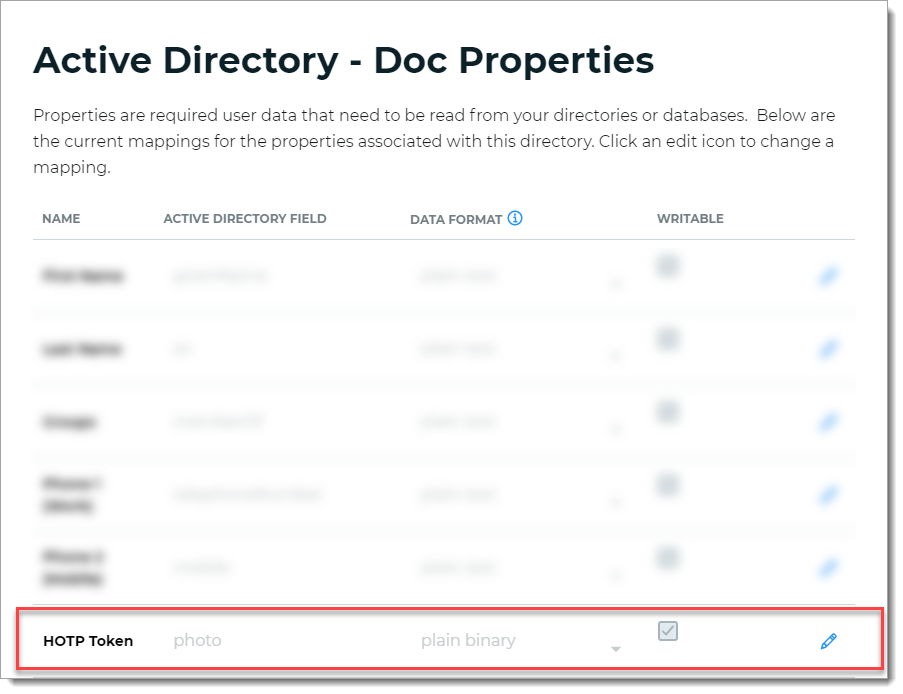
Data store configuration
The data store configuration applies only to the Identity Platform on-prem and hybrid deployments.
In the data store configuration, map the data store field attribute to the HOTP Token field.
For example, for an Active Directory data store, it could be photo or for SQL Server, it could be OATHToken.
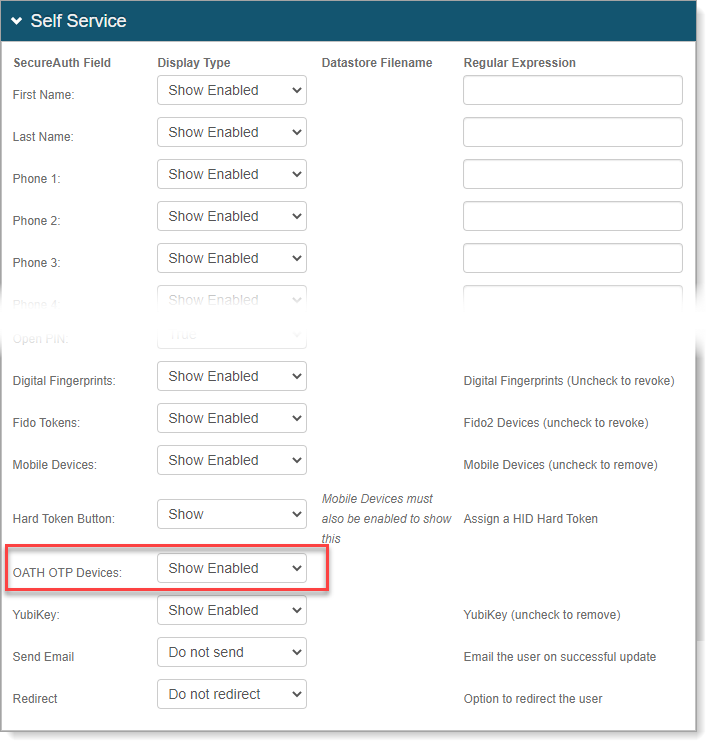
Configure Self-service Account Update page
In the Self-service Account Update page configuration, set the OATH OTP Devices field to Show Enabled. You'll need this setting so that end users can view, add, and assign a YubiKey OATH HOTP device on the Self-service page.
If you do not have a Self-service Account Update page set up, see Self-service Account Update page configuration.
Note
In the Internal Application Manager, the 3rd Party App Integrations > YubiKey Provisioning application is reserved for Yubico OTP provisioning.
Otherwise, to quickly get to this configuration, do the following:
In the Internal Application Manager, edit the Self-service Account Update page.
Scroll to the bottom of the page and click the Go to Advanced Settings to finish the configuration for this application link.
in the Identity Management section, click the Configure self service page link.
Scroll to the bottom of the page and set the OATH OTP Devices field to Show Enabled.
The OATH OTP Devices field is used to display the YubiKey OATH HOTP information on the Self-service page.
Note
The purpose of the YubiKey field is for Yubico OTP.
Save your changes.
Next steps
After you've configured the Self-service page and enabled the YubiKey OATH HOTP field, there are some more configurations to bring it all together.
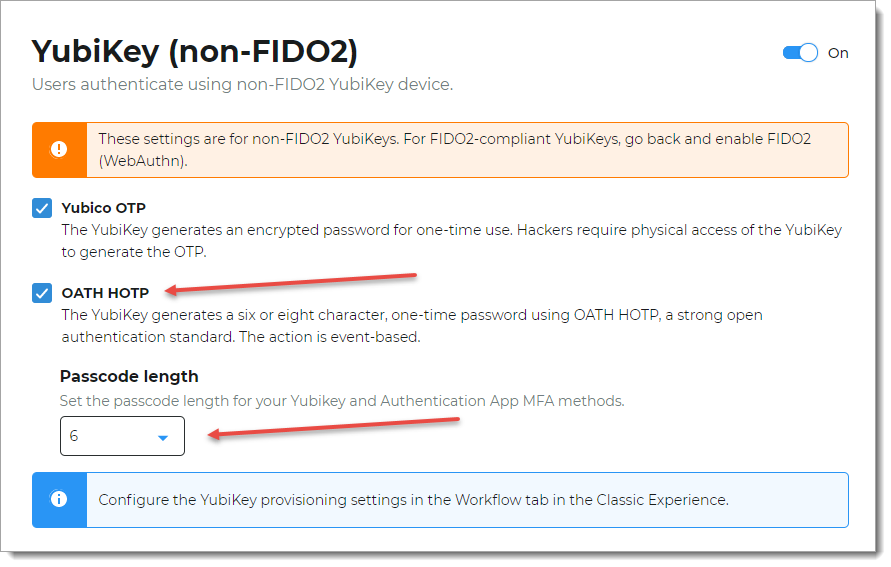
Turn on YubiKey global setting in the Identity Platform
Turn on and configure the YubiKey global MFA settings. Select the OATH HOTP check box and set the passcode length.
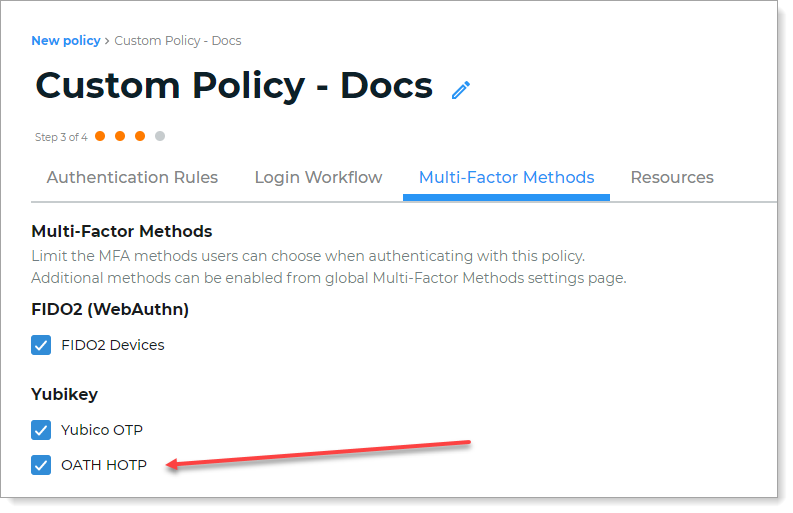
Enable YubiKey OATH HOTP for MFA in policy
In the authentication policy on the Mult-Factor Methods tab, select the OATH HOTP check box for YubiKey.
 |
Program YubiKeys to generate HOTP passcodes
As an administrator, you must program YubiKey devices to generate HMAC-based one-time passcodes (HOTP) before you give them to your end users.
End user instructions for YubiKey HOTP device provisioning
As an administrator, when you give the OATH HOTP YubiKey device to your end users, provide them with the following:
Link to the Self-service page that has the OTP Devices field enabled, so they can self-provision the HOTP YubiKey.
Device ID and secret key values for the HOTP YubiKey.
End user instructions about how to provision a HOTP YubiKey on the Self-service page. See Provision YubiKey OATH HOTP device (Self-service).