PagerDuty (SP-initiated) integration guide
This topic covers how to integrate the PagerDuty application in the SecureAuth® Identity Platform to securely allow the right user access to PagerDuty applications in your organization.
Prerequisites
PagerDuty account
Identity Platform release 19.07 or later
Have a defined user login authentication policy in the Identity Platform
Have an integrated data store in the Identity Platform
Identity Platform configuration
On the left side of the Identity Platform, click Application Manager.
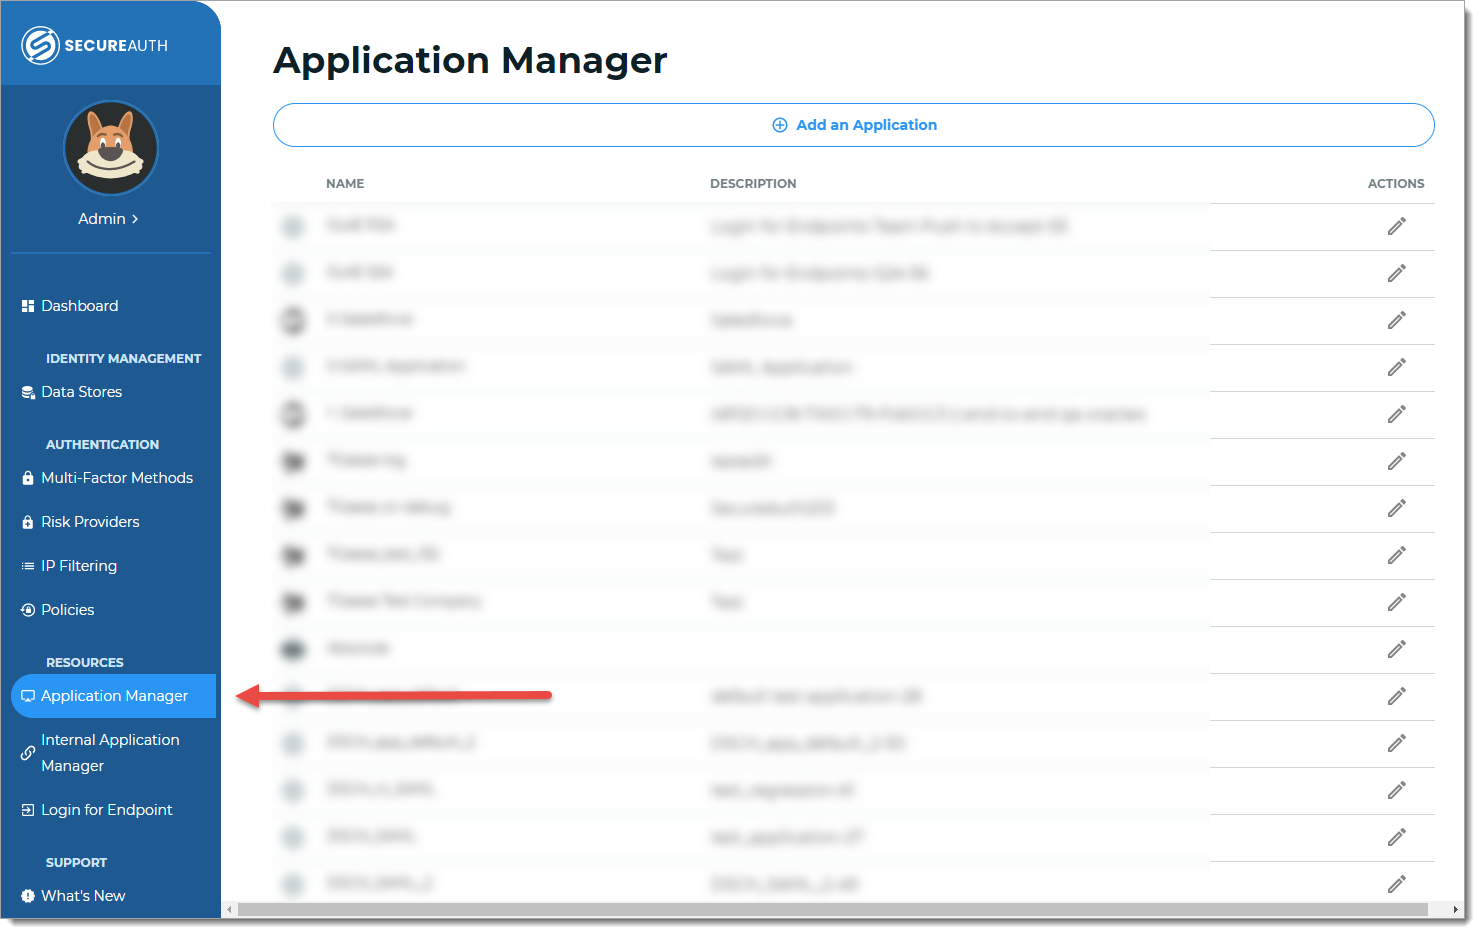
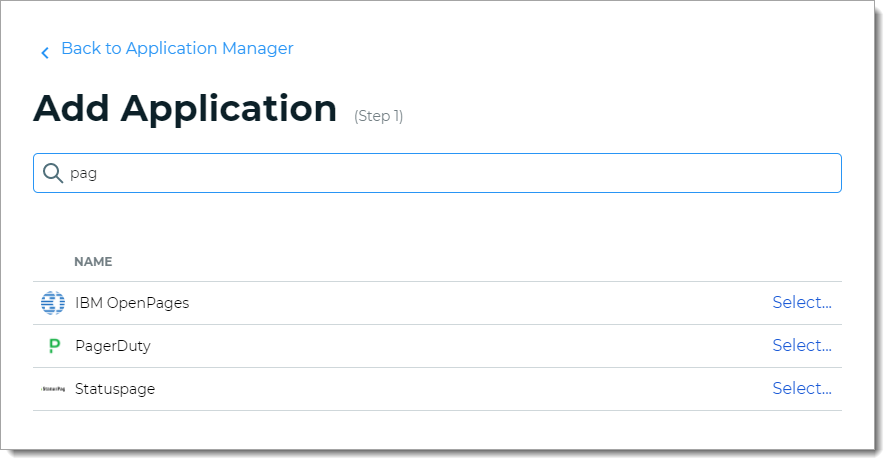
Click Add an Application.
The application template library page displays.
From the list of application templates, select PagerDuty.
On the Applications Details page, set the following configurations.
Application Name
Default name of the application. You can optionally change the application name.
The name displays on the Application Manager list and at the top of the Application Settings page.
Application Description
Enter a descriptive name about this application integration.
Upload logo
Optionally upload a different logo for the PagerDuty application.
Authentication Policy
Select the login authentication policy for the PagerDuty application.
Data Stores
Enter the data stores to to authenticate and allow user access for the PagerDuty application.
Start typing to bring up a list of data store names. You can enter more than one data store.
Groups
Use one of the following options:
Slider in the On position (enabled): Allow users from every group in your selected data stores access to the PagerDuty application.
Slider in the Off position (disabled): Enter the specific groups who are allowed access to the PagerDuty application.
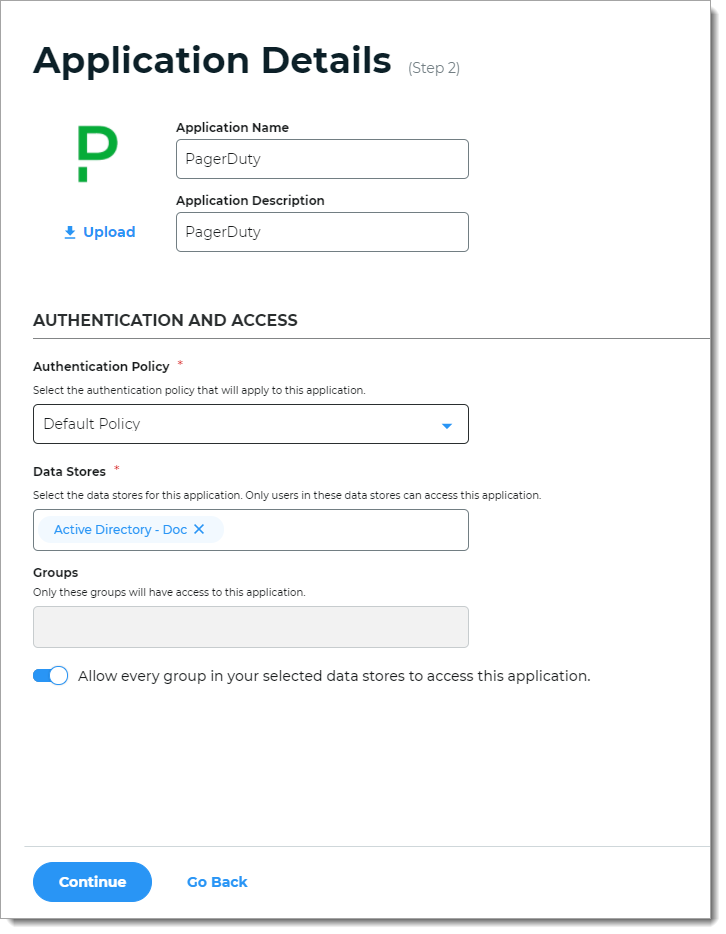
Click Continue.
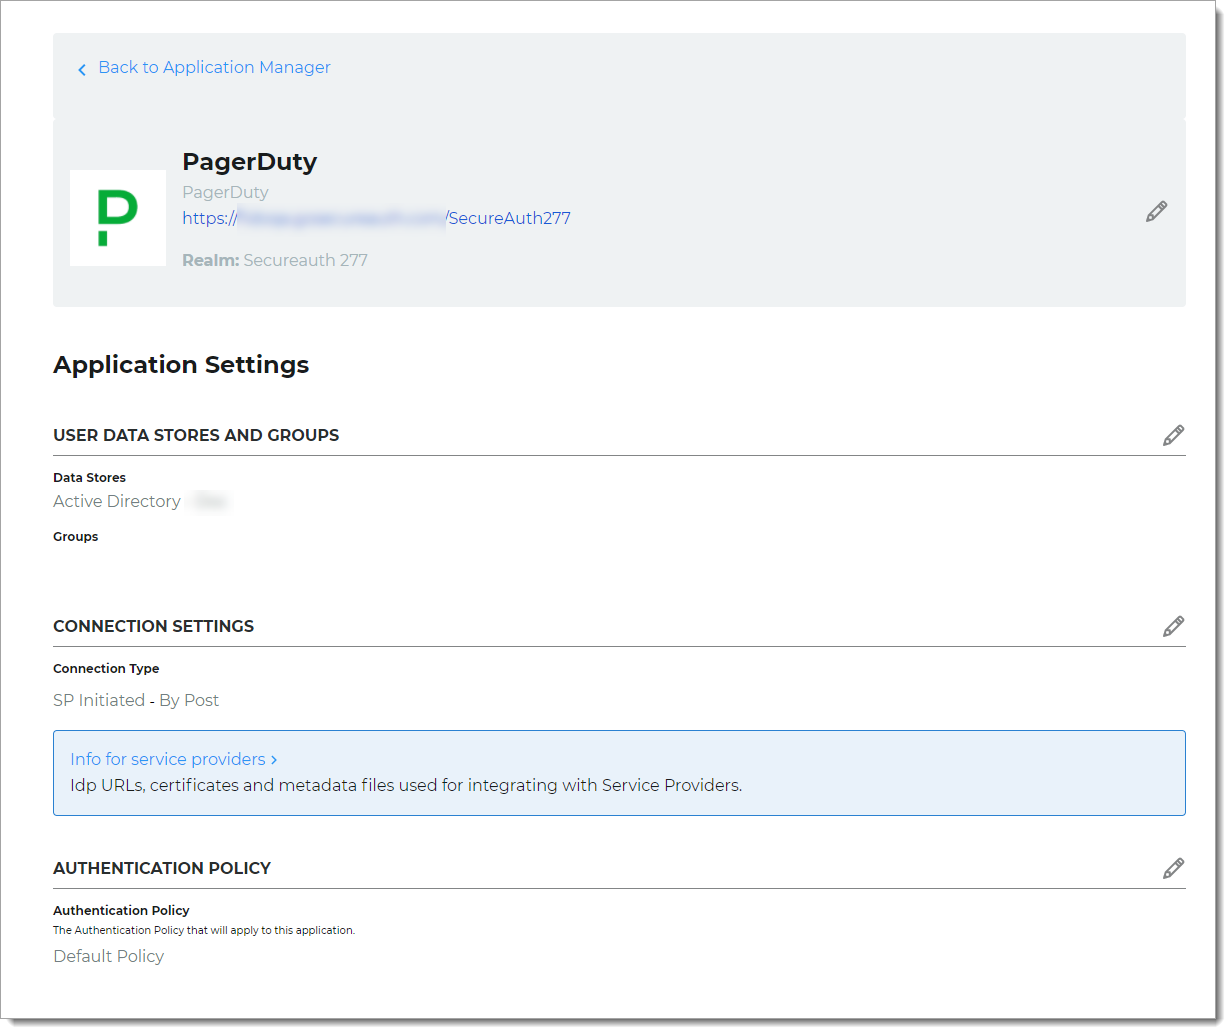
The Connection Settings page displays.
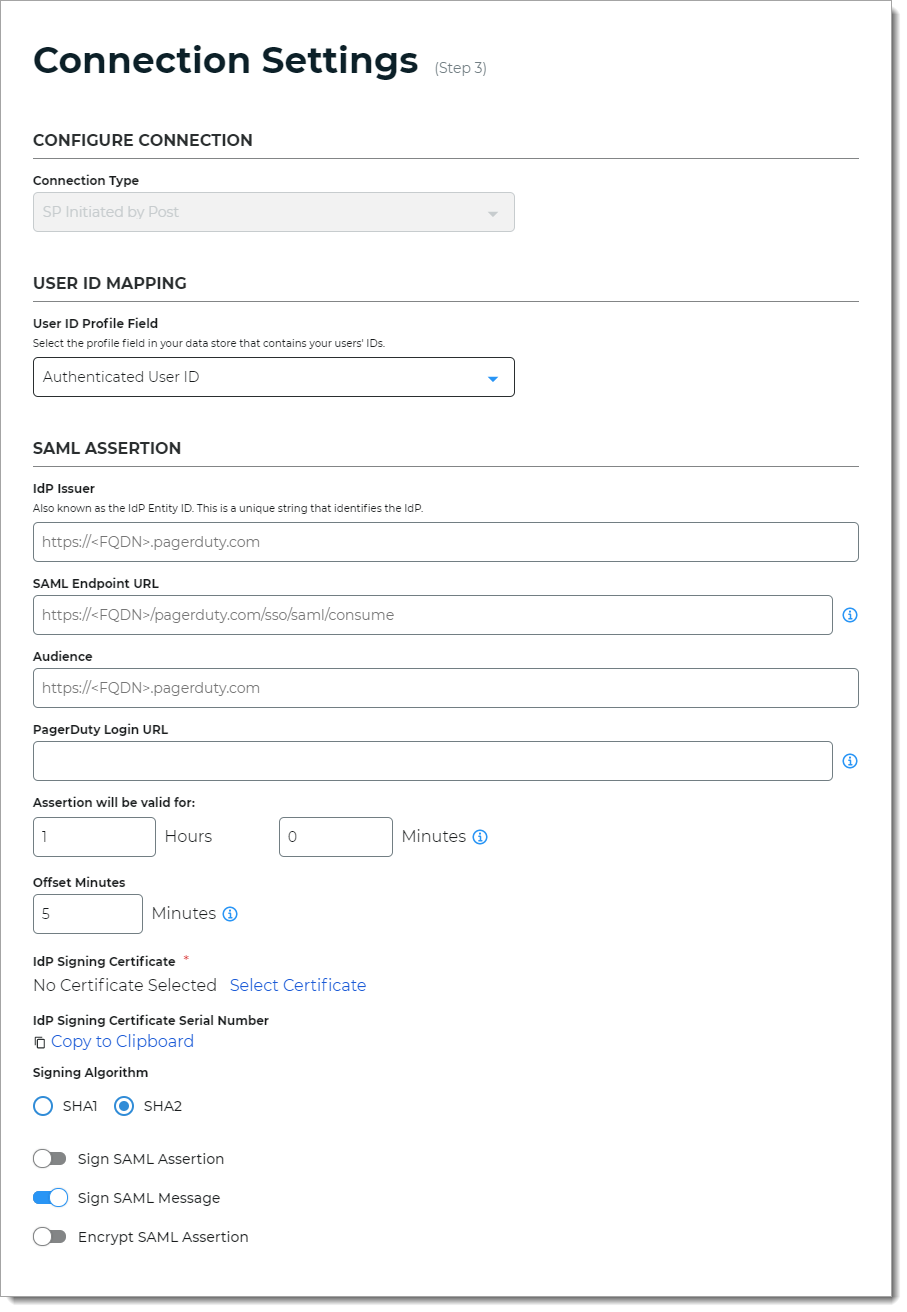
In the Configure Connection section, the Connection Type is set to SP Initiated by Post.
This is set by default. The user login process starts in the PagerDuty application, then redirects the user to the Identity Platform for authentication. Upon successful authentication, it asserts the user back to the PagerDuty application.
It uses the SAML specification to send authentication requests (AuthNRequest) using HTTP Post binding with embedded signature.

In the User ID Mapping section, set the User ID Profile Field to the profile field in your data store that contains the PagerDuty user ID.

For example, if the log in page accepts a username like
jsmith, you could set it to Authenticated User ID.Otherwise, if the log in page requires an email address, you could use another available profile field like Email 1, Email 2, Aux ID 1, and so on.
Note
If you select a user profile field other than Authenticated User ID, make sure you have the data store field attribute correctly mapped to an available profile property, like Email 1 (Work)=
mail.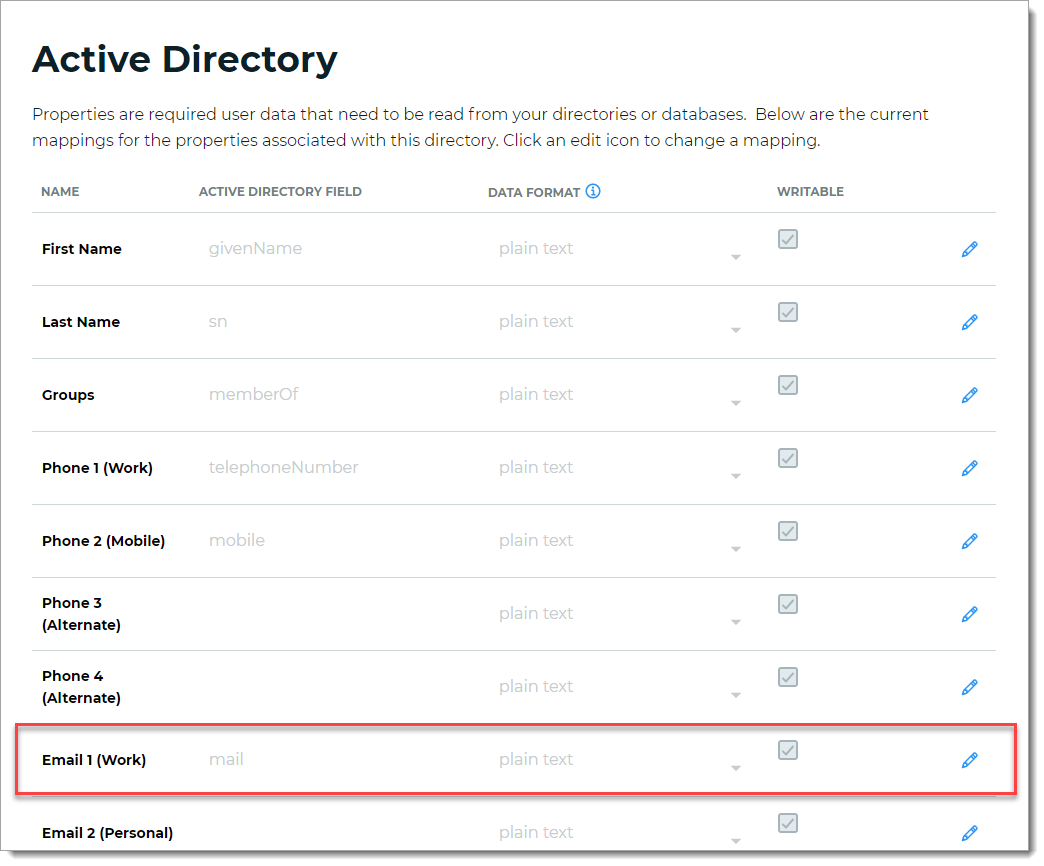
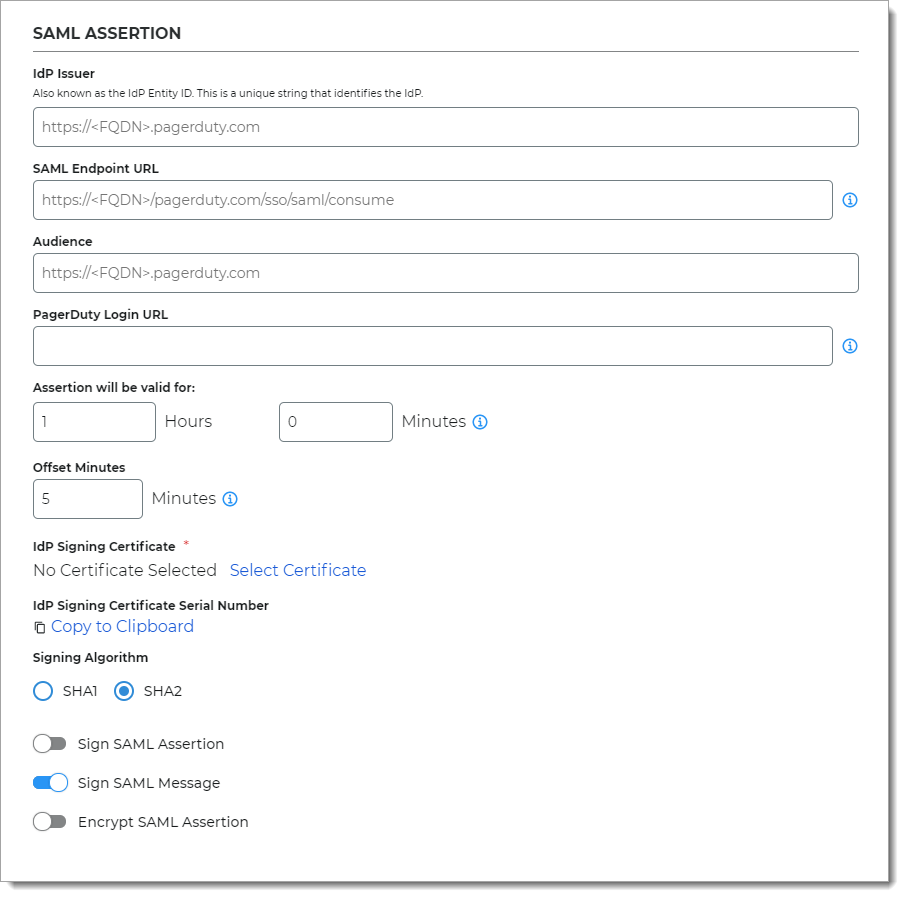
In the SAML Assertion section, set the following configurations.
IdP Issuer
A unique name that must match exactly on the Identity Platform side and the PagerDuty application side.
This helps the PagerDuty application identify the Identity Platform as the SAML issuer.
For example,
https://company.pagerduty.comSAML Endpoint URL
PagerDuty endpoint URL that initiates authentication and accepts the SAML assertion from the Identity Platform.
For example,
https://company.pagerduty.com/sso/saml/loginAudience
Optional. A unique string that identifies PagerDuty as the service provider (SP).
Usually, this is the entity ID of the service provider.
For example,
https://company.pagerduty.comPagerDuty Login URL
This is the PagerDuty login URL as a service provider (SP).
Usually, this is the same address as the SAML Endpoint URL.
For example,
https://company.pagerduty.com/sso/saml/loginAssertion will be valid for
Indicate in hours and minutes, how long the SAML assertion is valid.
This is referred to as SAML NotOnOrAfter in the SAML specifications.
The default setting is one hour, but for more sensitive application resources, the recommended value is between one to five minutes.
Offset Minutes
Indicate in minutes to account for the time differences among devices.
This is referred to as SAML NotBefore in the SAML specifications.
Recommended value is five minutes.
IdP Signing Certificate
Click Select Certificate, then choose the IdP signing certificate to use.
IdP Signing Certificate Serial Number
When you select an IdP signing certificate, the serial number populates this field.
Signing Algorithm
The signing algorithm digitally signs the SAML assertion and response.
Choose the signing algorithm – SHA1 or SHA2 (slightly stronger encryption hash and is not subject to the same vulnerabilities as SHA1).
Sign SAML Assertion
Indicate whether the Identity Platform signs the SAML assertion sent to the service provider (SP). The signed certificate ensures assertion integrity from the Identity Platform.
Sign SAML Message
Indicate whether the Identity Platform signs the SAML message, including the SAML assertion, sent to the service provider (SP). The signed certificate ensures message integrity from the Identity Platform.
Encrypt SAML Assertion
Indicate whether the Identity Platform sends an encrypted SAML assertion to the service Provider (SP).
If the slider is ON, then select the data and key encryption methods:
Data Encryption Method – Select the algorithm of the data encryption method
Key Encryption Method – Select the type of key encryption method (symmetric or asymmetric)
Click Add Application.
After saving the application, it displays the Information for Service Providers page.
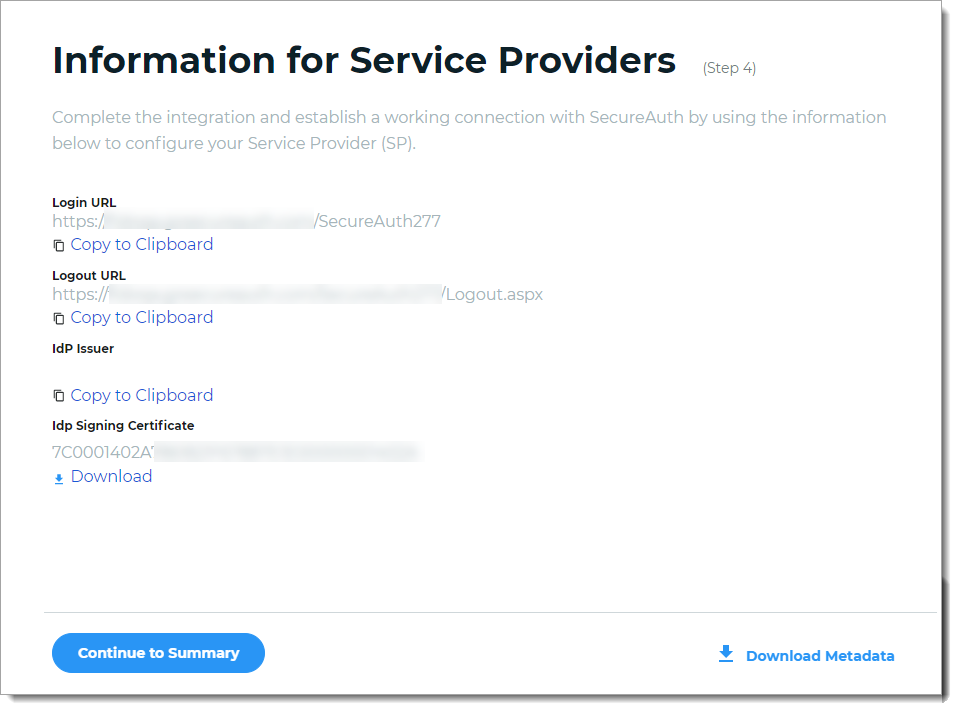
To complete the integration and establish a working connection with SecureAuth, copy the following information as needed for the PagerDuty configuration.
Login URL
Logout URL
IdP Issuer
Click Copy to Clipboard to copy the Identity Platform realm information and paste it in the corresponding field in the PagerDuty service provider configuration, as required.
IdP Signing Certificate
Download the IdP Signing Certificate.
Click Continue to Summary to review the PagerDuty application settings.
Click Back to Application Manager to find the application added to the list.
PagerDuty configuration
In PagerDuty, click Profile icon > Account Settings > Single Sign-on.
The Enable Single Sign-on (SSO) page displays.
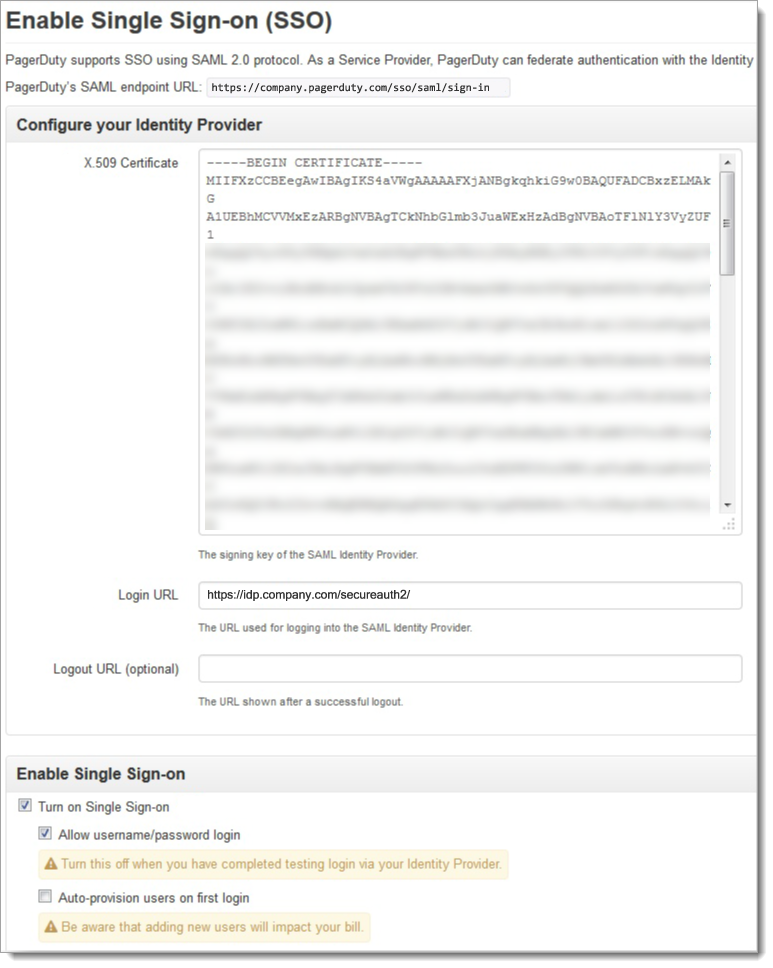
Make the following configurations.
PagerDuty SAML endpoint URL
PagerDuty endpoint login URL that initiates authentication and accepts the SAML assertion from the SecureAuth Identity Platform.
For example,
https://company.pagerduty.com/sso/saml/sign-inX.509 Certificate
Open the downloaded IdP Signing Certificate from the SecureAuth Identity Platform in a text editor (see Identity Platform configuration, in Step 10).
Copy and paste the contents into the X.509 Certificate box.
Login URL
Enter the URL of the SecureAuth Identity Platform and realm number of the PagerDuty integration. This authenticates the user SSO login through SecureAuth Identity Platform.
This is known as the Login URL in the SecureAuth Identity Platform with the realm number in the URL. (see Identity Platform configuration, in Step 10).
For example,
https://company.secureauth.com/SecureAuth277Turn on Single Sign-on
To use SSO, select this check box.
Allow username/password login
Select one of the following options in use with SSO:
Clear check box – Authenticate end user login through SecureAuth Identity Platform and assert user into PagerDuty application
Select check box – Bypass end user login through SecureAuth Identity Platform and login directly to PagerDuty application
Support
If you need help with this integration, please contact SecureAuth Support.