Microsoft Conditional Access External Authentication Method (EAM) integration guide
External Authentication Method (EAM) is a feature in Microsoft Entra ID that lets users use different multi-factor authentication (MFA) providers for signing in. This means that instead of using Microsoft's MFA options, your organization can choose and integrate SecureAuth® Identity Platform as an MFA provider to meet your security needs.
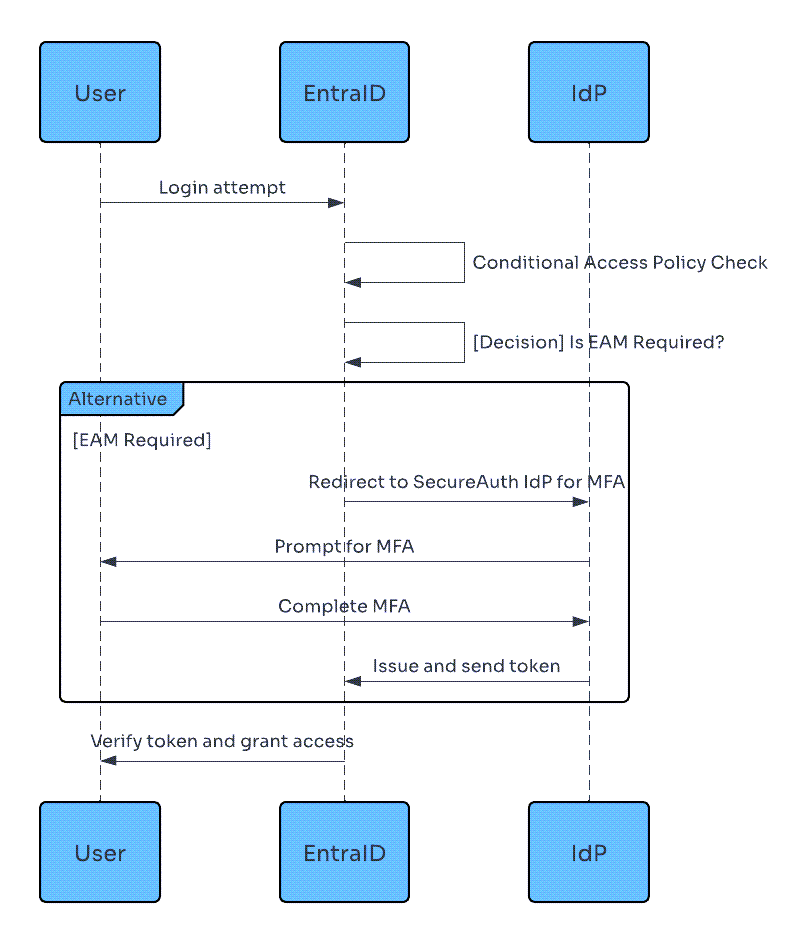
How External Authentication Method (EAM) works with the Identity Platform:
User login attempt: When a user attempts to access a protected resource, it evaluates the Conditional Access policy.
Conditional Access policy check: If the Conditional Access policy in Microsoft Entra ID is configured to require additional verification through EAM, it sends the user to the configured location for MFA.
Redirect and verification with IdP: Through the authentication policy in SecureAuth IdP, it prompts the user for MFA.
Token issuance and transfer: When user completes MFA, SecureAuth IdP issues an authentication token and sends it back to Microsoft Entra ID.
Access granted: Microsoft Entra ID verifies the token and if valid, grants user access to the requested resource.
 |
Prerequisites
Available in the following Identity Platform product releases:
Identity Platform release 24.04 with update 24.4.2 or later
Identity Platform release 23.07 with hotfix 23.07-10 or later
Identity Platform release 22.12 with hotfix 22.12-13 or later
Have an OIDC application or create one in Task A: Configure OIDC application
Process
To set up a Conditional Access integration with the Identity Platform as an EAM provider, the following is an outline of tasks to complete.
- Task A: Configure OIDC application
For Conditional Access with EAM, have an OpenID Connect (OIDC) application configured.
You will need the Client ID generated in the OIDC application for the Entra ID configuration.
- Task B: Register an application in Microsoft Entra
Register an application and add the Redirect URI.
- Task C: Add Identity Platform as an EAM in Microsoft Entra
Add an external authentication provider in Microsoft Entra. Use the Client ID from the OIDC application.
- Task D: Configure Conditional Access policy
Configure your Conditional Access policy to redirect users to the Identity Platform as an EAM.
Task A: Configure OIDC application
In the Identity Platform, have an OIDC application configured for use with Microsoft Conditional Access with EAM.
For the OIDC application, configure the settings as described next in each of the sub sections.
Test connection
Make sure that https://login.microsoftonline.com/common/discovery/keys is accessible from the SecureAuth server.
Data tab settings
In Advanced Settings, select the Data tab.
Create a connection based on the data store type, such as Active Directory or SQL Server.
Make sure the searchFilter field is set to
(|(samAccountName=%v)(userPrincipalName=%v))to allow this application a dual lookup filter to support the UPN format provided by the inbound Microsoft request.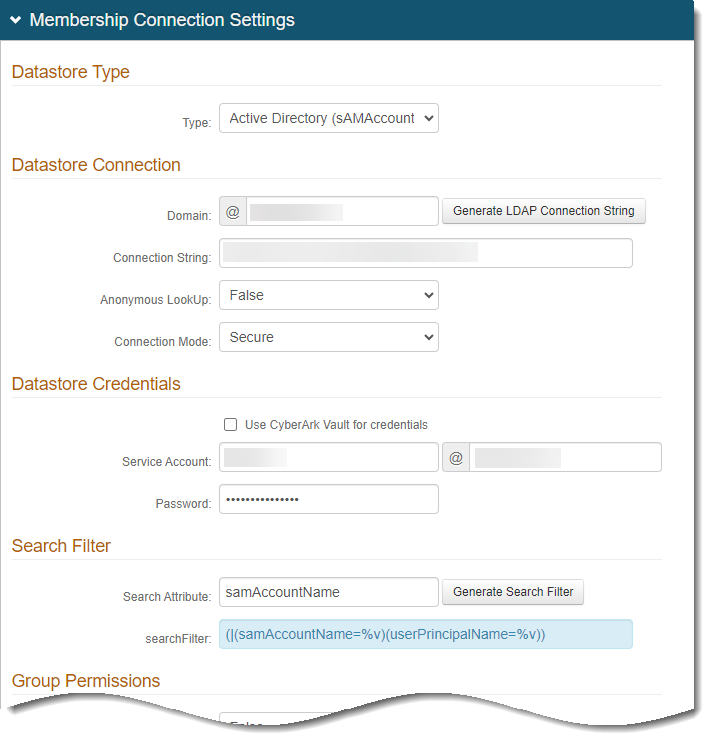
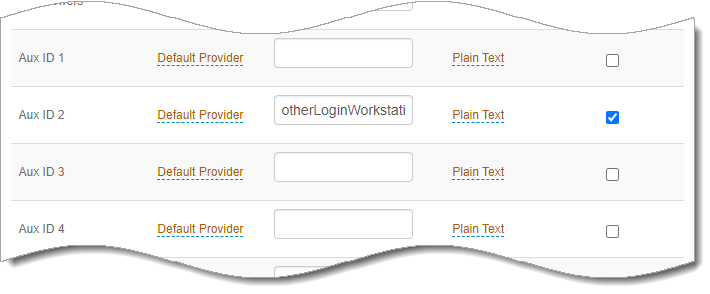
In the Profile Fields section, set the following Aux ID value:
Aux ID 2
Set to otherLoginWorkstations and select the Writable check box.
You will need this on the Post Authentication tab for the Consent Storage Attribute field.
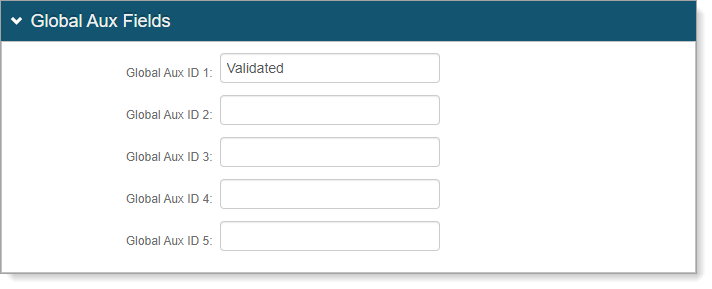
In the Global Aux Fields section, set the following Global Aux ID value:
Global Aux ID 1
Set to Validated.
You will need to set this Aux ID on the Post Authentication tab for the Custom Claims.
Workflow tab settings
Select the Workflow tab.
In the Workflow section, set the following Login Screen Options:
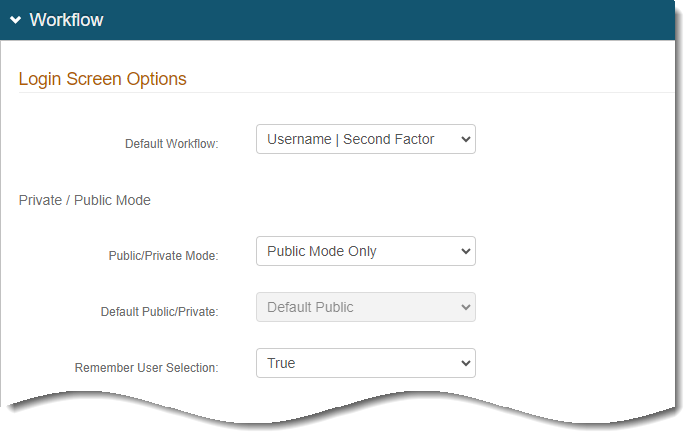
Default Workflow
Set to Username | Second Factor.
Public/Private Mode
Set to Public Mode Only.
Remember User Selection
Set to True.
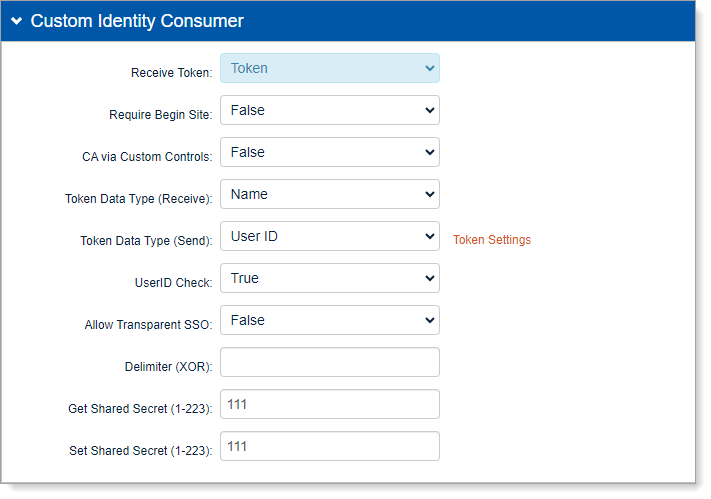
In the Customer Identity Consumer section, set the following values:
Receive Token
Set to Token.
CA via Custom Controls
Set to False.
Turn off Custom Controls (CA) since we are going to use Conditional Access via external authentication method (EAM).
Leave all other fields set to the default.
Multi-Factor Methods tab settings
Select the Multi-Factor Methods tab.
In the Multi-Factor Configuration section, configure the multi-factor methods that you want to enable in the Phone Settings.
For example, set the following phone (SMS) and email methods.
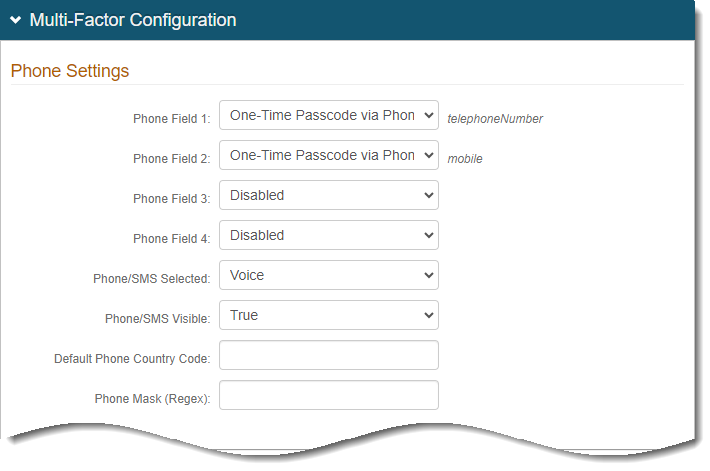
Phone Field 1
Set to One-Time Passcode via Phone Call and SMS.
Phone Field 2
Set to One-Time Passcode via Phone Call and SMS.
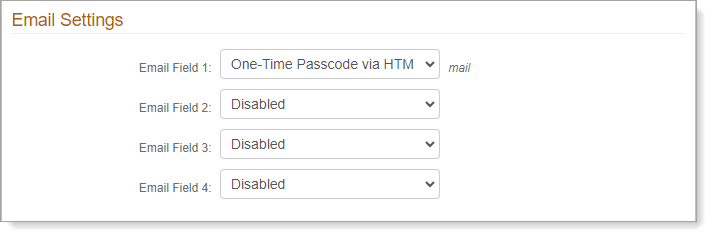
In the Email Settings section, set the following email setting:
Email Field 1
Set to One-Time Passcode via HTML Email.
Post Authentication tab settings
Select the Post Authentication tab.
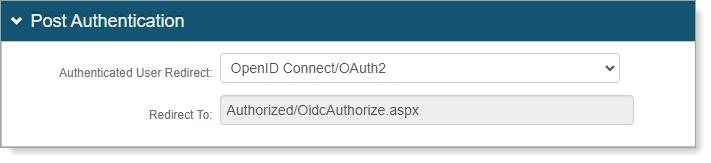
In the Post Authentication section, set the following:
Authenticated User Redirect
Set to OpenID Connect/OAuth2.
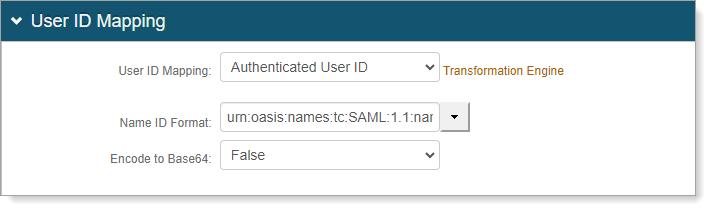
In the User ID Mapping section, set the following values:
User ID Mapping
Set to Authenticated User ID.
Name ID Format
Set to urn:oasis:names:tc:SAML:1.1:nameid-format:unspecified.
Encode to Base64
Set to False.
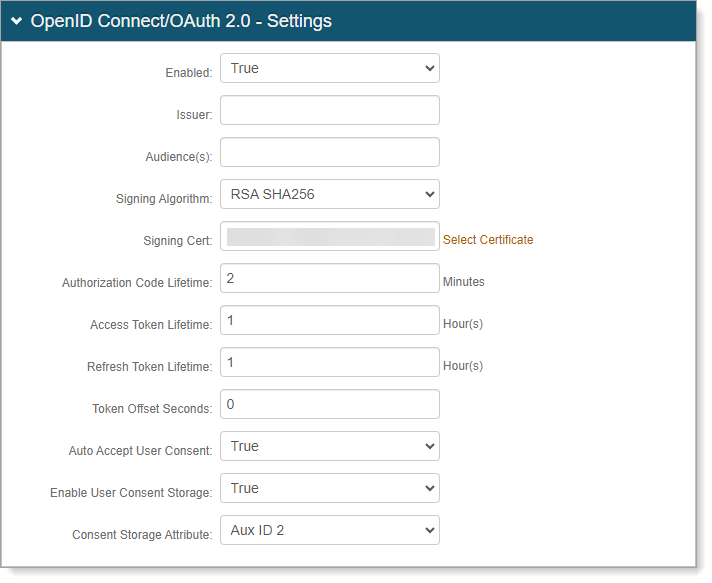
In the OpenID Connect/OAuth 2.0 – Settings section, set the following values:
Enabled
Set to True.
Issuer
Set to the fully qualified domain name (FQDN)/Hostname of the IdP instance.
For example, idp.company.com.
This must be a public-facing and have a valid SSL certificate.
Signing Algorithm
Set to one of the following values:
RSA SHA256 (RS256) – An asymmetric algorithm, which means it uses a public/private key pair. SecureAuth uses the private key for signing and provides you with the public key to use to validate the signature.
HMAC SHA256 (HS256) – A symmetric algorithm, which means one secret key is shared between SecureAuth and the end-user. The same key is used to create the signature and to validate it. This key must be kept secret at all times.
Signing Cert
Set to any certificate that is a private key readable by SecureAuth Identity Platform.
Do not use wild cards in a certificate.
Auto Accept User Consent
Set to True to provide a clean user experience.
Enable User Consent Storage
Set to True to provide a clean user experience and to enable check session endpoints.
Consent Storage Attribute
Set to the AUX ID 2 value that was mapped earlier on the Data tab to a string attribute
For example, otherLoginWorkstations.
Authorization Code Lifetime
Access Token Lifetime
Refresh Token Lifetime
Leave the default settings as is.
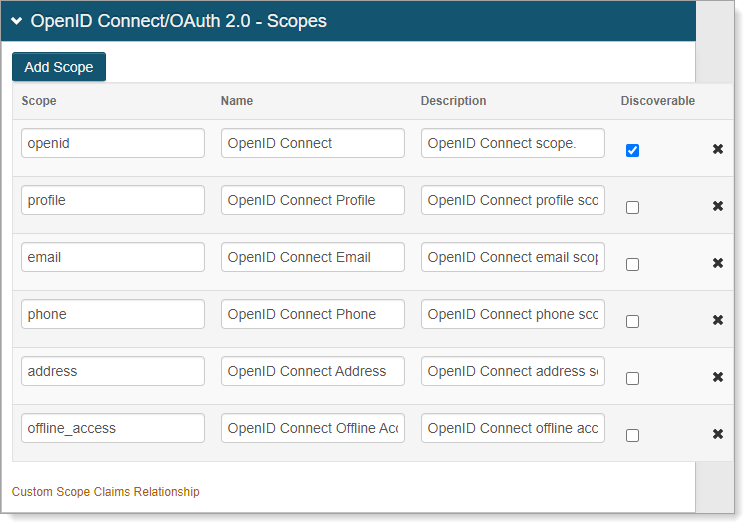
In the OpenID Connect/OAuth 2.0 – Scopes section, for the openid scope, select the Discoverable check box.
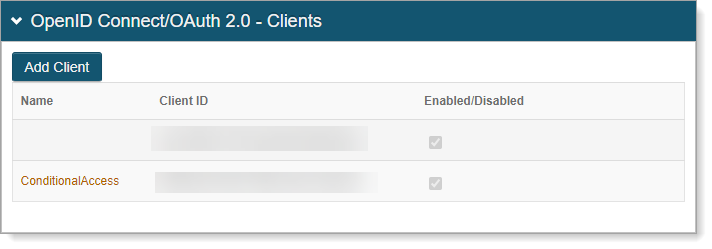
In the OpenID Connect/OAuth 2.0 – Clients section, click Add Client.
In the OpenID Connect/OAuth 2.0 - Client Details section, set the following values:
Enabled
Set to True.
Name
Set a name like ConditionalAccess.
Client ID
Client ID is automatically created.
Copy this Client ID. You will need this in Task C: Add Identity Platform as an EAM in Microsoft Entra.
Client Secret
Client Secret is automatically created.
JSON Web Encryption
Set to Disabled.
JSON Web Key URI
Clear the text box and leave blank.
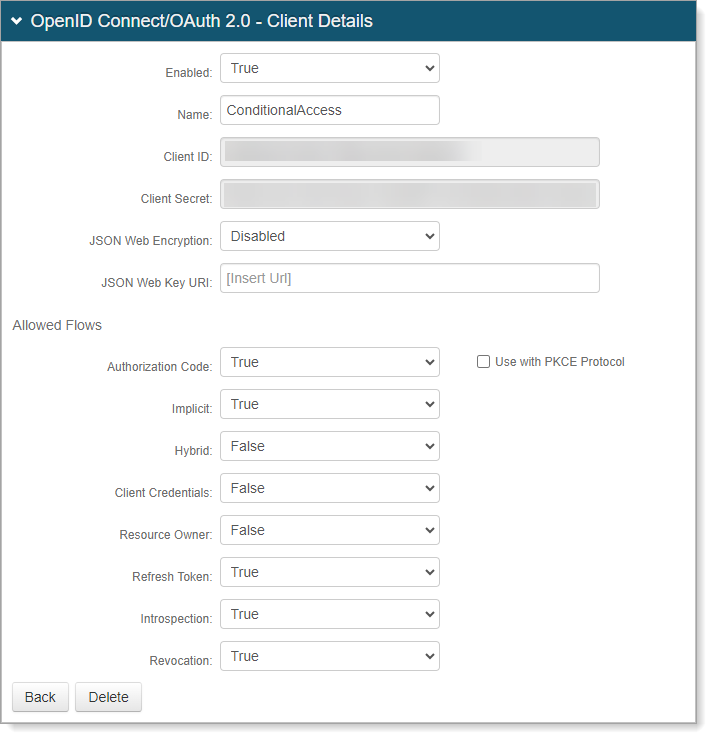
In the Allowed Flows section, set the following values:
Authorization Code
Set to True.
Implicit
Set to True.
Hybrid
Set to False.
Client Credentials
Set to False.
Resource Owner
Set to False.
Refresh Token
Set to True.
Introspection
Set to True.
Revocation
Set to True.
In the OpenID Connect/OAuth 2.0 - Client Redirect URIs section, click Add Redirect URI and set the following:
URI
Set to
https://login.microsoftonline.com/common/v2.0/oauth2/token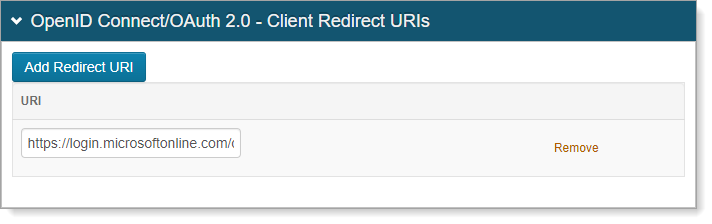
Save your changes.
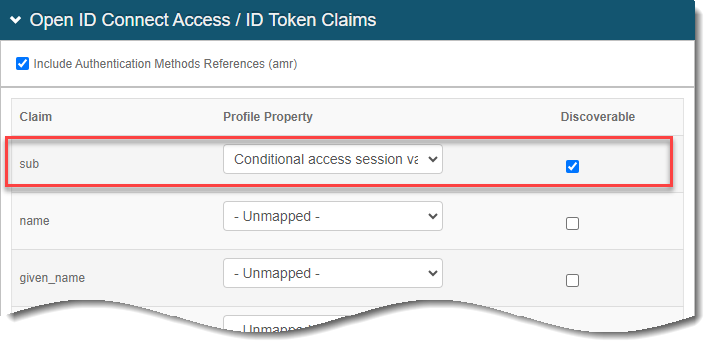
In the OpenID Connect Access / ID Token Claims section, set the following values:
Sub
Set the Profile Property to Conditional access session value.
Discoverable
Select this check box.
Save your changes.
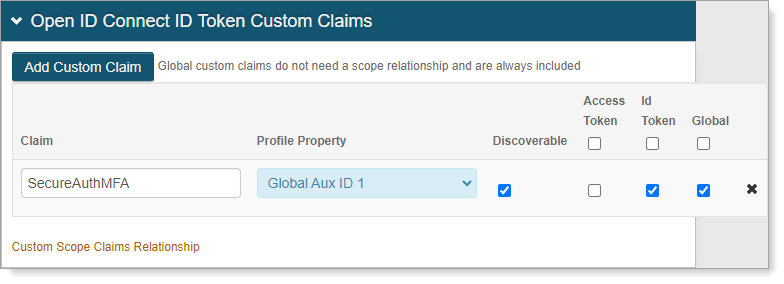
In the OpenID Connect ID Token Custom Claims section, click Add Custom Claim and set the following values:
Claim
Set to SecureAuthMFA.
Profile Property
Set to Global Aux ID 1.
This is the Global Aux ID that you set to Validated on the Data tab.
Discoverable
Select this check box.
Save your changes.
Task B: Register an application in Microsoft Entra
In this task, you will need to register an application in Microsoft Entra. Then, add the redirect URI to the Identity Platform realm configured for EAM.
Log in to Microsoft Entra admin center (formerly Azure AD portal) and register an application for the Identity Platform.
Go to App Registrations and enter the following values.
Name
Enter a user-facing display name for this application.
Redirect URI
Add a Redirect URI and enter the realm configured for EAM in this format:
https://{SecureAuthURL}/{RealmName}/SecureAuth.aspx
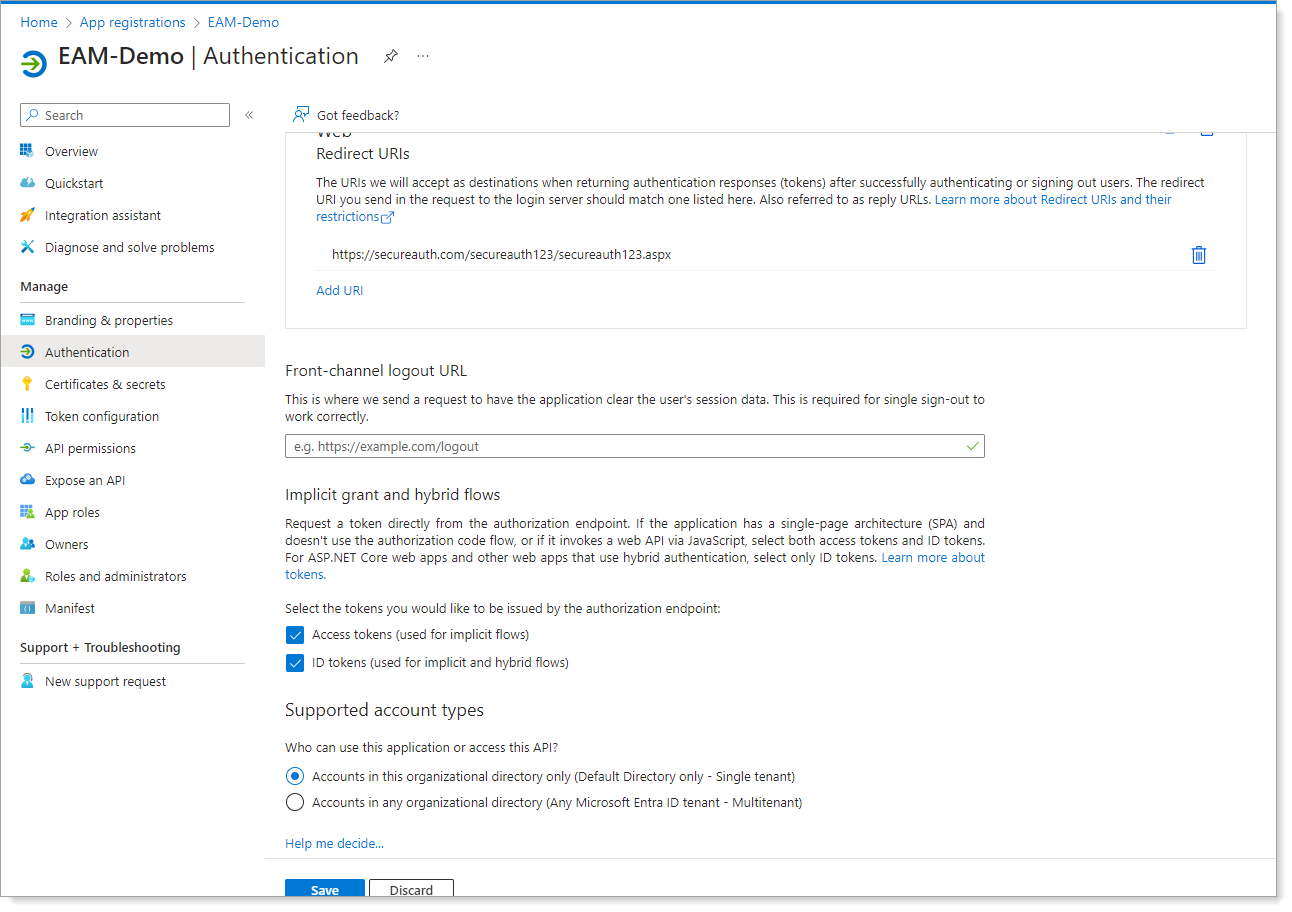
Go to the app you just registered and do the following.
In the left navigation, select Authentication.
In the Implicit grant and hybrid flows section, select the check boxes for the following.
Access tokens (used for implict flows)
ID tokens (used for implicit and hybrid flows)
Save your changes.
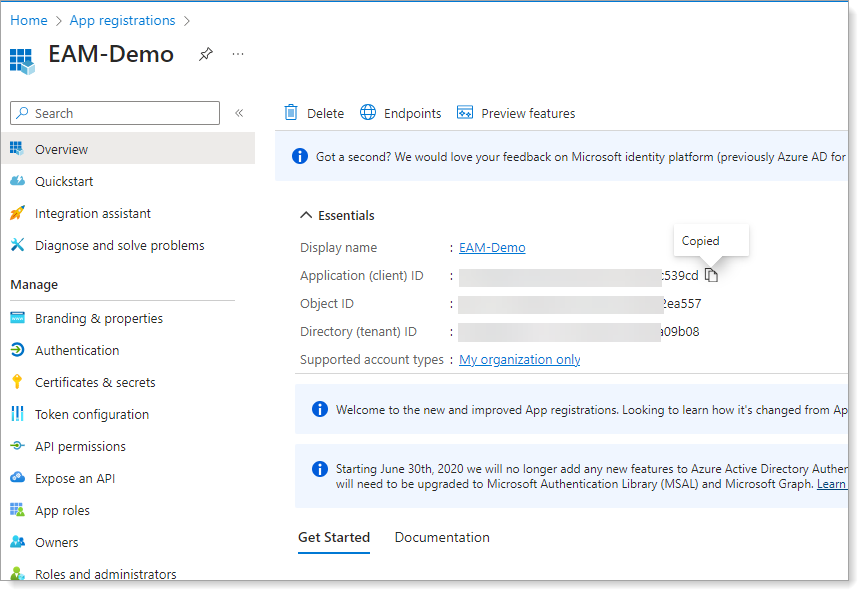
In the left navigation, select Overview and copy the Application (client) ID and save it somewhere.
Task C: Add Identity Platform as an EAM in Microsoft Entra
In this task you will add the Identity Platform as an external authentication provider in Microsoft Entra.
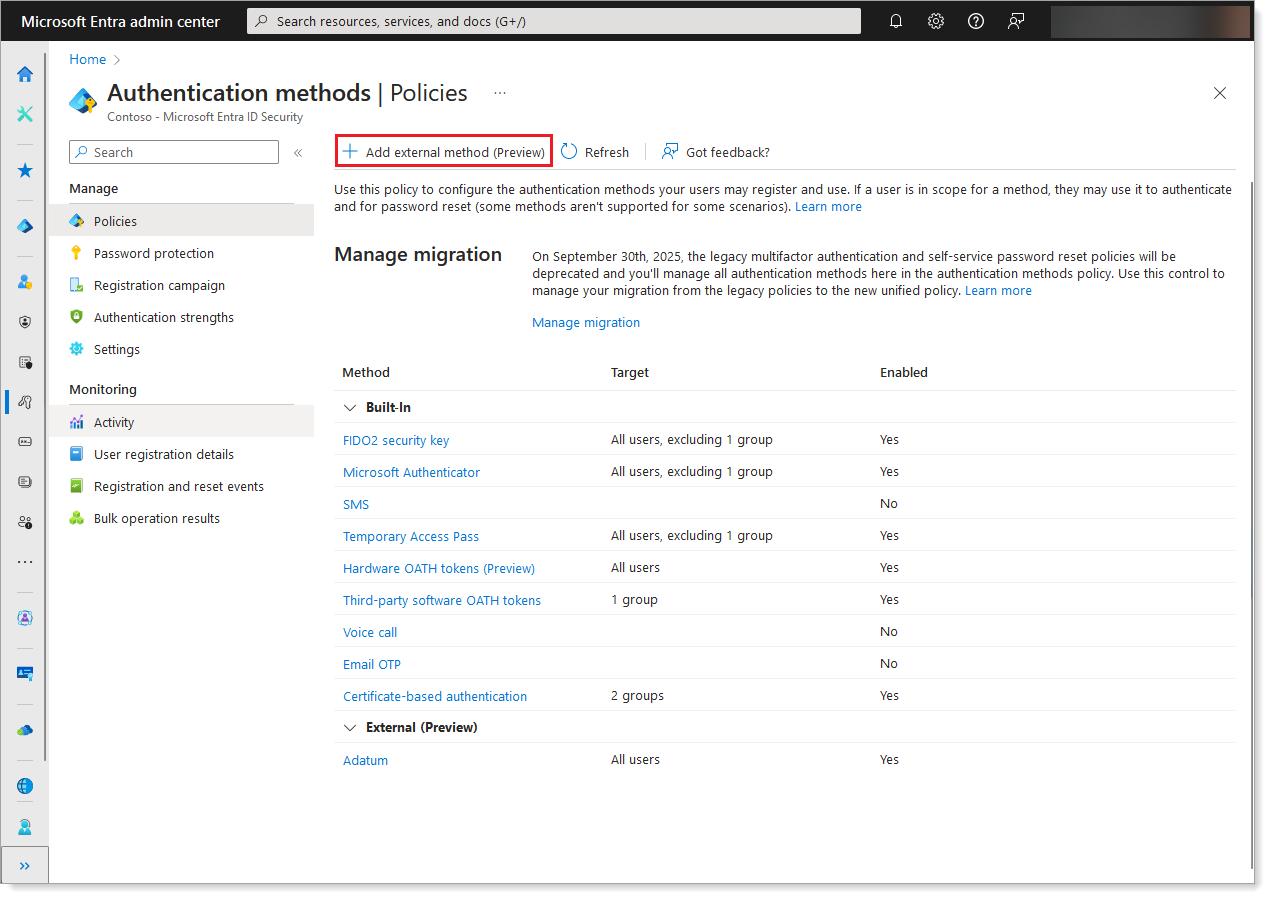
In the Microsoft Entra admin center, go to Authentication Methods > Policies.
Click Add a new external method (preview).
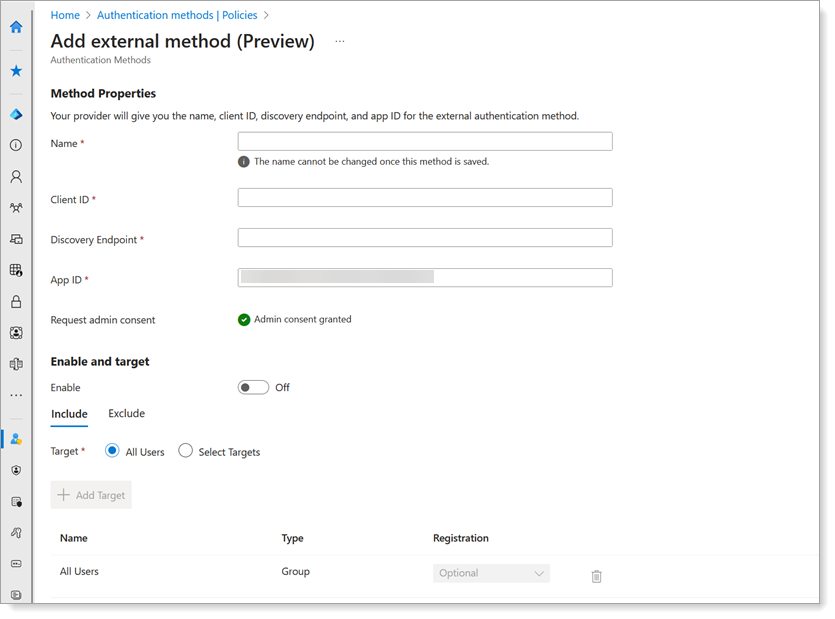
Set the following configurations.
Client ID
Paste the Client ID that you copied from the Identity Platform realm in Task A: Configure OIDC application.
Discovery Endpoint
This is the Redirect URI from the Identity Platform configuration that you also entered in Task B: Register an application in Microsoft Entra.
For example,
https://{SecureAuthURL}/{RealmName}/SecureAuth.aspxApp ID
This is the Application (client) ID from the app registration that you copied in Task B: Register an application in Microsoft Entra.
Confirm the Admin consent and select the targets for the policy.
Task D: Configure Conditional Access policy in Microsoft Entra
Configure your Conditional Access policy in Microsoft Entra. This will allow you to redirect users to the Identity Platform for authentication as an EAM.
Note
This task is completed in the Microsoft Entra admin center. For up-to-date, detailed instructions, refer to Microsoft's documentation for Tutorial: Secure user sign-in events with Microsoft Entra multifactor authentication and reach out to their support.
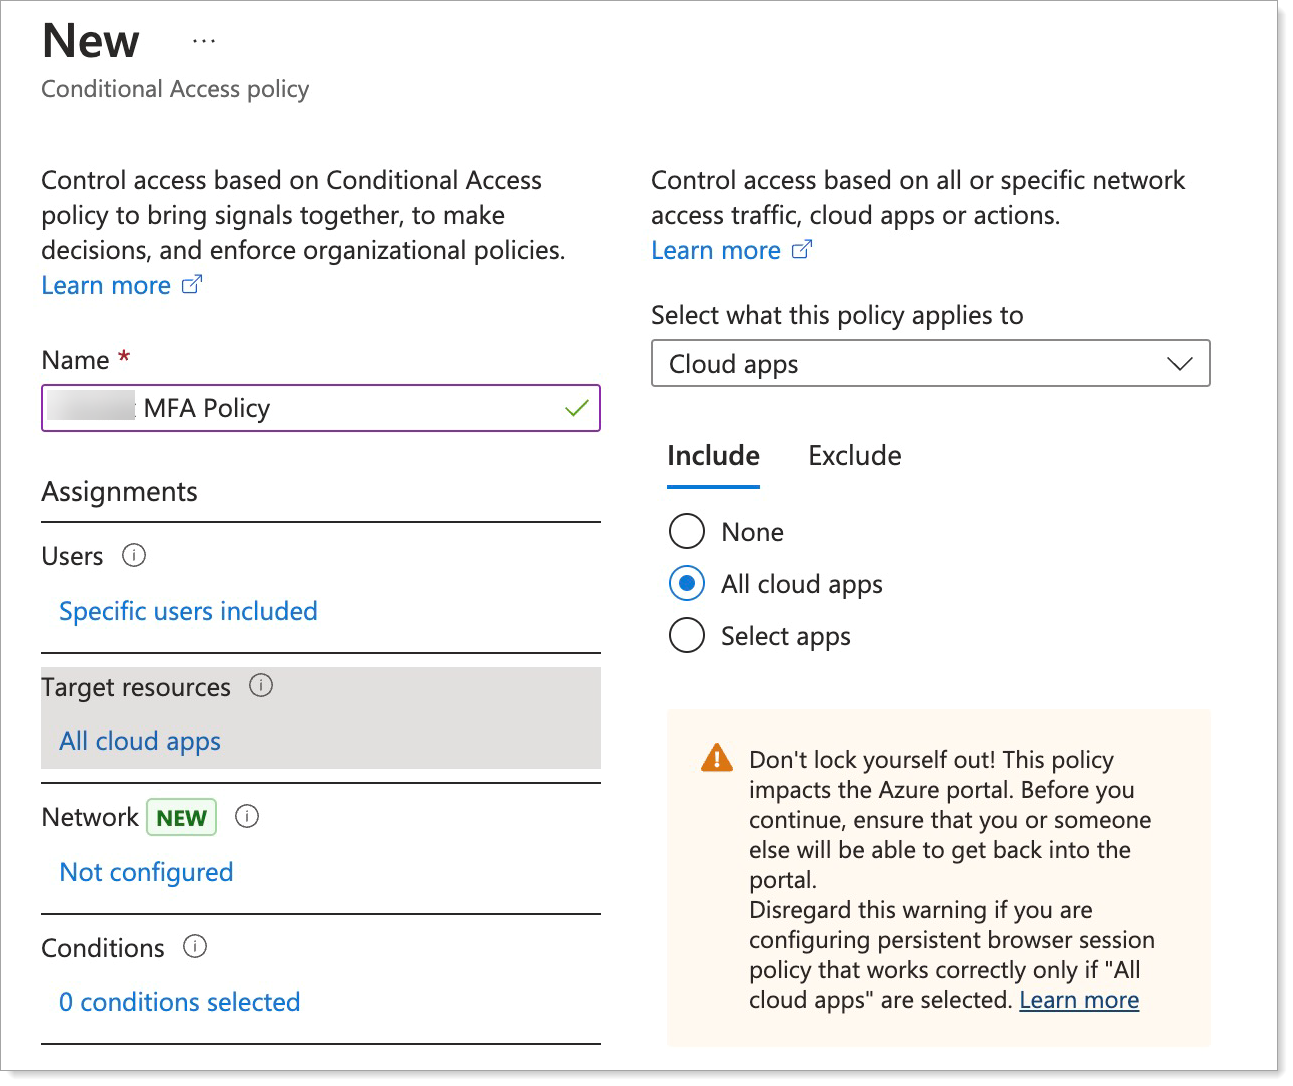
In the Microsoft Entra admin center, create a new policy for Conditional Access.
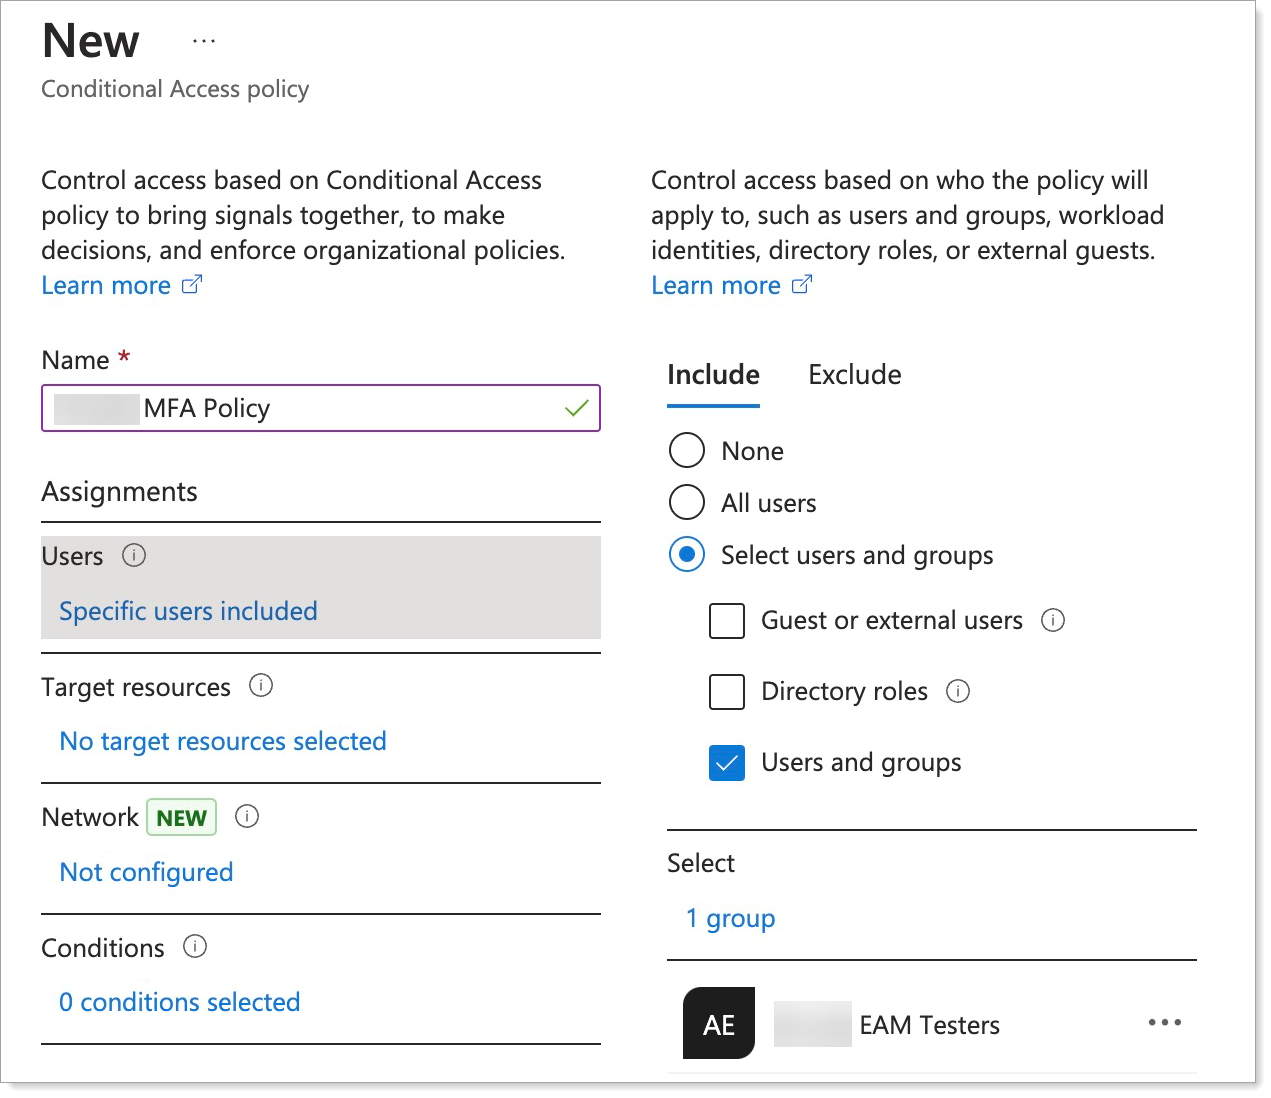
Select which users, groups, and applications to apply the policy to.
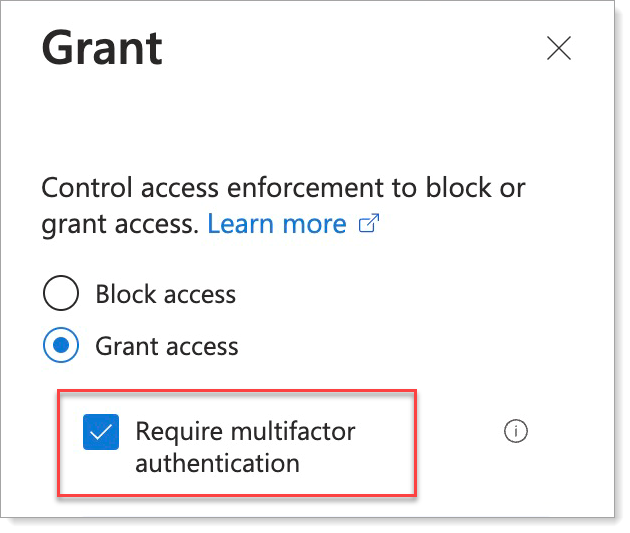
In the Grant section, select Grant Access and the Require multifactor authentication check box.
Set the Enable policy value to On.
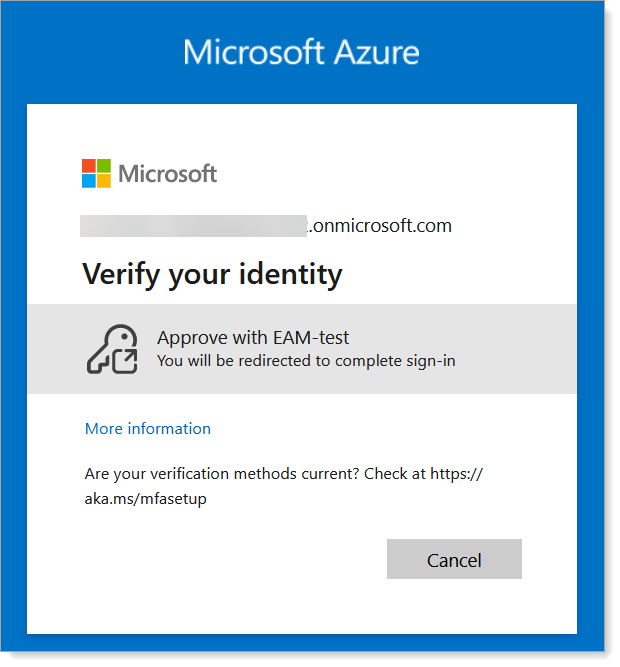
When you log in to Microsoft Azure, you see Approve with <name of IdP app> as an MFA option.