Email OTP
SecureAuth Connect Email OTP delivers one-time password (OTP) verification codes to users by email, using the built-in SecureAuth SMTP server or your organization's custom SMTP provider. When a user selects Email OTP during authentication, SecureAuth Connect sends an email containing the verification code to their registered email address.
Use cases
Email OTP fits when you need a factor that works on any device with an email client.
- Universal reach: Every user has an email address. No phone number, mobile app, or hardware key required.
- First-factor authentication: Email OTP can serve as a primary sign-in method, not just a second factor. Users enter their email, receive a code, and sign in without a password.
- Account recovery: Use Email OTP as a fallback when a user loses access to their phone or authenticator app.
- Low-friction onboarding: New users can authenticate immediately with the email address they registered with, before setting up stronger methods like passkeys or TOTP.
Email OTP is not the best fit when delivery speed is critical (email can be delayed by spam filters or server queues), or when users access email on shared or public devices where messages could be read by others.
How Email OTP delivery works
When a user selects email as their OTP delivery method, SecureAuth Connect sends an email to the user's registered email address. The email contains the OTP code. The user enters the code on the verification screen in their browser.
By default, SecureAuth Connect sends OTP emails through the built-in SecureAuth SMTP server. You can replace this with your organization's SMTP server to control deliverability, sender branding, and compliance with your email policies.
Prerequisites
- Tenant administrator access
- For custom SMTP: your SMTP server credentials (hostname, port, username, password)
Set up a custom SMTP provider (optional)
The built-in SecureAuth SMTP server works without configuration. Follow these steps only if you want to use your own SMTP server.
-
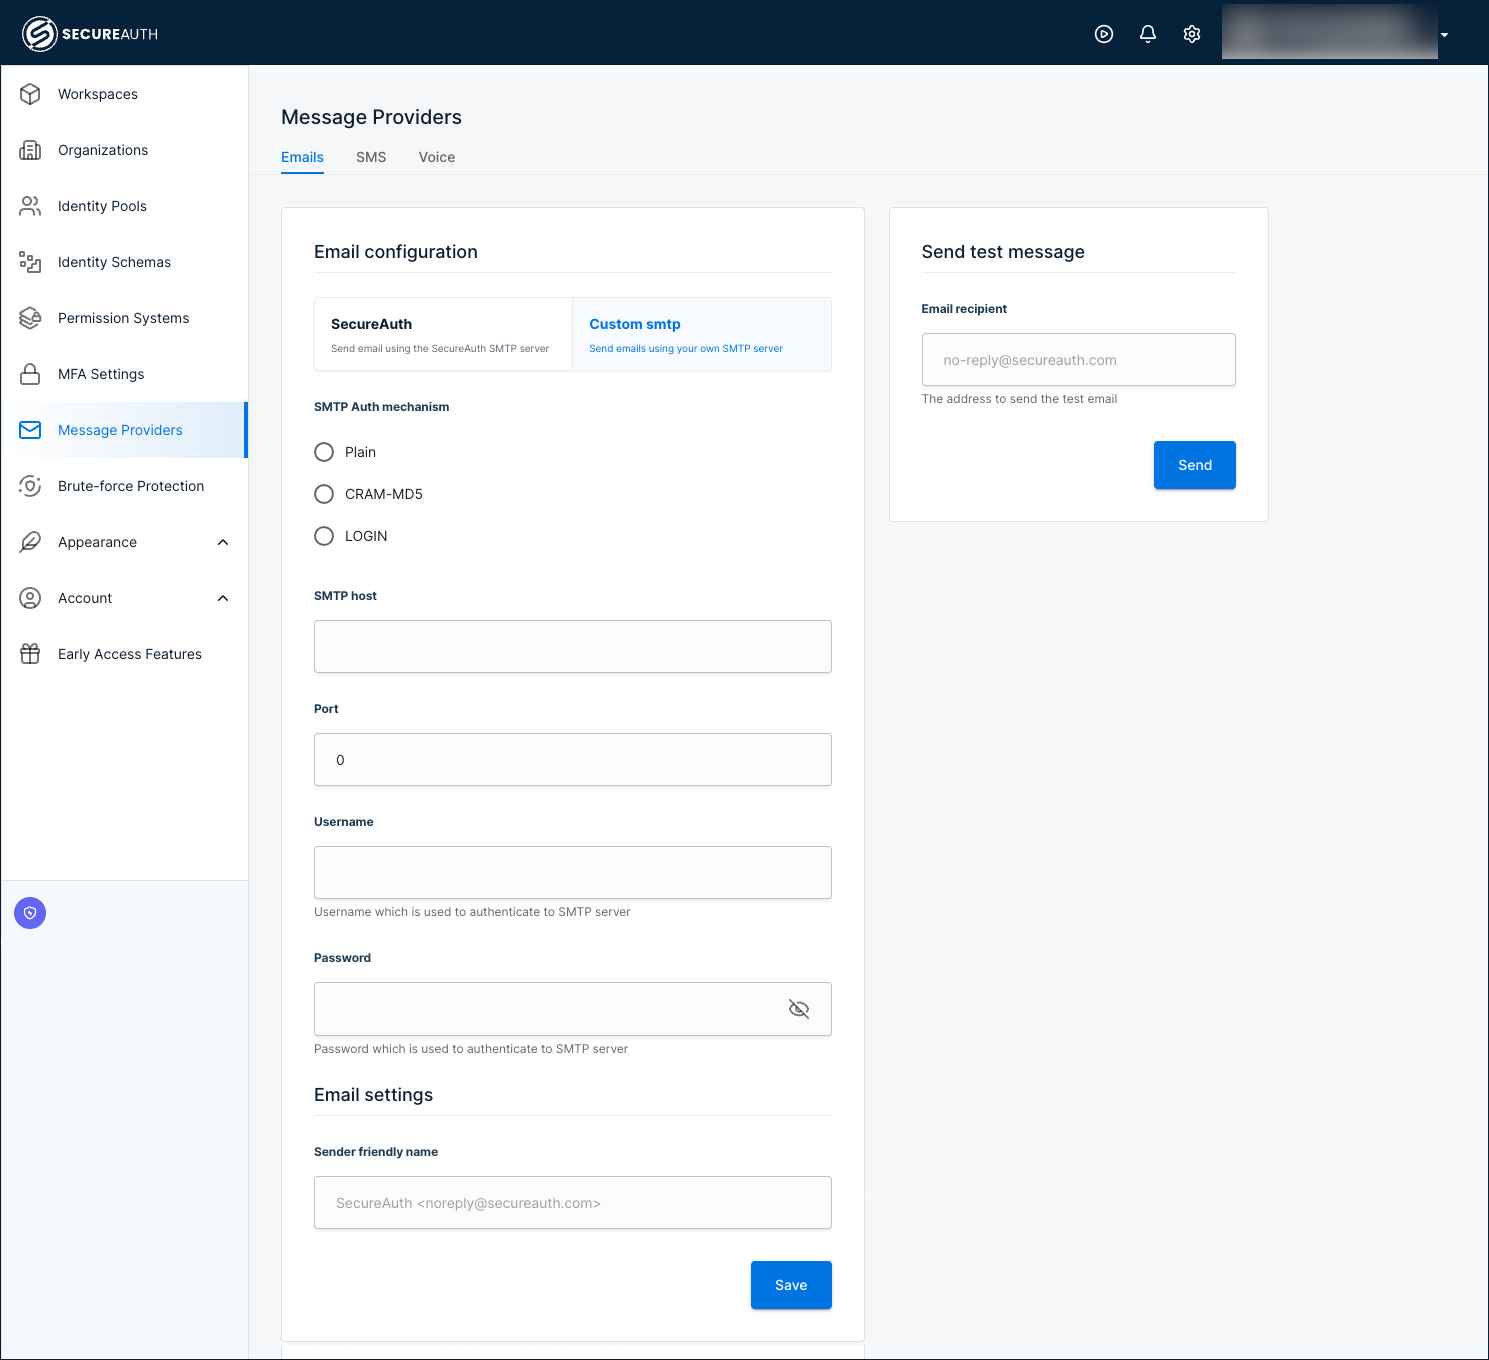
Go to Tenant Settings > Message Providers.
-
Select the Emails tab.
-
Select Custom SMTP as the provider.
-
Enter the required SMTP settings:
Setting Description SMTP Auth Mechanism Select Plain, CRAM-MD5, or LOGIN based on your server configuration. SMTP Host Your SMTP server hostname or IP address. SMTP Port The port number: 587(TLS),465(SSL),25(standard), or2525(alternative).Username The SMTP service account username. Password The SMTP service account password. Sender Friendly Name The display name that appears in the From field for recipients. -
Click Save.
Test your configuration
Use the built-in test option to verify email delivery:
-
Go to the Send test message section.
-
Enter a test email address.
-
Click Send. You should receive an email containing a test OTP code. Verify that the email arrives and the code displays correctly.
Set code length and lifetime
These are tenant settings and apply to all workspaces.
-
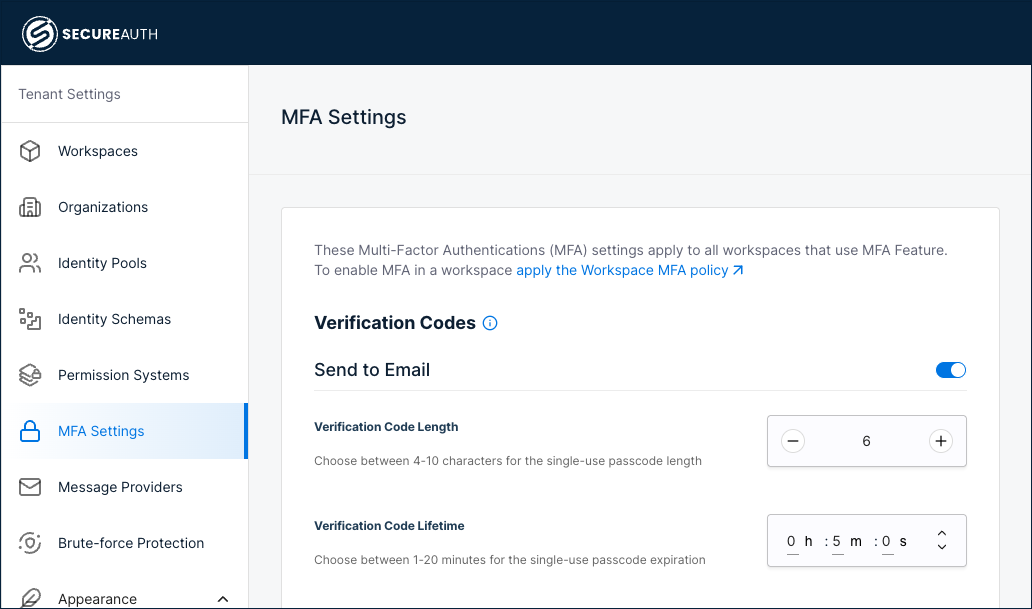
Go to Tenant Settings > MFA Settings.
-
Enable Send to Email.
-
Configure the verification code settings:
Setting Description Verification Code Length The number of digits in the code (for example, 6).Verification Code Lifetime How long the code remains valid (for example, 5minutes). -
Click Save.
Enable Email OTP as an authentication method
After configuring the email provider (or using the default), enable Email OTP as an authentication method:
-
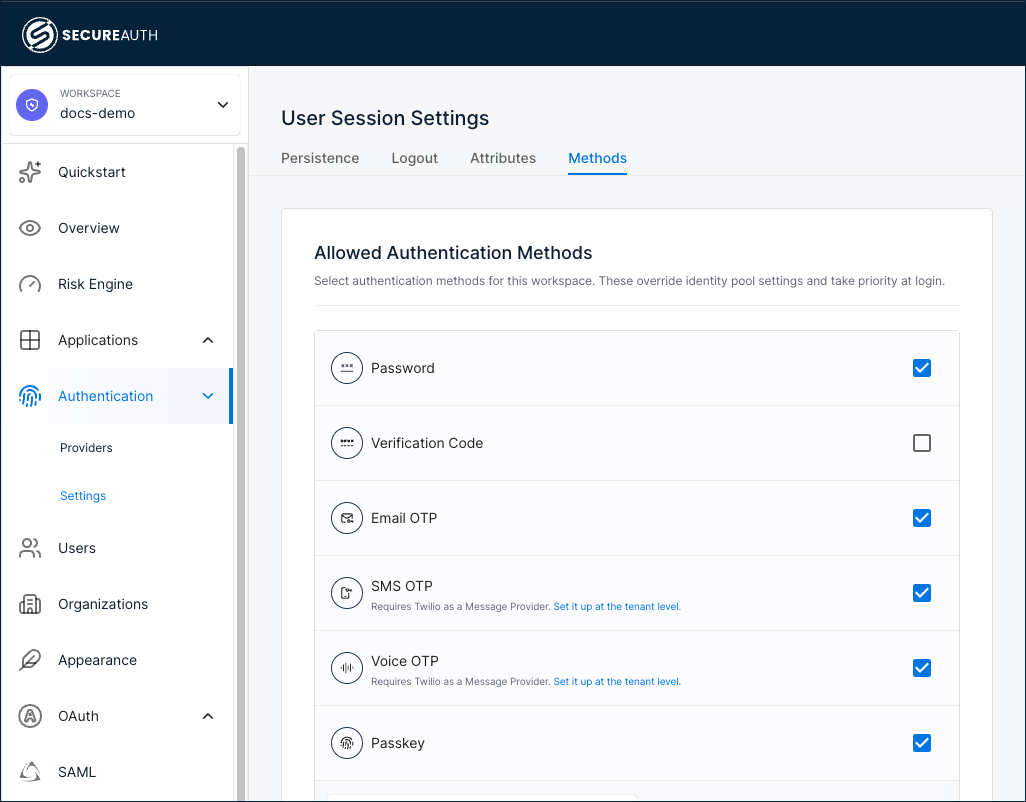
In your workspace, go to Authentication > Settings.
-
Select the Methods tab.
-
Select the Email OTP check box.
-
Click Save.
Add Email OTP as a sign-in method
Add Email OTP as a first-factor or second-factor authentication method for your users.
-
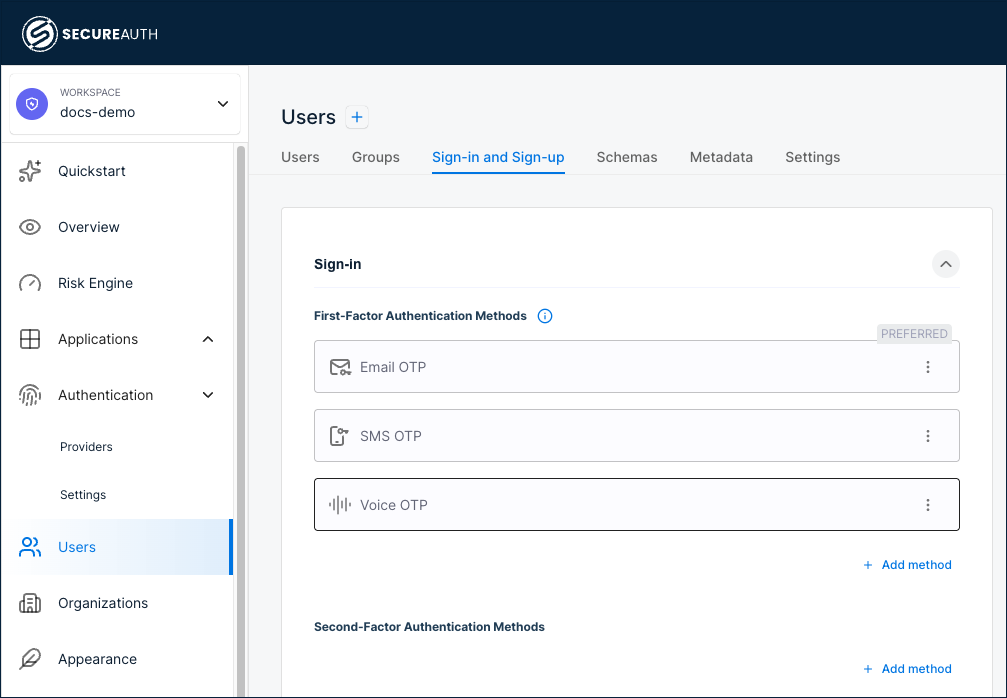
Go to Users > Sign-in and Sign-up.
-
Under First-Factor Authentication Methods or Second-Factor Authentication Methods, click + Add method and select Email OTP.
-
(Optional) To make Email OTP the preferred method shown at sign-in, click the three-dot menu and select Make Preferred. Only one method can be preferred per identity pool.
-
Click Save.
OTP rate limiting
Two different limits apply to OTP, and they guard against different attacks. Check which one a blocked request has hit before you change any settings.
How many codes can be sent
OTP send requests are capped at 2 per minute, counted separately for each user and each address (phone number or email). Separate counters mean that a flood aimed at one address does not use up another user's allowance.
The cap is on by default and applies to every OTP flow: sign-in, activation, self-registration, credential reset, resend requests, and the OTP endpoints in the Admin and System APIs. Requests over the limit return HTTP 429 with the message Rate limit exceeded.
The cap protects against attackers triggering large volumes of messages to inflate carrier charges (known as SMS pumping or toll fraud on phone channels), and against repeated resend requests aimed at a single user.
You cannot change this limit from the admin portal. In self-managed deployments, adjust limits.send_otp_limit in the platform configuration. See SecureAuth Platform Configuration Reference.
How many times a code can be guessed
Limits on incorrect code submissions are configured separately, under Tenant Settings > Brute-force Protection. Use the Identity code verify protection type for SMS and email codes, and MFA for codes used as a second factor. See Configure brute force protection.