Configure custom email providers
Configure SecureAuth to send verification codes, account notifications, and password reset emails through your organization's SMTP infrastructure instead of the default provider.
💡 Why this matters
Custom email providers improve deliverability, maintain brand consistency, and ensure compliance with your organization's email policies.
Configure SMTP settings
-
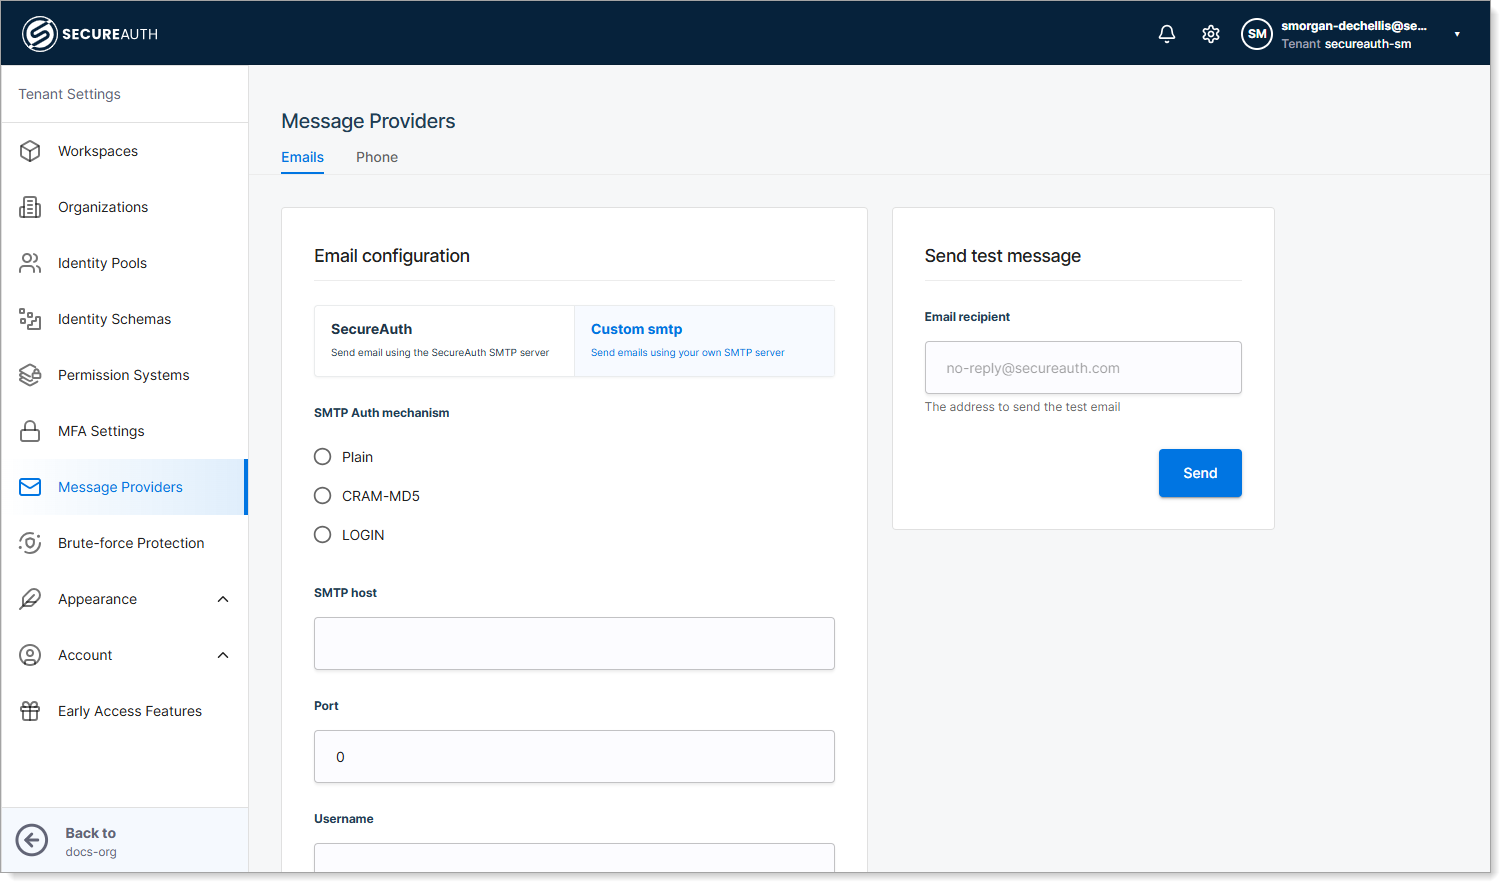
Go to Tenant Settings > Message Providers.
-
Select the Emails tab.
-
Choose Custom SMTP as the provider.
-
Set the following values:
Setting Instructions SMTP Auth Mechanism Choose Plain (basic), CRAM-MD5 (secure), or LOGIN (standard) based on server support SMTP Host Enter your SMTP server hostname or IP address SMTP Port Use 587 (TLS recommended), 465 (SSL), 25 (standard), or 2525 (alternative) Username Enter your SMTP service account username Password Enter the password for your SMTP service account Sender Friendly Name Enter your organization name as it appears to recipients Email Subject Enter default subject line (like "Account Verification Code") Verification Message Enter email body text using [[OTP]]as placeholder for the code⚠️ Security note: Use dedicated service accounts with minimal privileges for SMTP authentication

-
Save your changes.
Verify: Send test message → Check recipient inbox for delivery within 2 minutes
Test email delivery
- Scroll to Send test message section.
- Enter a test email address.
- Send test message.
- Confirm delivery and formatting.
Next step: Configure email templates