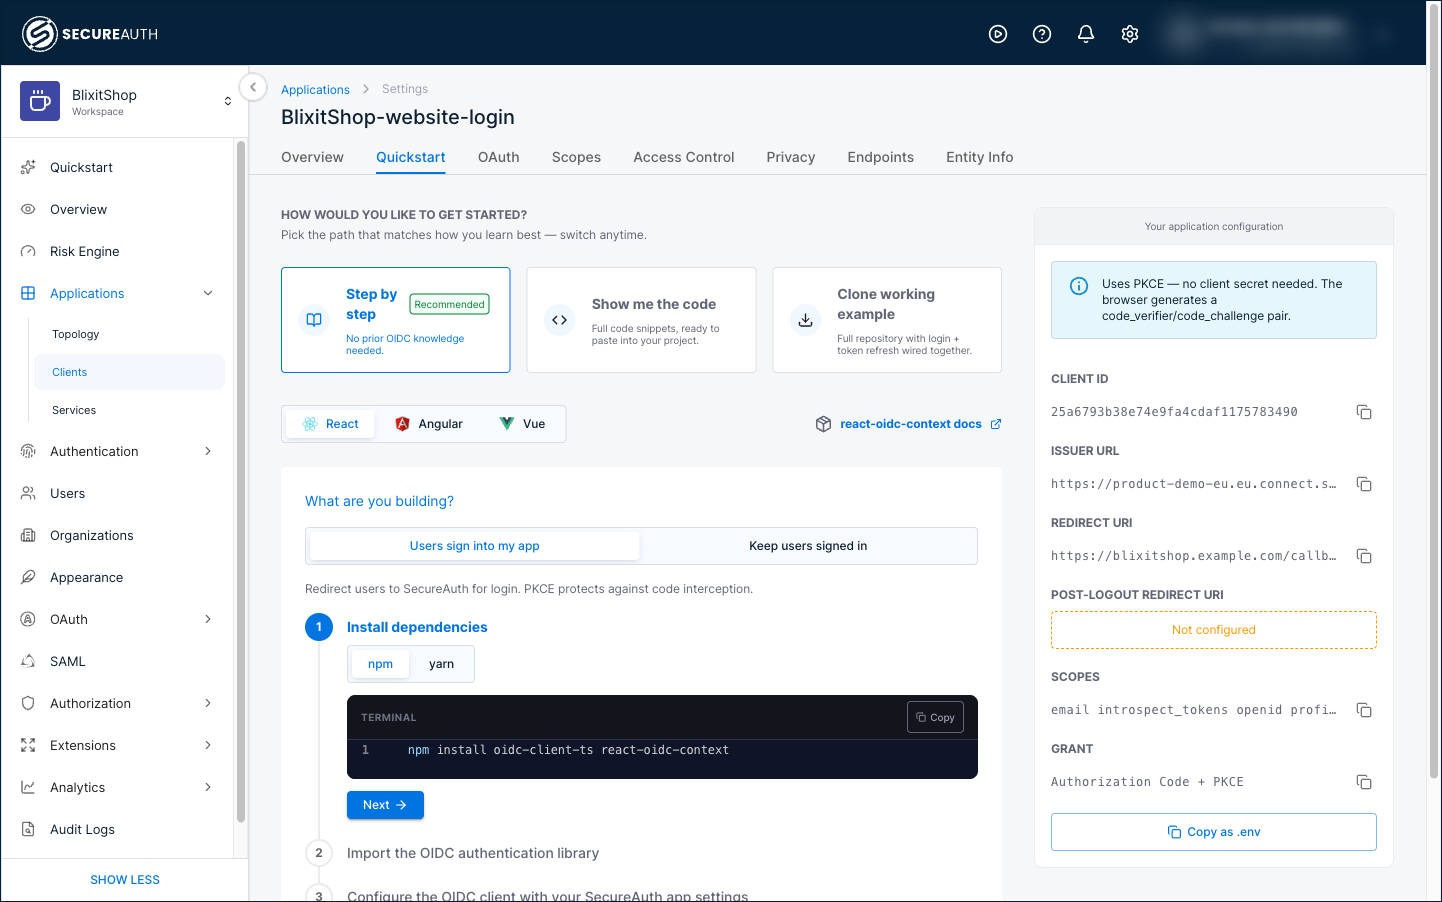
Integrate your application using the Quickstart tab
When you register an application, SecureAuth and your application need to know how to talk to each other. The Quickstart tab makes that connection concrete: it generates integration code specific to your framework, pre-filled with your application's actual configuration. You don't need to look up or manually copy any values.
Use the Quickstart tab
Follow these steps to generate framework-specific integration code for your registered application.
-
In your workspace, go to Applications and open a registered application.
-
Select the Quickstart tab.
-
Under How would you like to get started?, choose the path that fits how you want to work. You can switch paths at any time.
- Step by step (recommended) – Walk through each integration step with its code. No prior OIDC knowledge needed.
- Show me the code – See the full code snippets together, ready to paste into your project.
- Clone working example – Get a complete working project from the SecureAuth quickstart samples repository, with login and token refresh already wired together.
-
Select your framework. The Quickstart generates library-specific code, so the instructions differ from one framework to the next, and each framework links to its underlying library's documentation. The available frameworks depend on your application type (see Available frameworks).
-
If your application type supports more than one flow, choose one under What are you building?:
- Users sign into my app – The standard sign-in flow. Users are redirected to SecureAuth to authenticate, then returned to your application. Uses Authorization Code with PKCE.
- Keep users signed in – Silently renews a user's session when their access token expires, without asking them to sign in again. Requires the
offline_accessscope.
SAML service providers use a single flow (SAML SSO), so this option doesn't appear for them.
-
Follow the instructions or copy the code into your application.
Your application configuration
The Your application configuration panel on the right side of the tab shows the values specific to your registered application. The integration code uses these values to connect to your workspace, so you don't need to look them up or copy them manually.
Select Copy as .env to export all values as a configuration file. The file type matches your framework (for example, .env for Node.js, local.properties for Android, or Config.xcconfig for iOS). Most frameworks load this file automatically in local development, keeping your configuration out of your source code.
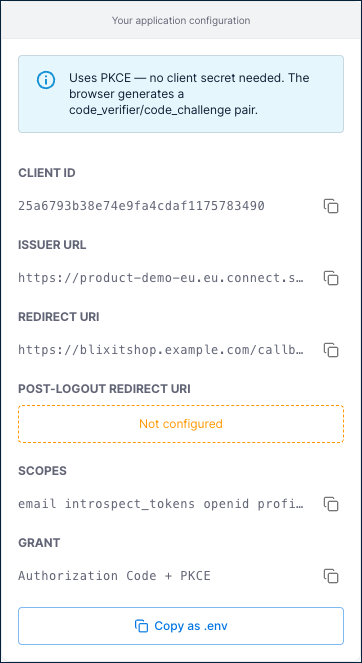
The values shown depend on your application type. OAuth applications (single-page, server-side web, and mobile or desktop) show the following:
| Value | Description |
|---|---|
| Client ID | Identifies your application to SecureAuth. Think of it as a username for your application. |
| Client Secret | A confidential value that server-side web applications use to authenticate to SecureAuth. Shown for server-side web applications only. Single-page and mobile or desktop applications are public clients and don't use a secret. |
| Issuer URL | The address of your SecureAuth workspace. Your application uses this to discover login endpoints and verify tokens. |
| Redirect URI | Where SecureAuth sends users after they successfully sign in. Must exactly match what you set when registering the application. |
| Post-Logout Redirect URI | Where SecureAuth sends users after they log out. |
| Scopes | Define what user information your application can access after sign-in (for example, profile data and email address). |
| Grant | The OAuth flow your application uses, determined by the application type you selected at registration. |
SAML service providers show SAML-specific values instead, such as the SP Entity ID, SP ACS URL, SAML IdP Single Sign-On URL, and the IdP signing certificate.
Once you've copied the configuration and followed the framework steps, your application is connected to SecureAuth and ready to authenticate users.
Available frameworks
The frameworks available in the Quickstart tab depend on your application type. Each type uses a different authentication flow, so the available libraries differ.
| Application type | Frameworks |
|---|---|
| Single-page application (SPA) | React, Angular, Vue |
| Server-side web application | .NET, Java, Node.js |
| Native or mobile application | Android, iOS, React Native |
| SAML service provider | .NET, Java, Node.js |