Add a custom application
A custom application is an OAuth client you configure from scratch. Unlike the preset application types, which come with a fixed OAuth flow, a custom application lets you choose the grant types, authentication method, and response types yourself. Use it when your application's requirements don't match a preset, or when you need an OpenID Connect app in a workspace that doesn't offer the preset OIDC types.
When to use a custom application
Choose the custom type when:
- No preset type fits. Your application needs a specific combination of OAuth grants, authentication methods, or response types that the single-page, server-side web, mobile, or service presets don't provide.
- You're registering an OpenID Connect app in a B2B or partner workspace. These workspaces use the client credentials grant by default and don't offer the single-page, server-side web, or mobile presets. Custom is how you register a standard OpenID Connect (Authorization Code) application there.
For a standard consumer application, prefer the preset type that matches, such as single-page or server-side web. The presets fill in sensible defaults and include a Quickstart tab. For an application that authenticates with SAML, use a SAML service provider instead.
Before you begin
You'll need:
- Access to your workspace in SecureAuth
- The OAuth flow your application uses (for example, Authorization Code with PKCE) and its redirect URI
Add the application
-
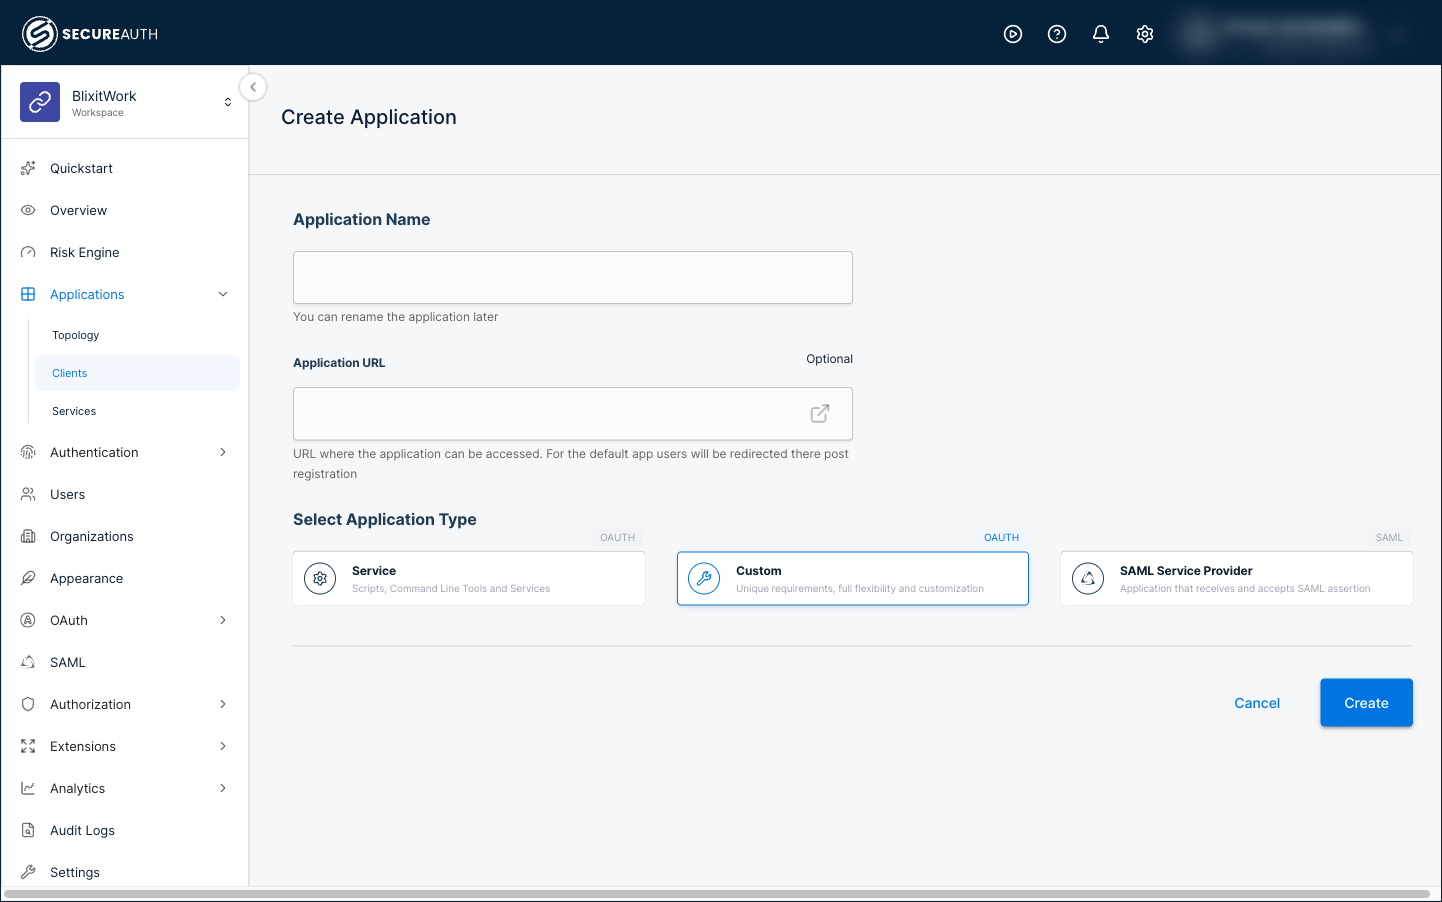
In your workspace, select Applications > Clients > Create client.
-
Enter a name, select the Custom type, and click Create.
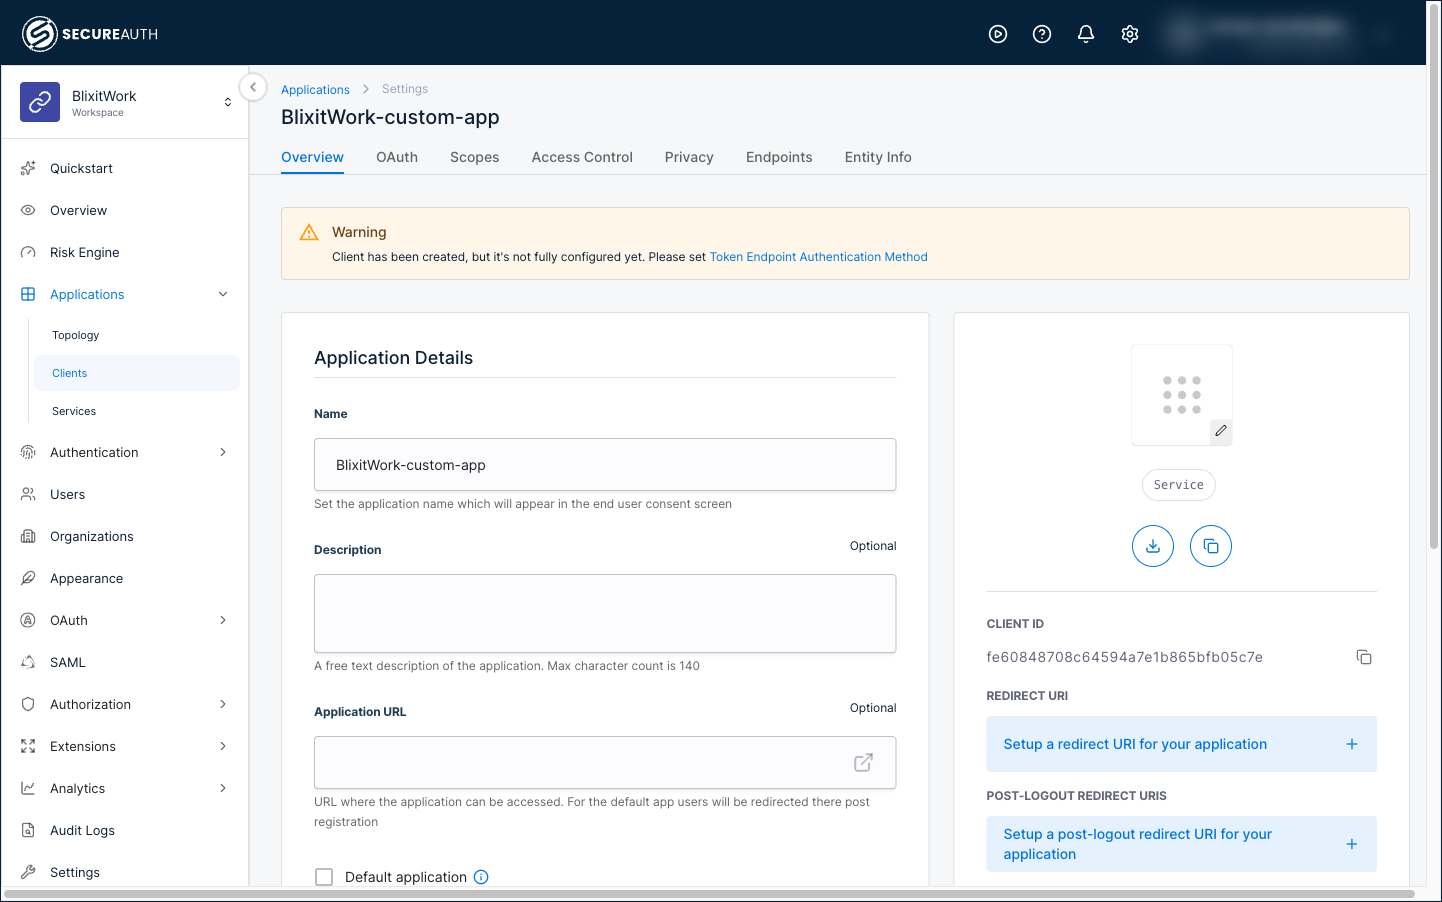
A custom application is created without a preset OAuth configuration, so it isn't ready to use yet. The Overview tab shows a warning until you set the token endpoint authentication method in the next step.
Configure the application
Because a custom application starts empty, you define its OAuth behavior yourself. At a minimum, set:
- Token endpoint authentication method – Set this first to clear the setup warning. Choose the method that matches your application, such as
client_secret_postfor a confidential app, ornonefor a public app that uses PKCE. - Grant types – Enable the grants your flow uses, such as Authorization Code (with PKCE) for user sign-in or Refresh Token to renew sessions.
- Redirect URI – On the Overview tab, add the callback URL where SecureAuth returns users after they sign in.
- Scopes – Subscribe the application to the scopes it needs.
For the full set of OAuth options and what each one does, see Configure OAuth settings for client applications.
Integrate with your application
Custom applications don't include a Quickstart tab, so there's no generated sample code. Integrate using your OpenID Connect or OAuth library, and copy the values your app needs – Client ID, issuer URL, and endpoints – from the Overview and Endpoints tabs.
To decide which flow to implement, see OAuth 2.0 Authorization Code flow.