Apple
Set up Apple as a social login provider in SecureAuth Connect so users can sign in with their Apple Account.
Apple shares user data (name, email) only during the first login. To retain this data for future logins, enable Just-in-Time (JIT) provisioning. See Provisioning.
Register Apple as a provider
-
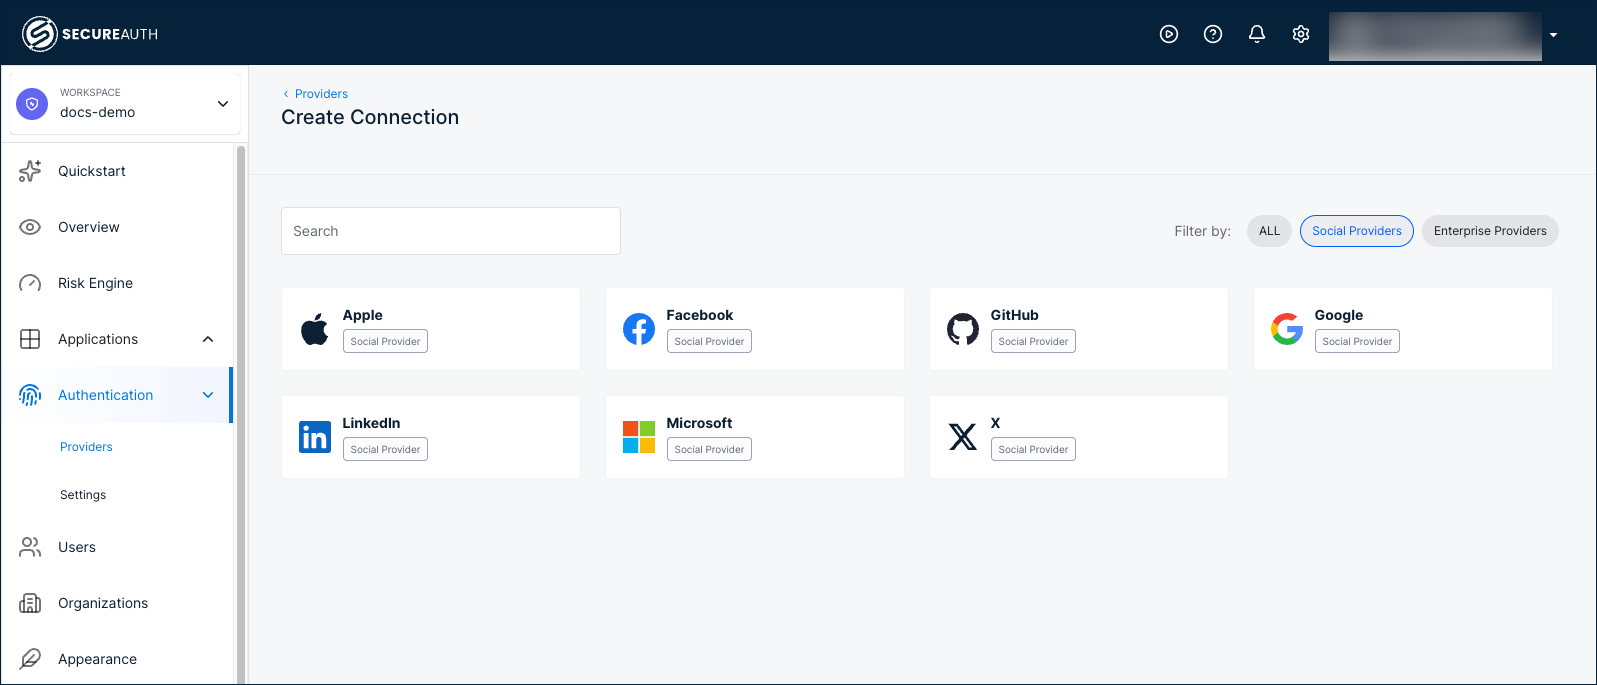
In your workspace, go to Authentication > Providers.
-
Click Create Connection.
-
Filter by Social Providers and select Apple.
-
Choose a registration mode:
Mode Description Embedded Uses a client application registered by SecureAuth. No developer portal registration required. The Apple sign-in page shows SecureAuth's app identity. Bring your Own Uses a client application registered by your organization. The Apple sign-in page shows your app's name. Requires registering an application in the Apple Developer portal to obtain a Client ID and Client Secret. 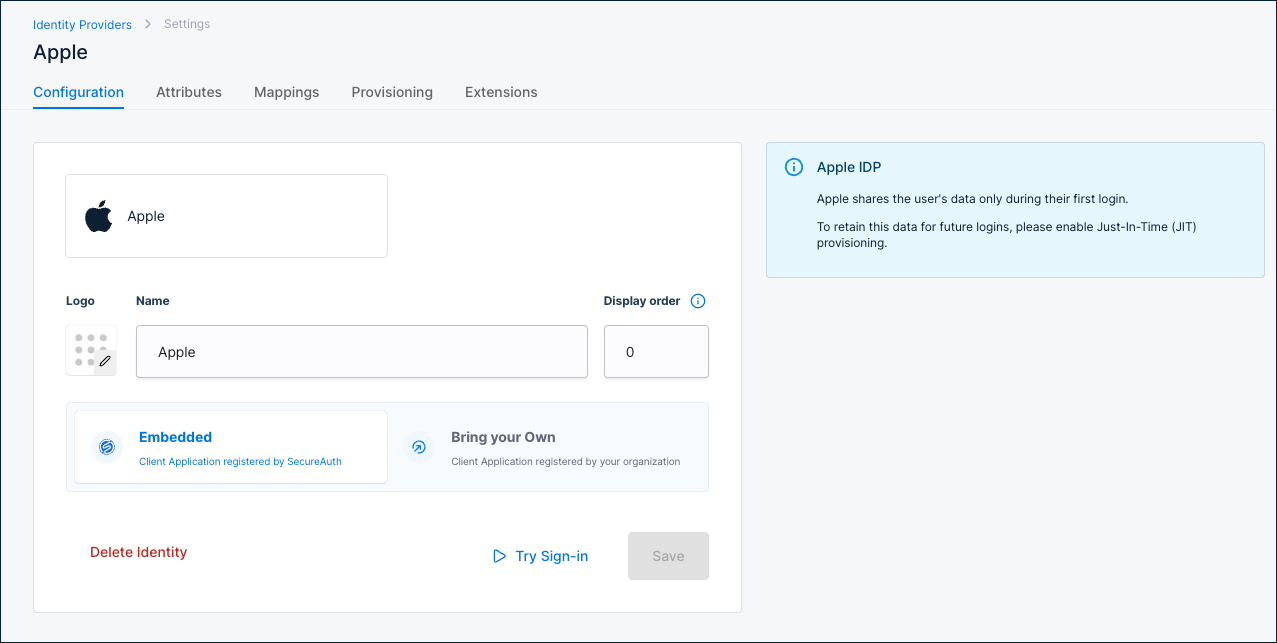
Configuration
| Setting | Description |
|---|---|
| Name | Display name for this provider. Default: Apple. |
| Display order | Controls the position of this provider on the sign-in page. Default: 0. |
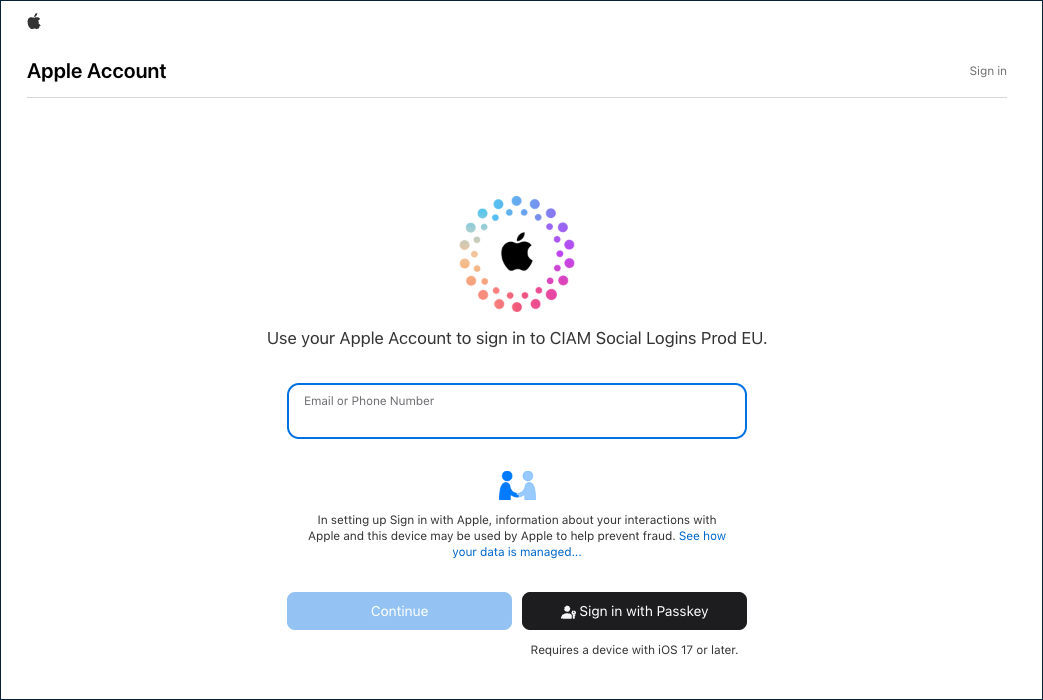
Use Try Sign-in to test the Apple sign-in flow.
Attributes
Apple returns the following attributes after authentication:
| Connector name | Friendly name | Data type | Scope |
|---|---|---|---|
email | String | User Info | |
firstName | First name | String | User Info |
lastName | Last name | String | User Info |
name | Name | String | User Info |
Apple returns fewer attributes than other social providers. If you need additional user data, collect it during registration or through a post-authentication extension.
To add custom attributes, click + Add attribute.
Mappings
Default attribute mappings from Apple to the SecureAuth authentication context:
| Source | Apple source name | SecureAuth target name |
|---|---|---|
| User Info | ||
| User Info | First name | Given name |
| User Info | Last name | Family name |
| User Info | Name | Name |
To customize, click + Add mapping or + Add static mapping.
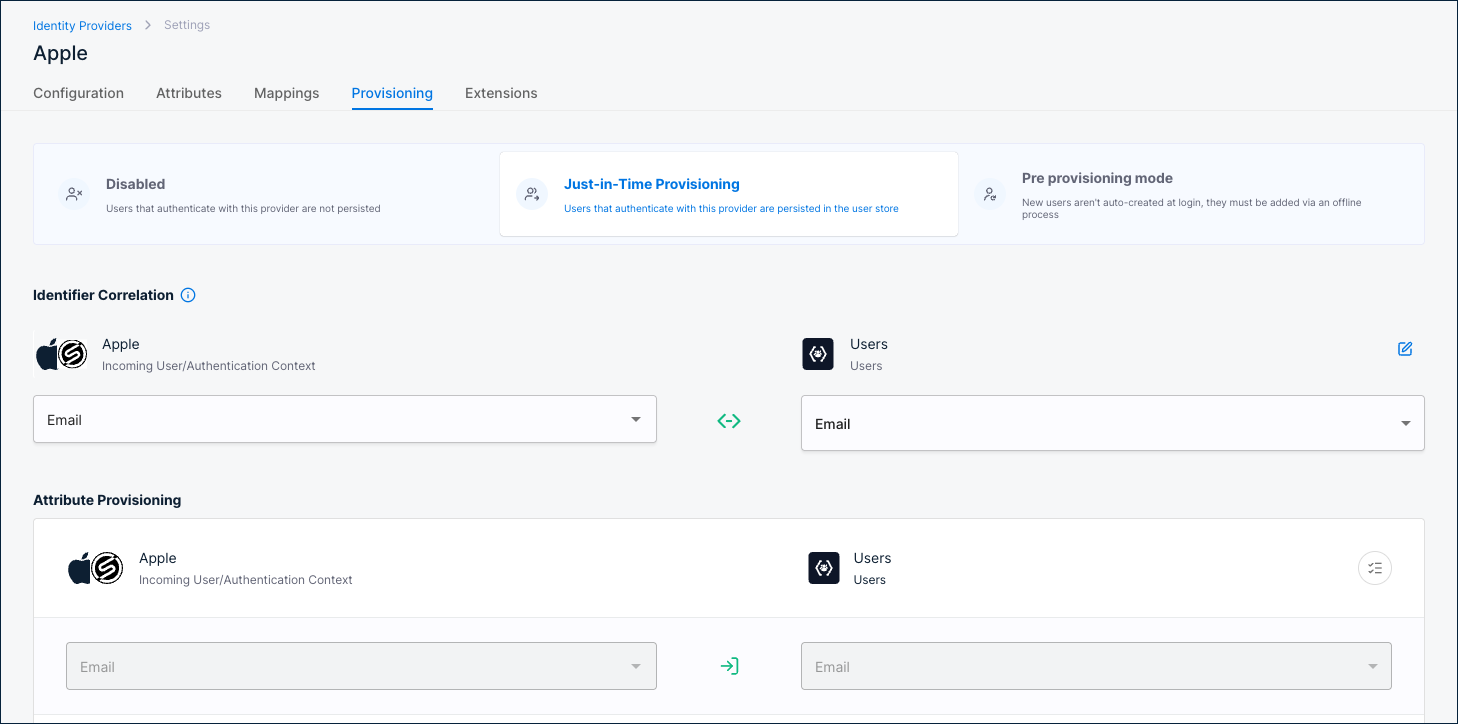
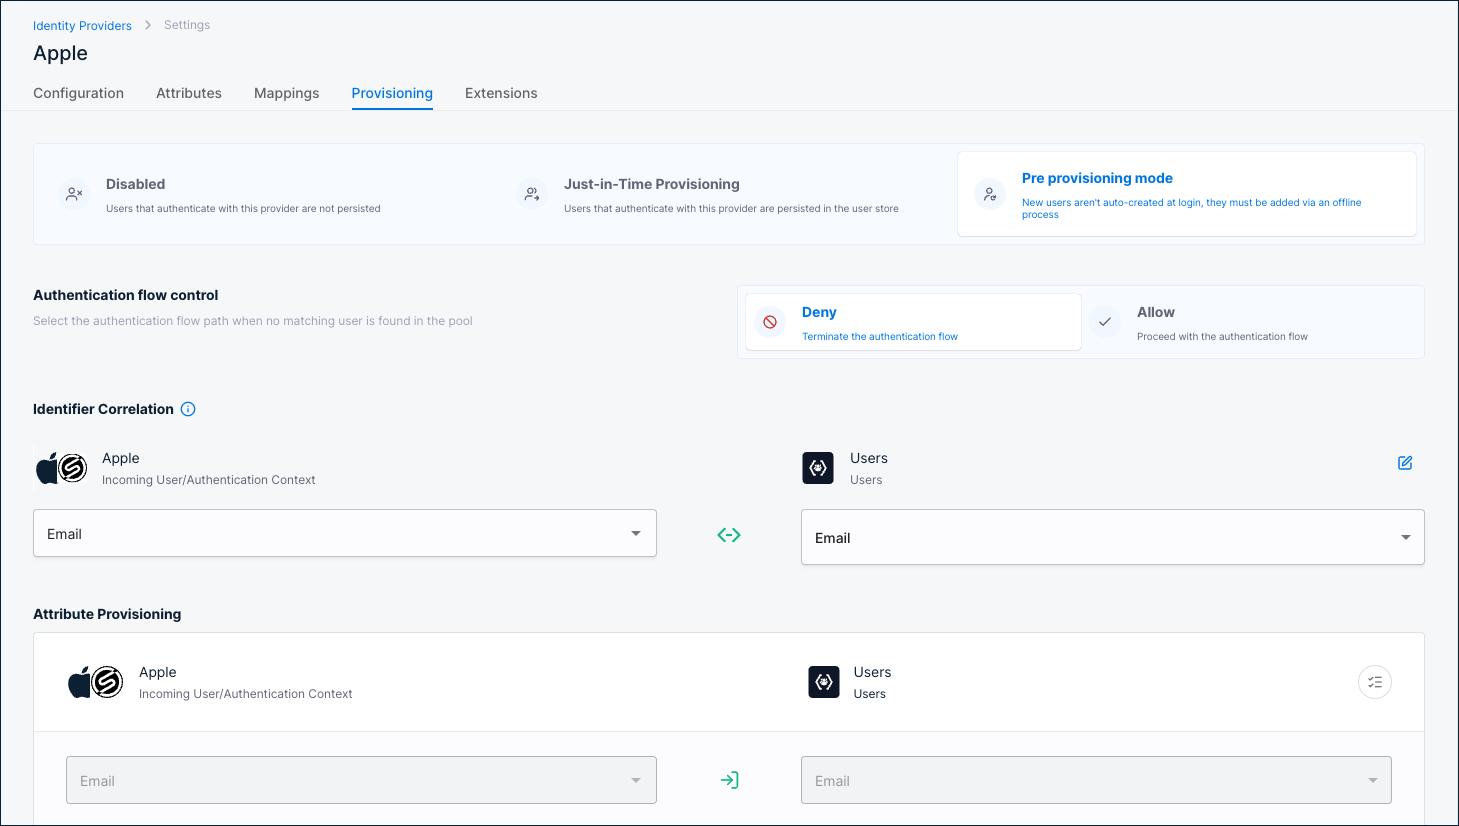
Provisioning
Provisioning controls what happens when a user authenticates through Apple.
Enable Just-in-Time Provisioning for Apple. Apple only shares user data (name, email) during the first login. Without JIT provisioning, this data is not stored and is unavailable on subsequent logins.
Disabled
Users are not persisted in the user store. Authentication succeeds but no user record is created. Not recommended for Apple due to the first-login data limitation.
Just-in-Time Provisioning
Users are persisted in the user store on first login. Recommended for Apple.
Identifier Correlation
Maps the incoming Apple identity to an existing user. Default: Apple Email ↔ Users Email.
Attribute Provisioning
Maps Apple attributes to user profile fields. Defaults:
Email→EmailGiven name→First nameFamily name→Last name
Pre provisioning mode
Users must already exist in the user store before they can authenticate. New users are not auto-created at login; they must be added via an offline process.
Authentication flow control
Select what happens when no matching user is found:
- Deny – Terminate the authentication flow.
- Allow – Proceed with the authentication flow.
Identifier Correlation
Maps the incoming Apple identity to an existing user. Default: Apple Email ↔ Users Email.
Attribute Provisioning
Maps Apple attributes to user profile fields. Defaults:
Email→EmailGiven name→First nameFamily name→Last name
Extensions
| Extension | Description |
|---|---|
| Post Authentication script | A server-side script that runs after Apple authentication completes. Click Manage Script to configure. |
| Post Authentication application | A custom application that receives a callback after Apple authentication completes. Click Manage Custom App to configure. |