Set up Google as a social login provider in SecureAuth Connect so users can sign in with their Google account.
Register Google as a provider
-
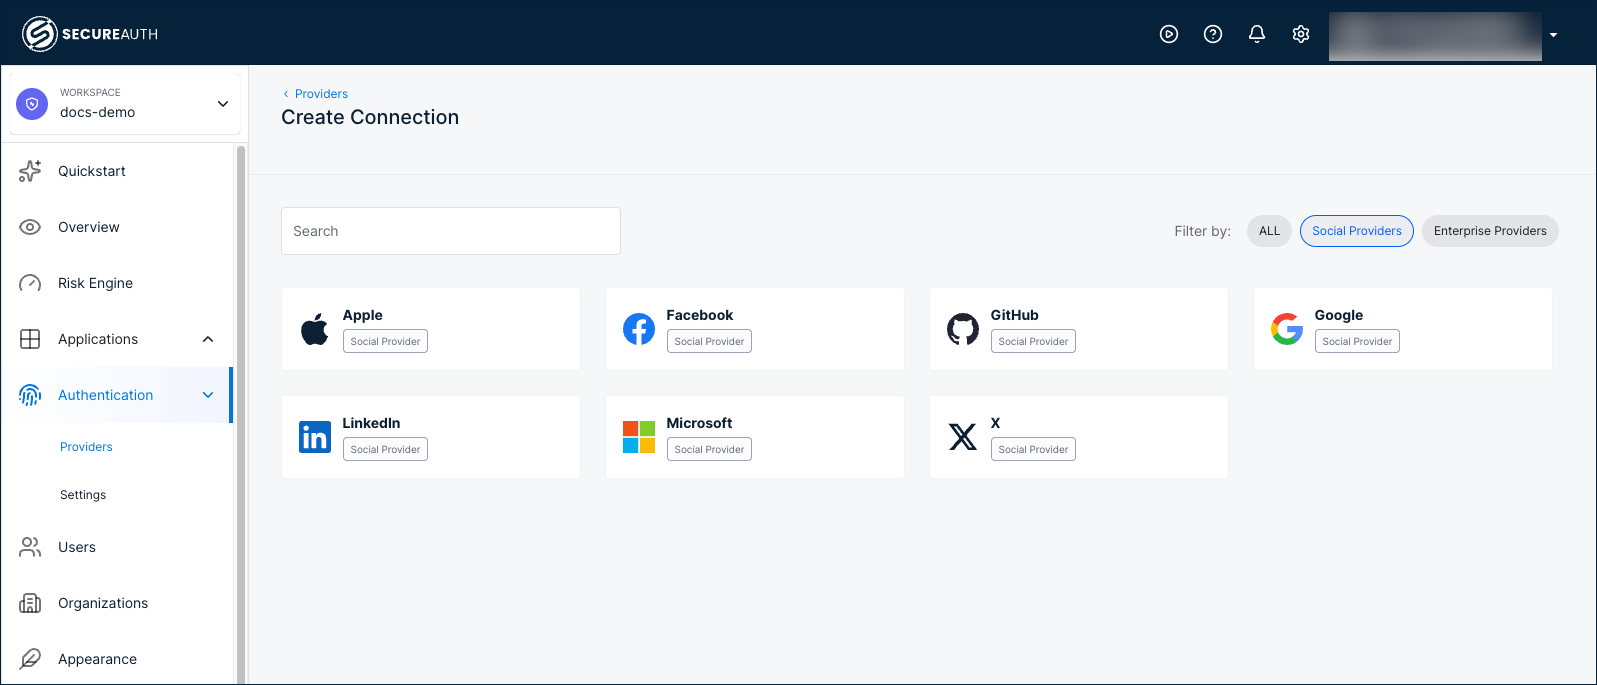
In your workspace, go to Authentication > Providers.
-
Click Create Connection.
-
Filter by Social Providers and select Google.
-
Choose a registration mode:
Mode Description Embedded Uses a client application registered by SecureAuth. No developer portal registration required. Bring your Own Uses a client application registered by your organization. Requires registering an application in the Google Cloud Console to obtain a Client ID and Client Secret. 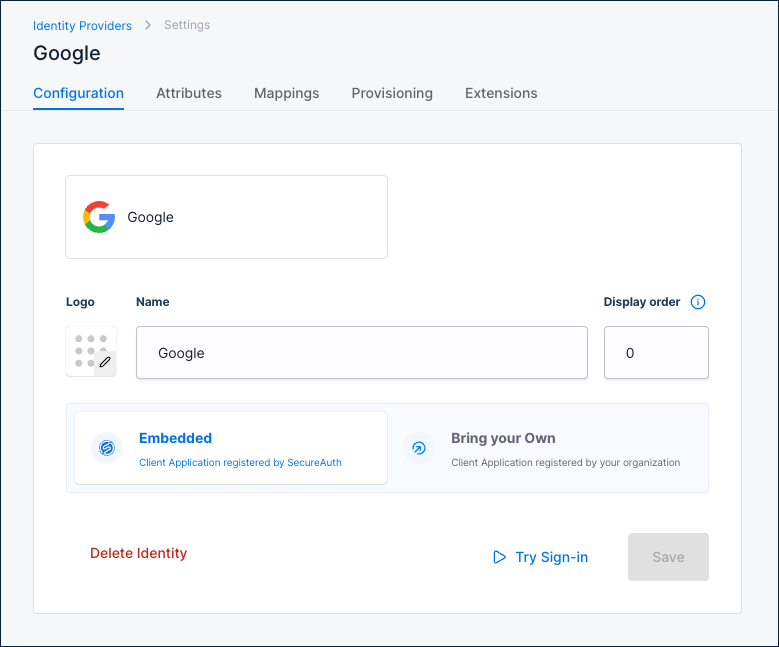
Configuration
| Setting | Description |
|---|---|
| Name | Display name for this provider. Default: Google. |
| Display order | Controls the position of this provider on the sign-in page. Default: 0. |
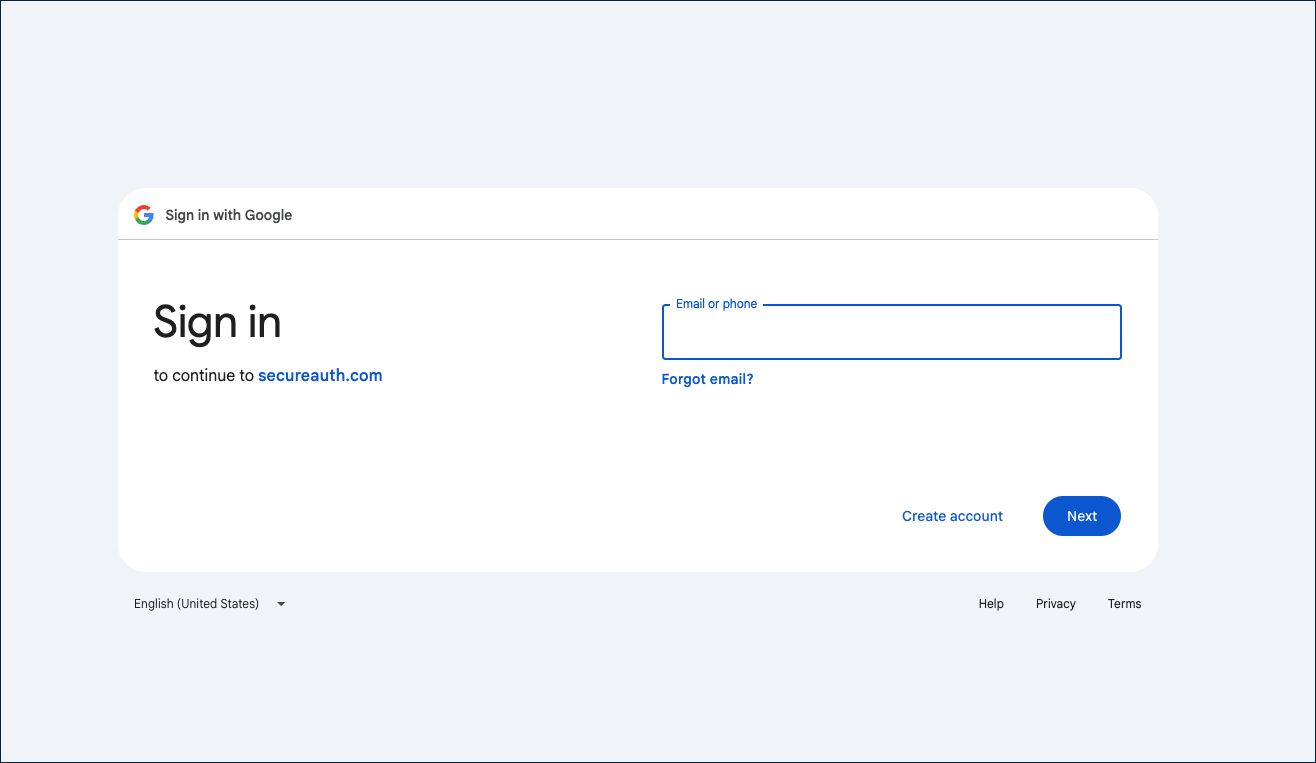
Use Try Sign-in to test the Google sign-in flow. Use Delete Identity to remove this provider.
Attributes
Google returns the following attributes after authentication:
| Connector name | Friendly name | Data type | Scope |
|---|---|---|---|
sub | Subject | String | ID token |
aud | App's Application ID | String | ID token |
iss | Issuer | String | ID token |
iat | Issue time | Number | ID token |
exp | Expiration time | Number | ID token |
email | String | ID token | |
email_verified | Email verified | Boolean | ID token |
name | Name | String | ID token |
given_name | Given name | String | ID token |
family_name | Family name | String | ID token |
Google returns the most attributes of any social provider, including token metadata (sub, aud, iss, iat, exp) and email_verified to confirm whether the user's email address has been verified by Google.
To add custom attributes, click + Add attribute.
Mappings
Default attribute mappings from Google to the SecureAuth authentication context:
| Source | Google source name | SecureAuth target name |
|---|---|---|
| ID token | Subject | Subject |
| ID token | Name | Name |
| ID token | ||
| ID token | Family name | Family name |
| ID token | Given name | Given name |
To customize, click + Add mapping or + Add static mapping.
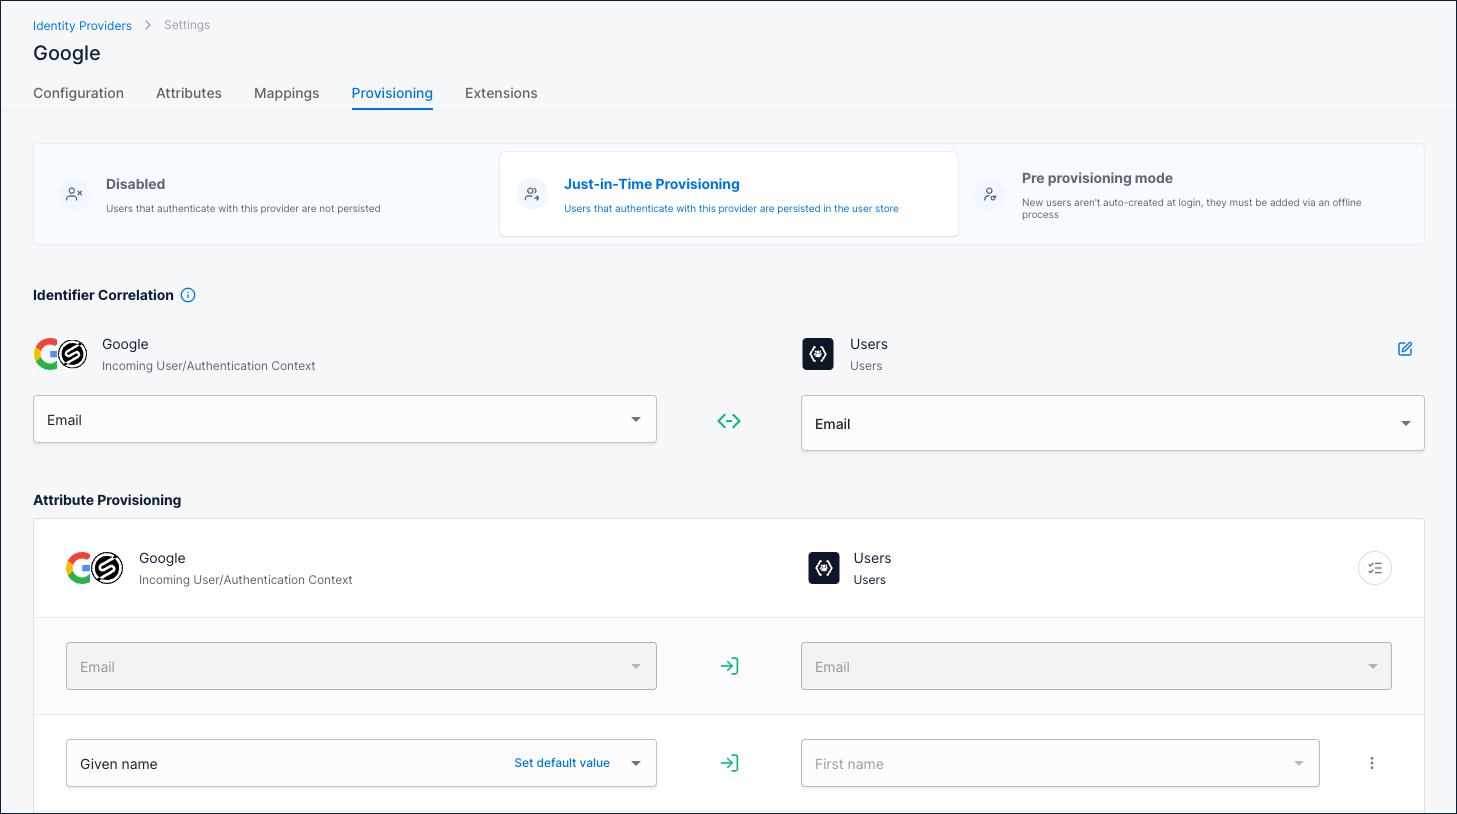
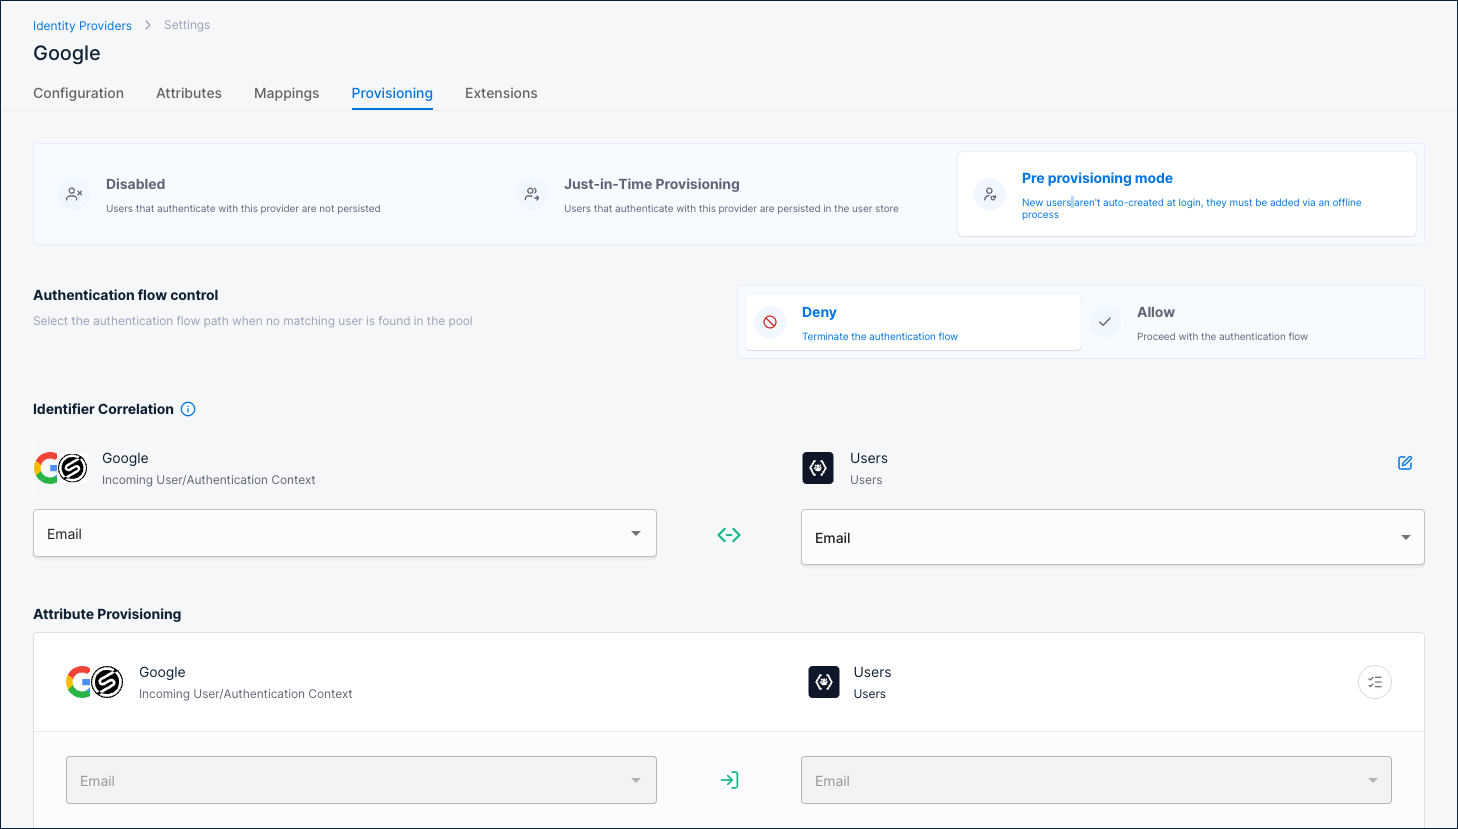
Provisioning
Provisioning controls what happens when a user authenticates through Google.
Disabled
Users are not persisted in the user store. Authentication succeeds but no user record is created.
Just-in-Time Provisioning
Users are persisted in the user store on first login.
Identifier Correlation
Maps the incoming Google identity to an existing user. Default: Google Email ↔ Users Email.
Attribute Provisioning
Maps Google attributes to user profile fields. Defaults:
Email→EmailGiven name→First nameFamily name→Last name
Pre provisioning mode
Users must already exist in the user store before they can authenticate. New users are not auto-created at login; they must be added via an offline process.
Authentication flow control
Select what happens when no matching user is found:
- Deny – Terminate the authentication flow.
- Allow – Proceed with the authentication flow.
Identifier Correlation
Maps the incoming Google identity to an existing user. Default: Google Email ↔ Users Email.
Attribute Provisioning
Maps Google attributes to user profile fields. Defaults:
Email→EmailGiven name→First nameFamily name→Last name
Extensions
| Extension | Description |
|---|---|
| Post Authentication script | A server-side script that runs after Google authentication completes. Click Manage Script to configure. |
| Post Authentication application | A custom application that receives a callback after Google authentication completes. Click Manage Custom App to configure. |