Add an Identity Pool as an identity source
 |
Identity Pools provide a flexible way to manage temporary or dynamic users without relying on enterprise data stores. Use Identity Pools to as an identity source to quickly add, scale, or remove users. This option is ideal for contractors or short-term access.
You can also create and manage groups within Identity Pools to organize users and streamline access control. Once configured, Identity Pools integrate seamlessly with applications for authentication and authorization.
Prerequisites
SecureAuth® Identity Platform release 26.0.0 or later
Add an Identity Pool
Create an Identity Pool to store user data, groups, and set password requirements.
On the left side of the Identity Platform page, click Identity Sources.
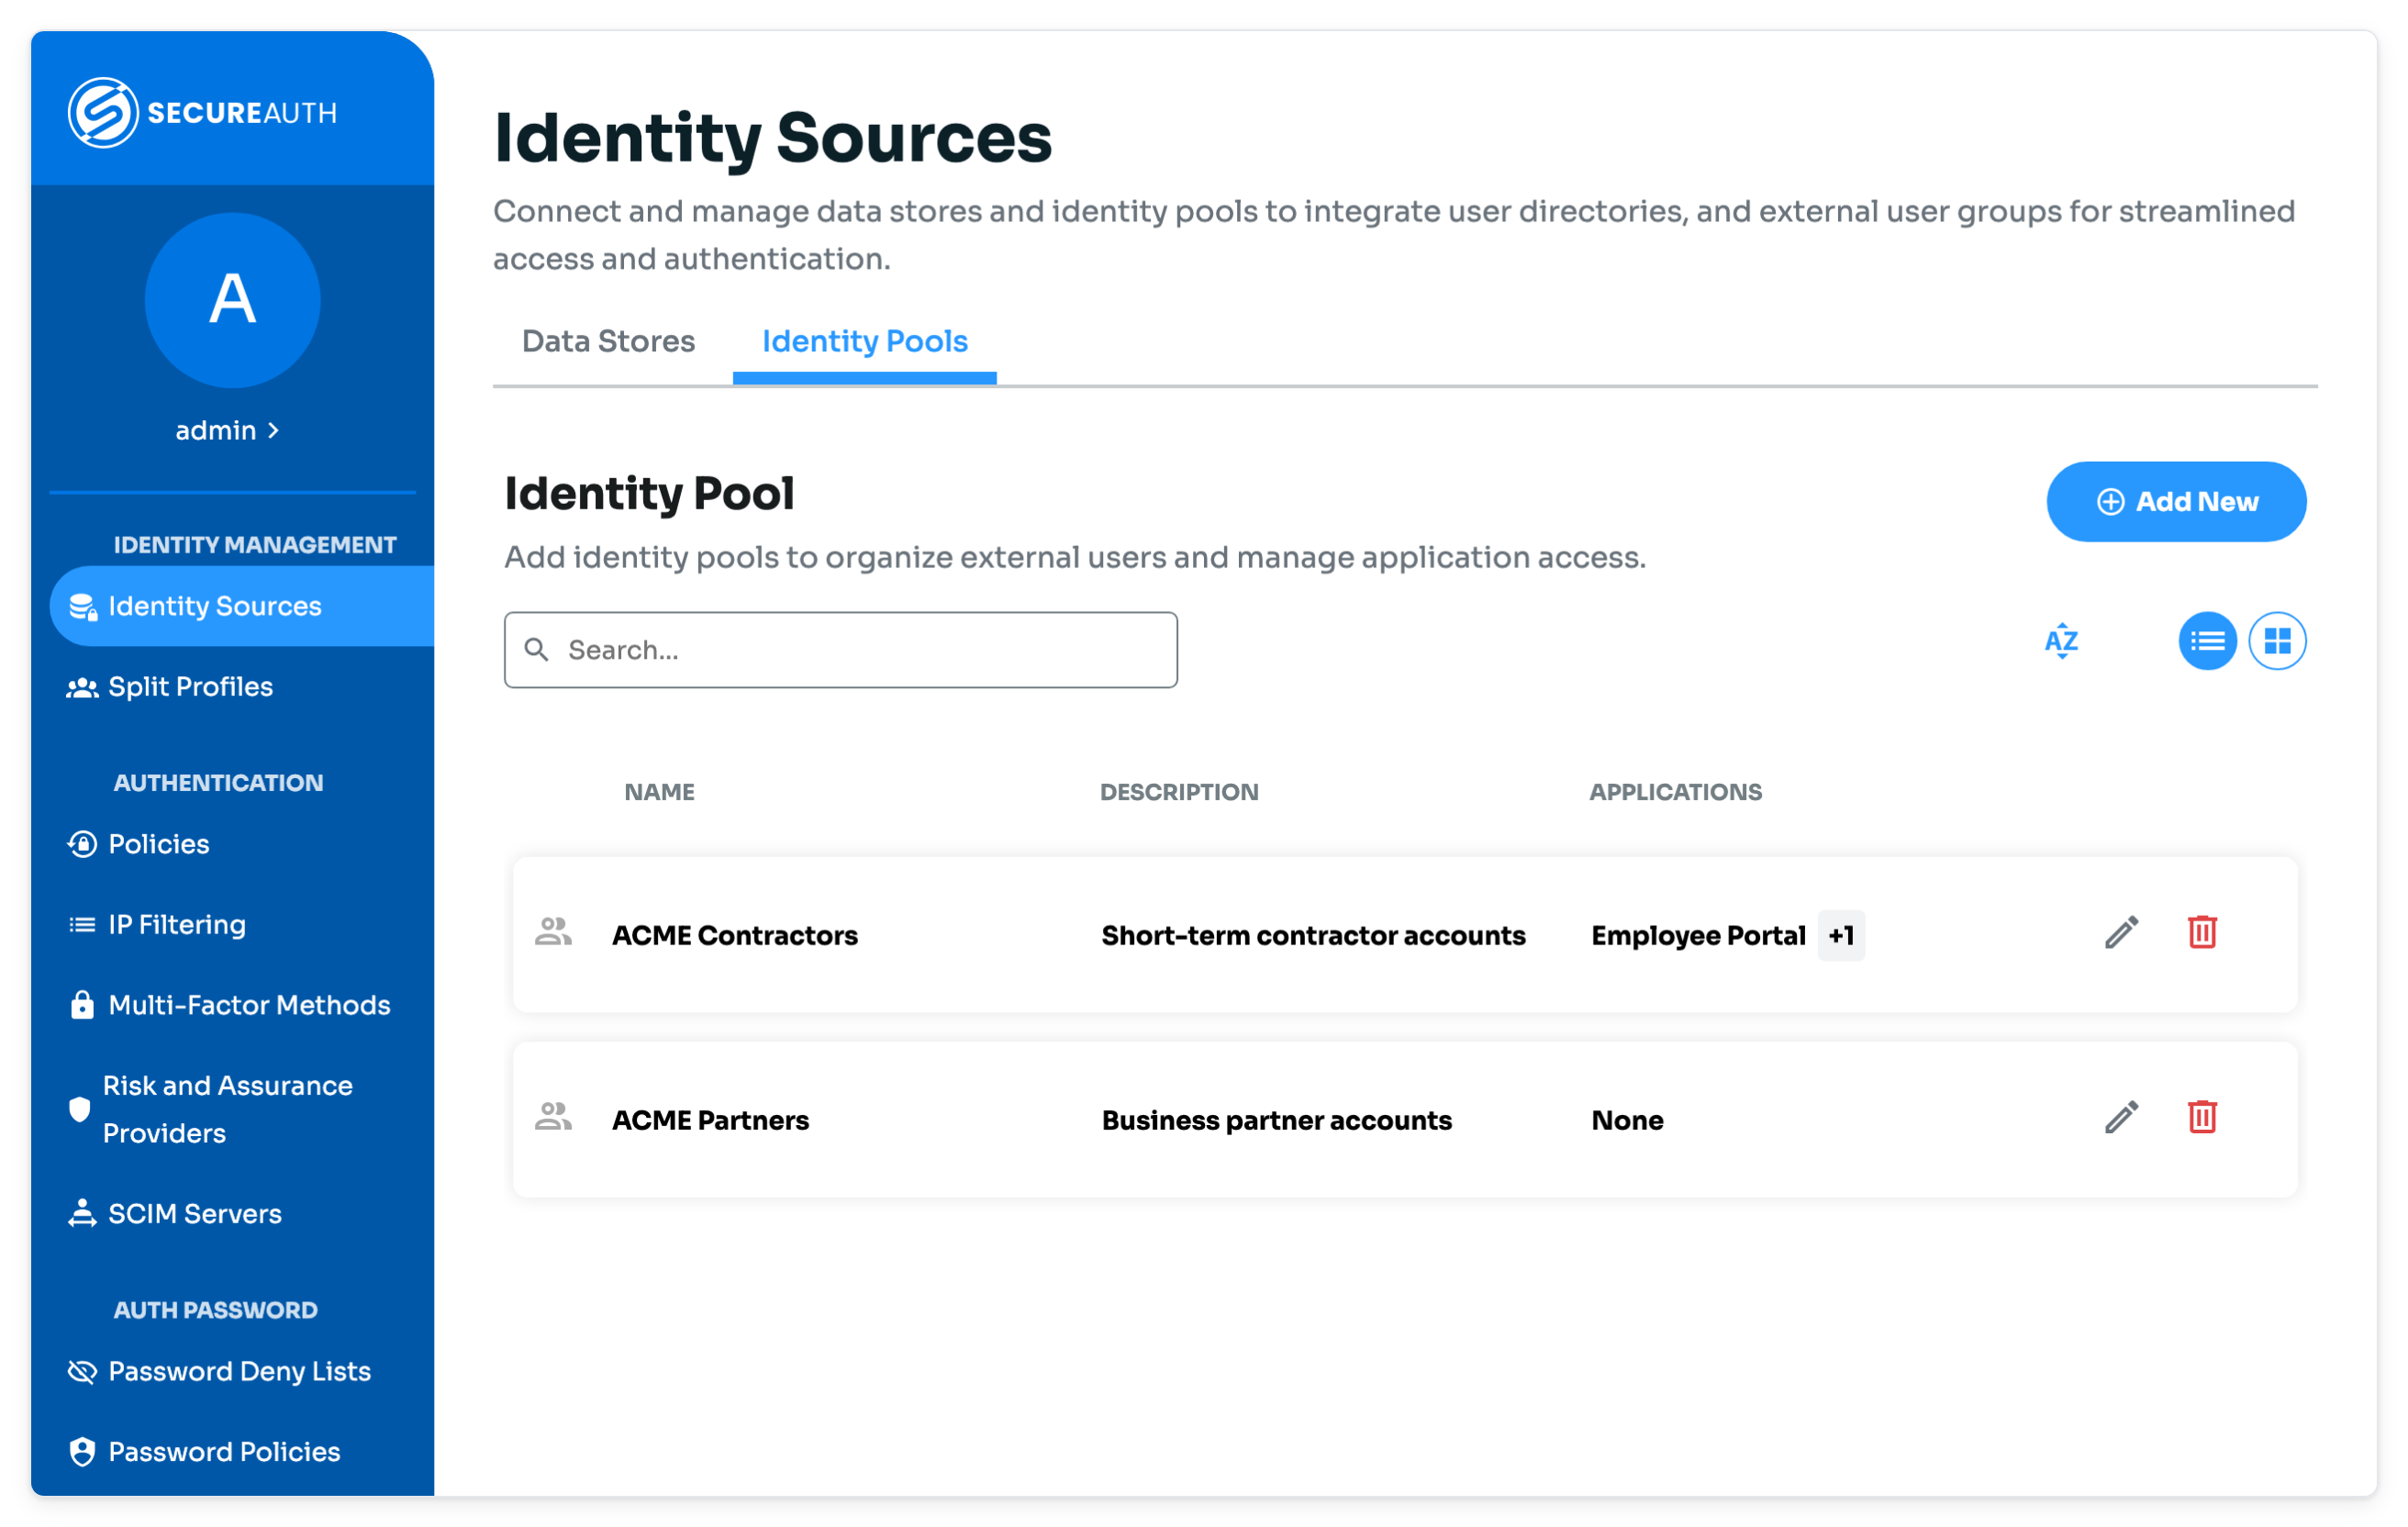
Select the Identity Pools tab, and click Add New.
Configure the basic settings:
Identity Pool Name
Display name for the identity pool
Description
Optional. Helps identify the pool
Save your changes.
Result: The pool is created but has no users yet.
Add users to an Identity Pool
Add users to an Identity Pool so they can log in and authenticate using the configured methods.
Note
Adding a user to an Identity Pool does not grant immediate access to your applications.
To enable authentication, you need to add the Identity Pool to an application in the Data Stores section.
On the left side of the Identity Platform page, click Identity Sources.
On the Identity Pools tab, click the pencil icon for the identity pool you want to manage. The pool page opens on the Manage Users tab.
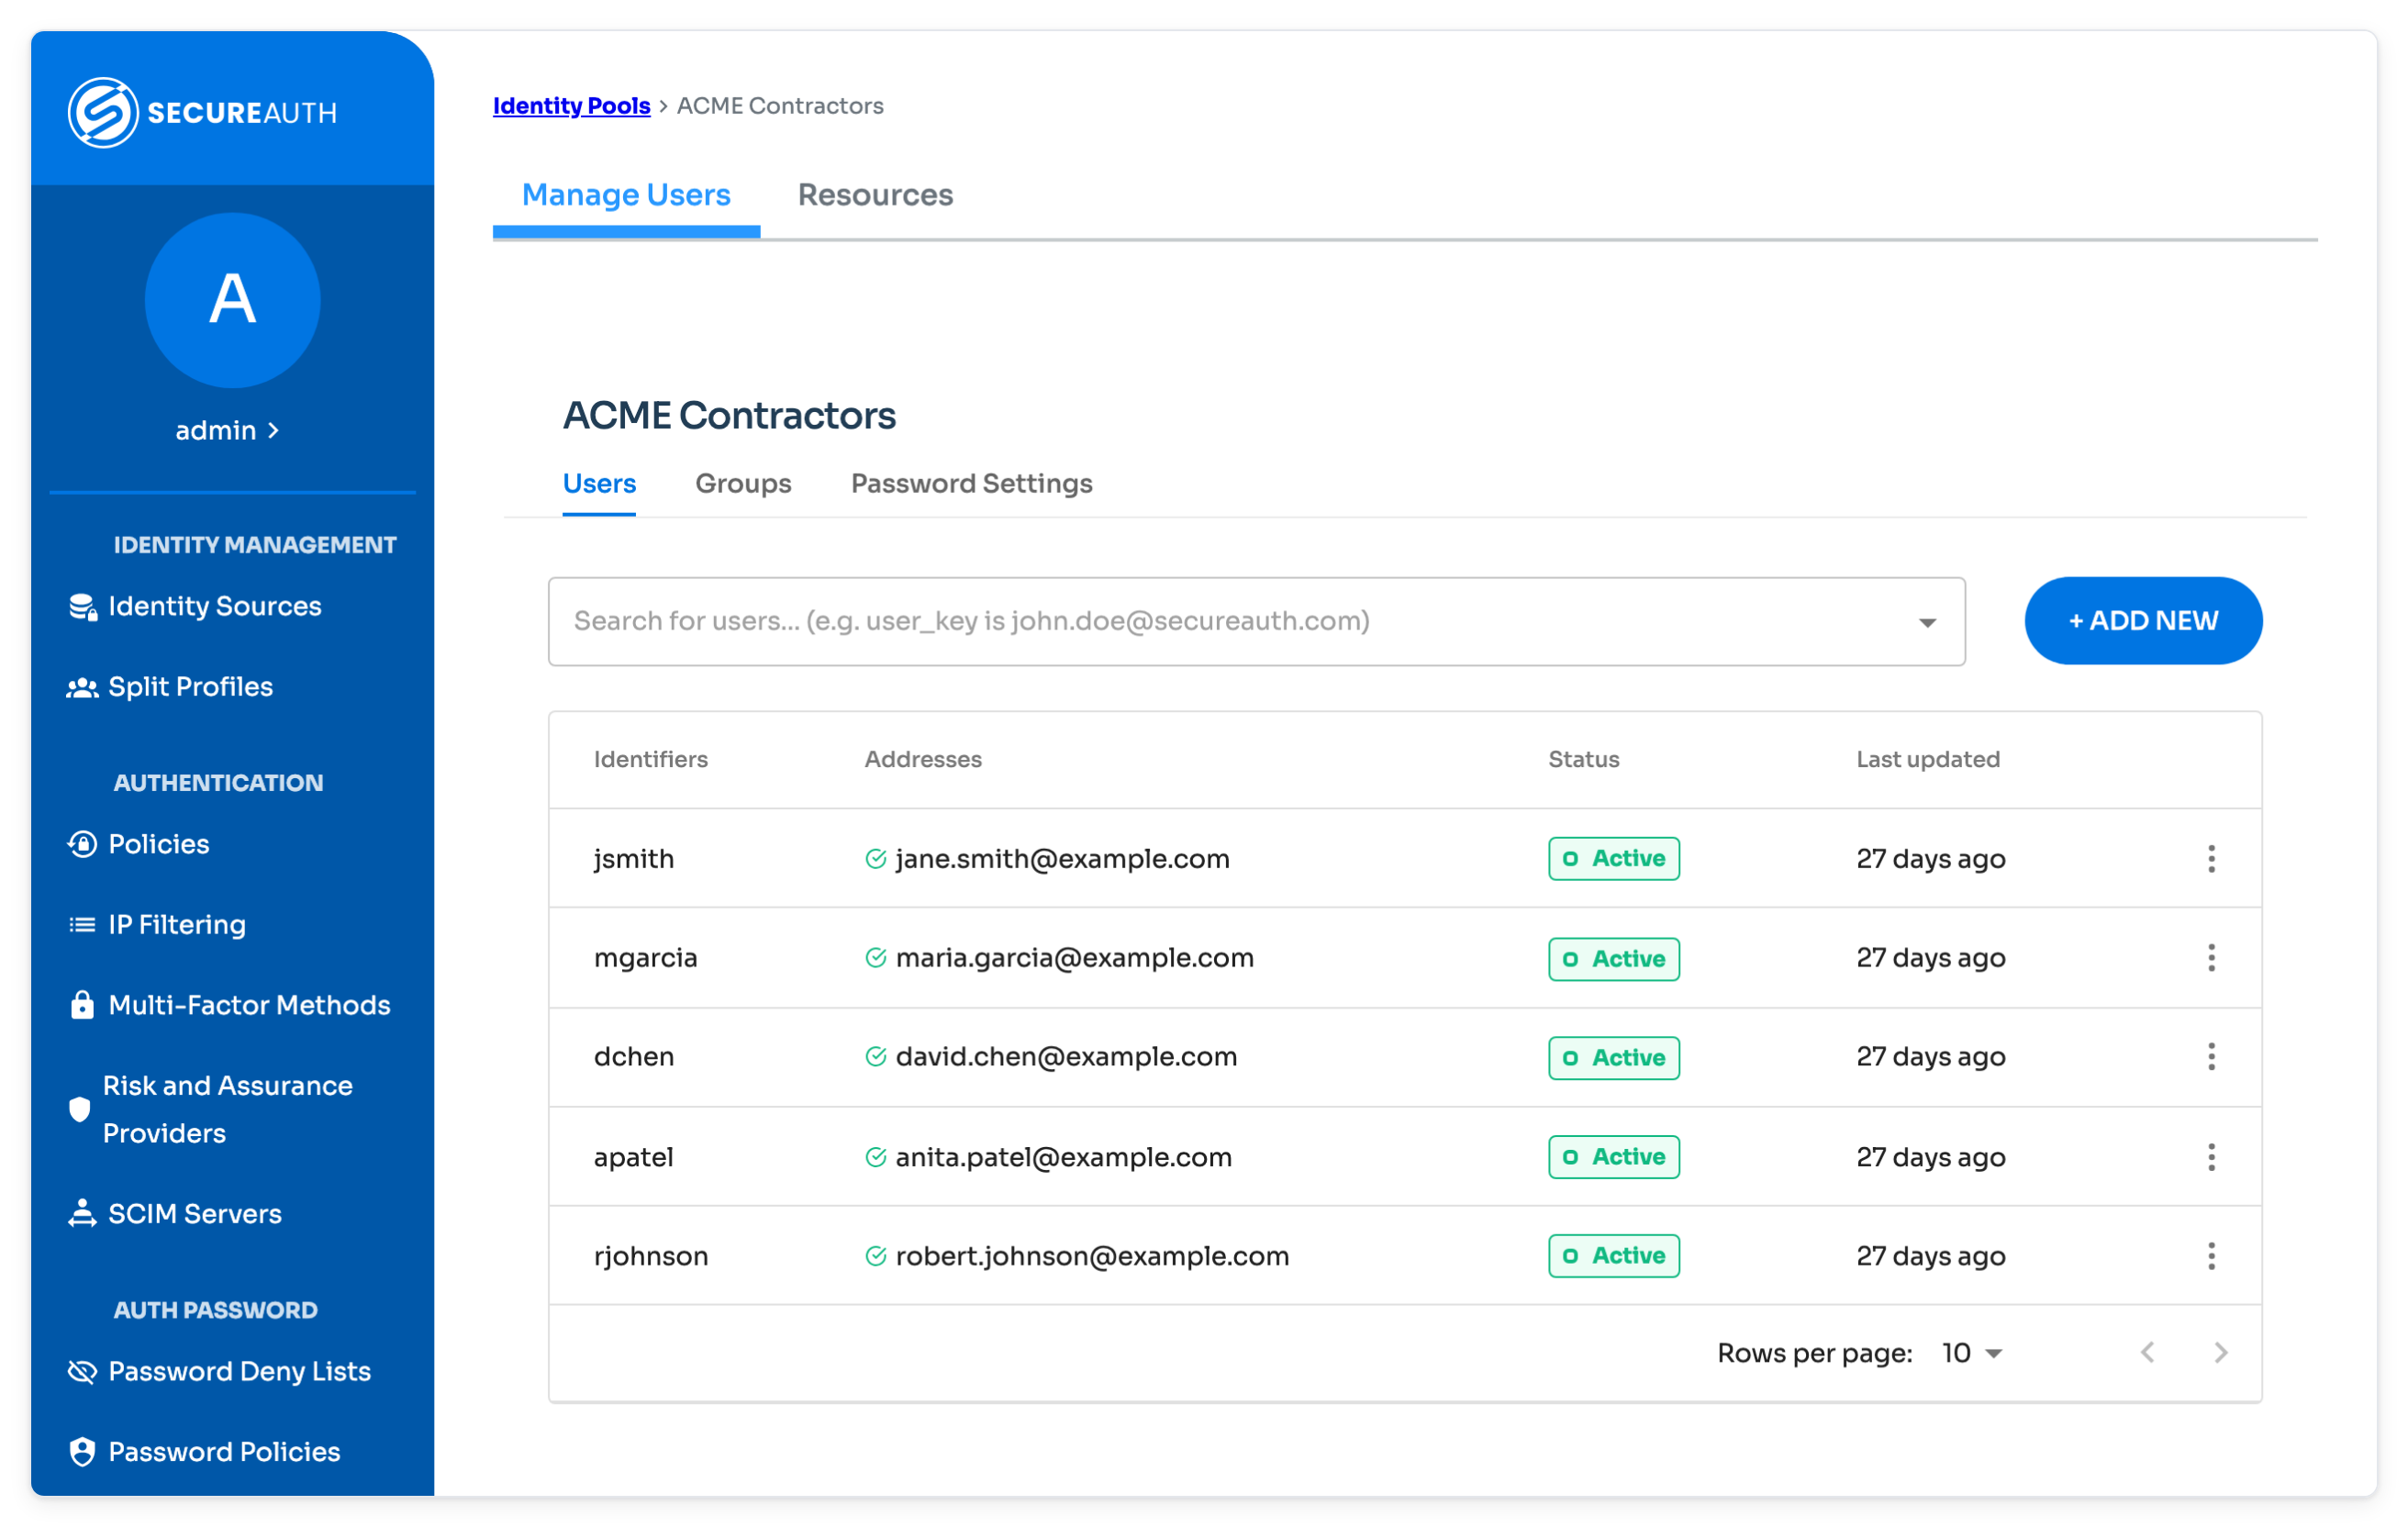
Click Add New.
Select a User Identifier—the required and optional fields will change based on your selection.
Note
Before setting passwords for users, configure the password policy on the Password Settings tab of the Identity Pool. To learn more, see Configure password policy in Identity Pool.
User Identifier
Fields to configure
Use case example
User ID
Required: User ID, Password
Optional: Email, Phone
Use for internal users with a unique system ID.
Email
Required: Email, Password
Optional: Phone
Use for contractors who log in with an email.
Mobile
Required: Phone, Password
Optional: Email
Use for field staff or mobile workers who authenticate by phone.
External
Required: External, Password
Optional: Email, Phone
Use for vendors or partners who authenticate with a unique external ID.
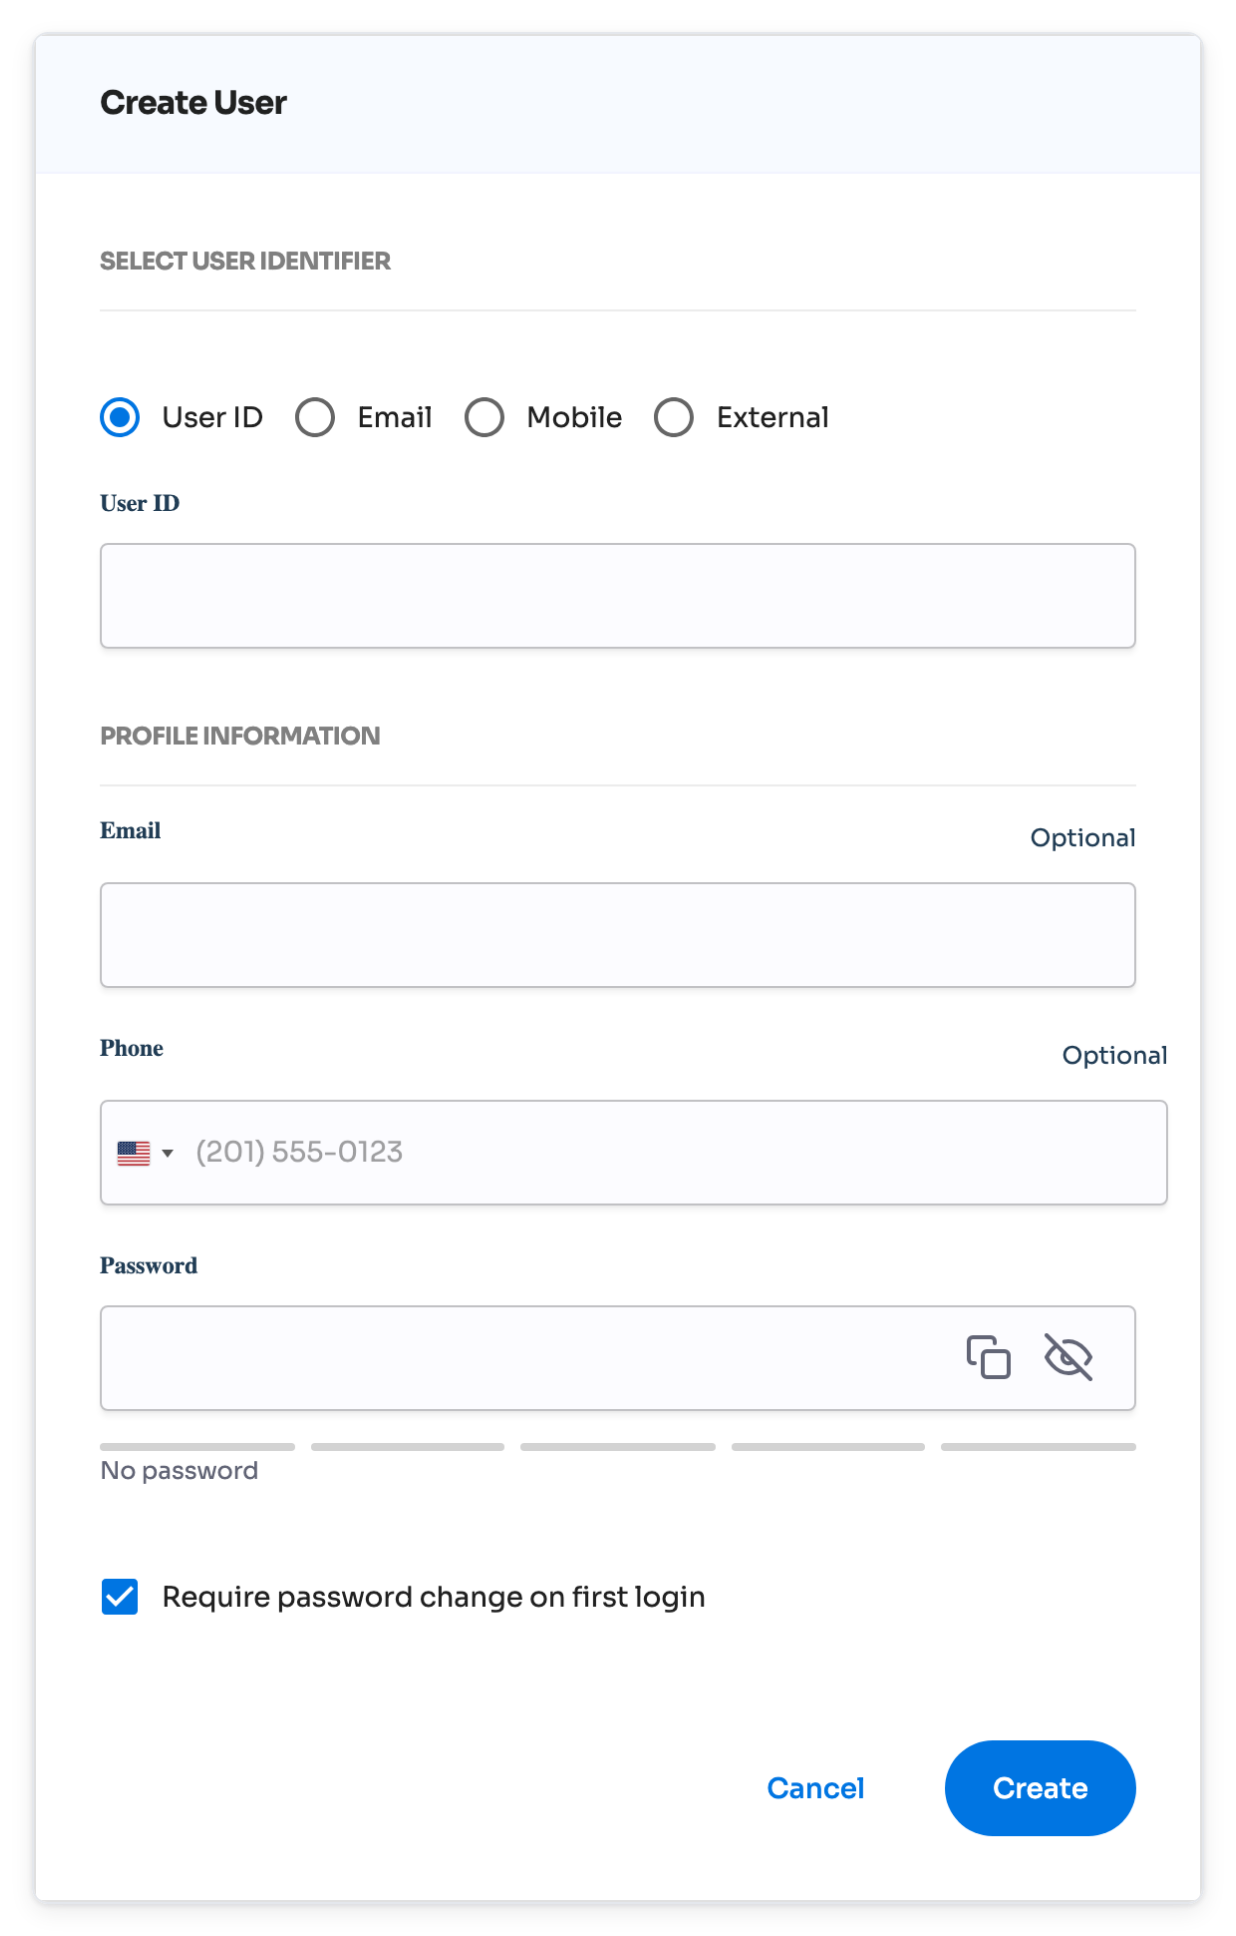
Click Create.
Add groups in an Identity Pool
Use groups in an Identity Pool to manage access and permissions at scale. Organize users by role, department, or external affiliation to simplify policy enforcement and application access.
For example, create groups for internal teams, business partners, or customer segments—each with specific access to assigned resources.
Assign users to groups within the Identity Pool to centrally manage access control and streamline permission management across applications.
On the left side of the Identity Platform page, click Identity Sources.
On the Identity Pools tab, click the pencil icon for the identity pool you want to manage. The pool page opens on the Manage Users tab.
Select the Groups tab and click Create Group and provide a name and description.
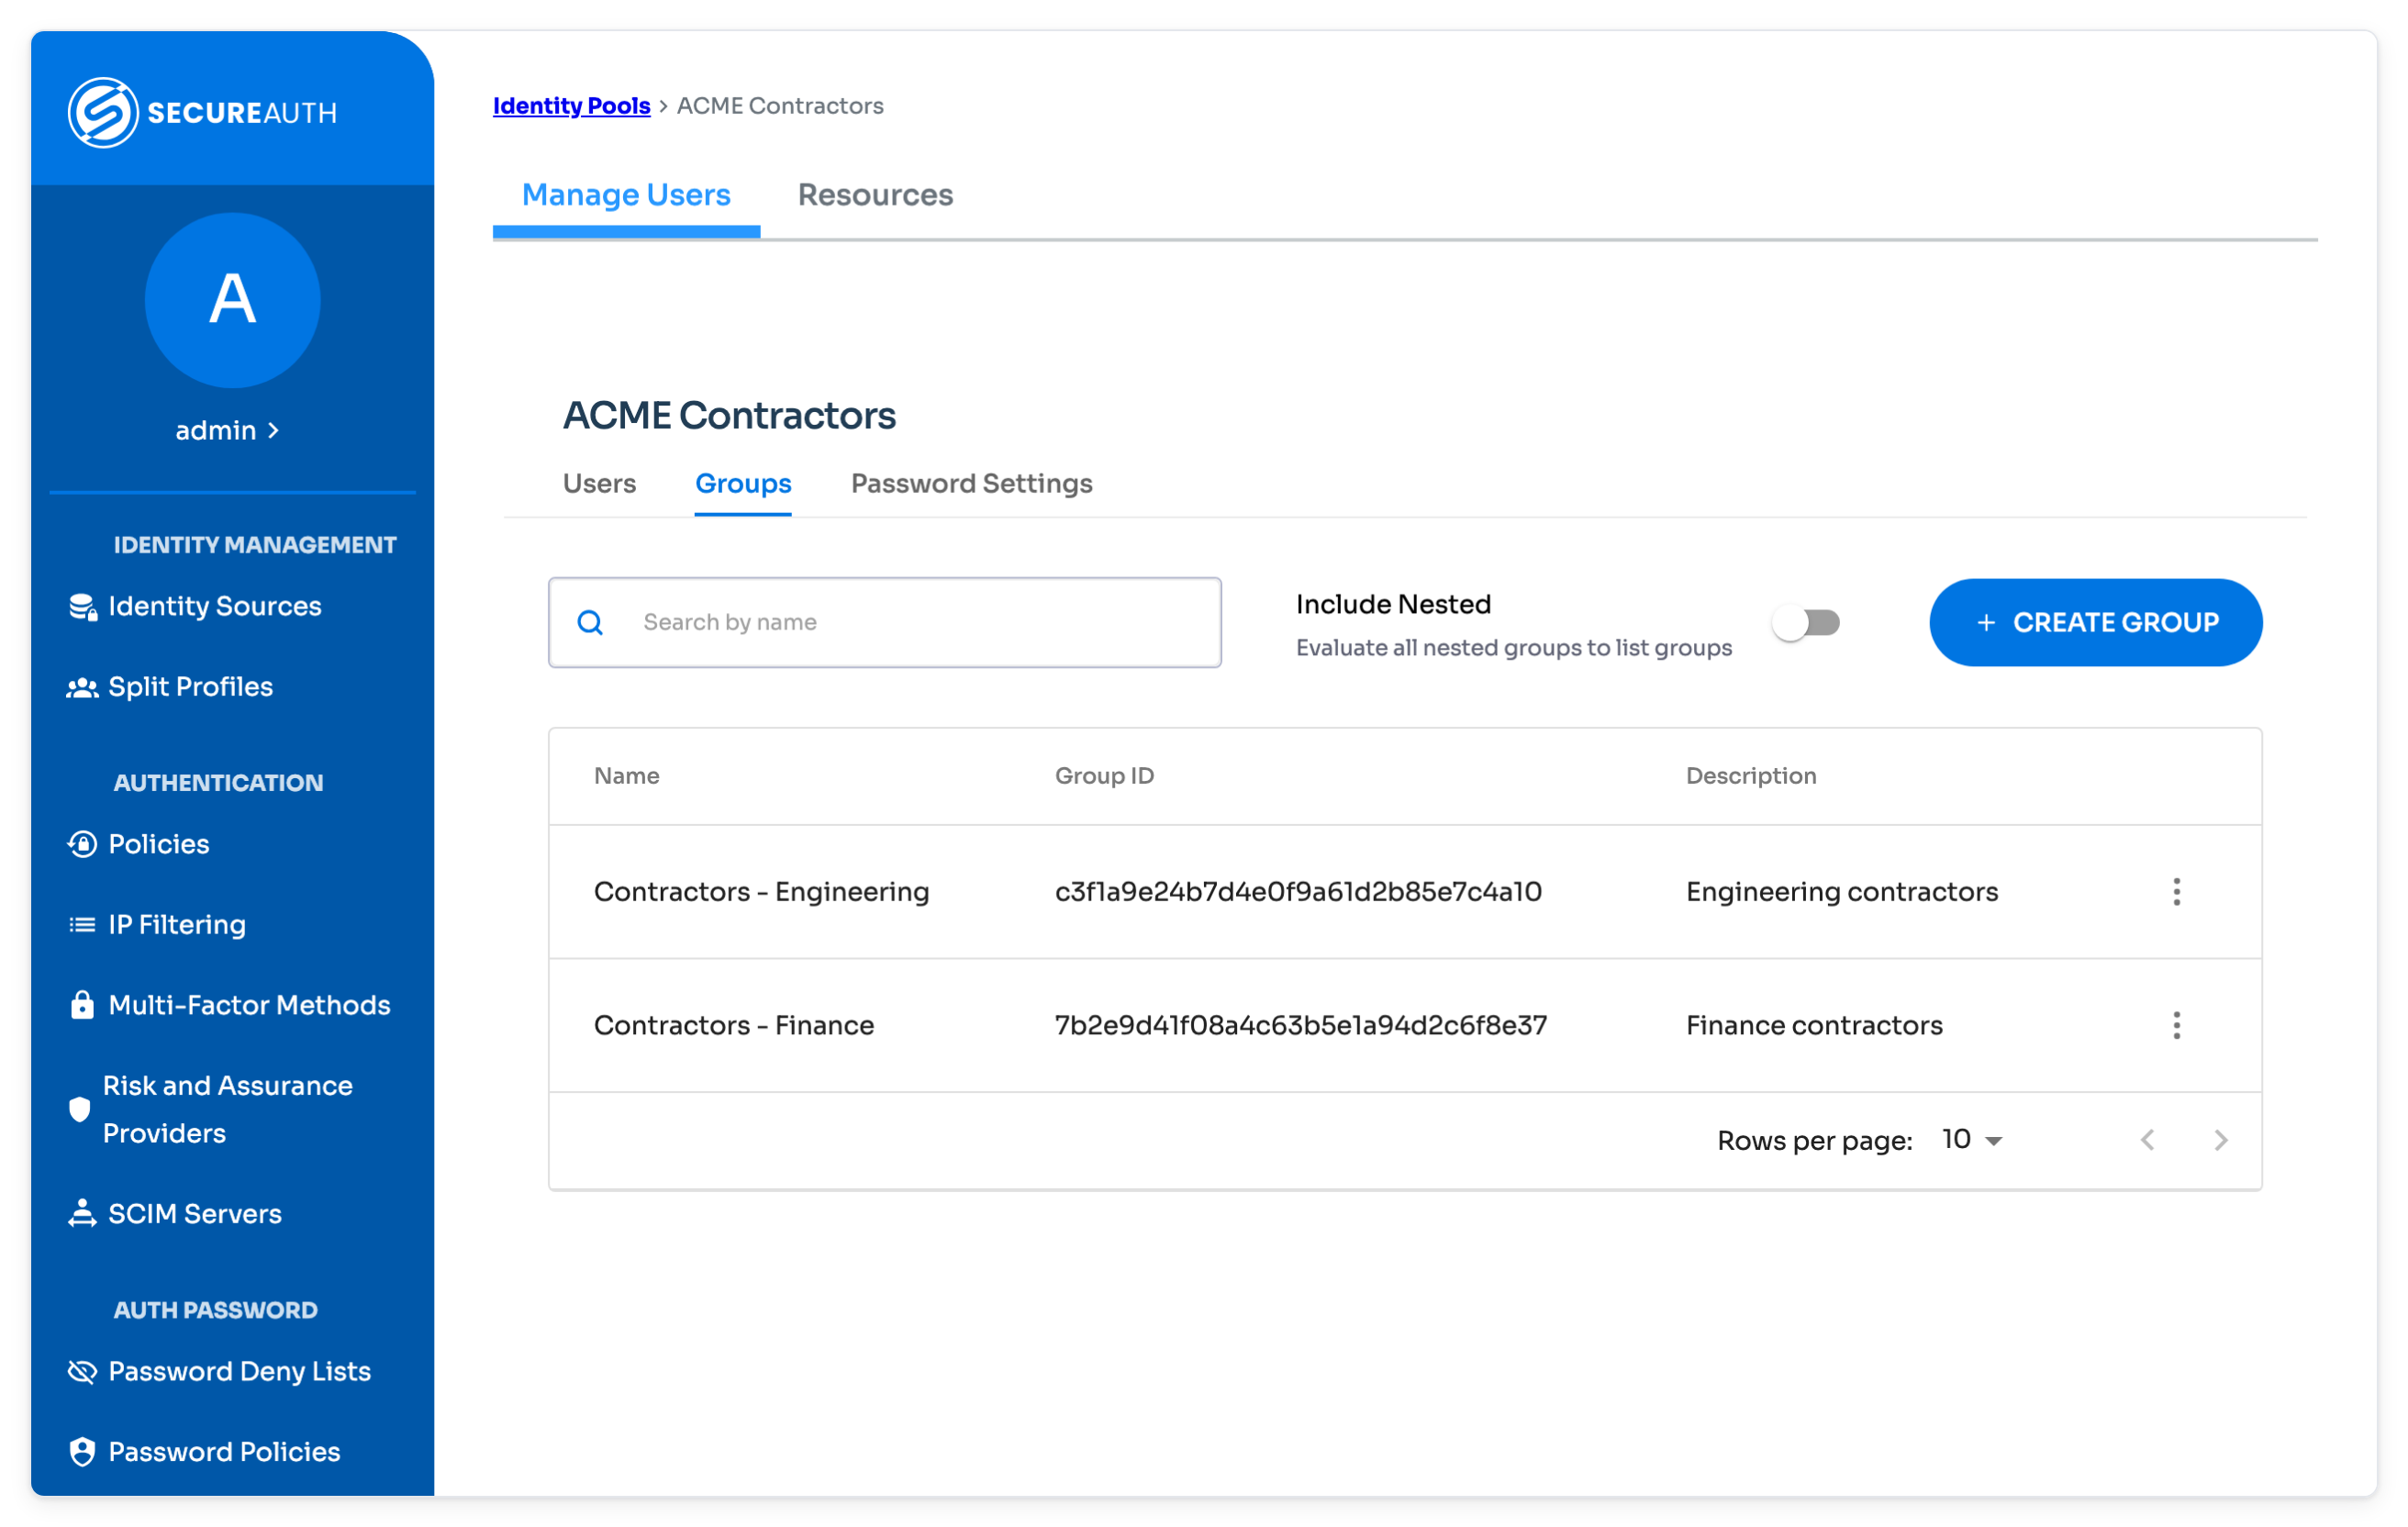
Click Assign Users to assign users to the group.
Note
You can only assign users to a group if they already exist in the Identity Pool. Create users first before adding them to a group.
View applications that use an Identity Pool
Added in SecureAuth IdP release 26.4.0
On the left side of the Identity Platform page, click Identity Sources.
On the Identity Pools tab, click the pencil icon for the identity pool.
Select the Resources tab.
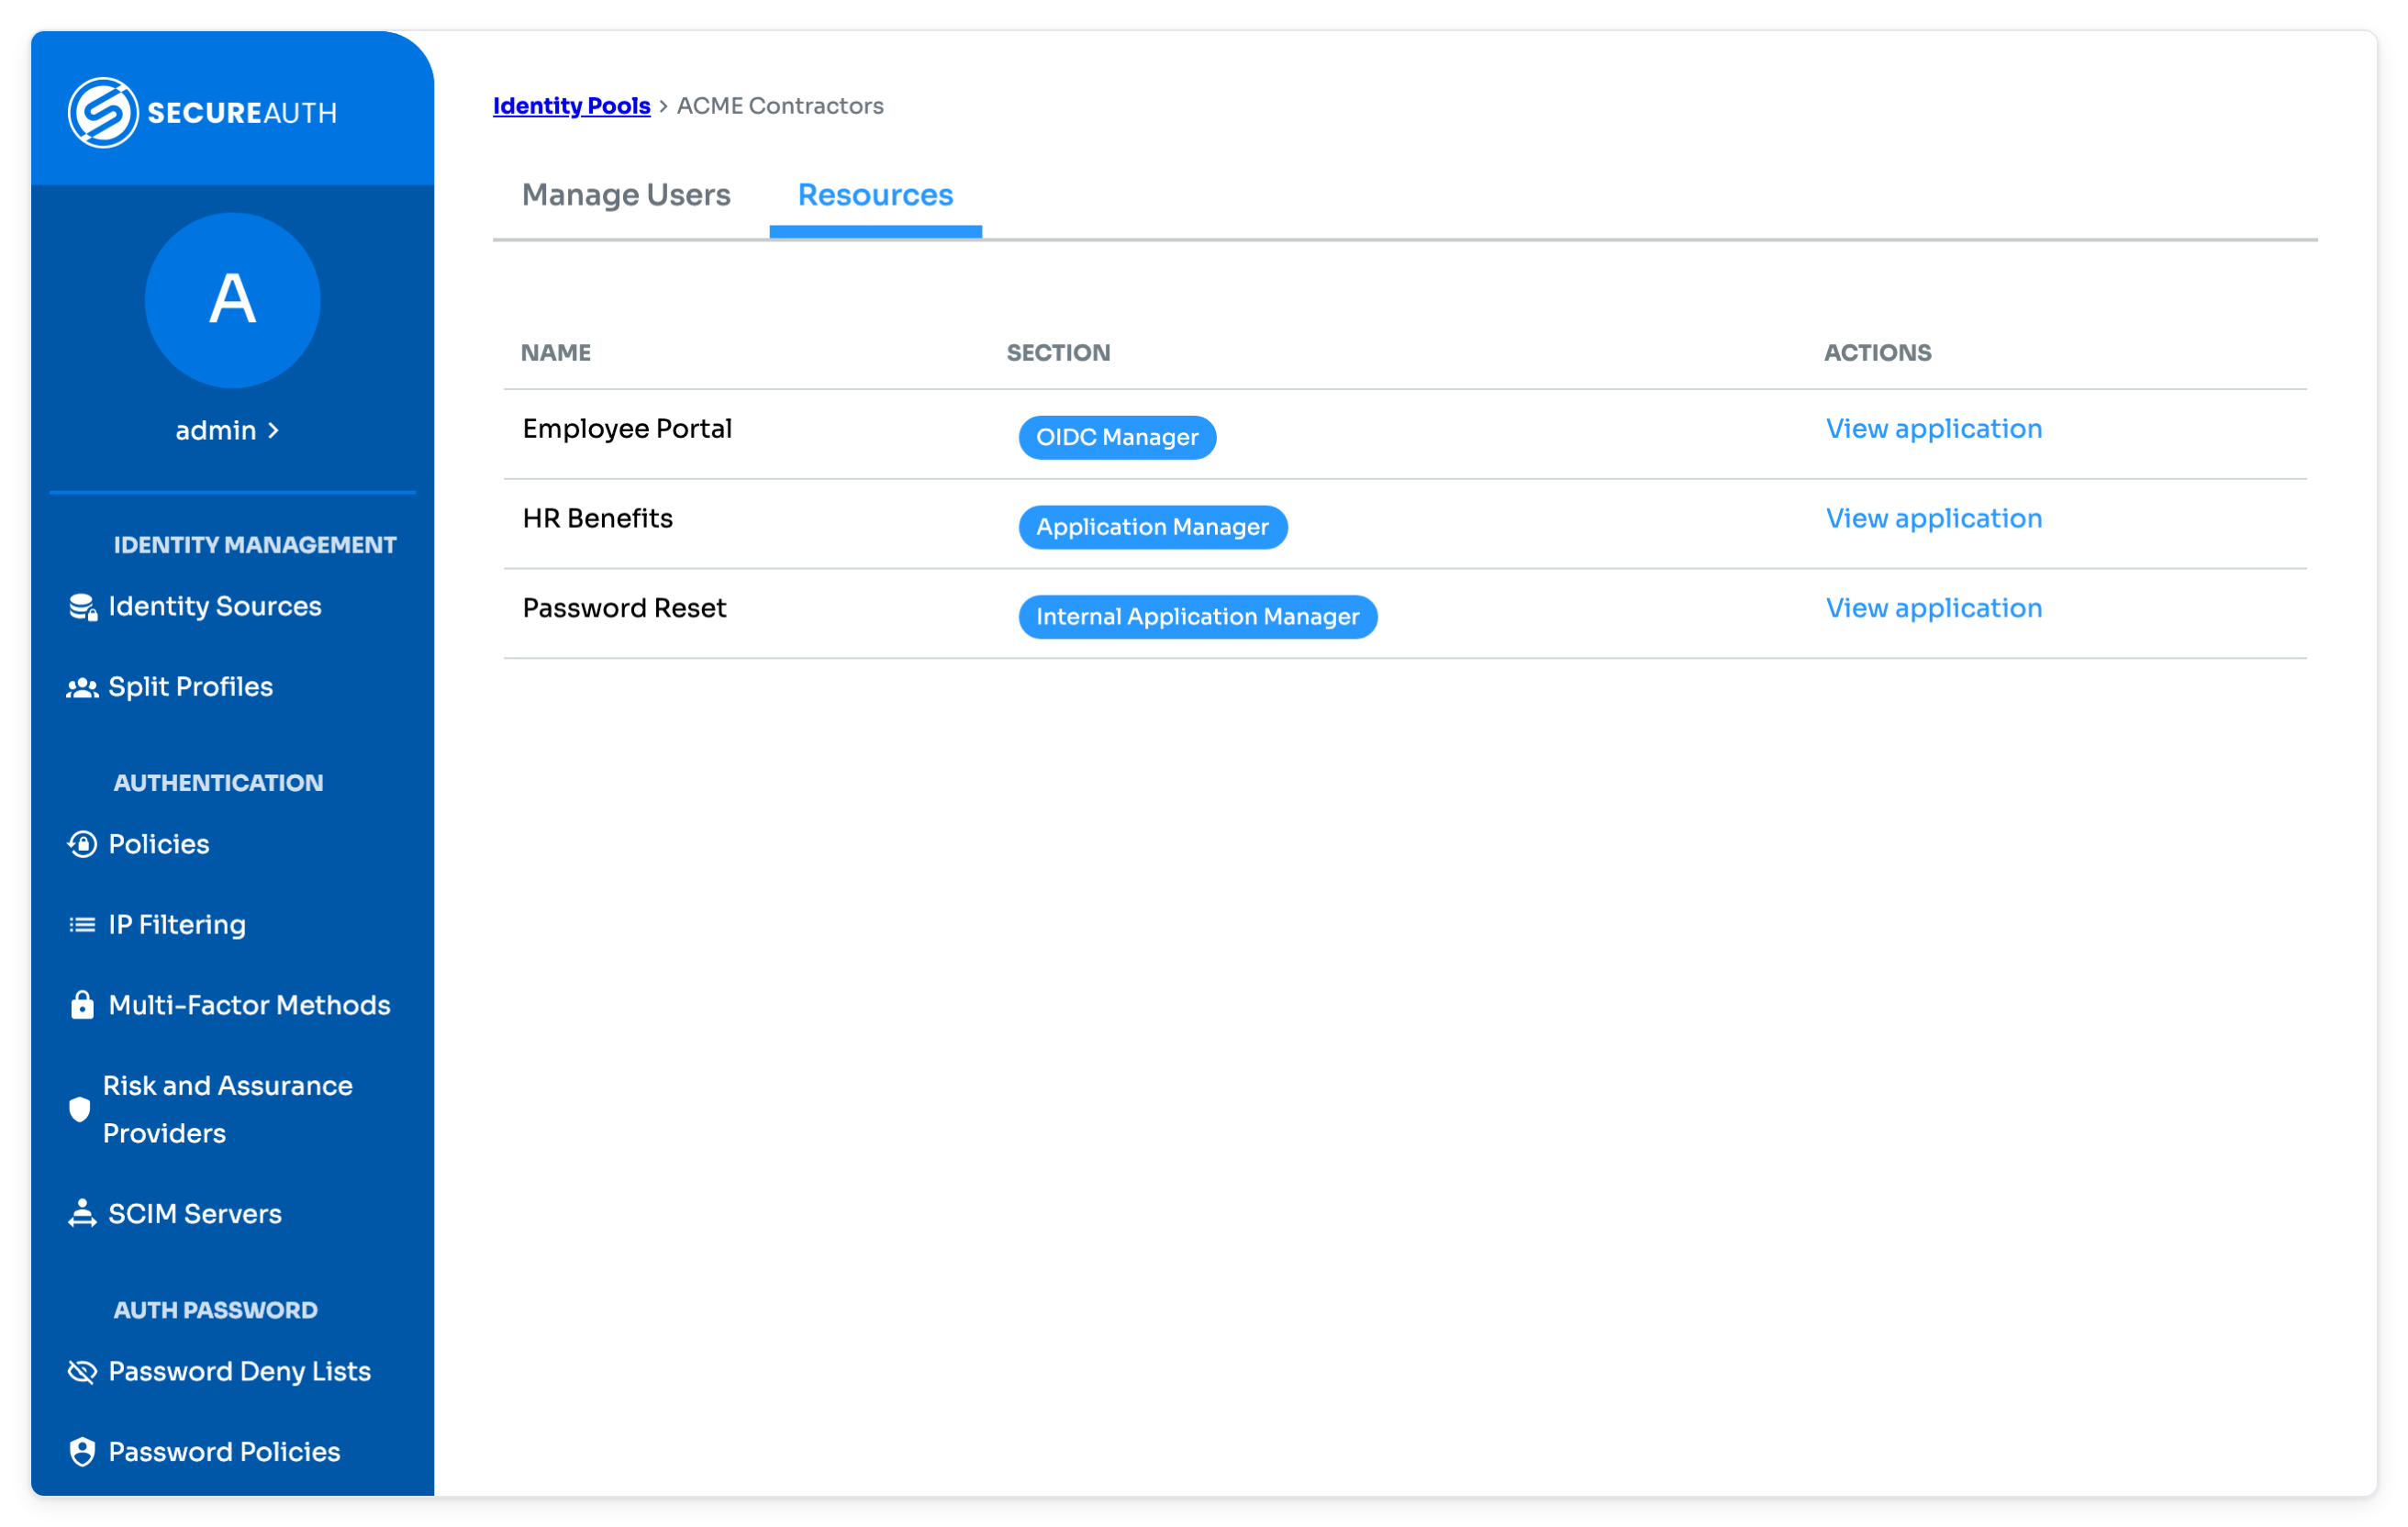
Each row shows the application name and its section, for example Internal Application Manager. To open an application's settings, click View application.