FIDO2 WebAuthn global MFA settings
Use this page to configure global FIDO2 (WebAuthn) settings for the Identity Platform. These settings apply to all FIDO2 authentication, including the User Account page where users manage their own devices.
Note
In SecureAuth documentation, the terms FIDO2 authenticator, security key, and device refer to the same thing. Authenticators can be external (for example, a YubiKey) or built into the user's hardware (for example, Windows Hello or Touch ID)
To set up the FIDO2 Enrollment page that end users use to register their devices, see FIDO2 enrollment page configuration.
Enable FIDO2 devices
Follow these steps to enable FIDO2 devices in the SecureAuth® Identity Platform New Experience.
On the left side of the Identity Platform page, click Multi-Factor Methods.
Click the pencil icon for FIDO2 (WebAuthn).
The configuration page for FIDO2 (WebAuthn) appears.
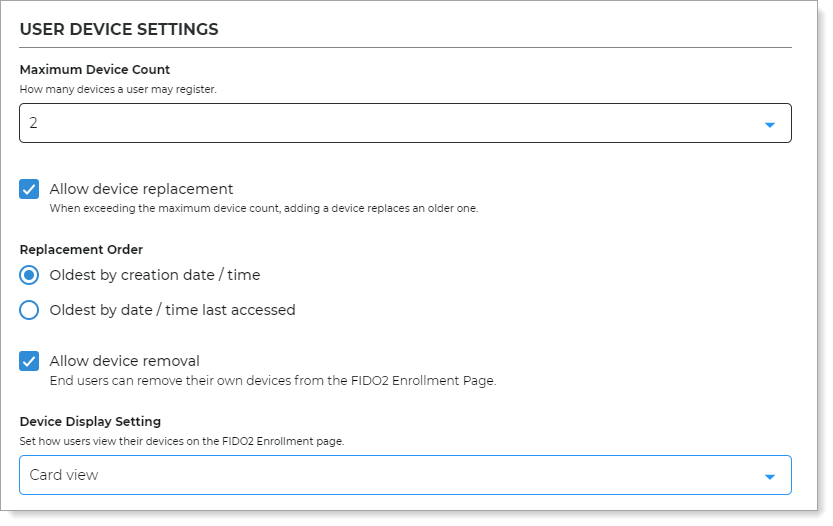
In the User Device Settings section, set the following configurations.
Maximum Device Count
Set how many FIDO2-enabled devices a user can register.
Valid values are No limit, or 1 through 10.
Allow device replacement
Set whether to allow replacement of a device when the user has reached the maximum number of registered devices.
The next admin setting determines which device to replace. This information is not displayed to the end user; they are only prompted to replace a device.
Replacement Order
This option is active only when the Allow device replacement option is selected. Choose which device to automatically replace:
Oldest by creation date/ time - the last time the user registered the device
Oldest by date time last accessed - the last time the device was used in the system
Allow device removal
Set whether to allow users to remove their own device from the FIDO2 registration and management page.
Device Display Setting
Set how users view their devices on the FIDO2 enrollment page.
The options are:
Card view
Table view
In the Device Restriction section, set whether users must provide verification (for example, PIN) for enrollment and verification while using a FIDO2 authenticator, like a security key or mobile device.
Note
Some browsers and operating systems might not have PIN support for FIDO2 authenticators. To learn more, see Admin troubleshooting PIN support for FIDO2 WebAuthn.

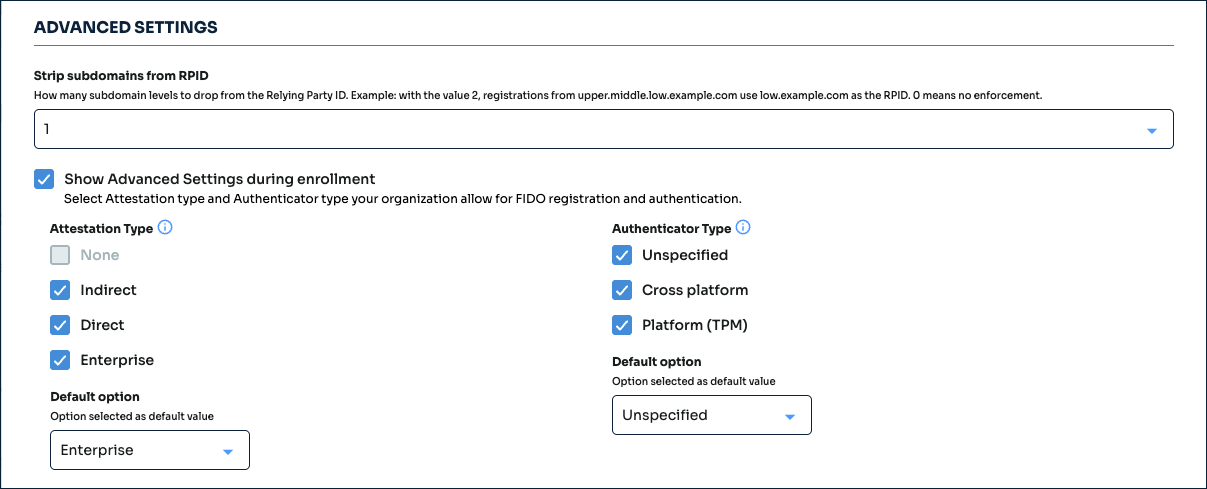
In the Advanced Settings section, set whether to allow registration of any FIDO2 authenticator by default. Or, you can limit registrations to certain FIDO2 authenticator types.
Show Advanced Settings during enrollment
Indicate whether to show the Advanced Settings during enrollment of the FIDO2 authenticator.
Use this setting only for end users who understand the FIDO2 WebAuthn specifications. Otherwise, the default settings are correct for most users.
Attestation Type
Attestation type is a FIDO protocol that sends identifying data about the device model.
None. Do not send authenticator data to the server. (Default setting)
Indirect. Requires user consent. Send anonymized authenticator data to the server.
Direct. Requires user consent. Send authenticator data to the server.
Enterprise. Restrict registration to a specific batch of pre-provisioned YubiKeys that you maintain in an Approved YubiKey Inventory. Use this when your organization procures YubiKeys and you want only those physical devices to enroll. Added in SecureAuth IdP release 26.2.0. To set this up, see Approved YubiKey Inventory.
Authenticator Type
Authenticator type enables you to allow or restrict certain authenticator types.
Unspecified. Allow all authenticator types like built-in biometric readers and separate (roaming) security keys. (Default setting)
Cross platform. Allow only separate (roaming) authenticators like smartphones and security keys (like YubiKey, Titan Security Key, etc.)
Platform (TPM). Allow only built-in (bound) authenticators on the same device like Touch ID, Face ID, and Windows Hello.
Default option
Each of Attestation Type and Authenticator Type has a Default option that sets the value preselected for new enrollments:
Recommended defaults:
Attestation Type – None
Authenticator Type – Unspecified
To use YubiKey Enterprise Attestation as the default, set the Attestation Type Default option to Enterprise. Populate the Approved YubiKey Inventory before you do this. See Approved YubiKey Inventory:
If you change a default, note the following:
New device registrations are allowed only for the selected Attestation Type and Authenticator Type. Users with existing devices in those categories can still authenticate.
Existing devices that do not match the selected types are blocked. Users with those devices cannot authenticate.
Set whether to Validate device registration with FIDO Alliance during enrollment.
Take note that while most devices comply, some unregistered devices like Touch ID on older MacBooks might fail enrollment.
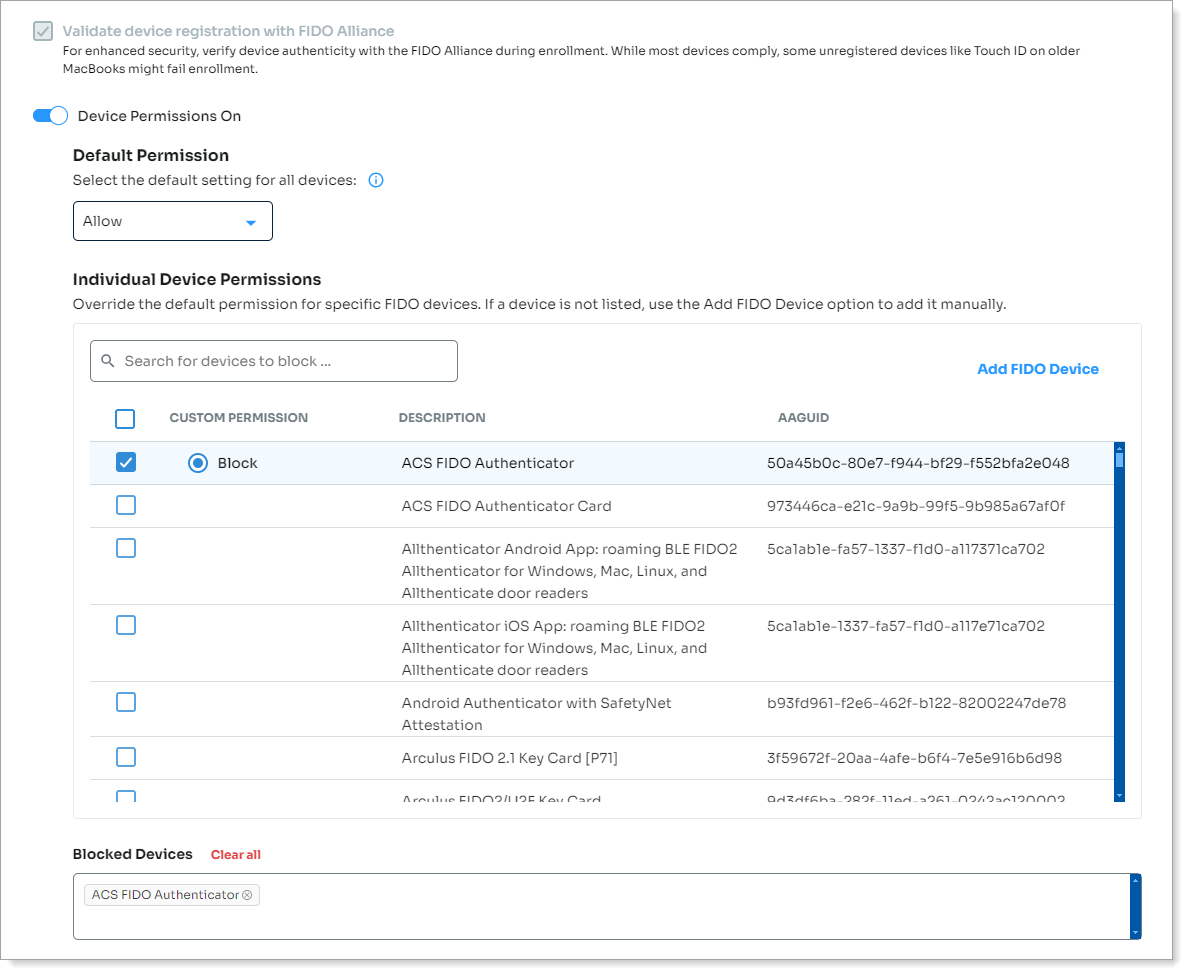
Optional. If you want allow or block certain FIDO devices, enable Device Permissions.
Result: When this setting is ON, it displays more settings for device permissions.
If you enabled Device Permissions, set the following:
In the Default Permission,section set the default setting for all devices:
Attest (verified) – Permit all devices verified by the FIDO Alliance, except those you choose to block.
Allow – Permit all devices, whether verified by the FIDO Alliance or not, except those you choose to block.
Block – Block all devices, except those you choose to choose to permit (allow or attest).
Next, in the Individual Device Permissions section, select the check box for each device and specify the following (as applicable):
Attest – Allow this device verified by the FIDO Alliance metadata service.
Allow – Allow this device whether verified by the FIDO Alliance or not.
Block – Block this device.
You can also Add a FIDO Device. You will need provide a description and the AAGUID (Authenticator Attestation Global Unique Identifier) of the device.
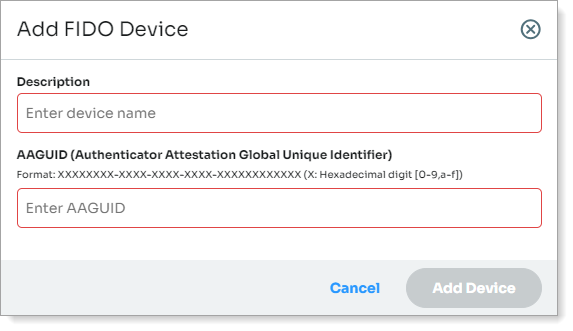
Result: All devices that you block, allow, or attest appear in a list below the Individual Devices Permissions section.
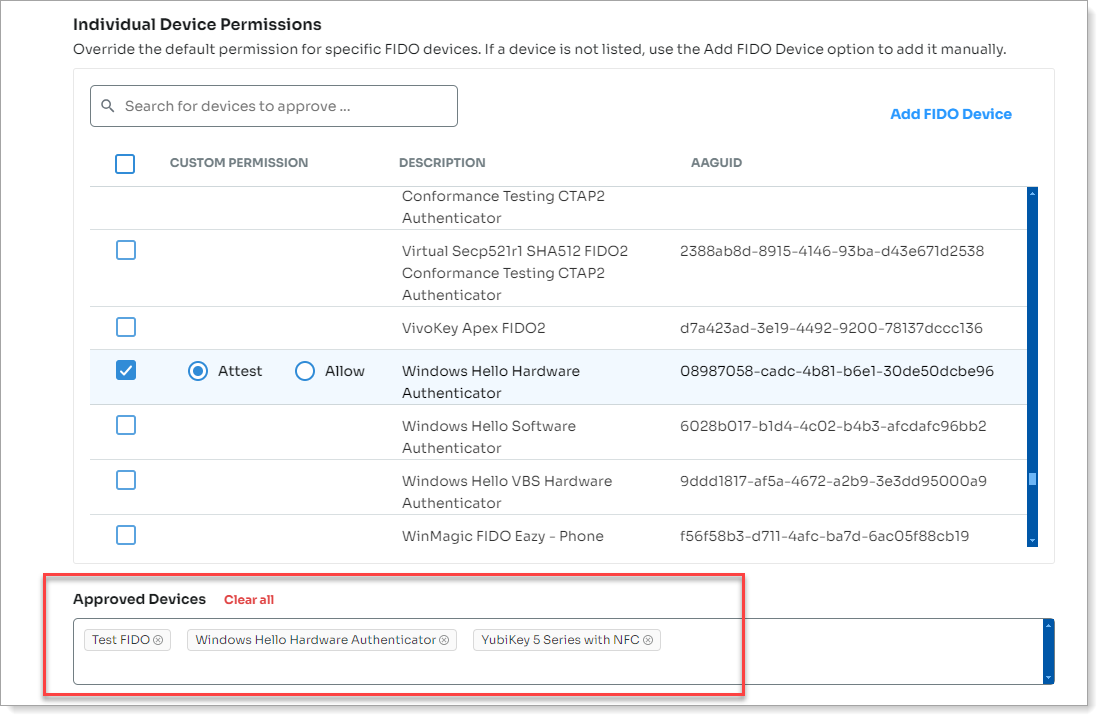
Blocked device after removal
A user enrolls FIDO2 device, but as an admin, you remove it later from the Individual Device Permissions list. The device will still show up for the user in their profile, but it will be blocked from use.
Save your changes.
Result: SecureAuth saves your global FIDO2 configuration.
End users register their FIDO2 devices in either of these places:
The User Account page where they can manage their profile and device registrations in one place.
A standalone FIDO2 Enrollment page that you set up separately in the Internal Application Manager. See FIDO2 enrollment page configuration.
Note
If you turn off FIDO2 as a login method, end users no longer see it as an MFA choice during login.
Next steps
Configure a policy to use FIDO2 authenticators as MFA in the login workflow. See Policy configuration - Multi-factor methods.
Share the User Account page URL with your end users so they can register their FIDO2 devices.
Not using the User Account page? Share the FIDO2 Enrollment URL with your end users.