How to send a confirmation email about a FIDO2 device
As an administrator, you can choose to send a confirmation email to the user when they enroll or remove a FIDO2 authenticator from their profile.
Prerequisites
SecureAuth® Identity Platform release 26.2.0 or later
Have FIDO2 WebAuthn global MFA enabled in the Identity Platform
Add a FIDO2 enrollment page in the Identity Platform with the Email Notification feature enabled
Solution
You will need to enable the "send email confirmation" setting in the FIDO2 enrollment page. And you optionally can change the default email text.
Turn on the setting to send a confirmation email
In the Identity Platform, go to the Internal Application Manager and click the pencil icon to edit a FIDO2 Enrollment page.
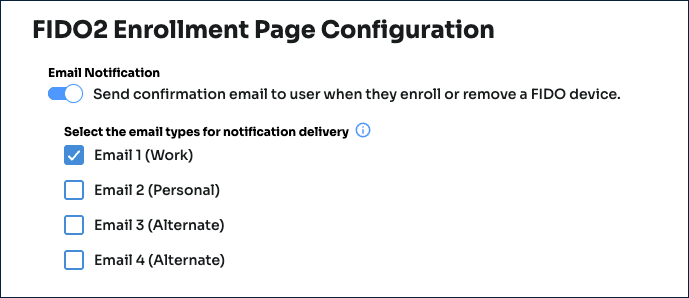
In the FIDO2 Enrollment Page Configuration section, turn on Email Notification.
Then select which email types (Email 1 through Email 4) to send confirmation email to. Make sure you have the emails mapped and configured in your data store properties.
Save your changes
Optionally change the default email text
In the Identity Platform, go to the Internal Application Manager and and click the pencil icon to edit the FIDO2 Enrollment page whose email text you want to change.
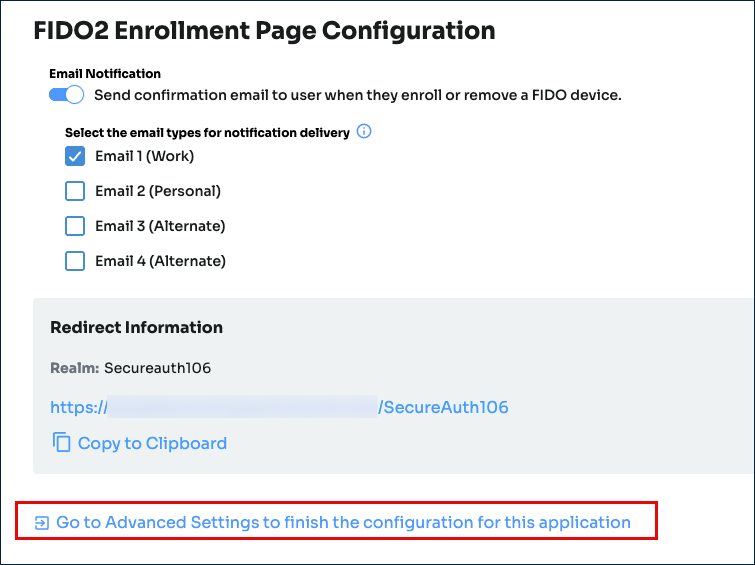
In the Redirect Information section at the bottom of the page, note the realm number for this FIDO2 Enrollment page and click the Go to Advanced Settings to finish configuration for this application link.
Select the Overview tab, scroll down to the Advanced Settings section, and click the Content and Localization link.
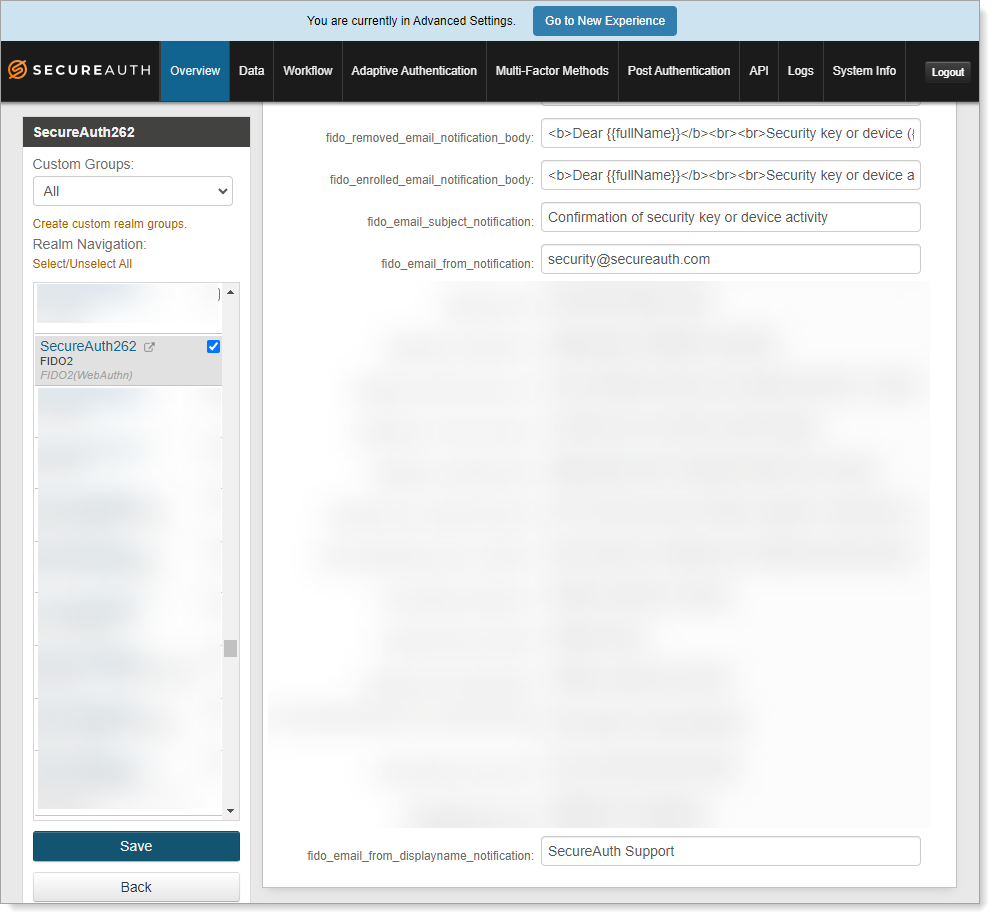
In the Verbiage Editor, scroll down to the bottom and edit any of these resource fields for the email output.
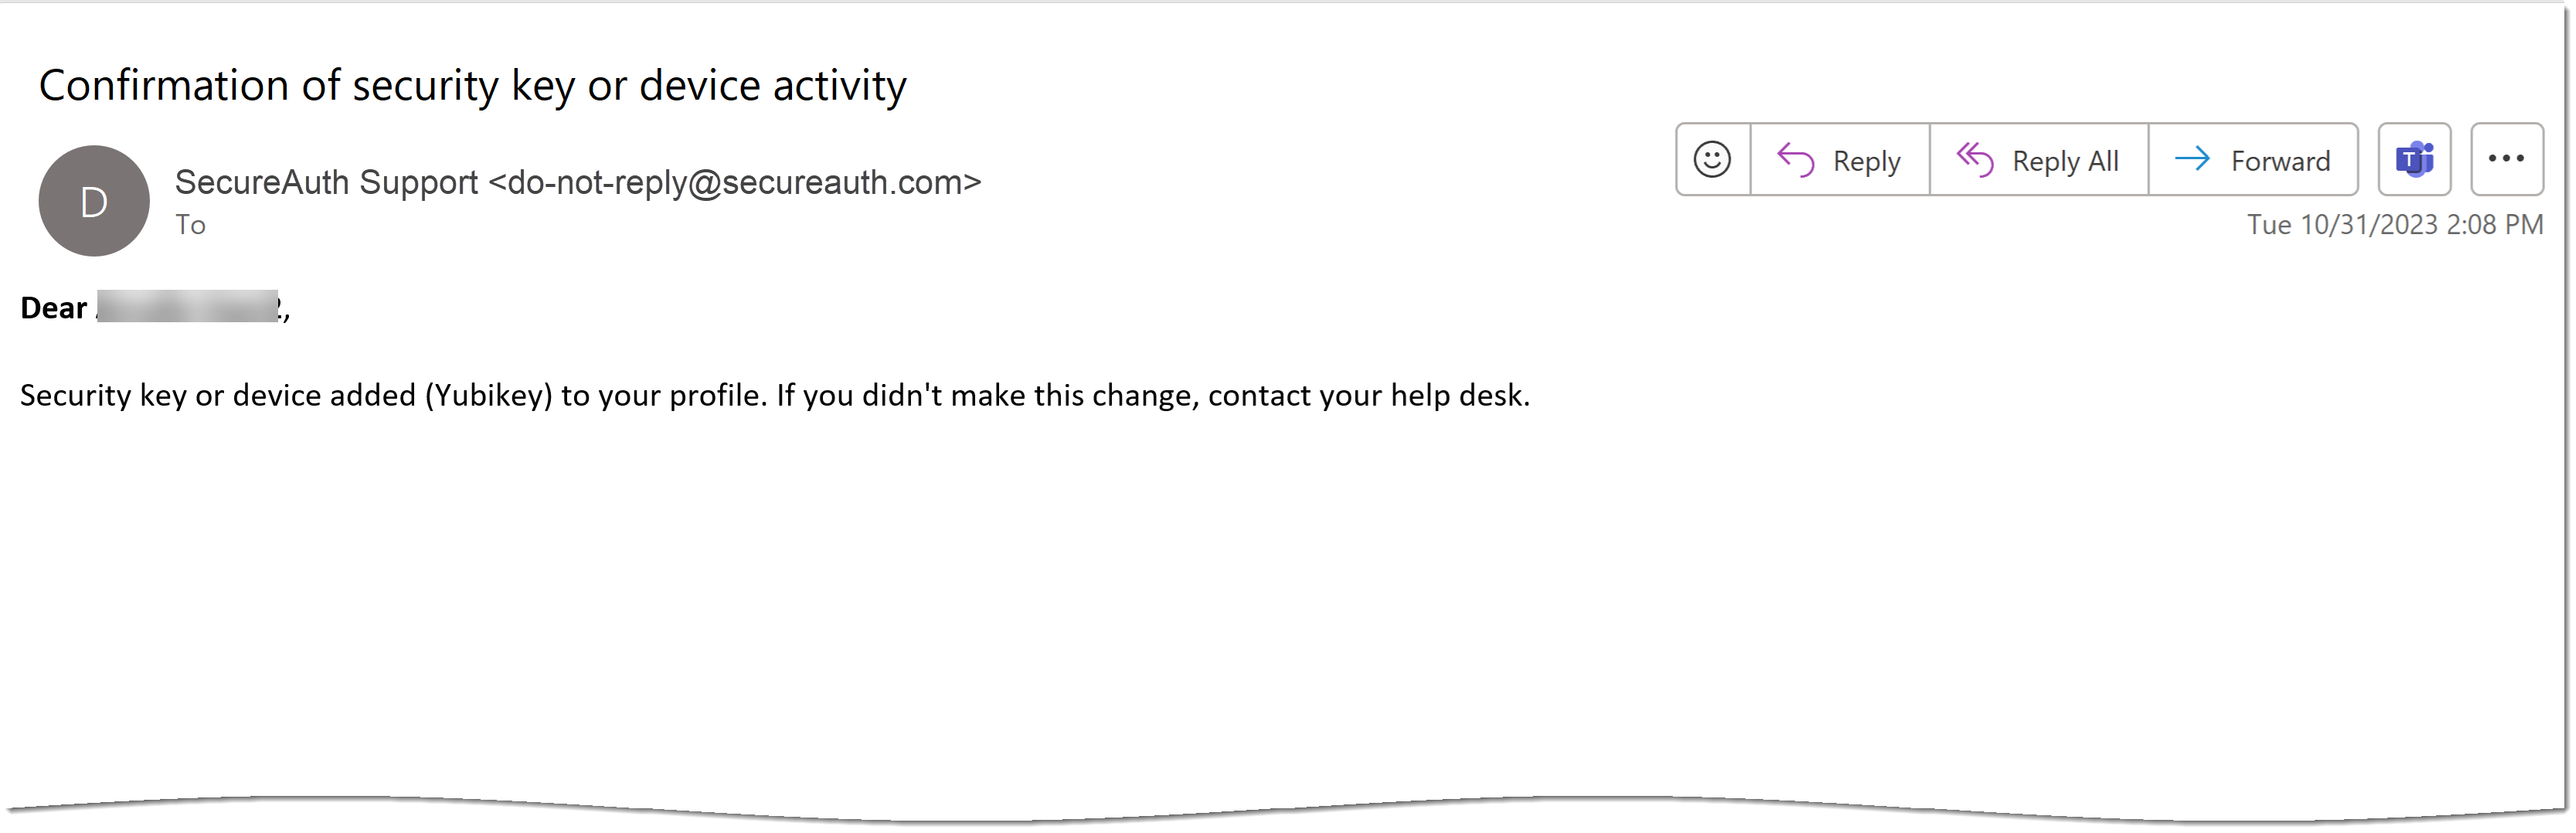
See the following example of an email confirmation.
 Resource fields
fido_removed_email_notification_body– Email body about removing a FIDO2 device from your profile. For example:<b>Dear {{fullName}}</b>,<br><br>Security key or device ({{deviceName}}) removed from your profile. If you didn't make this change, contact your help desk.fido_enrolled_email_notification_body– Email body about adding a FIDO2 device to your profile. For example:<b>Dear {{fullName}}</b>,<br><br>Security key or device added ({{deviceName}}) to your profile. If you didn't make this change, contact your help desk.fido_email_subject_notification– Email subject line. For example:Confirmation of security key or device activity
fido_email_from_notification– Sender email address. For example:security@secureauth.com
fido_email_from_displayname_notification– Display name of sender email address. For example:SecureAuth Support
Save your changes.