Help Desk user verification configuration
Configure the Help Desk page to verify user identity before providing account assistance. This prevents unauthorized users from gaining access through social engineering.
How verification works
When an employee contacts the Help Desk for assistance, you send a verification request:
SMS or email – You send an OTP code the user repeats back to you.
Voice OTP – The user receives a phone call that reads an OTP code, then repeats the code back to you. Added in SecureAuth IdP release 26.4.0
Mobile Authenticate OTP – You ask the user to provide the code from their Authenticate app.
Mobile Authenticate push notification – The user approves the request in their Authenticate app.
Mobile Authenticate symbol to accept – The user taps the matching symbol in their Authenticate app.
After verification succeeds, you can safely assist with their request.
Prerequisites
SecureAuth® Identity Platform release 26.0.0 or later
Data store with write privileges
Configured user authentication policy
Enable Symbol to Accept in the authentication policy
Symbol to Accept requires a setting in the authentication policy that your Help Desk page uses. You configure the policy separately from the Account Management (Help Desk) page. This step is required only for Symbol to Accept. The other verification methods do not need it. Added in SecureAuth IdP release 26.2.0
Open the authentication policy that your Help Desk page uses.
Select the Multi-Factor Methods tab.
Under Phone as Token, select Login notification.
For Accept Method, select User selects matching symbol displayed on device.
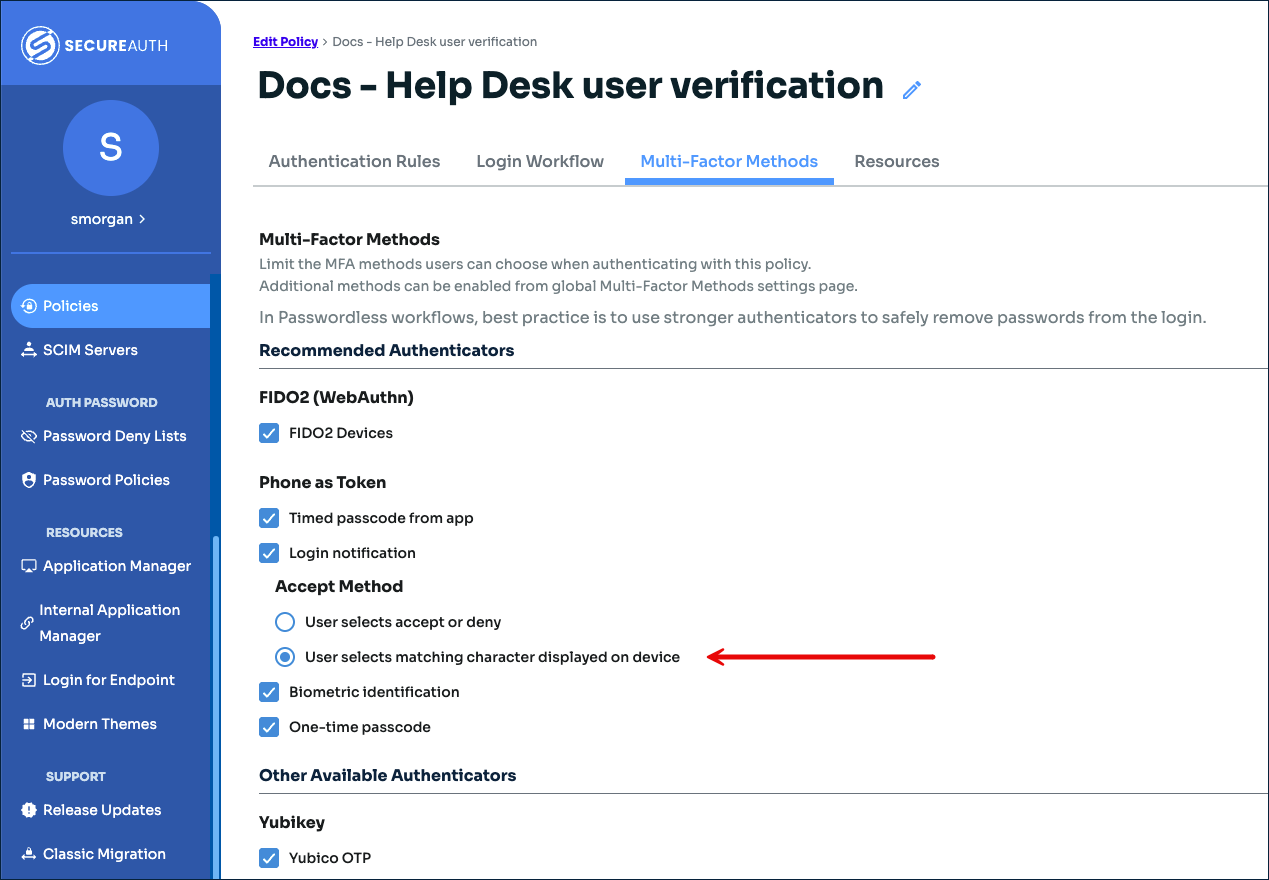
Save your changes.
Configure Account Management (Help Desk) page
In this section, you'll configure the Account Management (Help Desk) page to enable the user verification feature.
If you do not have an Account Management (Help Desk) page set up, see Account Management (Help Desk) page configuration.
Otherwise, to quickly get to this configuration, do the following:
In the Internal Application Manager, edit the Account Management (Help Desk) page.
Scroll to the bottom and click the Go to Advanced Settings to finish the configuration for this application link.
In the Identity Management section, click Configure help desk page.
On the Help Desk page, scroll down to the bottom and set User Verification to Show.
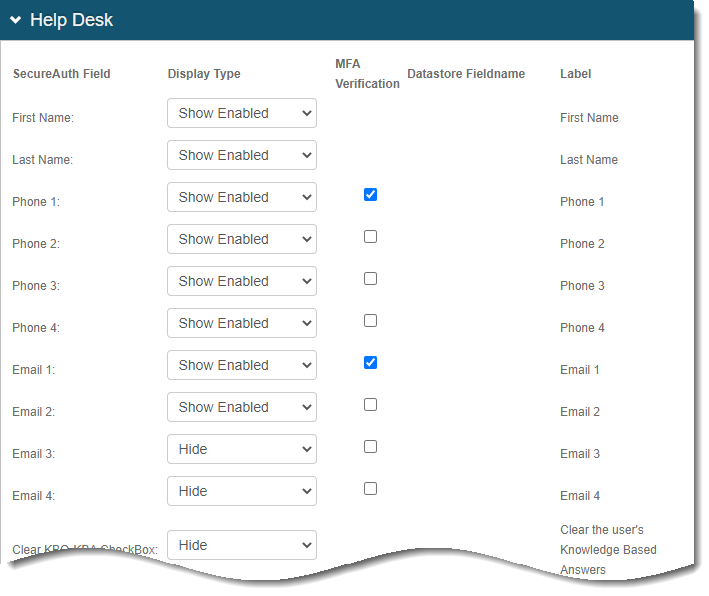
Top of page
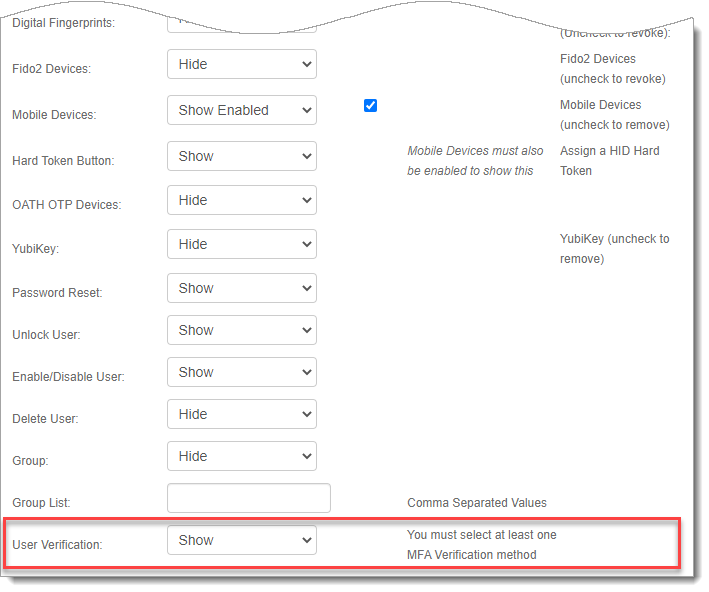
Bottom of page
Configure the remaining Help Desk page settings as needed.
<SecureAuth Field>
For each field, choose how it appears on the Help Desk page:
Hide – Do not show the field.
Show Enabled – Show the field and allow the help desk agent to edit it.
Show Disabled – Show the field as read-only.
Password Reset
Optional. Set to Show to let help desk agents reset user passwords.
Unlock User
Optional. Set to Show to let help desk agents unlock user accounts.
Requires Lock user account after exceeding attempts to be enabled in Multi-Factor Methods tab > Multi-Factor Throttling.
Enable / Disable User
Optional. Set to Show to let help desk agents enable or disable user accounts.
Delete User
Optional. Set to Show to let help desk agents delete user accounts.
Password Throttling
Set to Show Enabled to allow help desk agents to clear password throttling for locked-out users. Requires Password throttling to be configured.
MFA Throttling
Set to Show Enabled to allow help desk agents to clear MFA throttling for locked-out users. Requires MFA throttling to be configured. (Available in SecureAuth IdP 26.0.0)
In the MFA Verification column, select the check boxes for verification methods you want available. For example, under Mobile Devices, select Push, Symbol, and OTP to offer those Authenticate app methods.
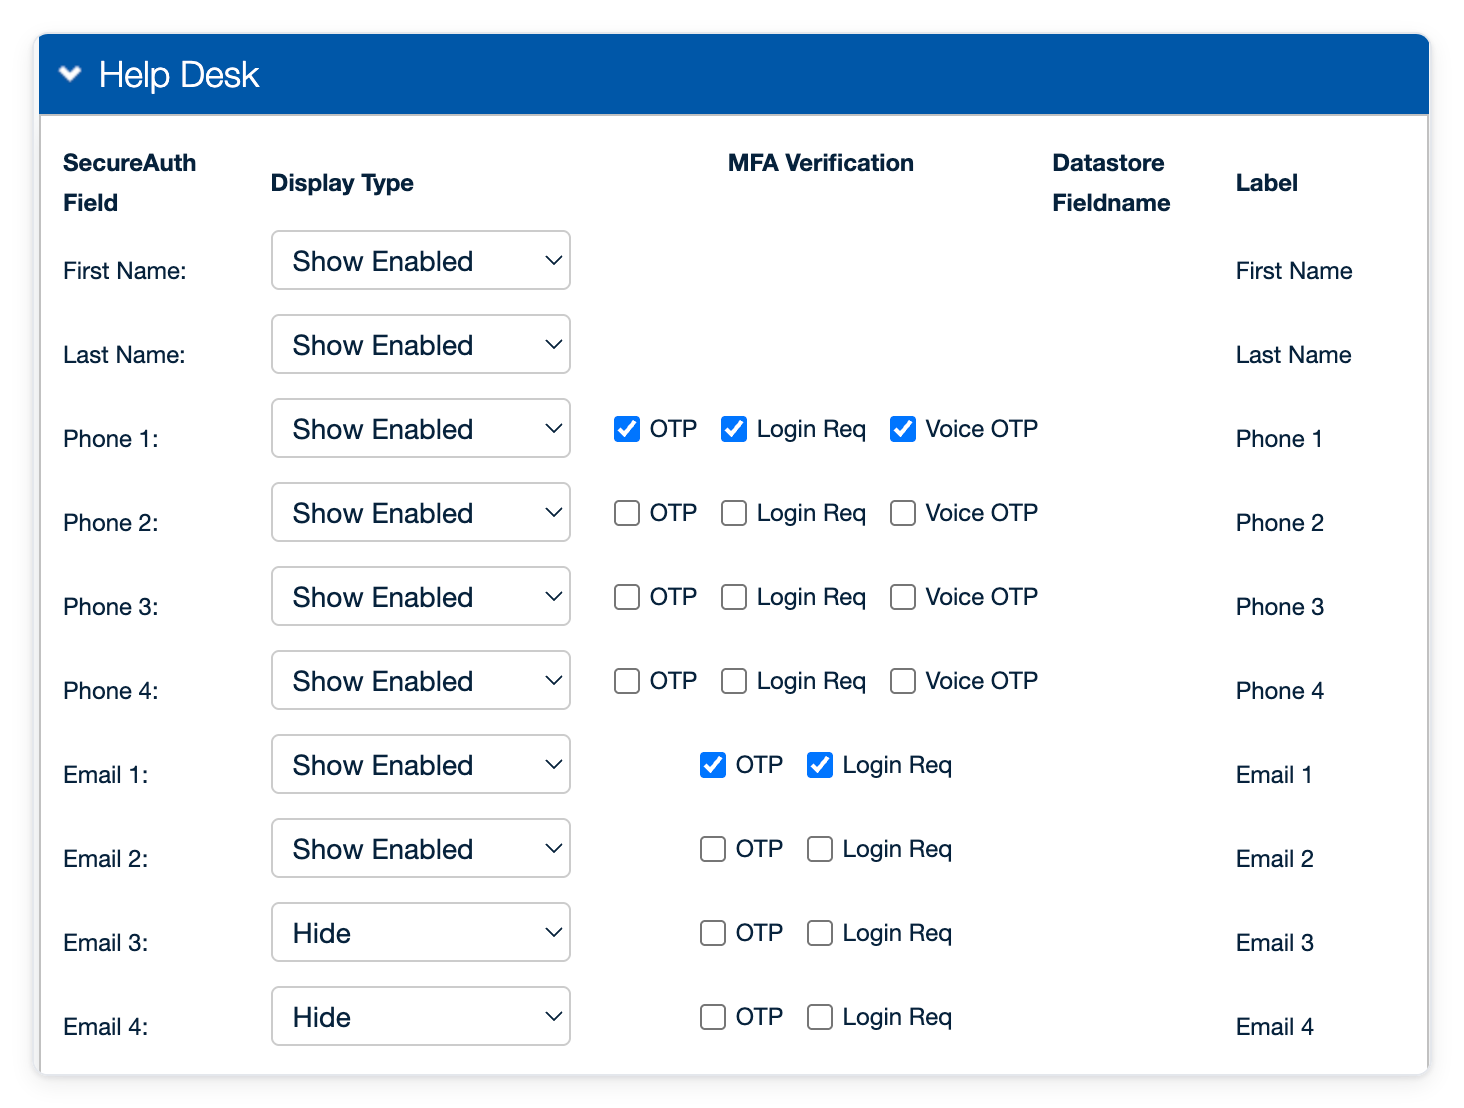
Select delivery methods
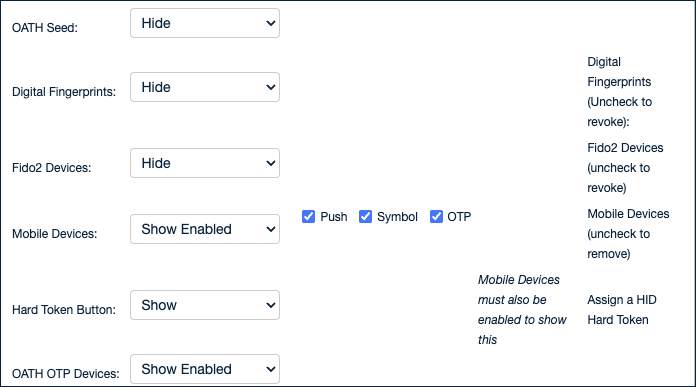
Mobile Devices verification methods: Push, Symbol, and OTP
Available verification methods:
Phone – Verify by SMS. Select the options you want available: OTP (a one-time passcode the user reads back to you) and Login Request (a one-tap approval request the user approves).
To verify by phone call, select Voice OTP. The user receives a call that reads a one-time passcode, then reads it back to you. The Voice OTP check box appears only for a phone field that is set to deliver passcodes by phone call in the realm's Multi-Factor Methods settings. It is off by default, including in realms upgraded from earlier releases. Added in SecureAuth IdP release 26.4.0
Email – Verify by email. Select the options you want available: OTP (a one-time passcode the user reads back to you) and Login Request (a one-tap approval request the user approves).
Mobile Devices – Ask the end user to read a code, accept a push notification, or tap a matching symbol (Symbol to Accept) in the Authenticate app.
Note
As of SecureAuth IdP release 26.2.0, OTP and Login Request are independent. Enable either or both, and each appears to the help desk agent only when you enable it. Earlier releases enabled both through a single Phone or Email option.
Save your changes.