FIDO2 enrollment page configuration
The FIDO2 enrollment page lets end users register and manage their FIDO2 authenticators in one place. Use the Internal Application Manager to add a FIDO2 enrollment page as an internal application.
As an administrator, you can create more than one FIDO2 enrollment page, each with its own data store, groups, authentication policy, and email notification settings. For example, you can set up a FIDO2 enrollment page for employees and a separate page for contractors, each with different access and notification rules.
Global FIDO2 settings, such as attestation type, authenticator type, device limits, and user verification, are configured in Multi-Factor Methods > FIDO2 (WebAuthn). See FIDO2 WebAuthn global MFA settings.
Prerequisites
SecureAuth® Identity Platform release 26.2.0 or later
Data store added to the Identity Platform
Data store with service account write privileges to add and change user information
Configured user authentication policy
Add and configure FIDO2 enrollment page
Use the Internal Application Manager to add and configure the FIDO2 enrollment page.
On the left side of the Identity Platform, click Internal Application Manager.
Click Add New Internal Application.
The New Internal Application page displays.
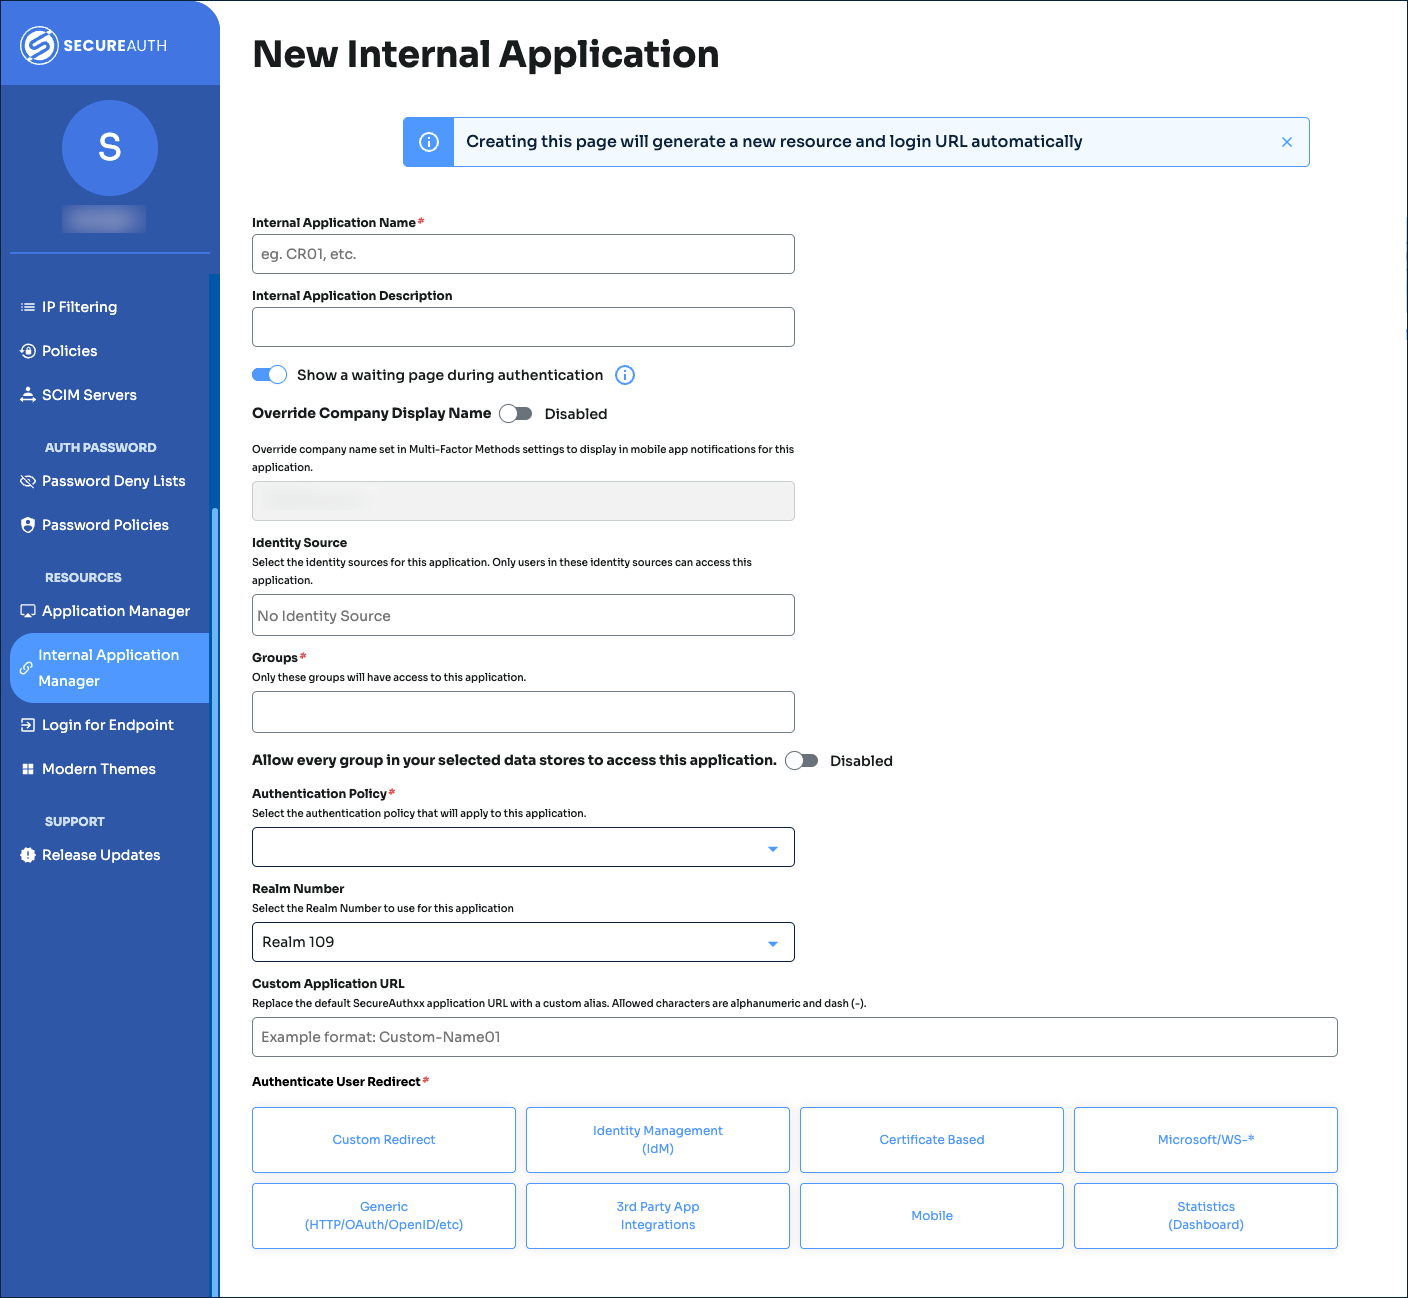
Set the following configurations:
Internal Application Name
Set the name of the FIDO2 enrollment page.
This name is shown on the page header and document title of the end user login pages.
Note
If you change this name, it will overwrite any value that is set on the Overview tab in Advanced Settings.
Internal Application Description
This is an internal description not shown to end users.
Identity Source
Enter the data store to authenticate and allow user access to the FIDO2 enrollment page.
Groups
Use one of the following options:
Slider in the On position (enabled): Allow users from every group in your selected data stores access to the FIDO2 enrollment page.
Slider in the Off position (disabled): Enter the specific groups who are allowed access to the FIDO2 enrollment page.
Authentication Policy
Select the user authentication policy for the FIDO2 enrollment page.
Realm Number
Select the Realm Number to use for this application.
Note
You can select the Realm Number only when you create the application. After you save, the realm appears in the Redirect Information section as read-only.
Authenticate User Redirect
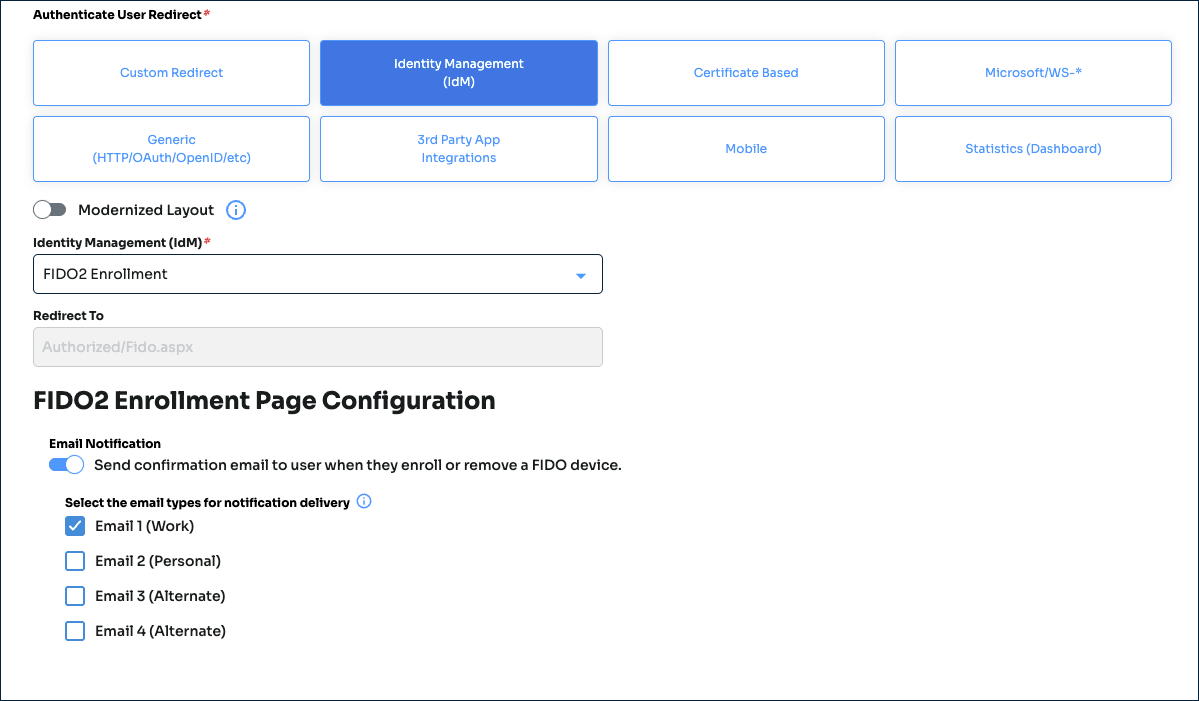
Select the Identity Management (IdM) category.
Modernized Layout
Leave the slider in the Off position.
Note
FIDO2 enrollment does not appear in the Identity Management (IdM) list when the Modernized Layout slider is On.
Identity Management (IdM)
Select FIDO2 Enrollment.
Redirect To
This field is automatically populated with
Authorized/Fido.aspxwhen you select FIDO2 Enrollment.This is the page the end user lands on after login.
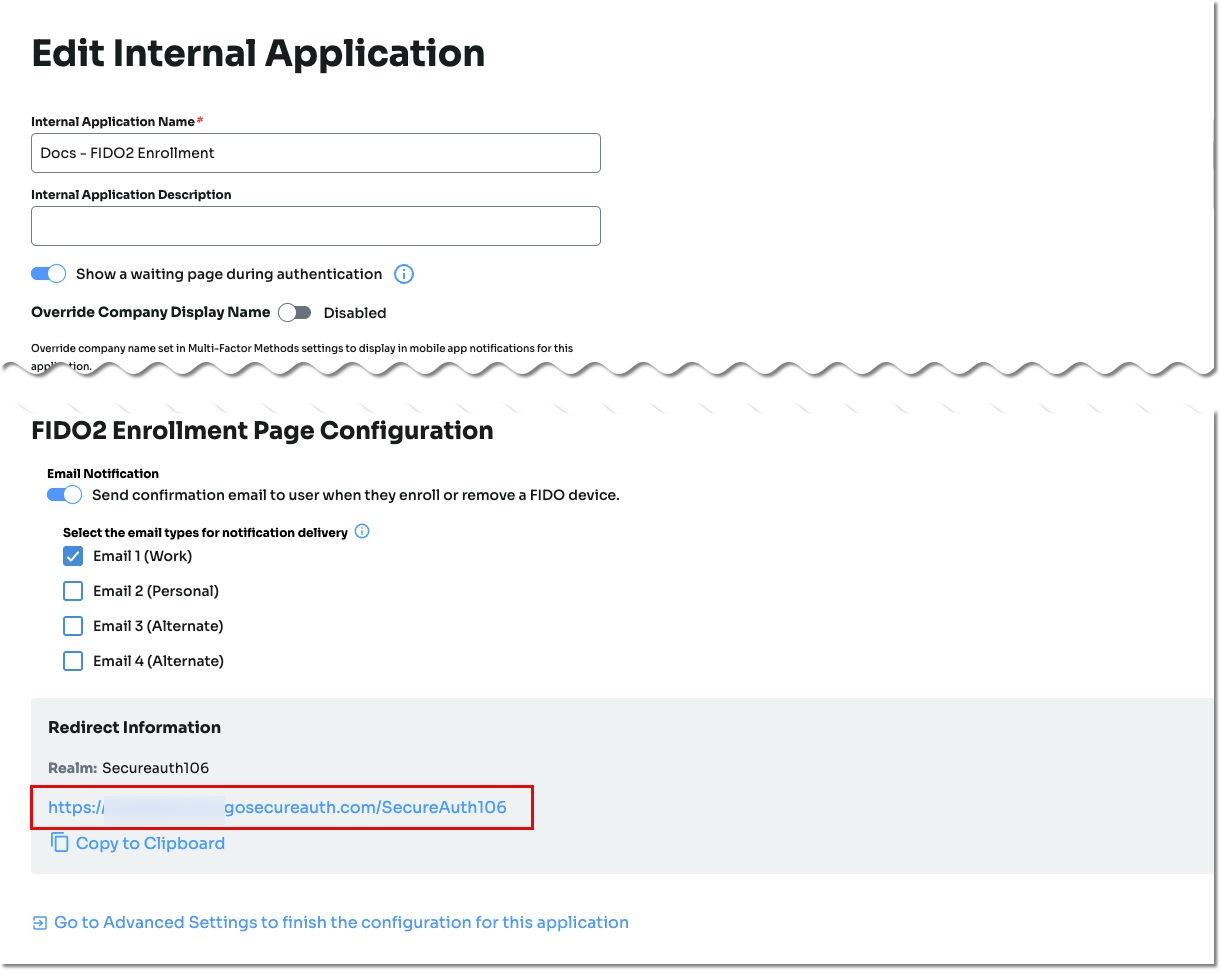
In the FIDO2 Enrollment Page Configuration section, set whether to send an email to the user when they enroll or remove a FIDO authenticator in their profile.
Then, select which email to send to the user. Make sure you have the emails mapped and configured in your data store properties.
To customize the email, see How to send a confirmation email about a FIDO2 device
Click Create Connection.
This creates a new internal application with an attached user authentication policy from the New Experience.
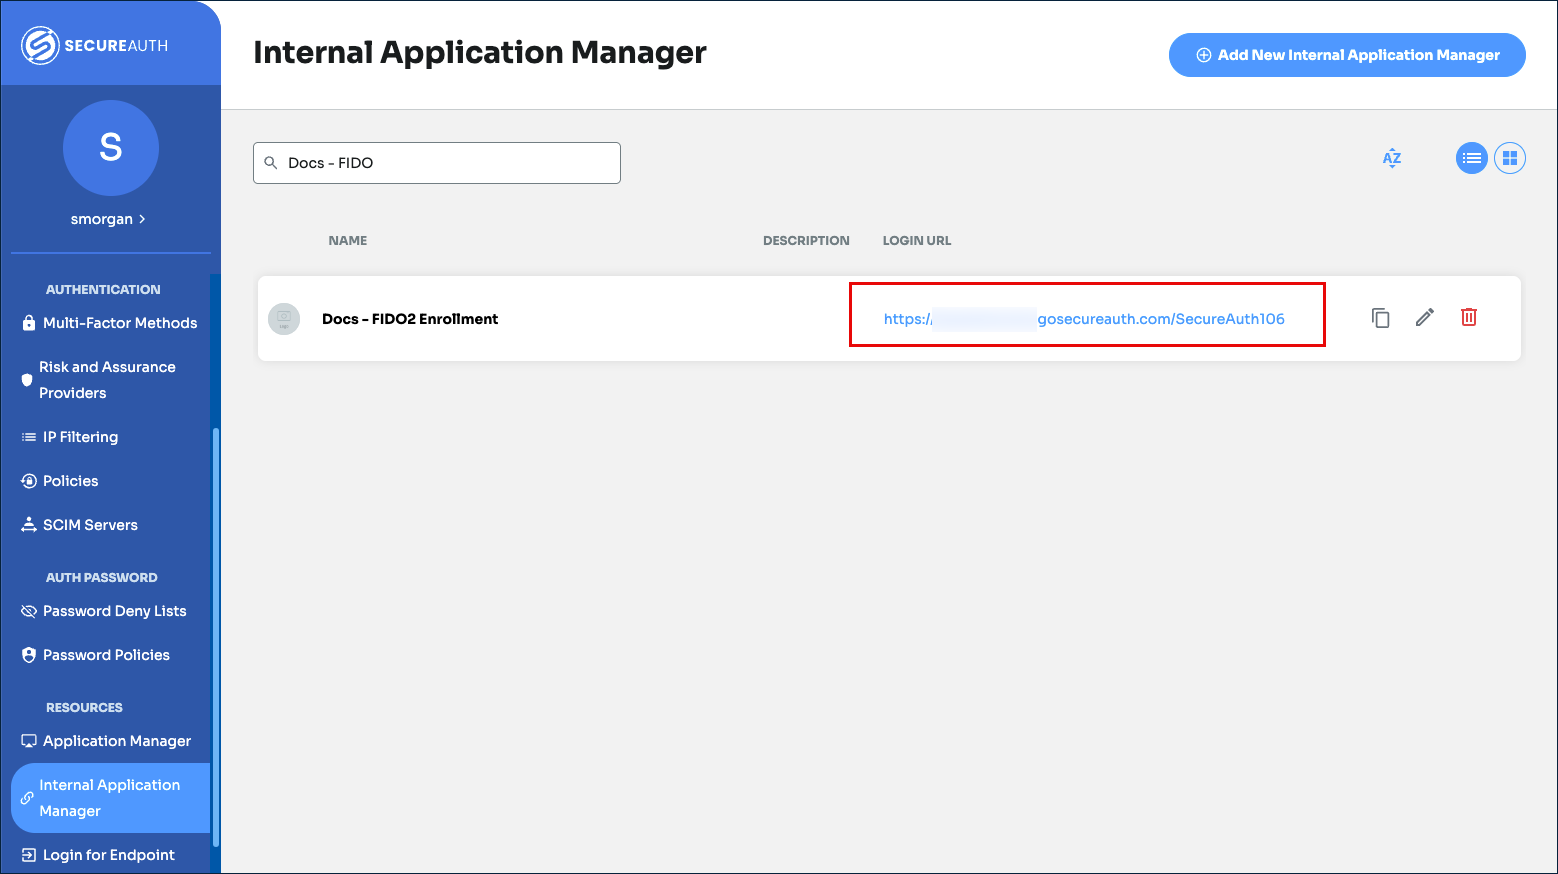
Copy the login URL for your end users to access the FIDO2 enrollment page.
You'll need this information to share with your end users.
You can find this on the main Internal Application Manager page or when you edit the FIDO2 enrollment configuration in the Redirect Information section at the bottom.