Set up Okta for authentication with a client secret
Users in your Okta org can sign in to applications registered in SecureAuth Connect, using the account they already have. Okta acts as an external identity provider, following the Bring Your Own Identity (BYOID) model.
Two ways to connect Okta over OIDC
SecureAuth has two Okta OIDC templates, and they integrate with your Okta org differently.
With the connector in this guide, you register one Okta web application, and every SecureAuth application authenticates through it. Setup is short, and SecureAuth needs no administrative access to your Okta org.
With the other connector, SecureAuth holds an Okta service application with application management rights and creates an Okta application for each application you register. That is more to set up and more privilege to grant. In return, you can keep per-application sign-on rules in Okta.
Okta | OktaV2 | |
|---|---|---|
| Application you register in Okta | API Services (machine to machine) | Web Application (OIDC) |
| Okta API scopes it needs | okta.apps.manage, okta.groups.read | None |
| How it authenticates | Private key | Client secret, or private key |
| Applications it creates in your Okta org | One for each application you register in SecureAuth | None |
| Per-application sign-on rules in Okta | Yes | No |
| Guide | Okta (OIDC, private key) | This guide |
The Create Connection page shows a single Okta template, so you do not choose between them when you add a connection. To see which one an existing connection uses, check the Type column on the Identity Providers page. Okta has no matching label, so the difference is visible only on the SecureAuth side, or in what appears in your Okta org.
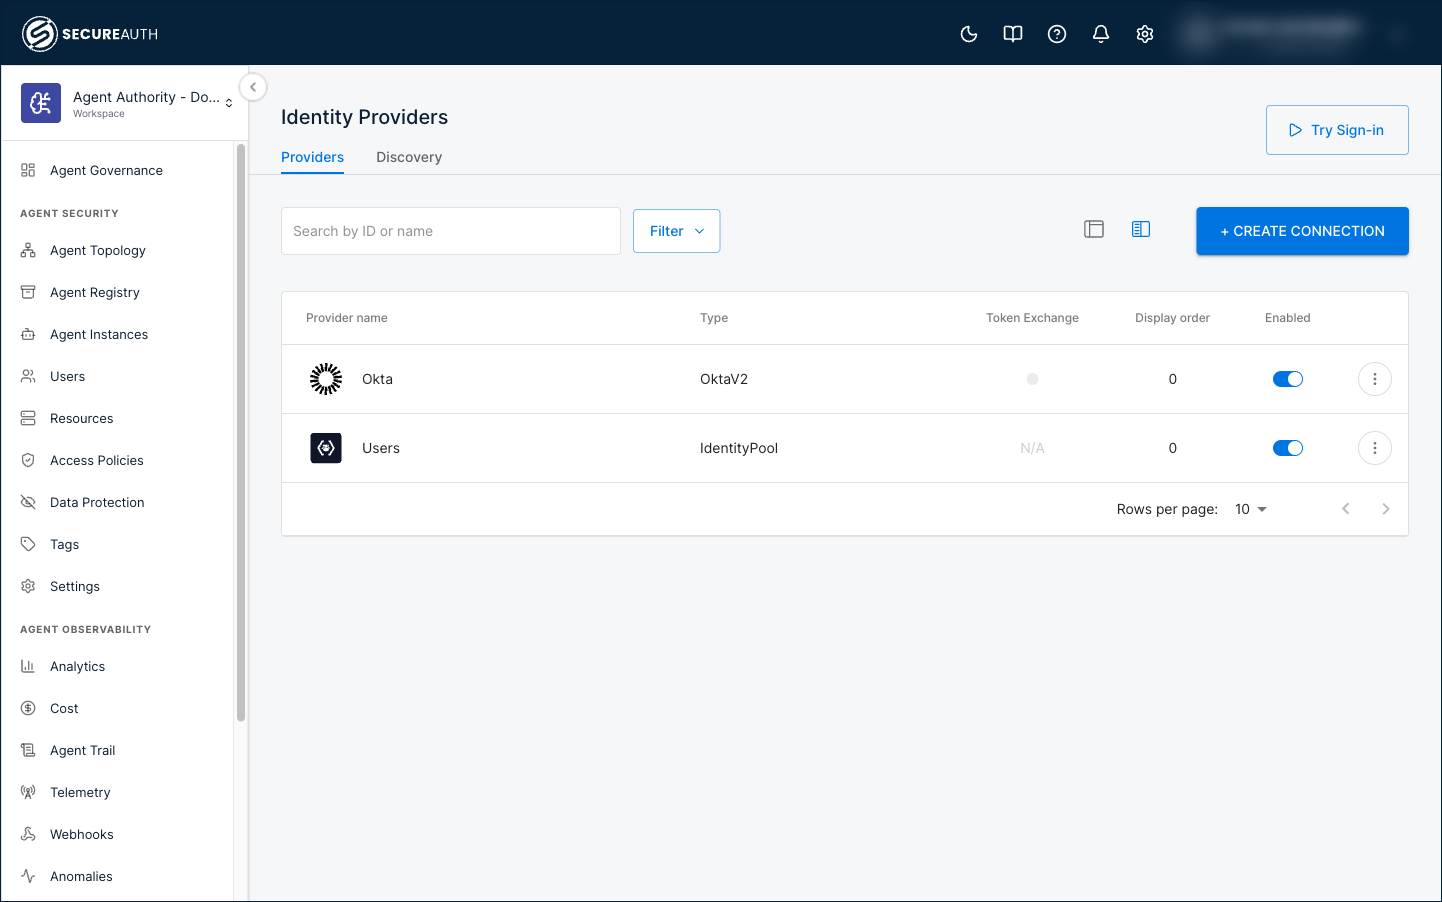
This guide covers the OktaV2 connector authenticated with a client secret, which is the common setup. The same connector can use a private key instead.
To connect Okta over SAML, read Okta (SAML).
Prerequisites
- Administrator access to your SecureAuth workspace.
- Administrator access to your Okta org, with permission to create an application integration.
You move between the SecureAuth admin portal and the Okta Admin Console during this setup, so keep both open.
Create the connection in SecureAuth
Start here rather than in Okta, because Okta needs the redirect URL that SecureAuth generates for the connection.
-
In your workspace, go to Authentication > Providers.
noteIn the Agentic AI workspace, the same page is at Identity & SSO > Identity Providers.
-
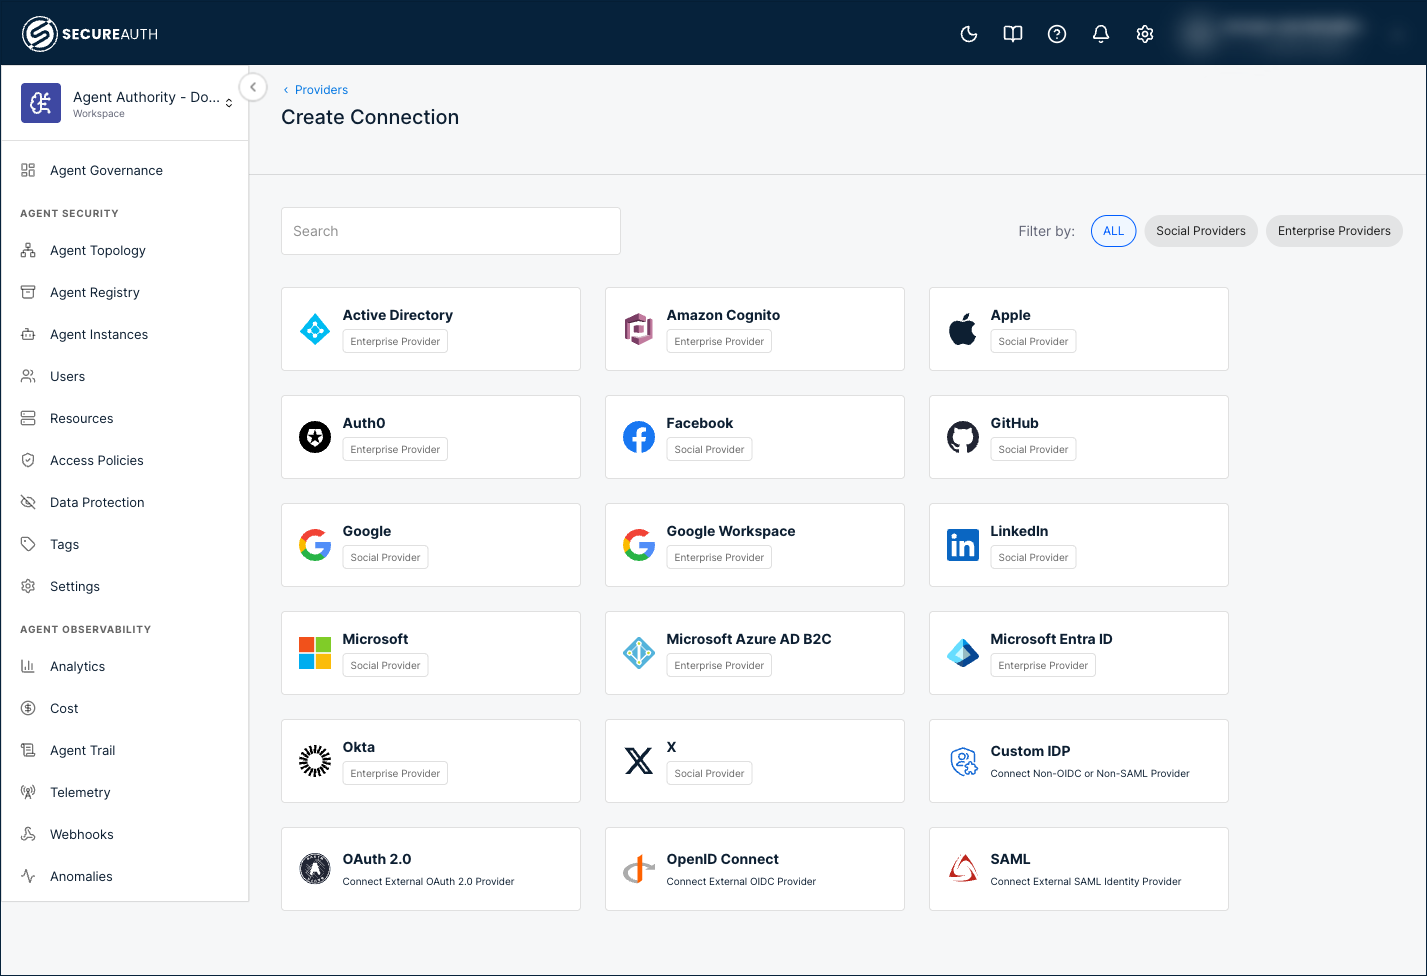
Click Create Connection.
-
Select the Okta template.
-
Copy the Redirect URL. You paste this into Okta in the next section.
Leave this page open.
Create the Okta application
Switch to your Okta Admin Console.
-
Create a new App Integration.
-
For Sign-in method, select OIDC - OpenID Connect. For Application type, select Web Application. Click Next.
-
Enter a name for the application.
-
In Sign-in redirect URIs, paste the redirect URL you copied from SecureAuth, and remove the default entry. Okta calls this value a sign-in redirect URI; SecureAuth calls it a redirect URL.
-
For Assignments, follow your organization's usual practice for deciding who gets the application.
-
Save your changes.
-
Copy the Client ID and Client Secret.
Complete the connection in SecureAuth
Switch back to the SecureAuth admin portal, to the connection you started.
-
Fill in the form.
Parameter Description Name Name for the connection. Users see this name when they choose how to sign in. Domain Okta domain where the application is registered, similar to example.okta.com. Do not include the protocol.Client ID Client ID of the application you registered in Okta. Authentication Method Select Client Secret. Client Secret Secret of the application you registered in Okta. 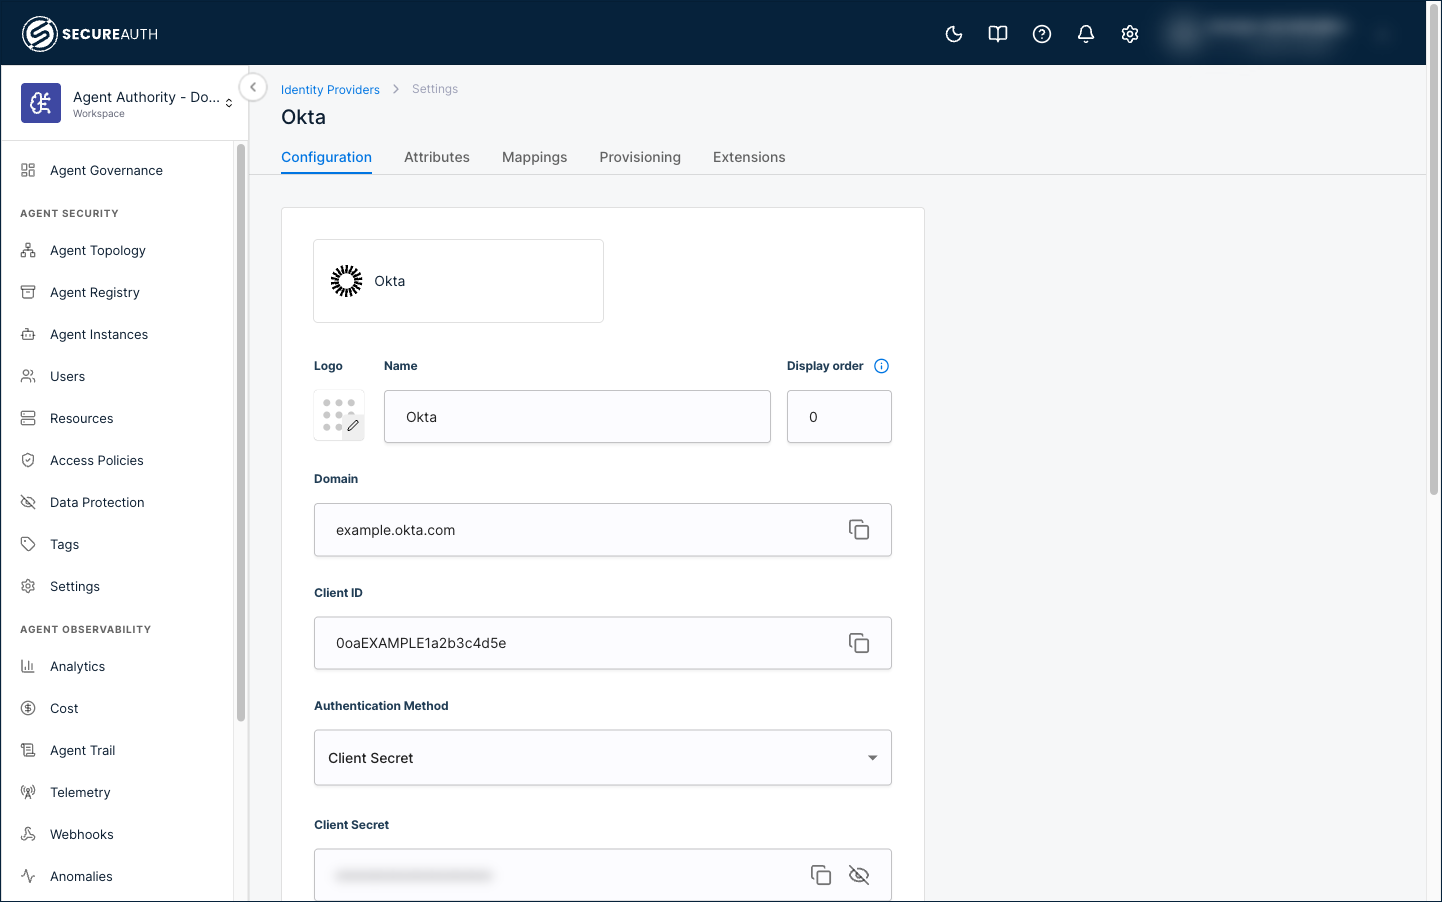
-
Save your changes.
-
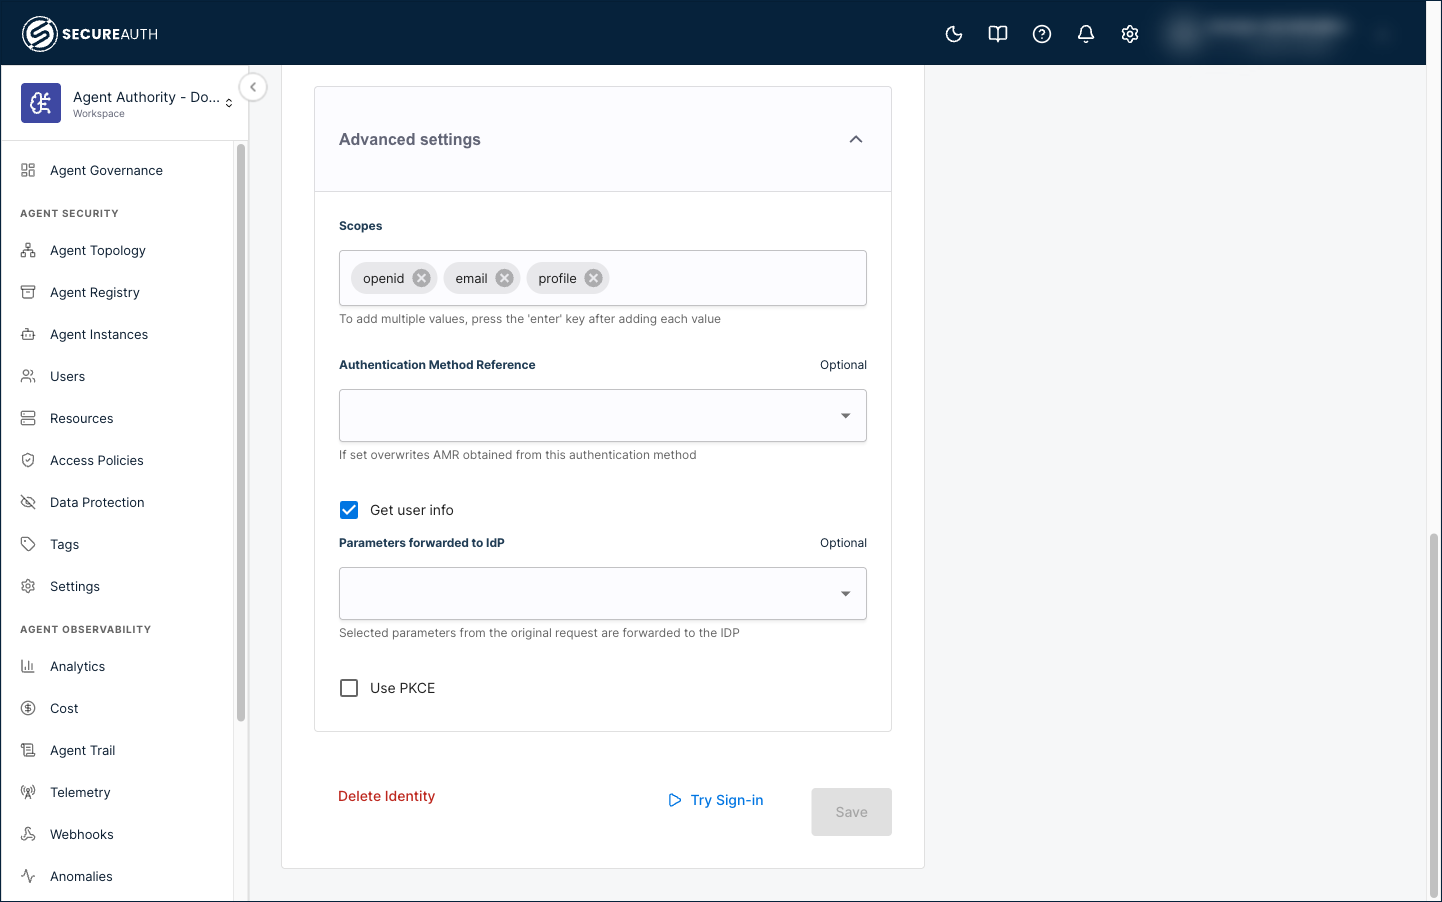
Expand Advanced settings and select the Get user info check box.
Okta's ID token does not carry the user's profile claims, so SecureAuth reads them from the Okta user info endpoint instead. Without this option, the attributes in the next section stay empty.
-
Save your changes.
Add the user info attributes
SecureAuth recognizes an incoming claim only after you add it to the connection. Add the profile claims that arrive from the user info endpoint so that you can map them in the next section.
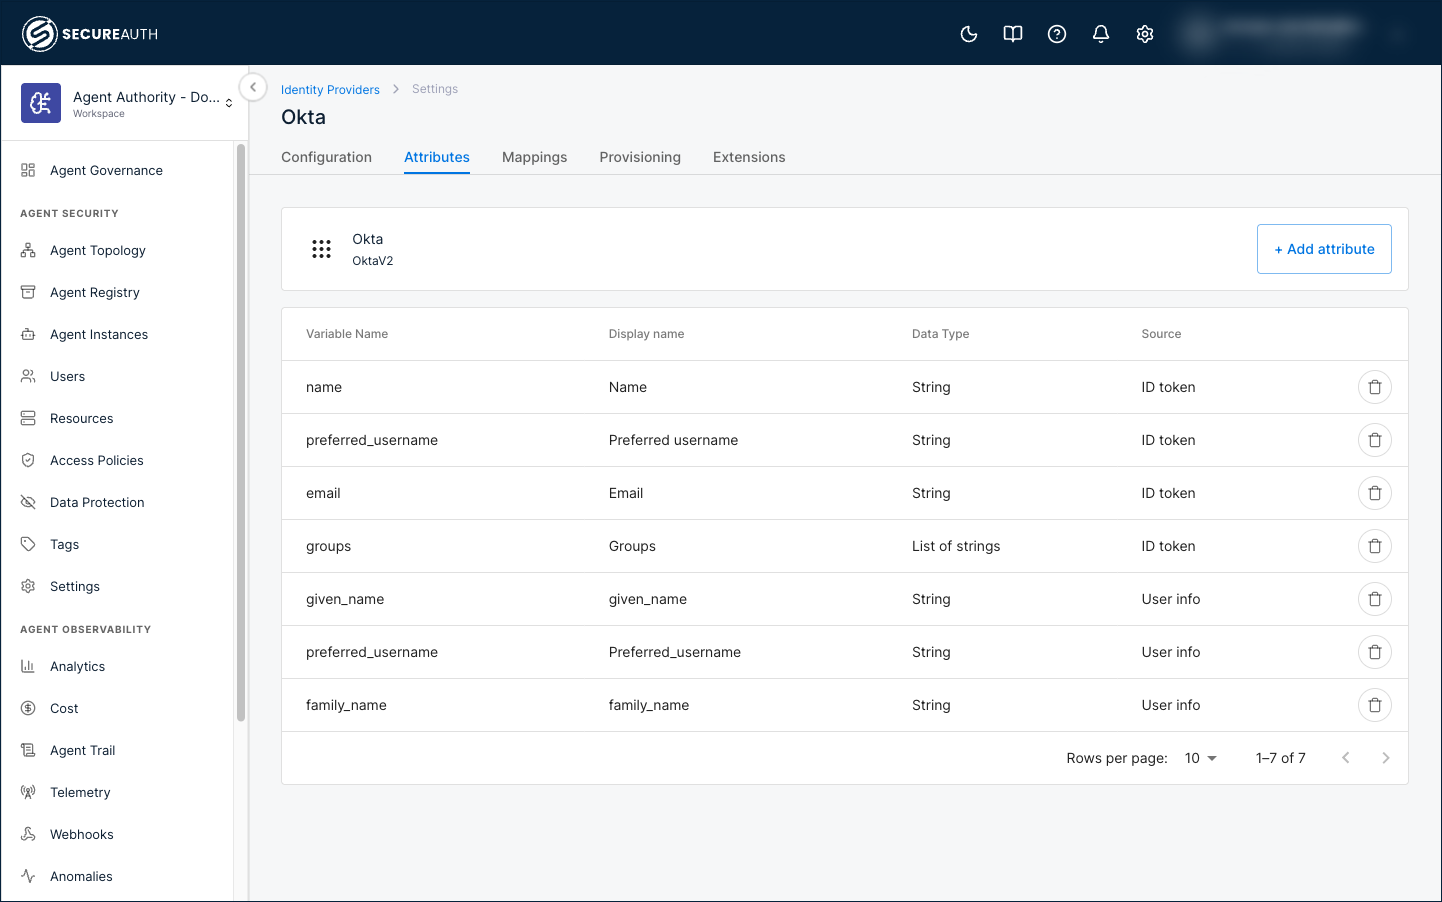
The connection starts with four attributes, all read from the ID token: name, preferred_username, email, and groups. Leave those in place and add three more.
-
Select the Attributes tab and click + Add attribute.
-
Set Source to User info, complete the rest of the form, and save. Repeat for each attribute in the table.
Variable name Display name Data type Source family_namefamily_nameString User info given_namegiven_nameString User info preferred_usernamePreferred_UsernameString User info
Map the attributes
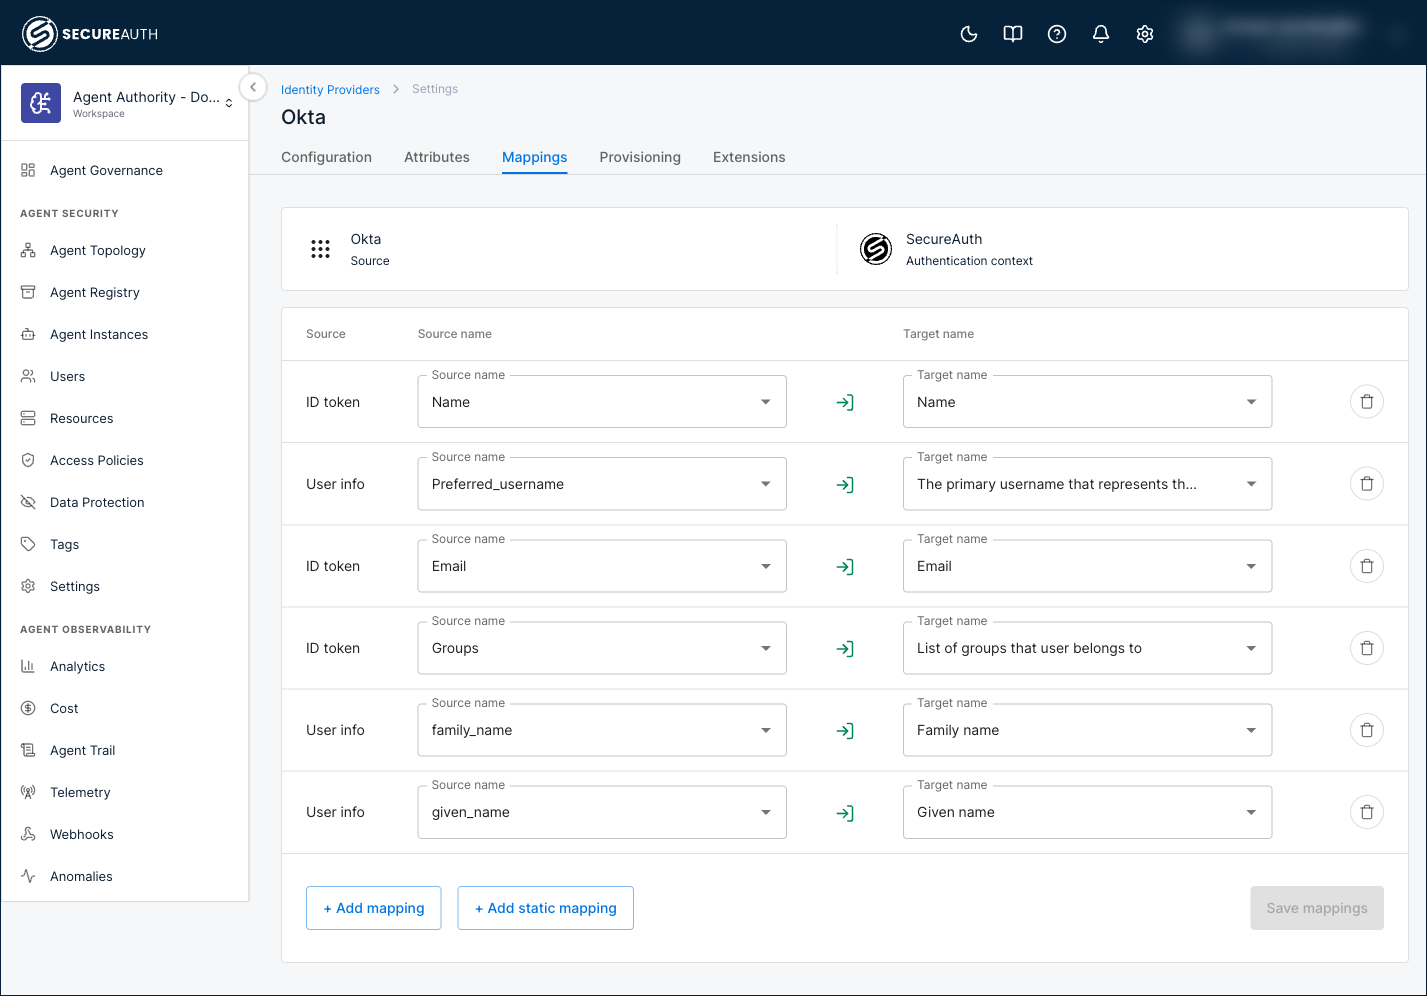
Mapping tells SecureAuth which field of the authentication context each incoming Okta claim fills. Applications and policies read the authentication context, not the raw claims.
The connection starts with four mappings, all sourced from the ID token. Repoint the username mapping at the user info attribute, then add the two name attributes.
-
Select the Mappings tab.
-
Find the row whose Target name is The primary username that represents the user, and change its Source name to the
Preferred_Usernameattribute you added. The Source column changes to User info. -
Click + Add mapping and set the new rows.
Source Source name Target name User info family_nameFamily name User info given_nameGiven name -
Click Save mappings.
Result: Six mappings, three from the ID token (Name, Email, Groups) and three from the user info endpoint.
Set up just-in-time provisioning
Just-in-time provisioning creates a user record the first time someone signs in through Okta. You do not add users by hand or migrate them ahead of time.
-
Select the Provisioning tab and choose Just-in-Time Provisioning. The other modes either discard users after they authenticate, or require you to create them ahead of time.
-
Under Identifier Correlation, leave Email selected on both sides. SecureAuth matches on this field to recognize a returning user instead of creating a second record for them.
-
Under Attribute Provisioning, click + Add row and set the rows so that incoming values land on the right user fields. The Email row is filled in for you from the identifier correlation.
Okta attribute User field Given name First name Family name Last name 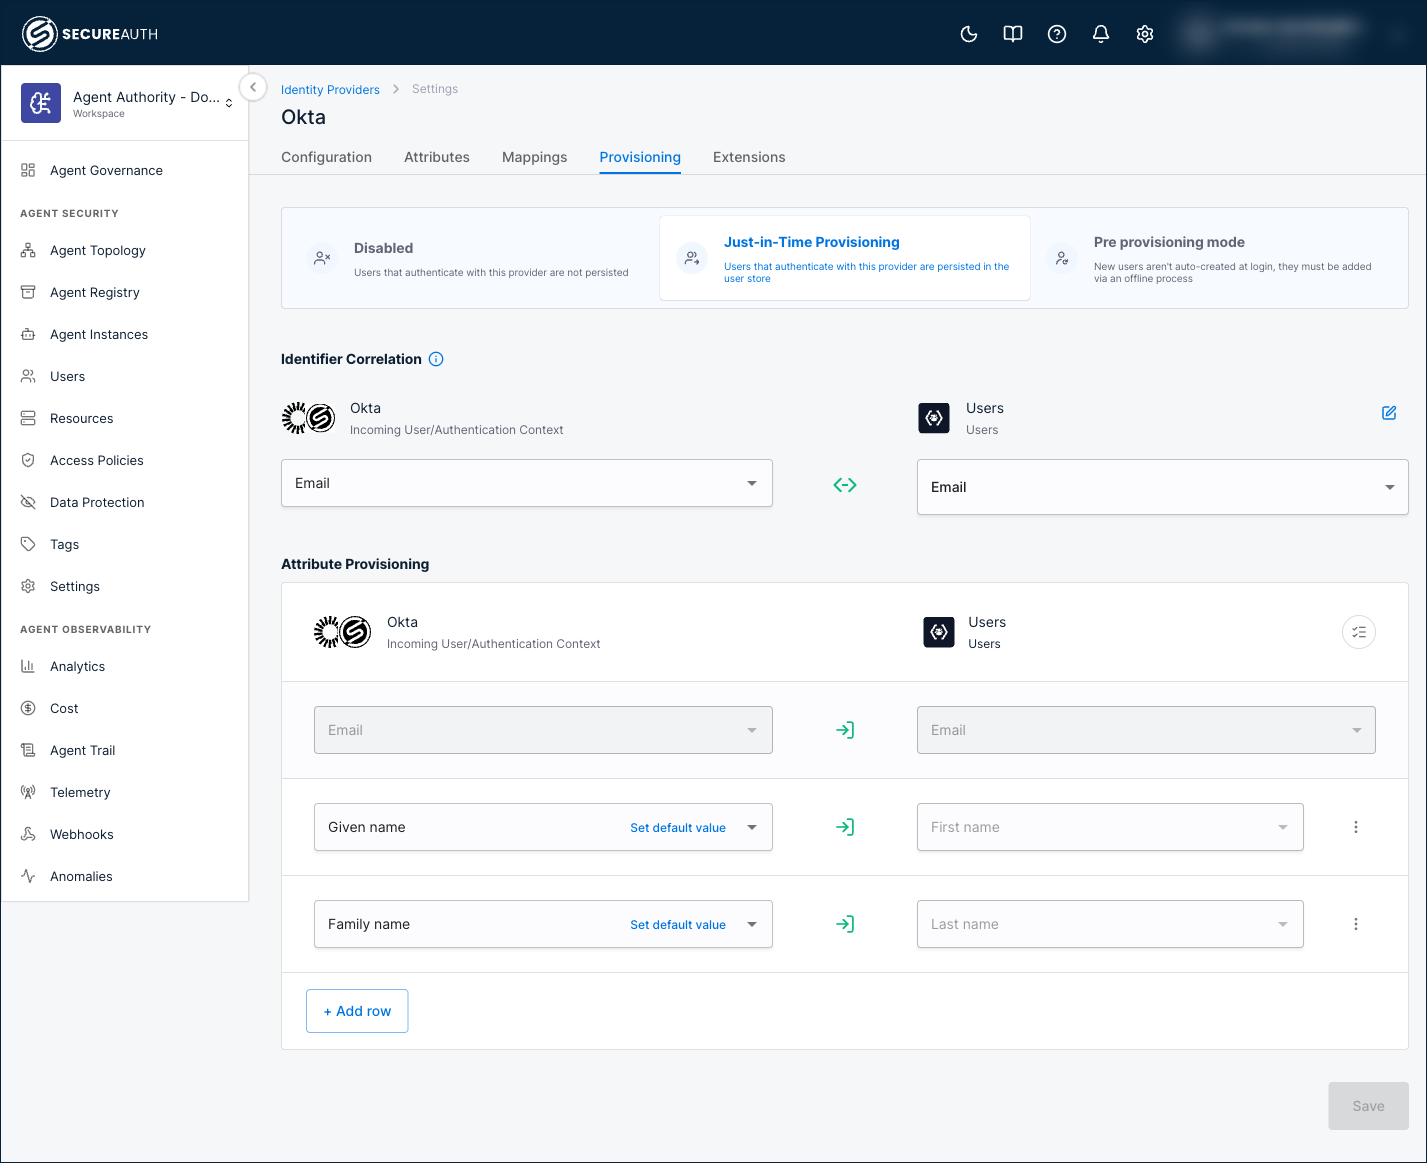
-
Save your changes.
Verify the connection
Test the flow before you point users at it.
-
Click Try Sign-in, at the bottom of the connection's Configuration tab or at the top of the Identity Providers page.
-
Sign in as a user assigned to the Okta application.
-
Confirm that sign-in completes, and that the user appears in your workspace with their first name, last name, and email.
If the name fields are empty, check two things. Confirm that Get user info is selected, and that all three user info attributes are present on the Attributes tab.