SSO Portal themes
The SSO Portal (formerly Secure Portal) provides a main page for end user single sign-on (SSO) access to applications.
As an Administrator, you can edit the default portal theme or create custom themes with your company's logo and branding colors. You can also decide how application tiles appear.
To apply a theme to your SSO Portal, see SSO Portal configuration
Note
The SSO Portal theme is different from the Identity Platform theme that you configure in Advanced Settings.
Prerequisites
Identity Platform release 24.04 or later
Create a new theme
On the left side of the Identity Platform page, click SSO Portal Themes.
Do one of the following:
Click Add Theme to create a new theme from the beginning.
Click the copy icon in the Default Theme section to copy the default theme. This creates a new theme pre-filled with default theme settings that you can edit.
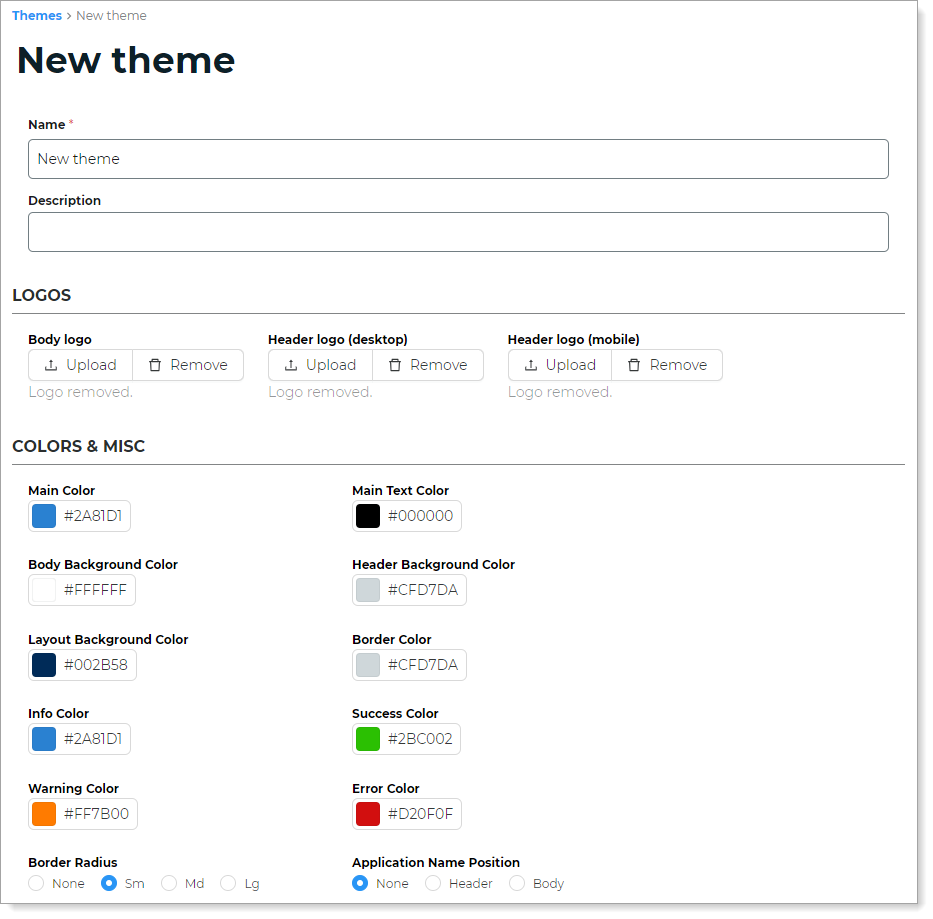
The New Theme page appears. Set the following:
Name
Enter a unique name for your theme.
Description
Optional. Enter a description about your theme.
Make the following customizations:
Tip
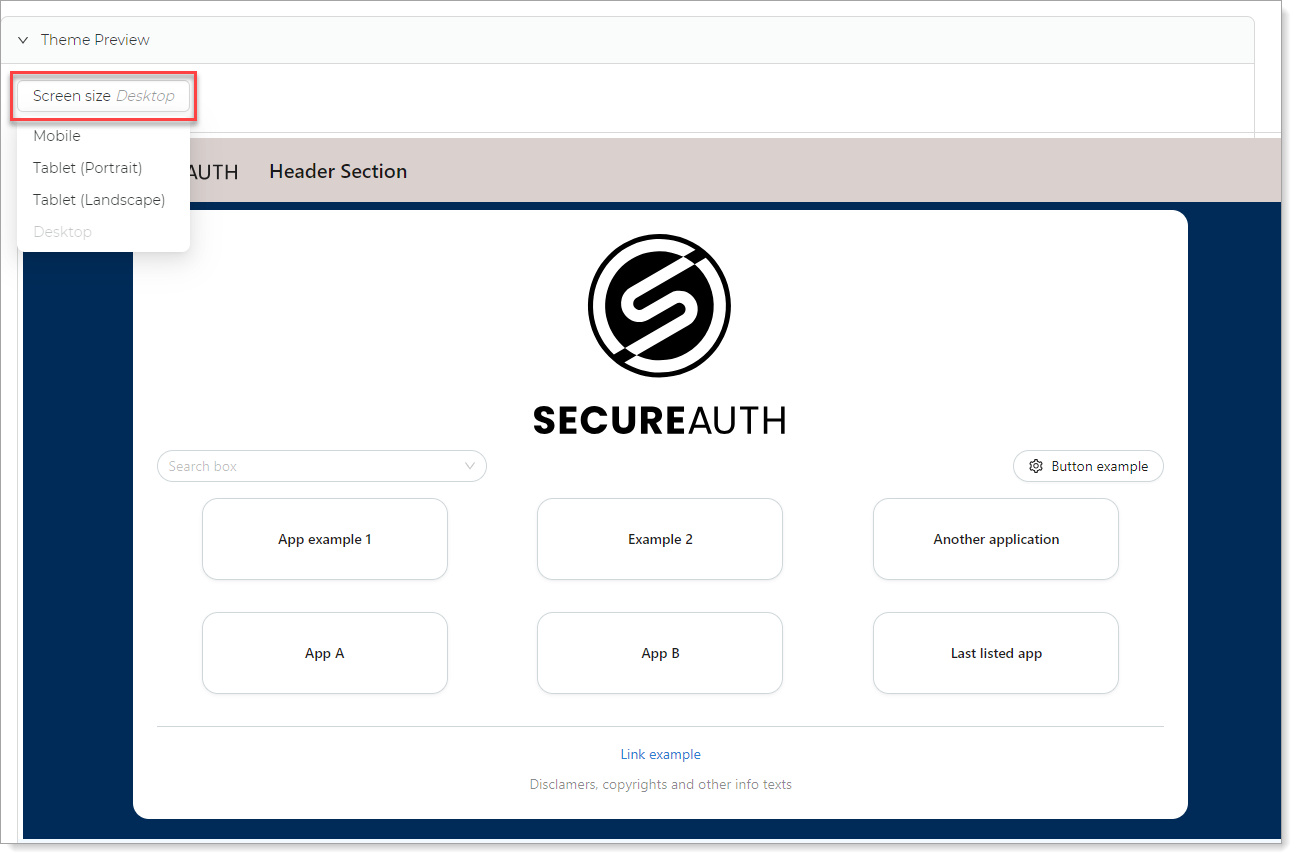
Click Theme Preview to view your SSO Portal Page customizations as you set them.
By default, the Theme Preview displays the Desktop screen size. Click the Screen size button to select one of the following layout sizes:
Mobile
Tablet (Portrait)
Tablet (Landscape)
Desktop
LOGOS
For each category, do one of the following:
Click Upload to upload an image file.
Click Remove to display no image.
The options for logo customizations are:
Body logo – This logo displays at the top center of the page body.
Header logo (desktop) –This logo displays at the top left corner of the page header when viewed on a desktop.
Header logo (mobile) – This logo displays at the top left corner of the page header when viewed on a mobile device.
Tip
For best image quality, follow these guidelines:
Upload images with transparent backgrounds.
Accepted image formats are: jpeg, jpg, png, svg, or webp.
The maximum size allowed is: 512KB.
COLORS & MISC
For each category, click the color preview square to open the color picker and do one of the following:
Move the sliders to select a new color and adjust the shade.
Click the down arrow icon and select a color format: HEX, HSB, or RGB. Enter an appropriate color code.
Border Radius
Set the border radius size for the page and application cards.
The options are:
None – Square edges for a sharp outline..
Sm – Small rounded edges for a subtle curve.
Md – Medium rounded edges for a noticeable, softer curve.
Lg – Large rounded edges for a pronounced, smooth curve.
Application Name Position
Set where the Application Name displays.
Note: This displays the name of the application as it was entered in the Internal Application Manager.
The options are:
None – No Application Name appears.
Header – Application name displays at the top of the page.
Body – Application name displays as a title in the body of the page.
Click Create.
Edit default theme
On the left side of the Identity Platform page, click SSO Portal Themes.
In the Default Theme section, click Edit Default Theme.
Make your customizations and click Update.
Tip
Click Restore Default Settings to clear any customizations. Once confirmed, the default theme reverts to its original settings.