Policy configuration - Login workflow
Use the Login Workflow tab to define how users authenticate. You can configure passwordless login, QR code authentication, or enforce multi-factor authentication (MFA) based on conditions.
For example, users can scan a QR code and approve a push notification on their mobile device. If they select a different MFA method, they may need to enter a password.
Configuring login workflow options
With a policy open in edit mode, select the Login Workflow tab.
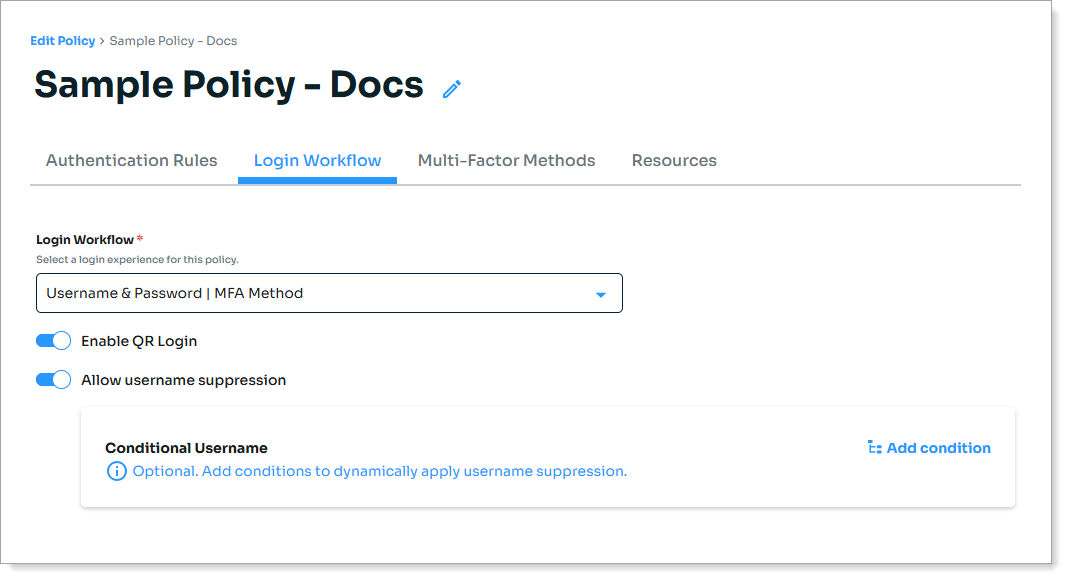
Select the Login Workflow experience for users to access a resource attached to this policy.
Login workflow experience
Description
Passwordless
Includes the following options:
Enable QR Login to show a QR code on the login page. Requires Authenticate app version 23.03 or later.
Allow username suppression to show only the QR code and hide the username field. Optionally add a condition to dynamically hide the username with any of these conditions:
Country
IP Range
Threat Service
For the end user, this the passwordless workflow login process:
Step 1: User provides username on the login page.
Step 2: User is prompted for multi-factor authentication on the next page.
The recommended authenticators for Passwordless login methods are:
FIDO2 security keys (Requires the Prevent licensing package.)
Phone as Token (timed passcode from an app, login notification, accept/deny method, select matching character displayed on device)
Biometric authentication (using SecureAuth Authenticate app)
One-time passcode
Scan QR code (using SecureAuth Authenticate app)
Username & Password | MFA Method
Includes the following options:
Enable QR Login to show a QR code on the login page. Requires Authenticate app version 23.03 or later.
Allow username suppression to show only the QR code and hide the username field. Optionally add a condition to dynamically hide the username with any of these conditions:
Country
IP Range
Threat Service
When you add a new policy, this is the default login workflow selection. For the end user, this is the workflow login process:
Step 1: User provides username and password on the login page.
Step 2: User is prompted for multi-factor authentication on the next page.
Username | MFA Method | Password
Includes the following options:
Enable QR Login to show a QR code on the login page. Requires Authenticate app version 23.03 or later.
Allow username suppression to show only the QR code and hide the username field. Optionally add a condition to dynamically hide the username with any of these conditions:
Country
IP Range
Threat Service
Allow password suppression with any of these conditions:
Device Recognition
Group
Multi-factor Methods
User
Option 1: Do not use password suppression
For the end user, this is the workflow login process:
Step 1: User provides username on the login page.
Step 2: User is prompted for multi-factor authentication on the next page.
Step 3: User provides password on the next page.
Option 2: Use password suppression
For the end user, this is the workflow login process:
Step 1: User provides username on the login page.
Step 2: User is prompted for multi-factor authentication on the next page.
Step 3: User provides a password on the next page, unless they meet the defined condition and do not need to provide a password.
For example, the condition might be that they use a login notification from an authentication app.
(Valid Persistent Token) | MFA Method
For the end user, this is the workflow login process:
Step 1: User provides valid persistent token (in lieu of a username) on the login page. A persistent token could be a fingerprint.
Step 2: User is prompted for multi-factor authentication on the next page.
(Valid Persistent Token) | MFA Method | Password
Includes Allow password suppression option with any of these conditions:
Device Recognition
Group
Multi-factor Methods
User
For the end user, this is the workflow login process:
Step 1: User provides valid persistent token (in lieu of a username) on the login page. A persistent token could be a fingerprint.
Step 2: User is prompted for multi-factor authentication on the next page.
Step 3: User provides a password on the next page, unless they meet the defined condition and do not need to provide a password.
For example, the condition might be that they use a login notification from an authentication app.
Windows SSO | MFA Method
Starting with this Identity Platform 24.04 release, the Windows SSO as an MFA method was moved to the Authentication Rules tab.
It is visible in the menu on the Login Workflow tab, but disabled, so it can't be selected.
Go to the Authentication Rules tab, use Run Windows SSO as a condition in an authentication rule for Country, IP Range, or Threat Service.
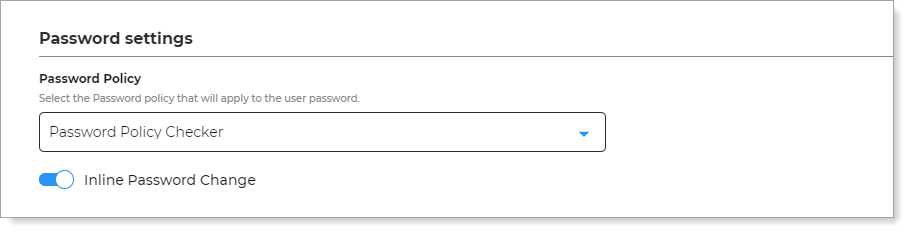
Optional. In the Password settings section, you can set the following configurations.
Password Policy
Select the password policy for the user password.
With this setting, it shows and enforces the password requirements to users in real-time when they change their password.
Inline Password Change
Move the slider ON to allow users to change their password inline without leaving the page.
Note: This setting applies to applications configured in the New Experience. This setting is no longer available in the Advanced Settings.
Optional. You can delegate SAML-based authentication to an external IdP.
For use case examples about how to use this setting, see SecureAuth IdP and Arculix integration (IdP Chaining) and SecureAuth IdP and Arculix integration (IdP Factoring).

In the Other settings section for External Identity Provider, click the Open settings link and move the slider to Enabled.
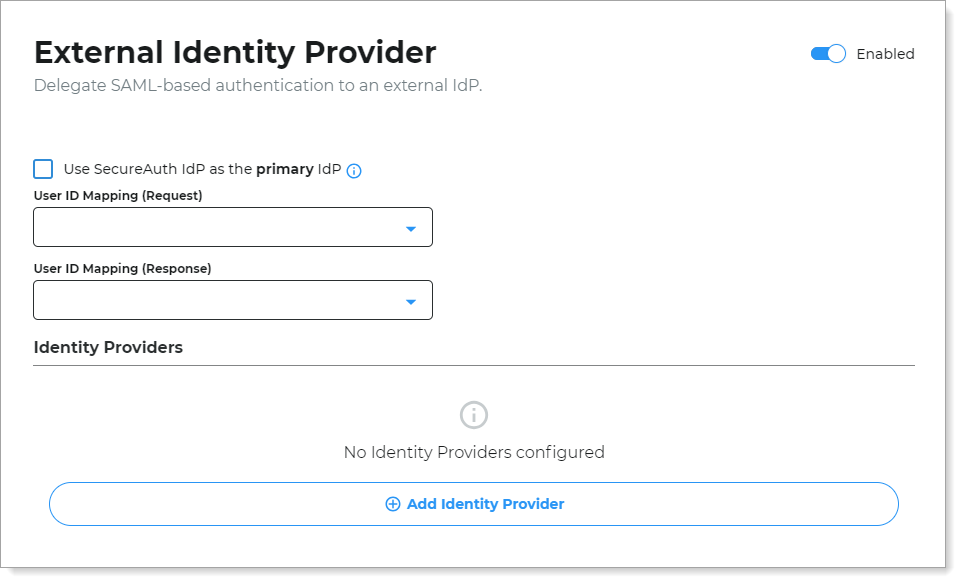
Set the following configurations.
Use SecureAuth IdP as the primary IdP
True – Select this check box if SecureAuth IdP will validate the user login.
False – Leave this check box cleared if the external IdP will validate the user login.
User ID Mapping (Request)
Set it to where the Search Attribute is mapped, like userPrincipalName, in the data store profile properties.
For example, Aux ID 9.
User ID Mapping (Response)
Set it to the mapped SAML Consumer response from the external IdP, like the samAccountName or Authenticated User ID.
For example, Authenticated User ID.
Click Add Identity Provider and set the following configurations.
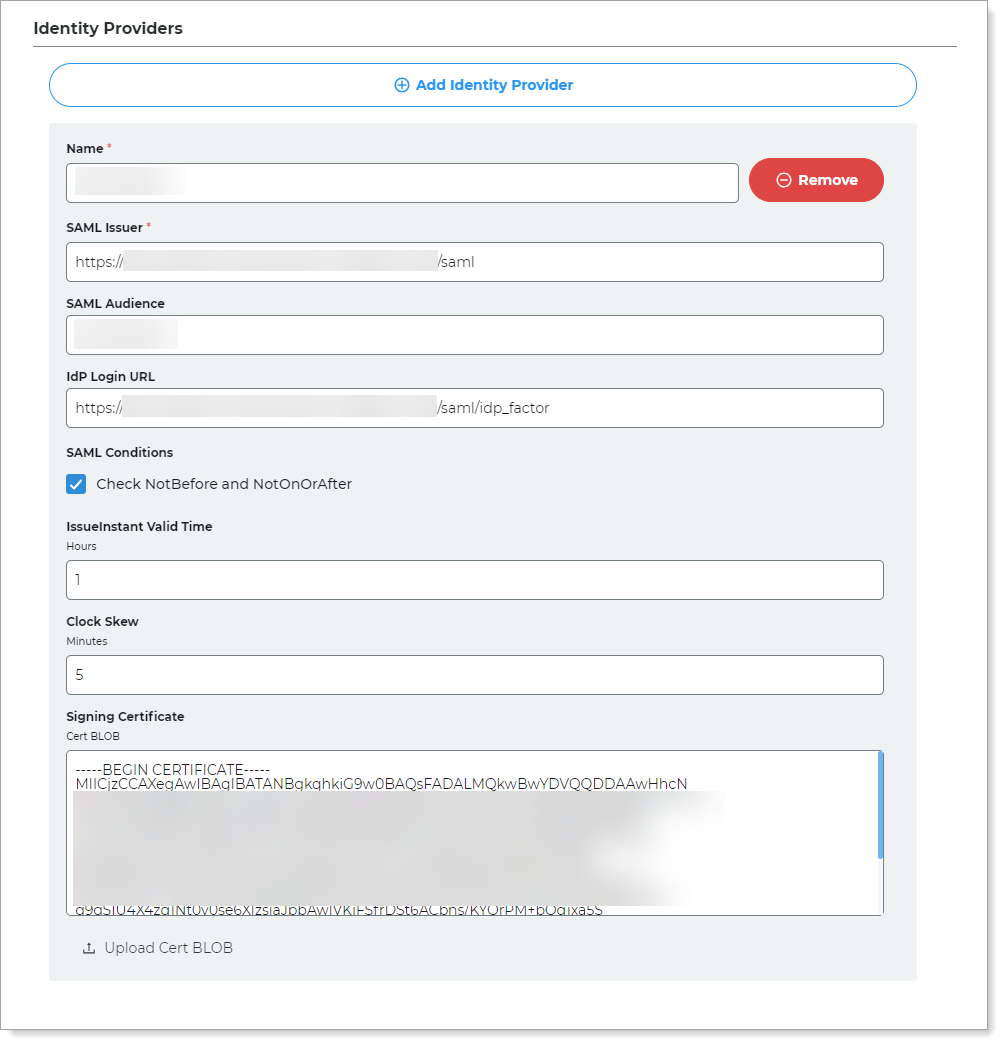
Name
Provide a descriptive name that identifies the external IdP.
For example, External-IdP
SAML Issuer
Enter the SAML Issuer information for your organization in the external IdP. This is usually the external IdP base URL followed by
/saml.For example,
https://sso.external-idp.com/<your-organization>/saml.SAML Audience
Provide a descriptive name that identifies the external IdP (you can use the same name as the Identity Provider Name, above).
For example, External-IdP
IdP Login URL
Enter the login URL for your organization in the external IdP. This is your usually the external IdP base URL followed by
/saml/idp_factor.For example,
https://sso.external-idp.com/<your-organization>/saml/idp_factorSAML Conditions
Select this check box. This activates the validation of time-based constraints on SAML assertions. It ensures they are only used within their valid time period of the SAML assertion. It checks:
NotBefore – Assertion is invalid if used before this time.
NotOnOrAfter – Assertion is invalid if used on or after this time.
This setting adds another layer of security. It stops the potential misuse of SAML assertions outside their intended time.
IssueInstant Valid Time
Set the number of hours during which the SAML assertion is valid.
Clock Skew
Set the number of minutes that SecureAuth IdP subtracts from the NotBefore SAML condition to account for any time differences between SecureAuth IdP and the external IdP.
Signing Certificate
Paste the certificate blob from the external IdP.
Optional. Use inline initialization to allow users to reset passwords and configure MFA methods during the login flow without leaving the authentication page.
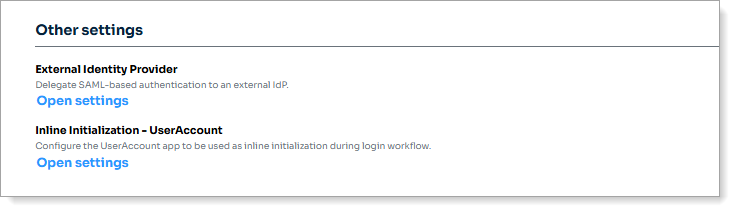
In the Other settings section for Inline Initialization, click the Open settings link and move the slider to Enabled.
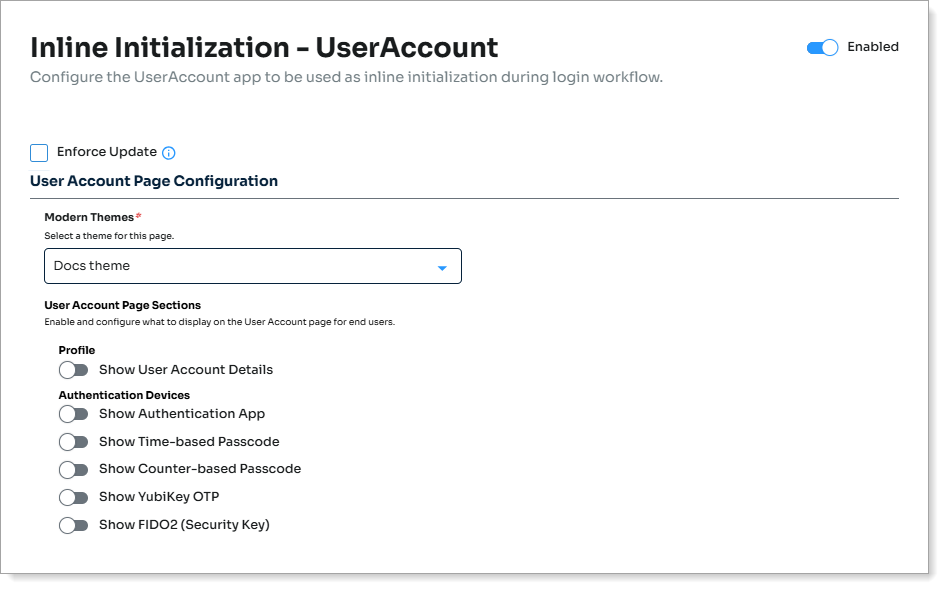
Select or clear the Enforce Update check box to either show a warning message to users (cleared) or prevent users from proceeding until they complete the required set up (selected).
Set the following configurations.
Profile
Configure which profile fields users can update during inline initialization.
For detailed field configuration options, see Profle configuration.
Authentication Devices
Allow users to register authentication devices inline, like mobile Push/TOTP, FIDO, Yubikey, TOTP/HOTP, HID hard tokens, and so on.
For detailed field configuration options, see Authentication devices.
Save your changes.