Multi-factor app enrollment QR code configuration
Use this guide to create an app enrollment page with a QR code workflow for end users to connect to their profile in the following ways to enroll and provision any of the following:
SecureAuth Passcode app to receive one-time passcodes (OTPs) on their desktop
SecureAuth Authenticate app to receive time-based one-time passcodes (TOTPs), push notification one-time passcodes (OTPs), Push-to-Accept, and Symbol-to-Accept login requests on their mobile device
Once provisioned to use SecureAuth Passcode and SecureAuth Authenticate, the passcode and login requests from the app is used to validate the end user attempting to log in to a protected resource.
For supported versions of mobile apps, OTP clients, desktop browsers, and paired smartwatches, see the SecureAuth compatibility guide.
Note
We now have a modernized User Account page in the New Experience. Users can now seamlessly register and manage authentication devices, including enhanced phone and email verification methods, all in one page.
To learn more and configure MFA app enrollments using a QR code, see ??? and Authentication Devices.
This topic is for the standard (non-modernized) configuration of the QR enrollment page.
Prerequisites
SecureAuth® Identity Platform release 24.04 or later
Data store added to the Identity Platform
Configured user authentication policy
Identity Platform configuration
Use the Internal Application Manager to add and configure the QR enrollment page.
On the left side of the Identity Platform, click Internal Application Manager.
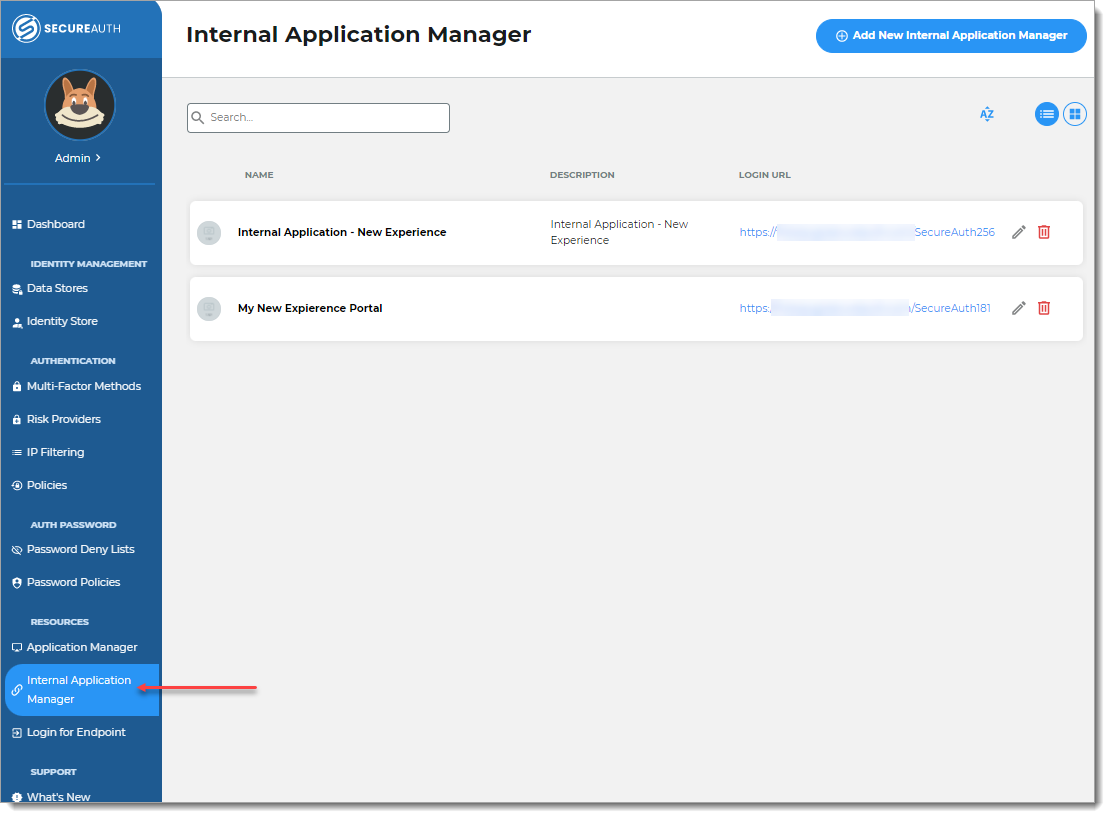
Click Add New Internal Application.
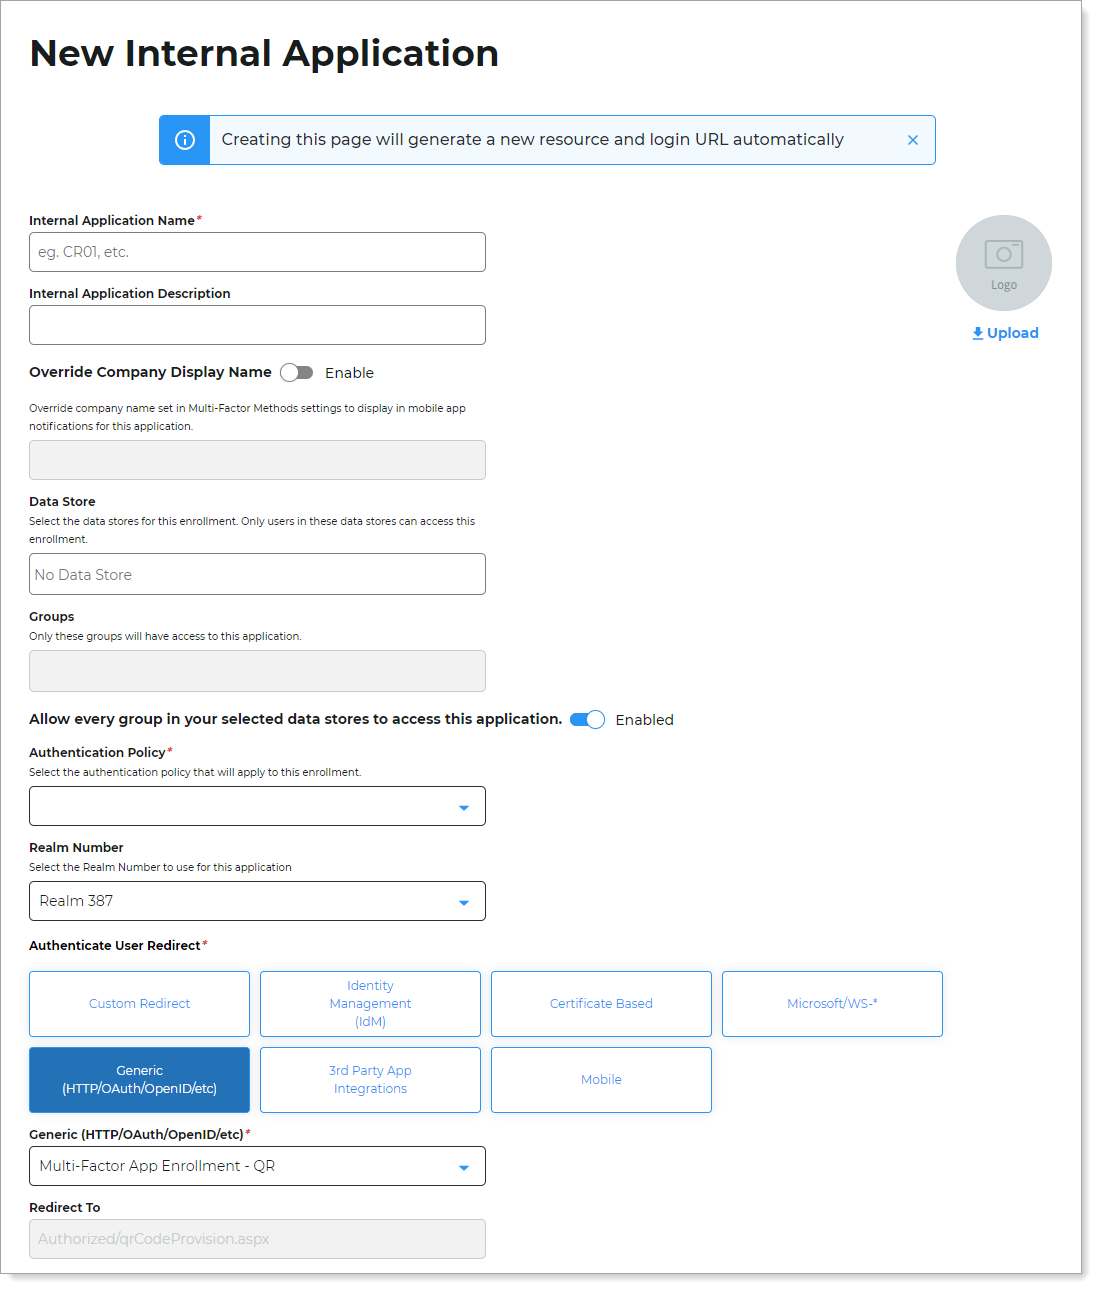
The New Internal Application page displays.
Set the following configurations:
Internal Application Name
Set the name of the QR enrollment application.
This name is shown on the page header and document title of the end user login pages.
Note
If you change this name, it will overwrite any value that is set on the Overview tab in the Advanced Settings.
Internal Application Description
This is an internal description not shown to end users.
Override Company Display Name
Enable / ON – Change the default company name that is set in the Multi-Factor Methods > Authentication Apps settings.
The company name entered in this field will display in mobile app notifications only for this application.
OFF – Do not override. Display the company name set globally in the Multi-Factor Methods > Authentication Apps settings.
Data Store
Enter the data store to authenticate and allow user access to the QR enrollment application.
Groups
Use one of the following options:
Slider in the On position (enabled): Allow users from every group in your selected data stores access to the QR enrollment application.
Slider in the Off position (disabled): Enter the specific groups who are allowed access to the QR enrollment application.
Authentication Policy
Select the user authentication policy for the QR enrollment application.
Realm Number
Select the Realm Number to use for this application.
Authenticate User Redirect
Select the Generic (HTTP/OAuth/OpenID/etc) category.
Generic (HTTP/OAuth/OpenID/etc)
Select Multi-Factor App Enrollment - QR.
Redirect To
This field is automatically populated by the selection of the Multi-Factor App Enrollment - QR as an internal application.
This is the QR enrollment page the end user lands on after login.
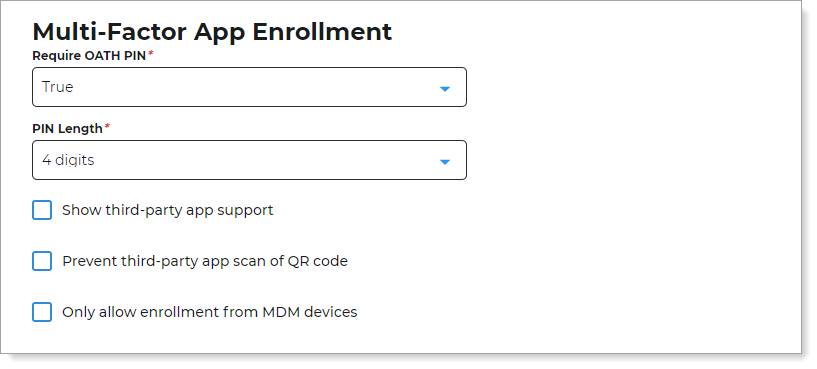
In the Multi-Factor App Enrollment section, set the following configurations.
Require OATH PIN
Set to one of the following options:
True – To view the time-based one-time passcode (TOTP) on the Authenticate app, require users to provide a PIN or biometric ID (fingerpint)
False – PIN is not required to view the TOTP on the Authenticate app
PIN Length
Set the number of digits in the PIN (4, 6, 8, or 10 digits).
Show third-party app support
Select this check box to display a message to end users on the QR enrollment page. The message is about supporting third-party apps. Users can scan the QR code and enroll on another mobile app of their choice.
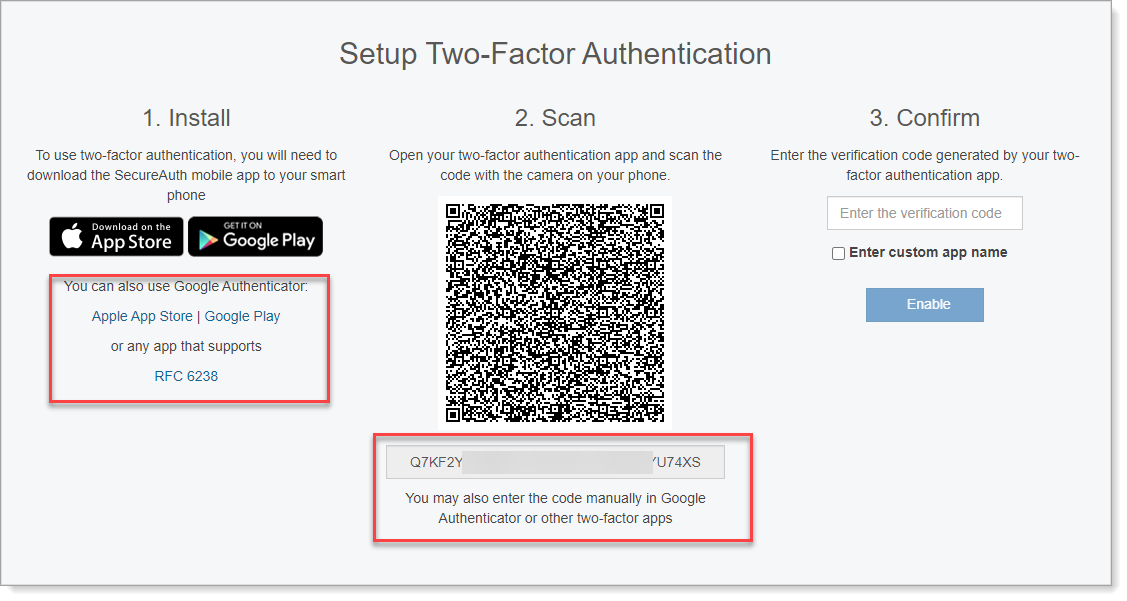
Prevent third-party app scan of QR code
Select this check box to prevent users from using third-party apps to scan the QR code on the QR enrollment page.
Only allow enrollment from MDM devices
Select this check box to only allow QR and URL enrollment from mobile device management (MDM) devices.
Click Create Connection.
This creates a new QR enrollment application with an attached user authentication policy.
Optional: You only need to complete the configuration in Advanced Settings if you want to do any of the following:
Change User ID Mapping to something else other than Authenticated User ID.
Configure token or cookie settings for the QR enrollment application.
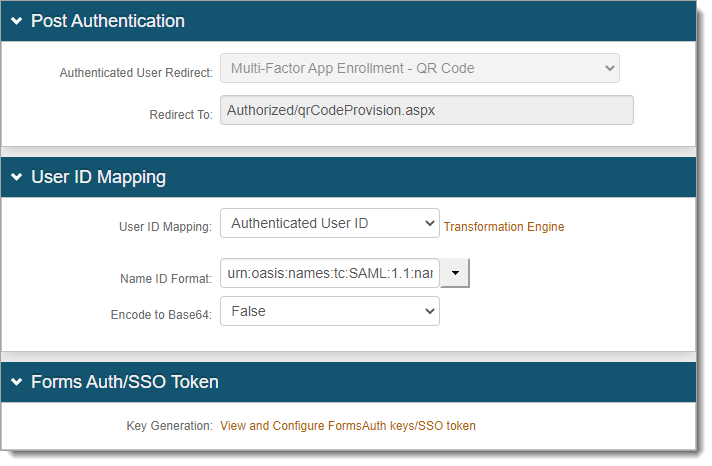
To go to Advanced Settings, click either link at the top or bottom of the Edit Internal Application page.
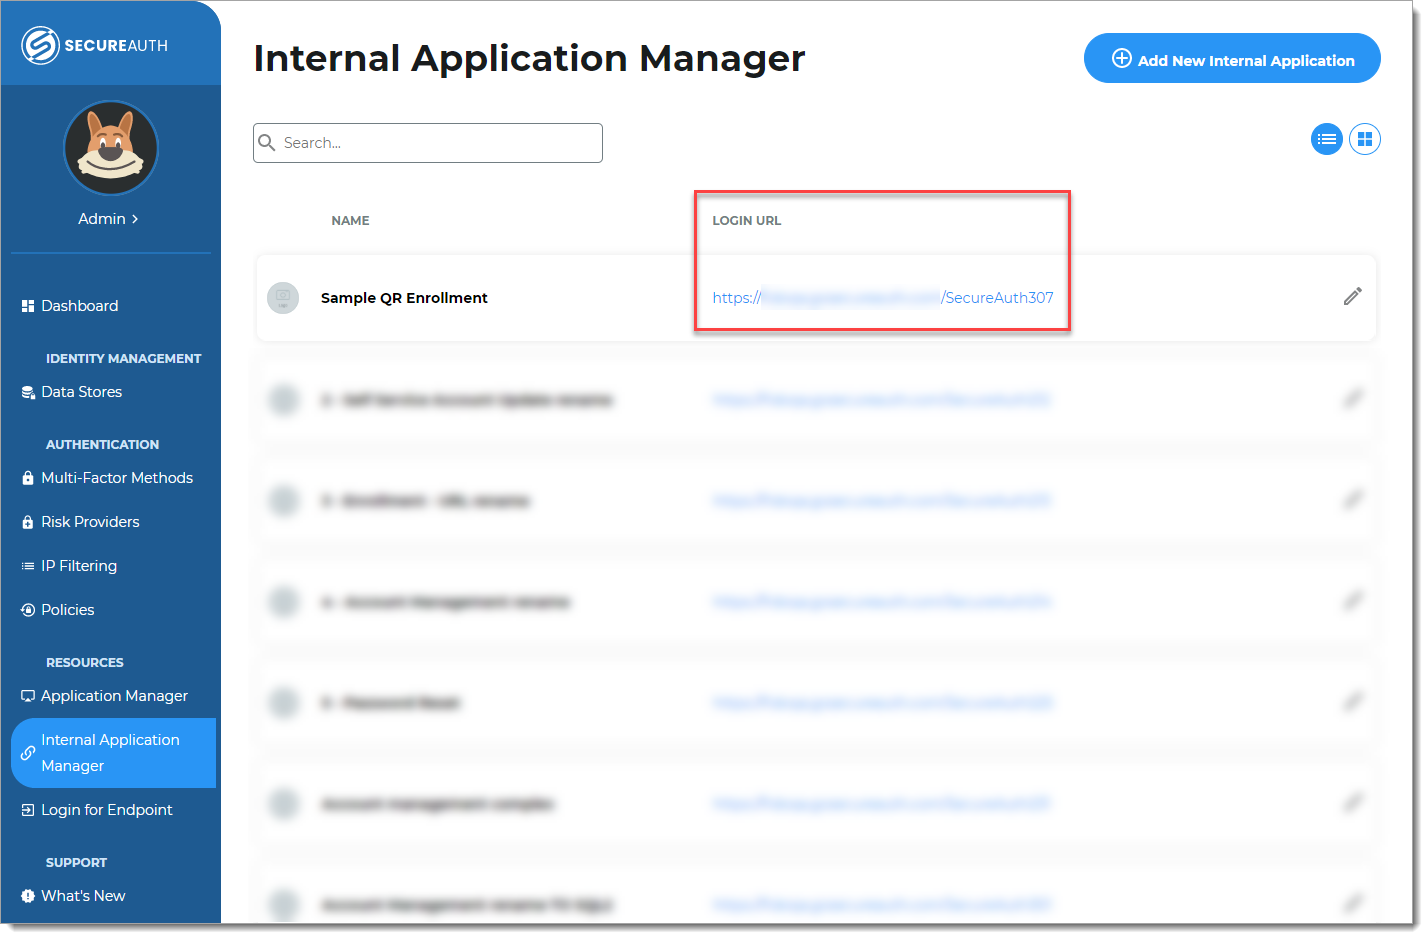
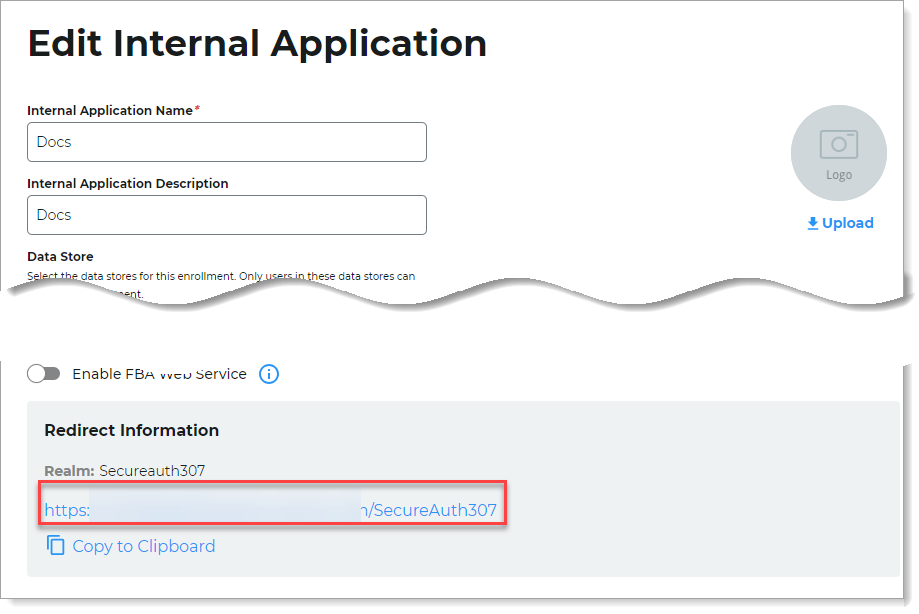
Use the login URL for your end users to access the QR enrollment page.
You can find this on the main Internal Application Manager page or when you edit the QR enrollment application in the Redirect Information section.
Change time length availability of QR code scan
By default, the availability of the QR code scan is set to 10 minutes. To change this setting, do the following:
Edit the web.config file. Go to D:\SecureAuth\SecureAuth# on the appliance (on-prem and hybrid).
To change this setting on the Identity Platform cloud instance, contact SecureAuth Support.
Change the following entry in the web.config file:
<add key="QRDeviceEnrollmentValidityThreshold" value="10" />Note
It is recommended to set this to the same value as the session timeout.
Save the file.