Manage data stores
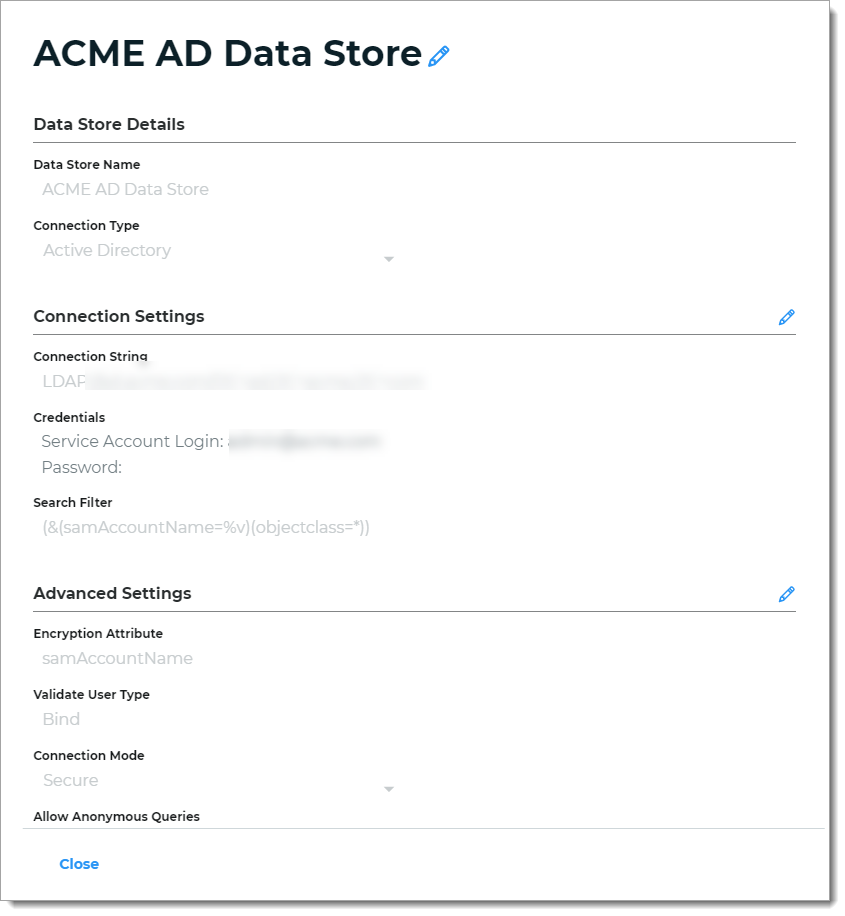
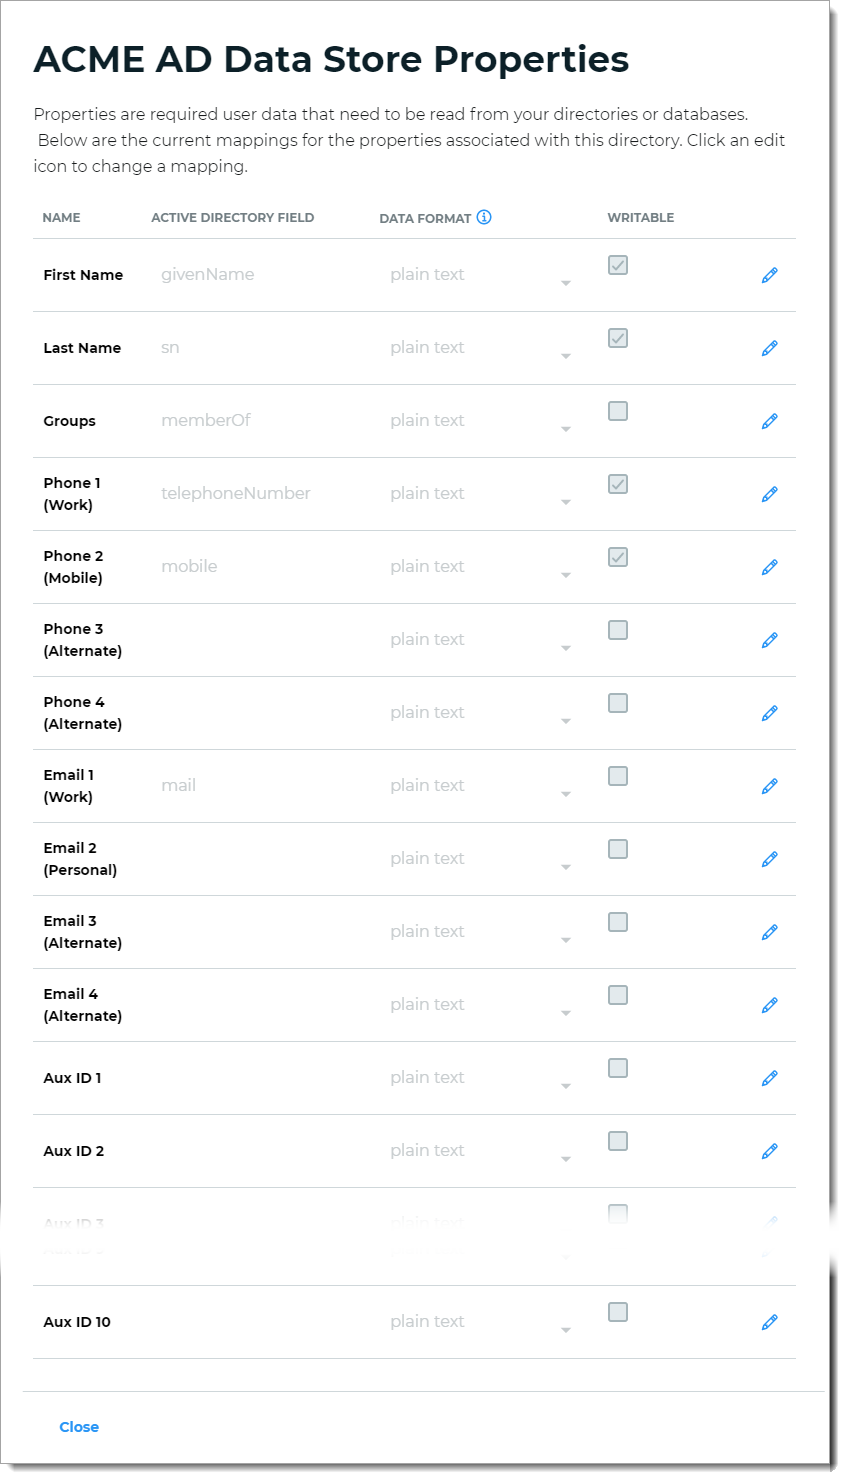
For any data store set up in the SecureAuth® Identity Platform, you can view a summary of the data store integration settings and mapped properties. From the same view, you can make edits as needed. You can also copy or delete any data store.
Note
If you have login performance issues, see this knowledge base article: How to improve performance by disabling lookups in nested groups
Data Stores tab
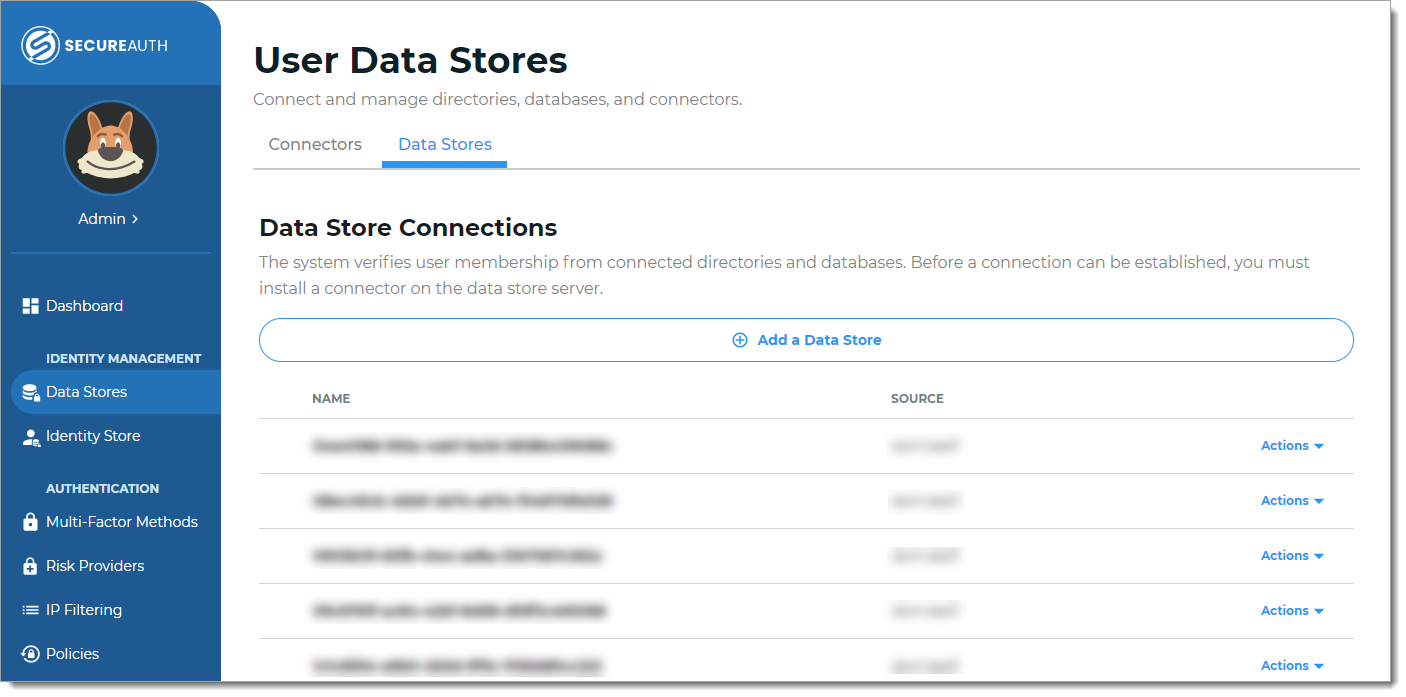
For all data store management options, start by navigating to the Data Stores tab.
On the left side of the Identity Platform page, click Data Stores.
Select the Data Stores tab.

View and edit data store settings
On the Data Stores tab, for the data store you want to view and edit, click Actions > View Summary.
Select View Summary.

To edit the data store configuration settings, click the pencil icon and make your edits.
Click Save.
View and edit mapped data store properties
On the Data Stores tab, for the data store you want to view or edit, click Actions > View Properties.
Select View Properties.

To edit the mapped data store properties, click the pencil icon and make your edits.
Click Save.
Copy data store
On the Data Stores tab, for the data store you want to copy, click Actions > Copy.
The Add a Data Store window opens with preset configurations from the data store you copied.
Edit any settings and click Continue.
Note
By default, copied data stores are named "Copy of [data store]". Change the Data Store Name before continuing.
Edit any data store property mappings and click Save Data Store.
Delete data store
Note
Before you can delete a data store, you must remove it from all applications and legacy Advanced Settings realms.
On the Data Stores tab, for the data store you want to delete, click Actions > Delete.
Select Delete.
Confirm.