Auth0 SAML integration
Acceptto integrates with Auth0™ via its SAML solution and provides a single sign-on (SSO) MFA to ensure the convenience of cloud SSO without its potential security risks. Multi-Factor Authentication (MFA) is an extra layer of security used when logging into websites or apps. Individuals are authenticated through more than one required security and validation procedure that only you know or have access to.
Auth0 is built for developers and is a trusted portal. Use this guide to configure Acceptto to add MFA to the Auth0 portal to provide secure login for developers.
Prerequisites
Acceptto account with a configured Identity Provider and LDAP Agent.
For more information, see the LDAP Agent deployment guide.
Auth0 user account with administrative privileges.
User account with administrative privileges for the Acceptto eGuardian dashboard.
Auth0 configuration
In this section, you'll configure Auth0 as a service provider (SP).
Download the SAML metadata and certificate for your organization from Acceptto.
Metadata download:
https://sso.acceptto.com/<myorganization>/saml/download/metadataView metadata:
https://sso.acceptto.com/<myorganization>/saml/metadataCertificate download:
https://sso.acceptto.com/<myorganization>/saml/download/certLog in to your Auth0 instance as an administrator and go to Authentication > Enterprise.
Click the + icon next to SAML.

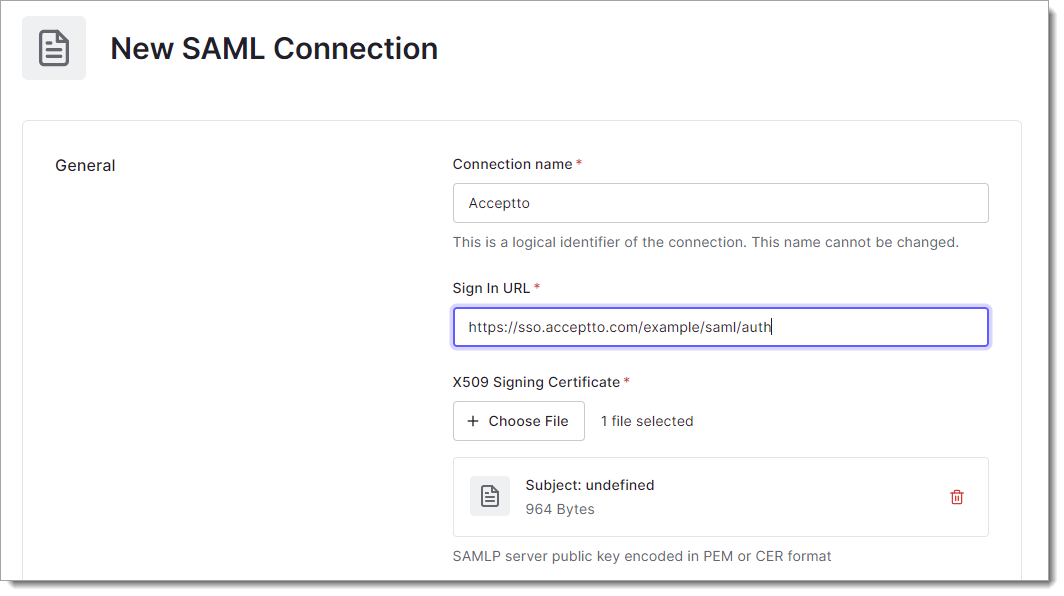
In the New SAML Connection section, set the following configurations:
Connection Name
Enter a unique identifier for the connection.
For example, Acceptto.
Sign In URL
Enter the URL used to log in to your Auth0 panel.
For example,
https://sso.acceptto.com/example/saml/auth.X509 Signing Certificate
Click + Choose File and upload the certificate downloaded in Step 1.
Save your changes.
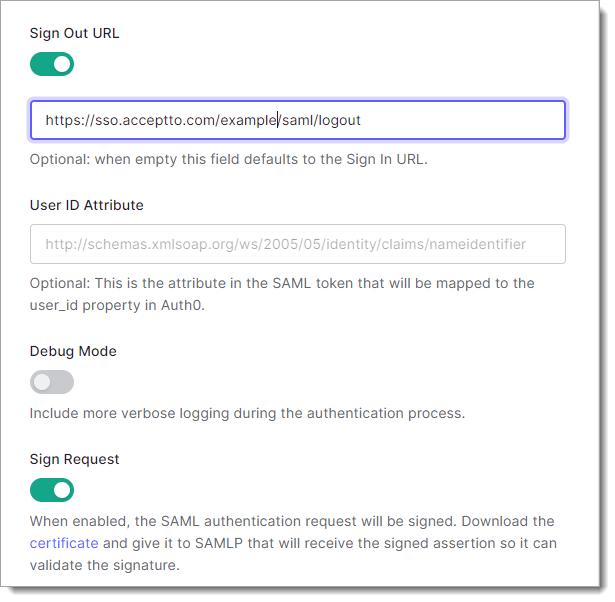
On the next page, set the following configurations:
Sign Out URL
Enable and set to the URL used to log out of your Auth0 panel.
For example,
https://sso.acceptto.com/example/saml/logoutSign Request
Enable and download the IdP signature certificate for Acceptto configuration.
Save your changes.
Select the Setup tab and click Continue.

Copy the information on this page for Acceptto configuration.
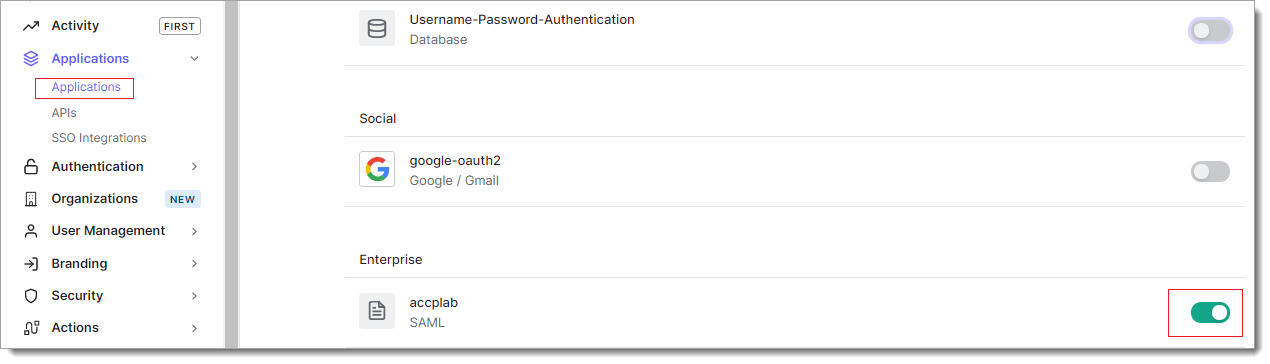
Go to Applications and select the application you want to connect.
In the Connections section, turn on Acceptto, and turn off all other sources.
Acceptto SAML configuration as an Identity Provider (IdP)
In this section, you'll add an application for Auth0 and set the SAML configuration settings. This will be the Identity Provider (IdP) side of the configuration.
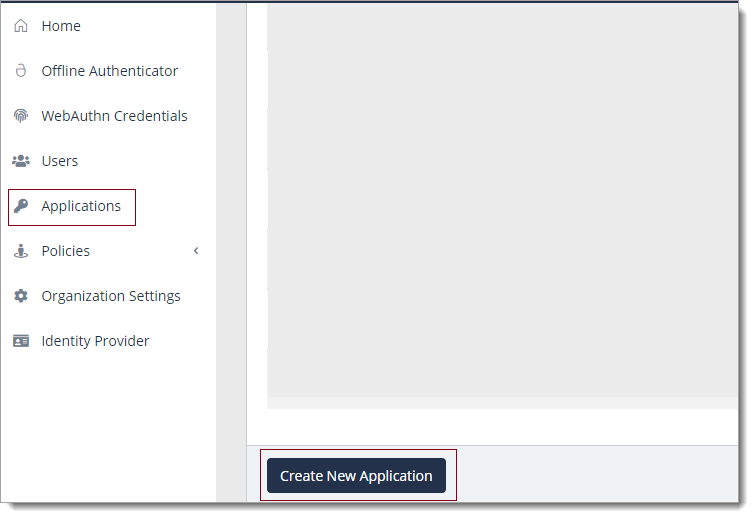
Log in to the Acceptto Dashboard with an administrative account and go to Applications.
Click Create New Application.
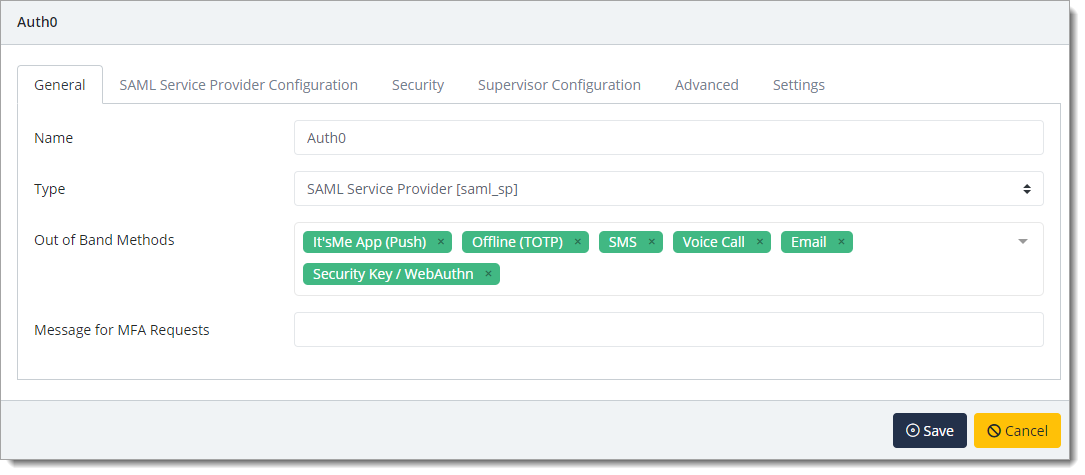
In the New Application form, on the General tab, set the following configurations:
Name
Set the name of the application. This is the name to display for push notifications, in the Admin panel, Application portal, and audit logs.
For example, Auth0.
Type
Set to SAML Service Provider.
Out of Band Methods
Select the allowed methods end users can choose to approve MFA requests.
For example, It'sMe app (push notifications), SMS, or Security Key.
Message for MFA Requests
(Optional) Type a message displayed to end users when sending an MFA request via push notification, SMS, or email.
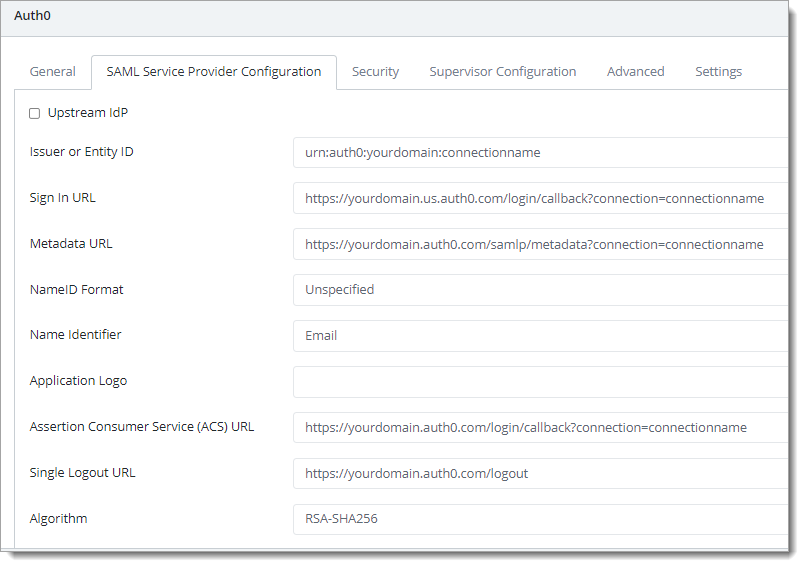
Select the SAML Service Provider Configuration tab, and set the following configurations:
Issuer or Entity ID
Enter the Issuer/EntityID provided in Auth0.
For example,
urn:auth0:yourdomain:YOUR_CONNECTION_NAME.Sign in URL
Enter the URL used to log in to your Auth0 panel.
NameID Format
Set to Unspecified.
Name Identifier
Set to Email.
ACS URL
Enter the ACS URL provided in Auth0.
For example,
https:/yourdomain.auth0.com/login/callback?connection=YOUR_CONNECTION_NAME.Single Logout URL
Enter the URL used to log out of your Auth0 panel.
For example,
https://yourdomain.auth0.com/logout.Algorithm
Set to RSA-SHA256.
Save your changes.
Test your application integration
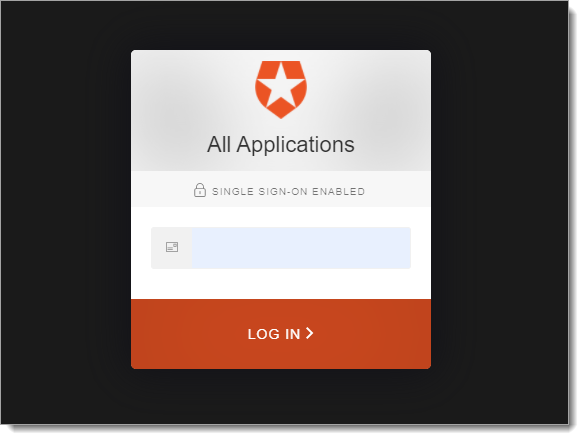
Run your Auth0 application. You will be redirected to the Acceptto SAML page.
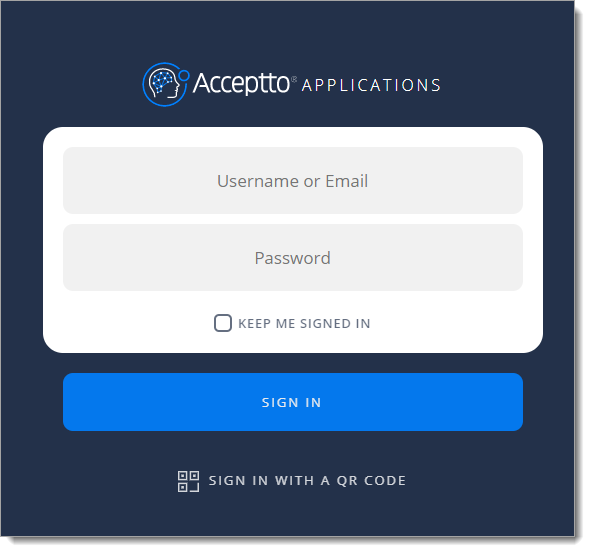
After successful authentication, you’ll see the Acceptto login page. Sign in with your username and password or scan the QR code.
After successful authentication, you will be redirected to your Auth0 application page.
Support
If you have questions or need assistance, contact SecureAuth Support.
Sales
Want to learn more about our MFA solutions? Contact our Professional Services for a demo today.
Disclaimer
All product names, trademarks, and registered trademarks are the property of their respective owners.
All company, product, and service names used in this document are for identification purposes only. The use of these names, trademarks, and brands do not constitute an endorsement by the SecureAuth Corporation.