Salesforce SAML integration
Salesforce unites organizations marketing, sales, commerce, service, and IT teams from anywhere with Customer 360 — one integrated CRM platform that powers our entire suite of connected apps. With Customer 360, organizations can focus their employees on what’s important right now: stabilizing your business, reopening, and getting back to delivering exceptional customer experiences.
Acceptto integrates with Salesforce to provide better security through Arculix's Intelligent Multi-factor Authentication. Acceptto's intelligent MFA uses many different signals to improve security while reducing friction.
This document contains instructions for configuring SAML 2.0 for Salesforce to improve the security of users' logins into the Salesforce portal by using single sign-on.
Prerequisites
An Acceptto account with a configured Identity Provider and LDAP Agent.
For more information, see the LDAP Agent deployment guide.
An organization identifier provided by Acceptto (organization slug).
A user with administrative privileges for the Salesforce portal.
Configure Salesforce as a SAML Service Provider
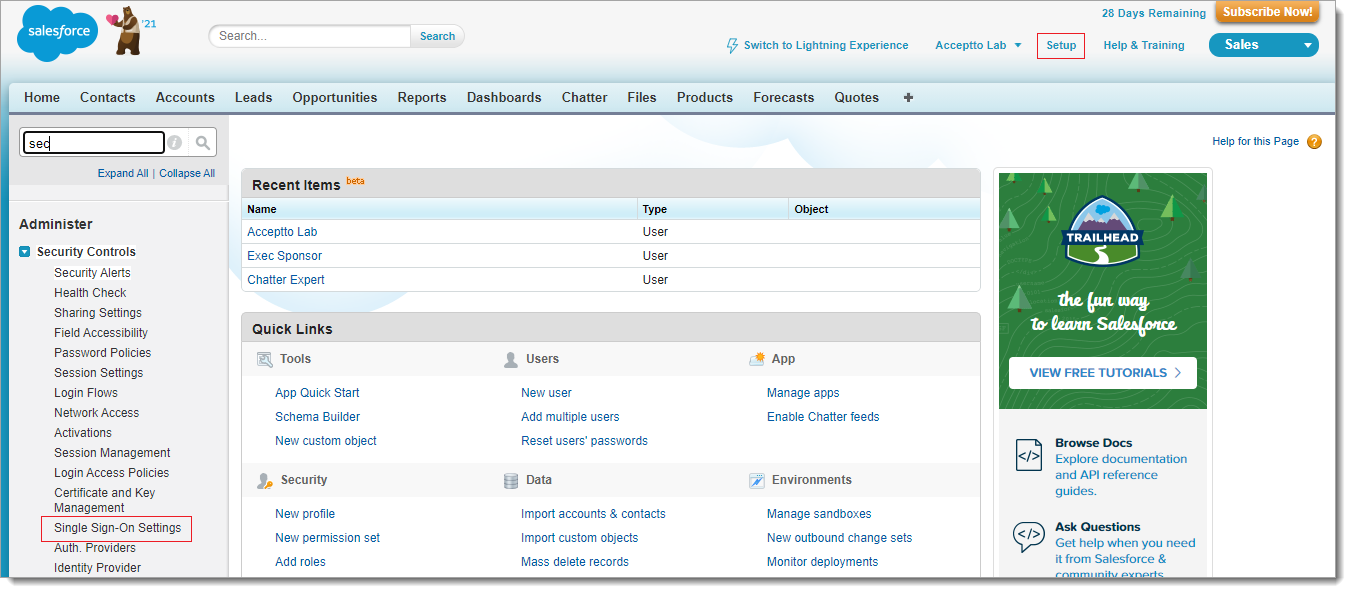
Login to your Salesforce. Salesforce has two user interfaces: Classic and Lightning. In Salesforce Classic: Navigate to Setup > Security Controls > Single Sign-On Settings and in Salesforce Lightning, click the gear icon. Navigate to Setup > Identity > Single Sign-On Settings.
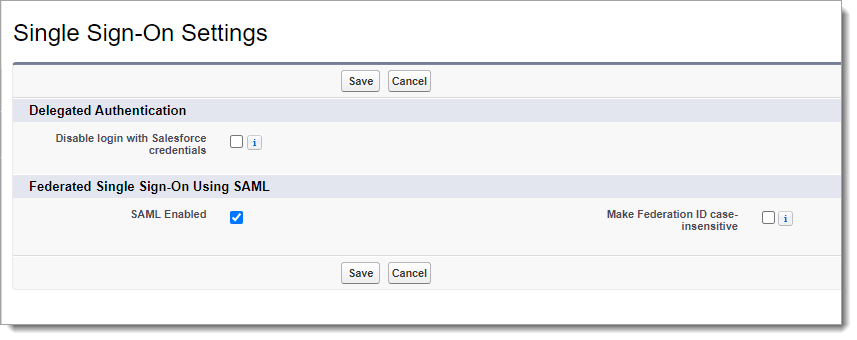
On the Single Sign-On Settings page, click Edit to enable SAML on Salesforce.

Check the SAML Enabled box to enable the use of SAML Single-Sign On, then click Save.
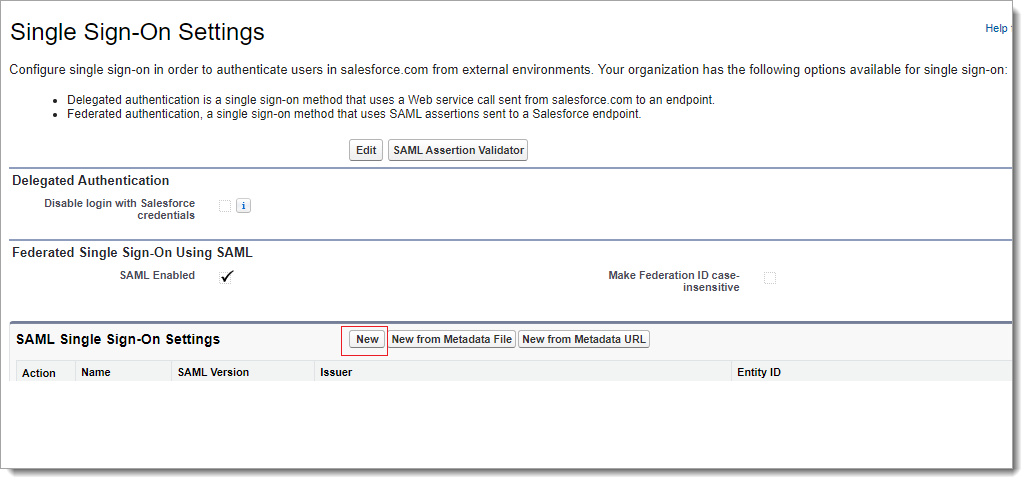
On the Single Sign-On Settings page, click New.
Enter the following information on this page:
Note: Download your SAML IdP X509 certificate. Go to
https://sso.acceptto.com/[organization identifier]/saml/download/certto download the cert.pem file containing your certificate.Download your SAML metadata file. Go to
https://sso.acceptto.com/[organization identifier]/saml/download/metadatato download your metadata file.Name: Enter a name of your choice.
SAML Version: Make sure this is set to 2.0. This should be enabled by default.
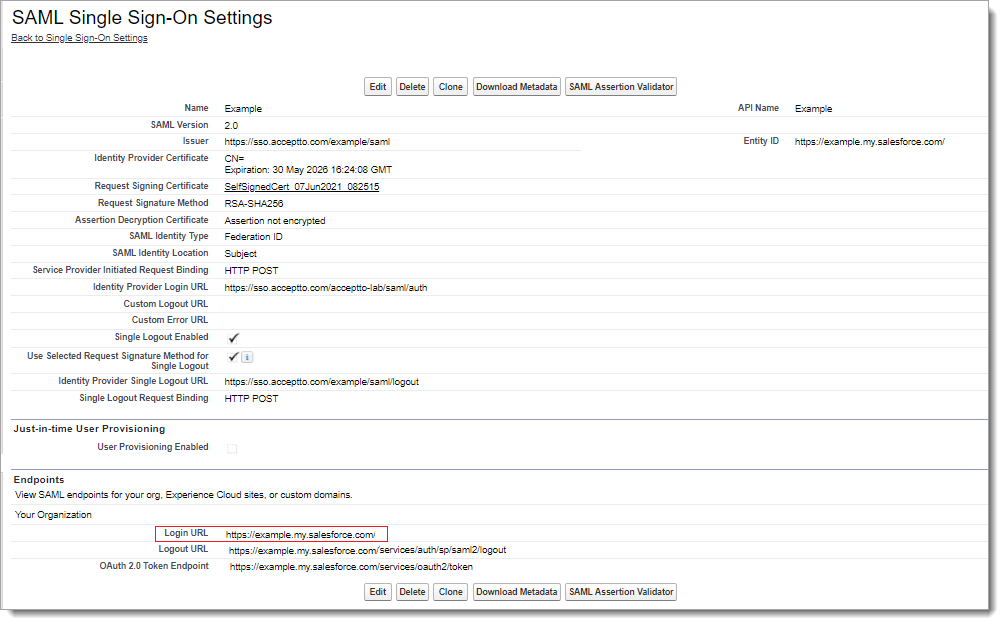
Issuer: Copy and paste the Acceptto SAML issuer (e.g.https://sso.acceptto.com/)
Identity Provider Certificate: upload an Acceptto certificate into this field. In the SAML Identity Type part, click on the Assertion containing the Federation ID from the User object item.
Identity Provider Login URL: Copy and paste the sign in URL from Acceptto metadata.
Custom Logout URL: Copy and paste this logout link from Acceptto metadata API Name: Enter an API name of your choice. Entity ID: Enter https://[customDomain].my.salesforce.com.
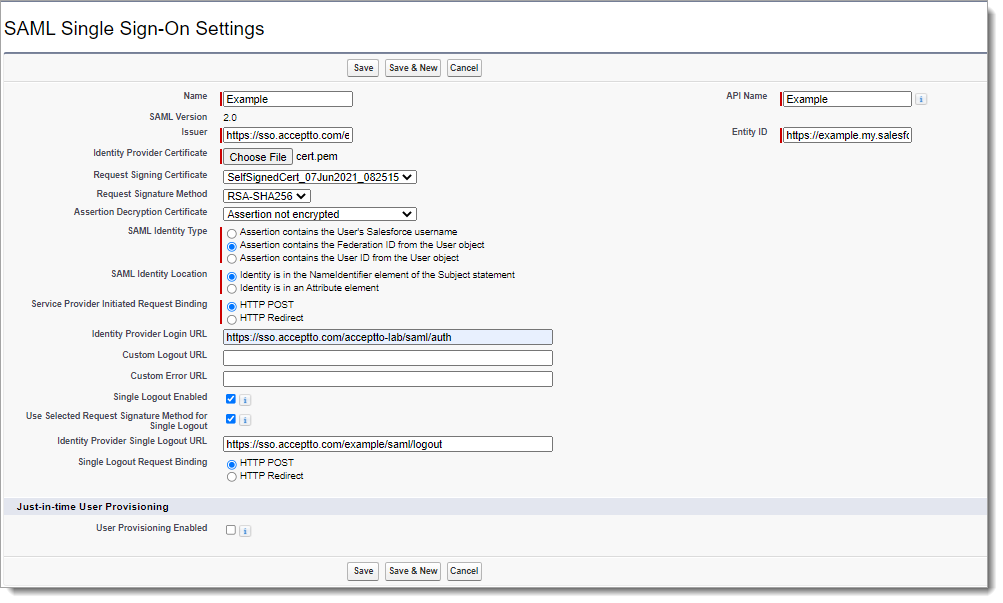
Click Save. Then you can see the following page. Copy the Login URL from this page.
Acceptto SAML Configuration as Identity Provider (IdP)
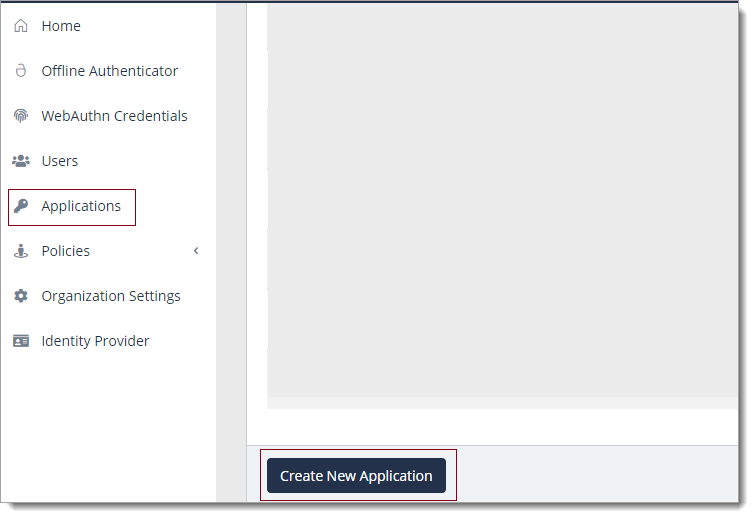
Login to the Acceptto Dashboard with an administrative account and go to Applications.
Create a new application by selecting Create New Application.
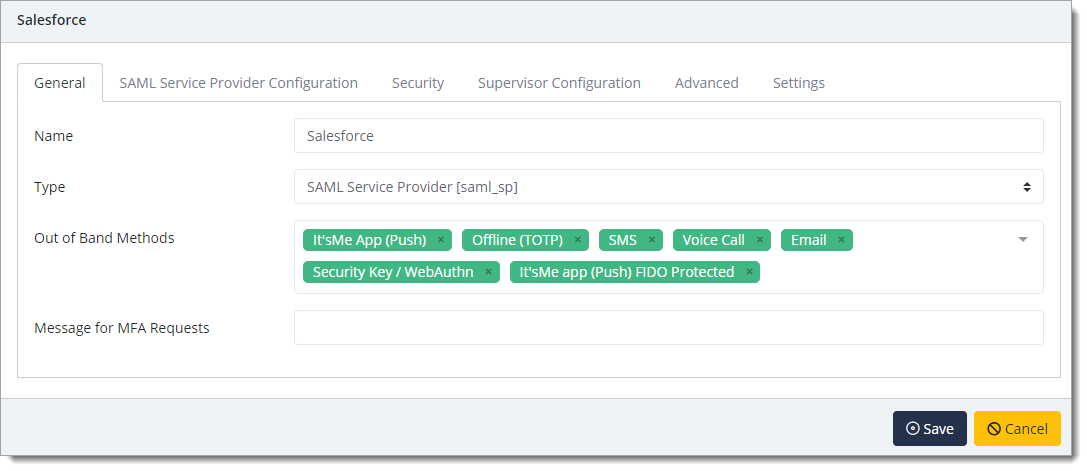
In the New Application form, enter the following values under the General tab.
Name - The application name displayed in the admin panel and application portal and used for push notifications and audit logs. (e.g. Salesforce)
Type - Select "SAML Service Provider" from the options
Out of Band Methods - Select the allowed methods for approving MFA requests
Message for MFA Requests - Enter the user-facing message for Push, SMS, and email MFA requests (optional)
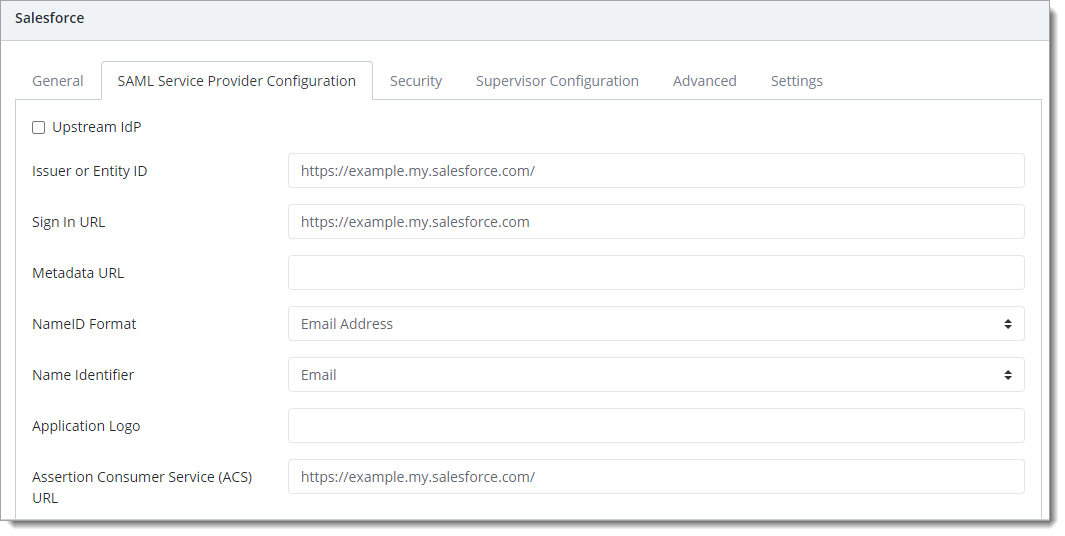
Under the SAML Service Provider Configuration tab, enter the following values:
Issuer or Entity ID – Enter the Issuer/EntityID of your Salesforce instance. This value is available in the Trusted IdP section of your Salesforce tenant as SP Entity ID (see the next section).
Sign in URL - The URL used to login to your Salesforce (e.g.
https://example.salesforce.com).NameID Format - Select "Email address" from the dropdown menu.
Name Identifier - Select "Email" from the dropdown menu.
Assertion Consumer Service (ACS) URL - Enter the URL on the service provider where the identity provider will redirect to with its authentication response. It should end at access/idp (e.g.
https://example.saleforce.com).
Then, type the Single Logout URL, which is given in the Salesforce portal.

Click Save to create the Application.
Authentication Configuration in Salesforce Portal
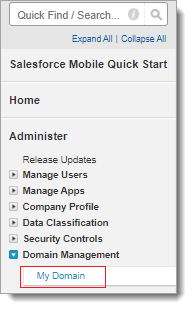
Navigate to setup in the Salesforce portal as an administrator. Go to My Domain.
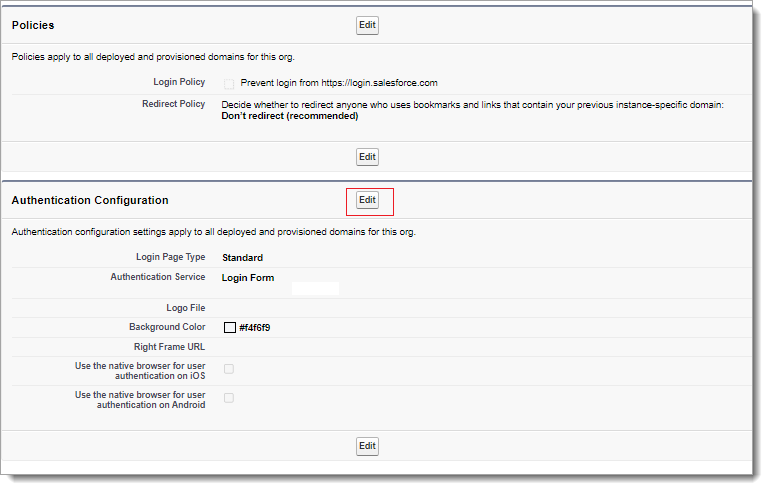
Click Edit in the Authentication Configuration section.
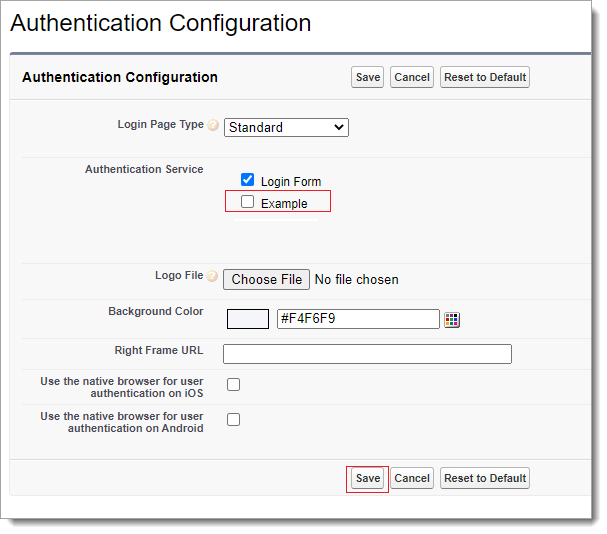
Check the Example box which you have created in the previous step. Click Save.
User Configuration in Salesforce Portal
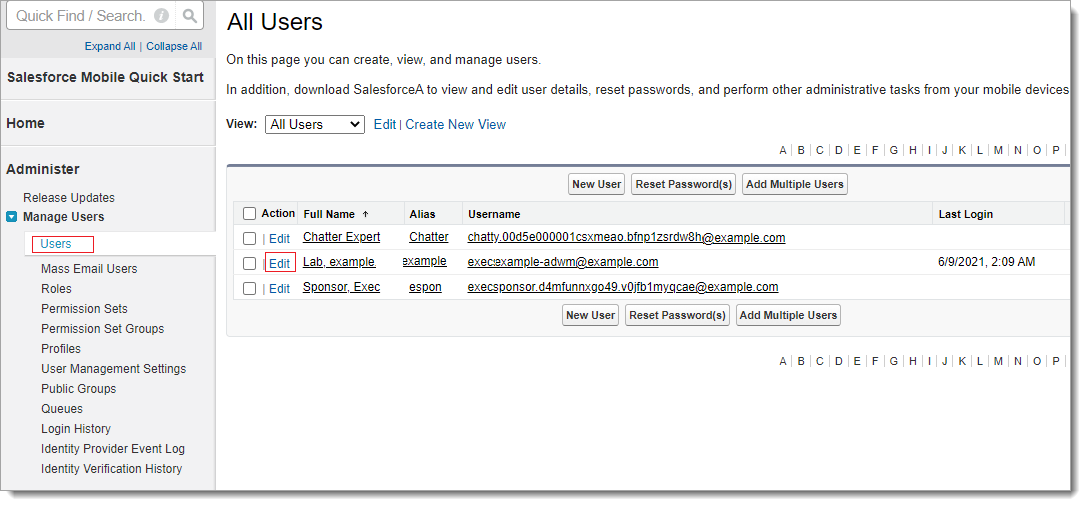
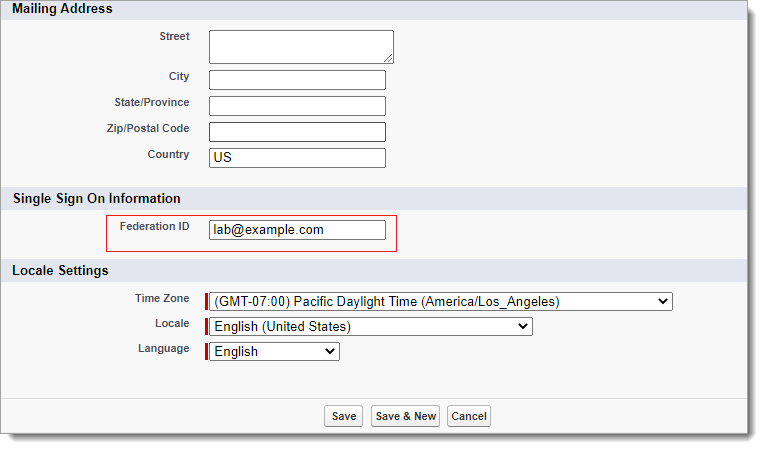
Navigate to the Users in the Setup page of Salesforce. Then click on Edit on the desired user.
In the user profile page drop down menu and in the Single Sign-on part, copy the email address which is integrated with your Acceptto account, in the Federation ID box. Click Save.
Test your application integration
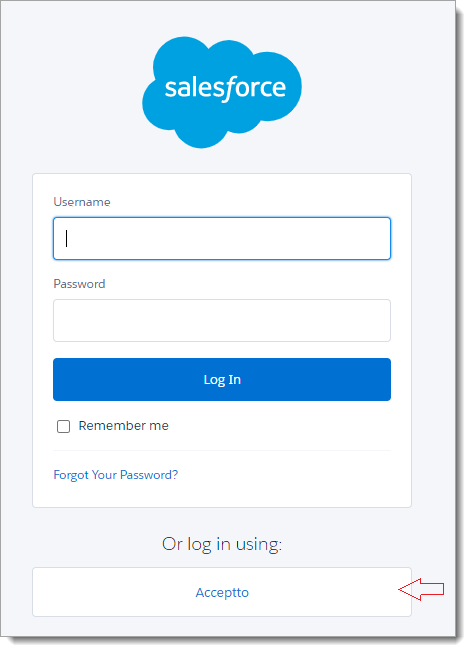
Open the Salesforce login URL through a browser and you can see the Acceptto login form. Click on that.
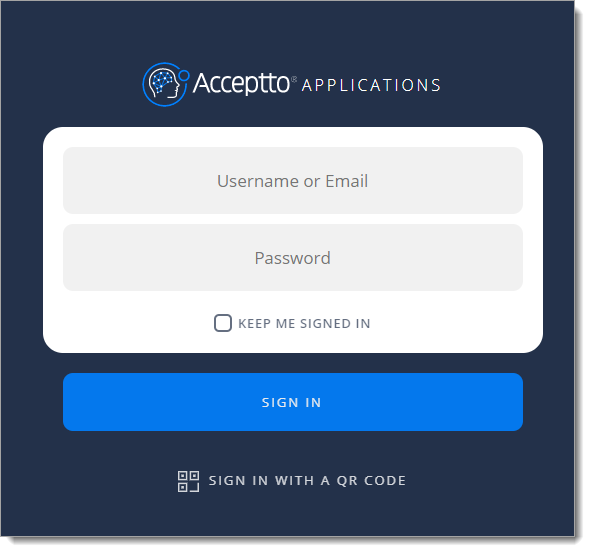
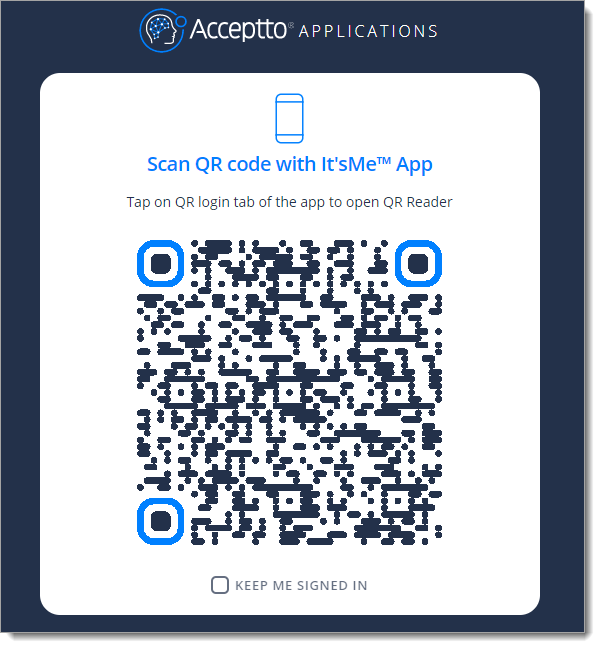
You will be redirected to the Acceptto SSO page.
After successful authentication, you’ll see the Acceptto MFA options. Select your desired method and pass the verification stage.
Finally you will be redirected to the Salesforce portal page passwordless and easily.
Support
If you have questions or need assistance, contact SecureAuth Support.
Sales
Want to learn more about our MFA solutions? Contact our Professional Services for a demo today.
Disclaimer
All product names, trademarks, and registered trademarks are the property of their respective owners.
All company, product, and service names used in this document are for identification purposes only. The use of these names, trademarks, and brands do not constitute an endorsement by the SecureAuth Corporation.