ServiceNow SAML integration
Multi-factor authentication (MFA) is an extra layer of security used when logging into websites or apps to authenticate users through more than one required security and validation procedure that only they know or have access to. Security Assertion Markup Language (SAML) is a protocol for authenticating to web applications. SAML allows federated apps and organizations to communicate and trust one another’s users.
Acceptto™, as a SAML provider, improves the user login experience for ServiceNow users with convenient MFA, and offers a simple SAML solution for adding MFA and single sign-on (SSO) on ServiceNow.
Prerequisites
An Acceptto account with a configured Identity Provider and LDAP Agent.
For more information, see the LDAP Agent deployment guide.
A user with administrative privileges for the Acceptto Cloud dashboard.
A user with administrative privileges for ServiceNow.
Ensure that you have a user account that has an admin role before enabling SAML. To configure a user as an admin, login to your ServiceNow instance and select System Security > Users.
Select a specific user and at the bottom section of the page, under Roles, select edit.
In the Collection field type admin, select the right arrow, and then Save.
To verify that your user is an admin, please select “Impersonate User” under the “System Administrator” pulldown menu as shown below, and enter the user you have promoted to admin.

You should be able to access privileged operations such as System Security.
Acceptto SAML Configuration as Identity Provider (IdP)
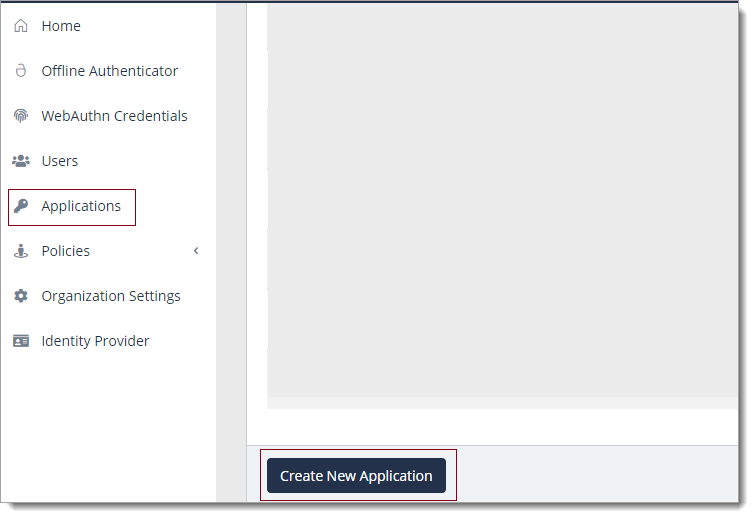
Login to the Acceptto Dashboard with an administrative account and go to Applications.
Create a new application by selecting the Create New Application.
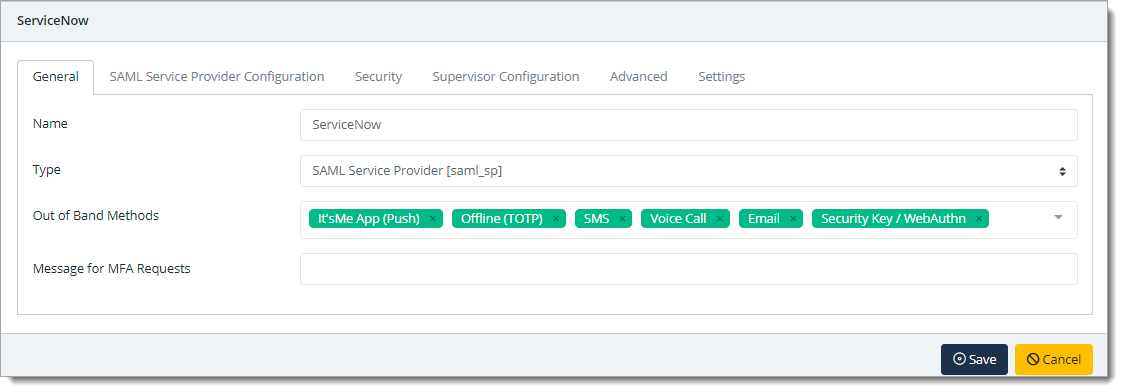
In the New Application form, enter the following values under the General tab.
Name - The application name displayed in the admin panel and application portal and used for push notifications and audit logs. (e.g.ServiceNow instance)
Type - Select SAML Service Provider from the options.
Out of Band Methods - Select the allowed methods for approving MFA requests.
Message for MFA Requests - Enter the user-facing message for Push, SMS, and email MFA requests (optional)
Under the SAML Service Provider Configuration tab, enter the following values:
Issuer or Entity ID - The Issuer/EntityID of the SAML application. (e.g.
https://my-servicenow-instance.service-now.com)Sign in URL - The link used by your users to access the ServiceNow instance. You can leave this field blank.
Metadata URL - The URL containing metadata about your ServiceNow instance. (e.g.
https://my-servicenow-instance.service-now.com/metadata)Name ID Format - ServiceNow requires that the NameID contains the user's email.
ACS URL - Your ServiceNow instance URL, (e.g.
https://my-servicenow-instance.service-now.com)Response hosts - list of your ServiceNow instances.
Click Save.
Configure ServiceNow as a Service Provider (SP)
Log into your ServiceNow instance. On the left upper section of the page, type Plugins.
Search for the plugin Integration - Multiple Provider Single Sign-On Installer and then select it.
Click Activate/Upgrade under Relative Links.
Go back to the left upper section and search and select Identity Providers.
Select New > SAML. A pop-up dialog will appear, configure it to use the URL
https://sso.acceptto.com/YourOrganization/saml/download/metadata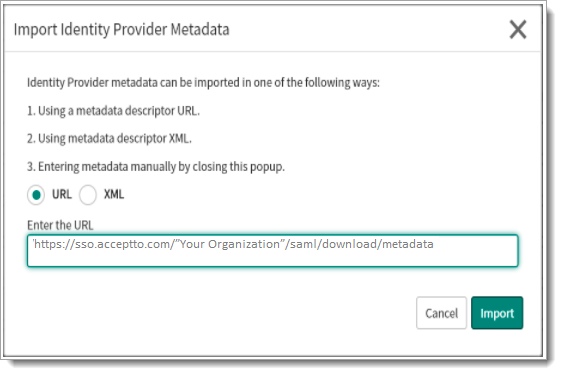
This will pre-populate some of the fields required to configure the SAML Identity Provider.
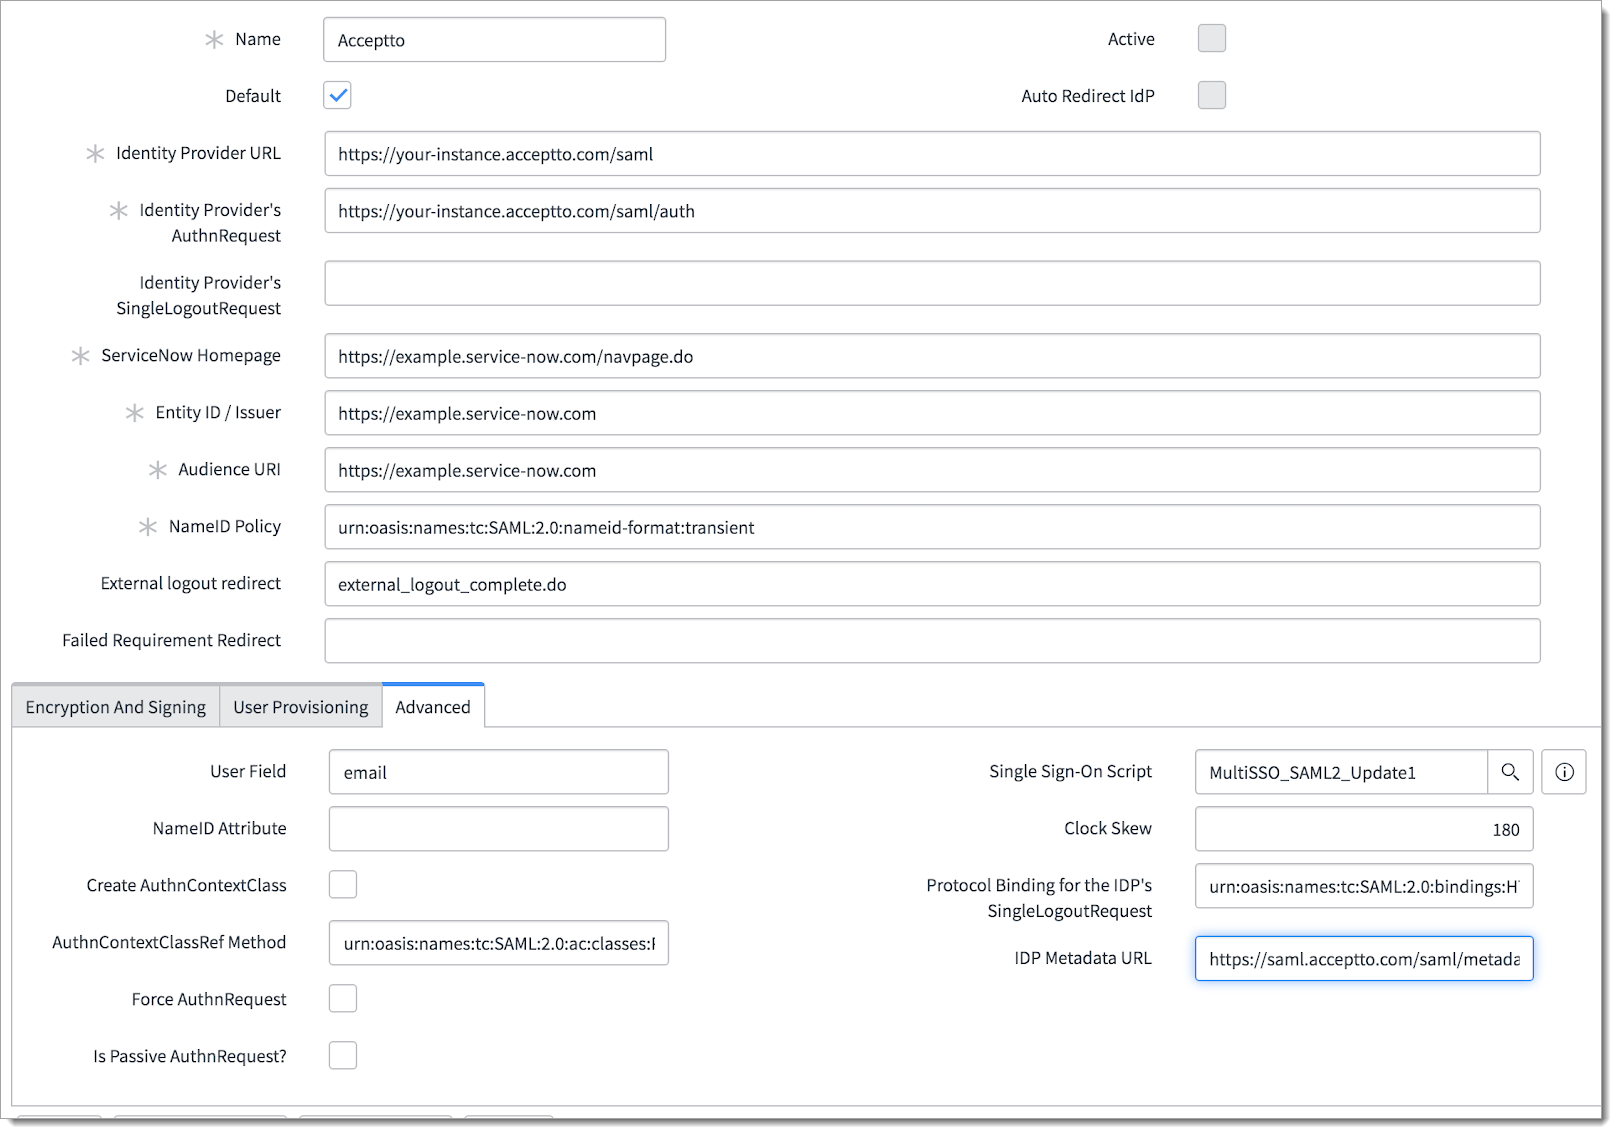
The Identity Provider record page will be shown, select Advanced in the bottom section of the page and fill in any fields that may be missing information:
Name: A description of the Identity Provider, e.g., Acceptto
Identity Provider URL: Your Acceptto instance, e.g.,
https://your-acceptto-instance.acceptto.comIdentity Provider AuthnRequest: Your Acceptto instance login URL, e.g.,
https://your-acceptto-instance.acceptto.com/saml/authServiceNow Homepage: Your ServiceNow instance homepage, e.g.,
https://your-servicenow-instance.service-now.com/navpage.doEntity ID / Issuer: Your ServiceNow instance, e.g.,
https://your-servicenow-instance.service-now.comAudience URI: The target audience of the SAML response, in essence, your instance, e.g.,
https://your-servicenow-instance.service-now.comNameID Policy: The subject or name identifier inside the SAML response to an authentication request, in this case the user’s email urn:oasis:names:tc:SAML:1.1:nameid-format:emailAddress
In the Advanced tab ensure that the following fields are completed:
User Field: The user identifier in this specific case email.
Protocol Binding for the IDP’s SingleLogoutRequest: The method by which the SP connects to the IdP for Logout requests, in this specific case, urn:oasis:names:tc:SAML:2.0:bindings:HTTP-Redirect
The configuration should be similar to the image below:
Once the SAML configuration is finished, import the Acceptto IdP certificate by selecting New under the X.509 Certificate tab and fill in the following fields.
PEM Certificate: PEM Certificate: Paste the content of the Acceptto IdP x.509 Certificate. The certificate can be downloaded at:
https://sso.acceptto.com/”your organization”/saml/download/cert.Name: An identifier of the certificate, e.g. Acceptto IdP Certificate.
The information on the page should be similar to the image below. Save the certificate by selecting Submit.

Before you can activate the newly configured IdP, select Test Connection on the middle section of the page. A new webpage should pop-up with the Acceptto IdP portal.
Once you login successfully, a page will appear with the test results. It is safe to ignore the error shown for the SSO Logout Test Results.
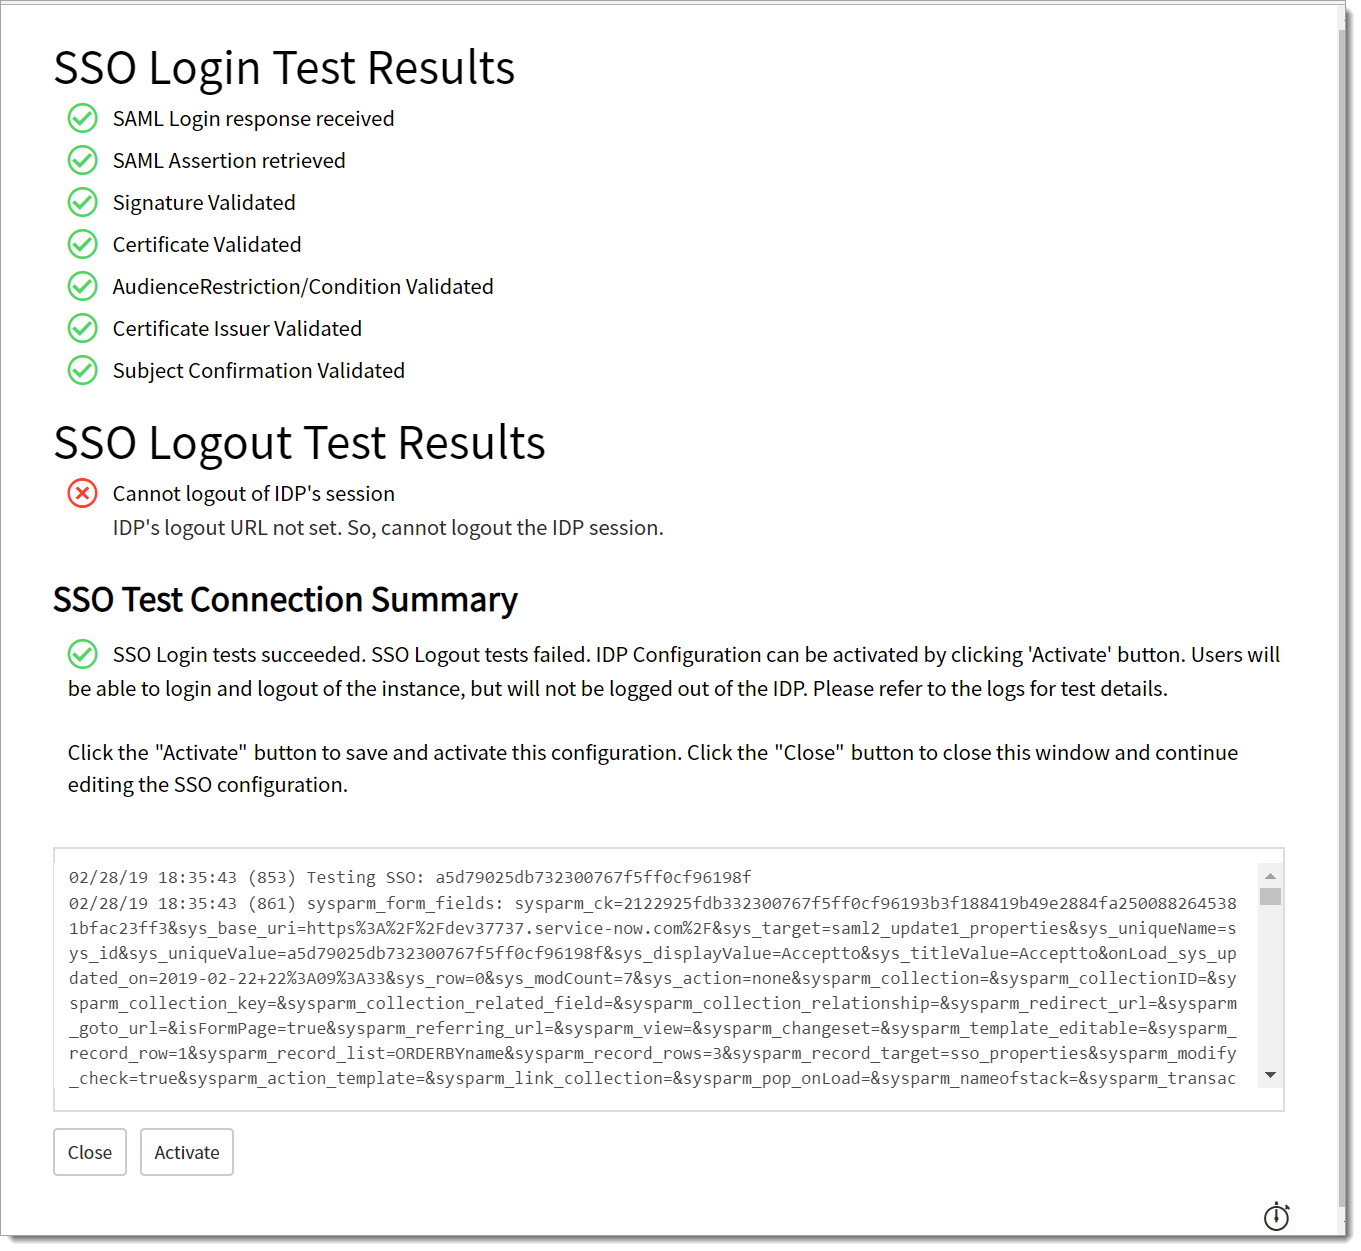
Select Activate to enable the IdP.
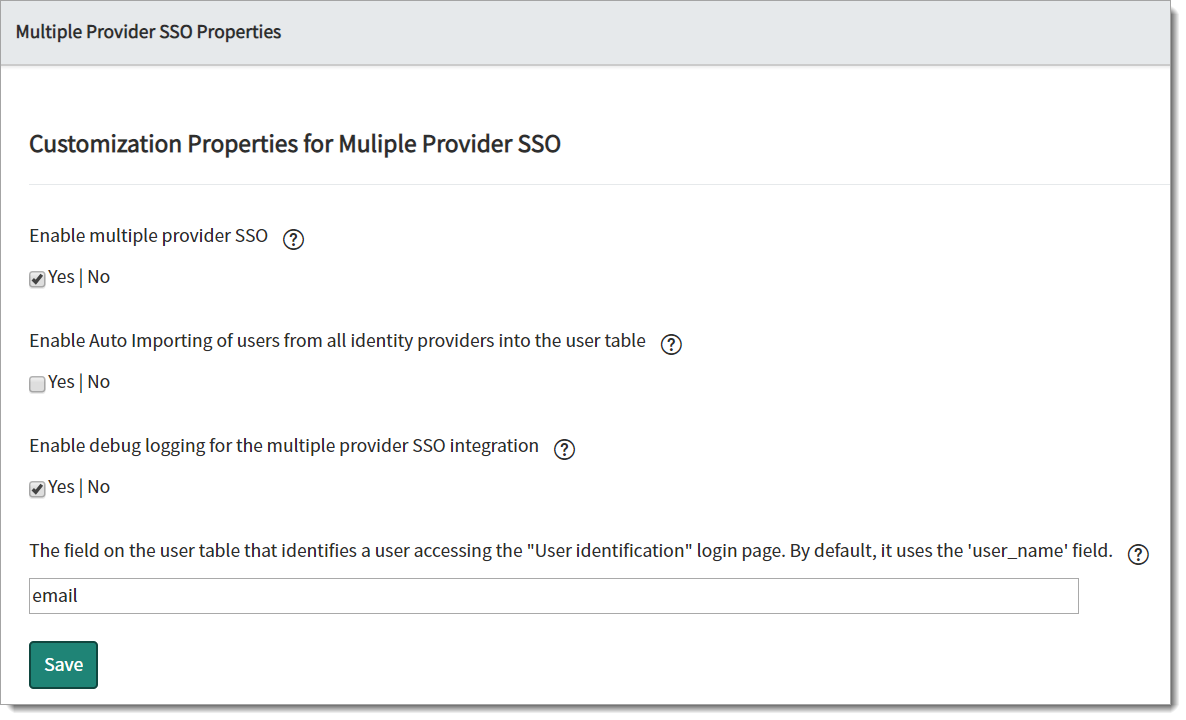
Go back to the search box on the upper left section of the page and type Multi-Provider SSO, select Properties below the administration, and ensure that the following controls are set:
Enable multiple provider SSO: Yes
The field on the user table that identifies a user accessing the "User identification" login page. By default, it uses the 'user_name' field: email
Enable debug logging for multiple provider SSO integration: Yes (optional)
Test your application integration
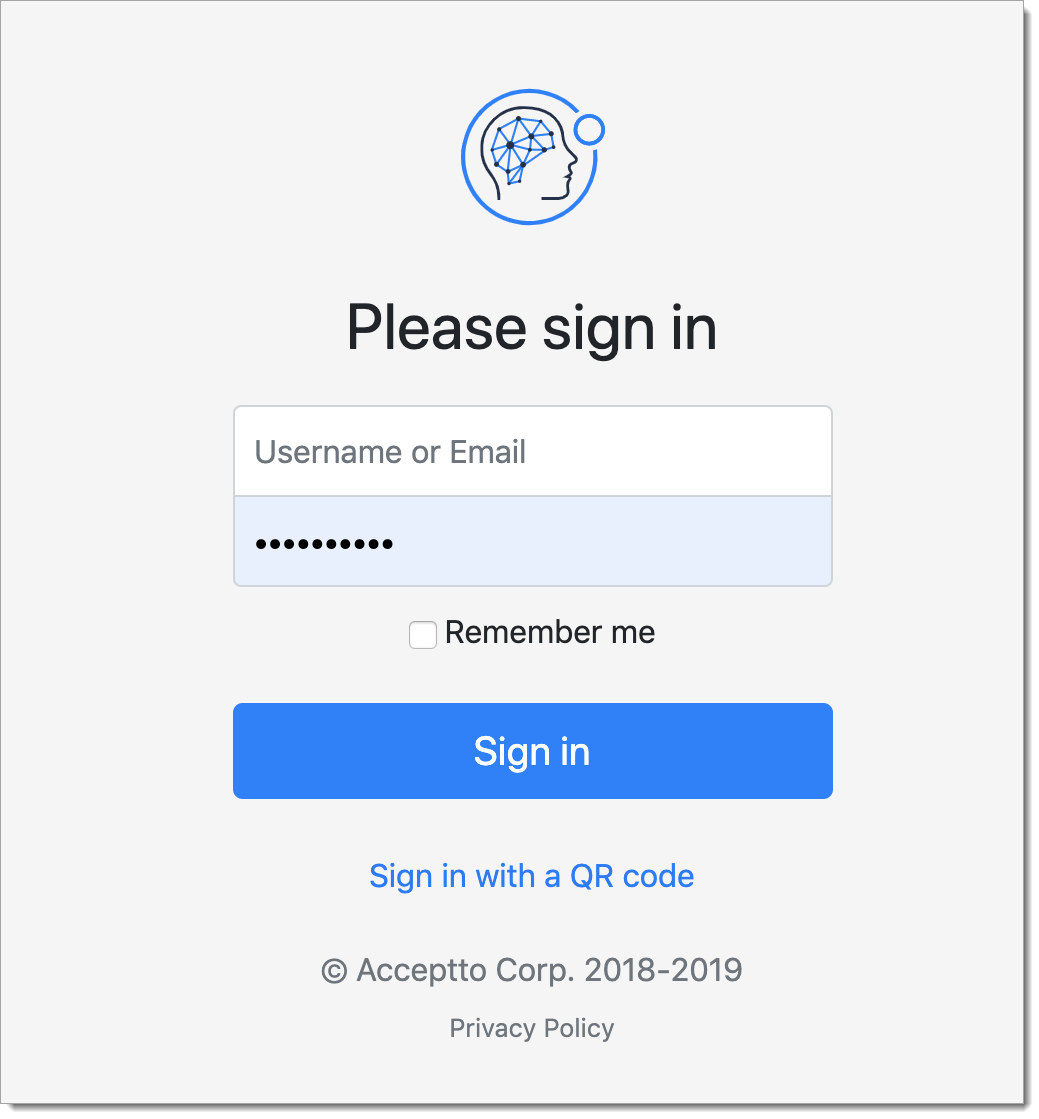
Go to your ServiceNow instance. You will be redirected to the Acceptto SAML page.
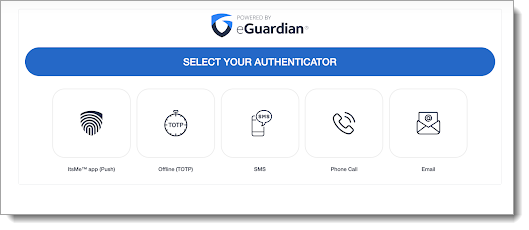
After successful authentication, you’ll see the Acceptto MFA options. Select your desired method and pass the verification stage on It’sMe mobile app.
You are now authenticated with Acceptto SSO-MFA and will be redirected to your ServiceNow portal.
If anything does not work as expected in steps 1 to 3, you need to login with an account (created in the prerequisites section of this document) to your instance by using the URL pointing to
https://your-servicenow-instance.service-now.com/login.doand using your local credentials. This will allow you to bypass SAML for accounts such as the admin user.
Support
If you have questions or need assistance, contact SecureAuth Support.
Sales
Want to learn more about our MFA solutions? Contact our Professional Services for a demo today.
Disclaimer
All product names, trademarks, and registered trademarks are the property of their respective owners.
All company, product, and service names used in this document are for identification purposes only. The use of these names, trademarks, and brands do not constitute an endorsement by the SecureAuth Corporation.