Microsoft Remote Desktop Gateway - RADIUS integration
Multi-factor authentication (MFA) is an extra layer of security used when logging into websites or apps to authenticate users through more than one required security and validation procedure that only you know or have access to.
RADIUS is a protocol commonly used to authenticate, authorize, and account for user access and actions.
Acceptto offers a simple solution for adding MFA to Remote Desktop Connection via its Radius solution. This step by step integration instruction illustrates how to configure Microsoft Remote Desktop Gateway and Acceptto RADIUS MFA authentication solution.
Prerequisites
Acceptto RADIUS Agent that is configured and connected to your user directory. For example, Microsoft Active Directory (AD).
For more information, see the Acceptto RADIUS deployment guide.
A domain-joined Microsoft Windows Server with installed RDG and NPS roles.
Acceptto RADIUS Agent configuration
To integrate Acceptto with your RDG, you will need to install an Acceptto RADIUS Agent on a machine within your network. This server will receive RADIUS requests from your RDG, check with LDAP server to perform primary authentication, and then contact Acceptto cloud service for secondary authentication.
For setting up Acceptto RADIUS Agent, refer to the Acceptto RADIUS deployment guide. After the setup, add these two additional variables to radius-agent-config.env file to enable support for Microsoft Remote Desktop Gateway:
  ARA_TRIM_NETBIOS_DOMAIN=true

  ARA_ALLOW_PASSWORDLESS=true
RDG configuration
Login to the Windows Server that configured and installed NPS and RDG roles on it with an administrative user.
Open the Network Policy Server manager.
Expand RADIUS Clients and Servers in the left sidebar
Select Remote RADIUS Server
Right click on TS GATEWAY SERVER GROUP and click on Add.
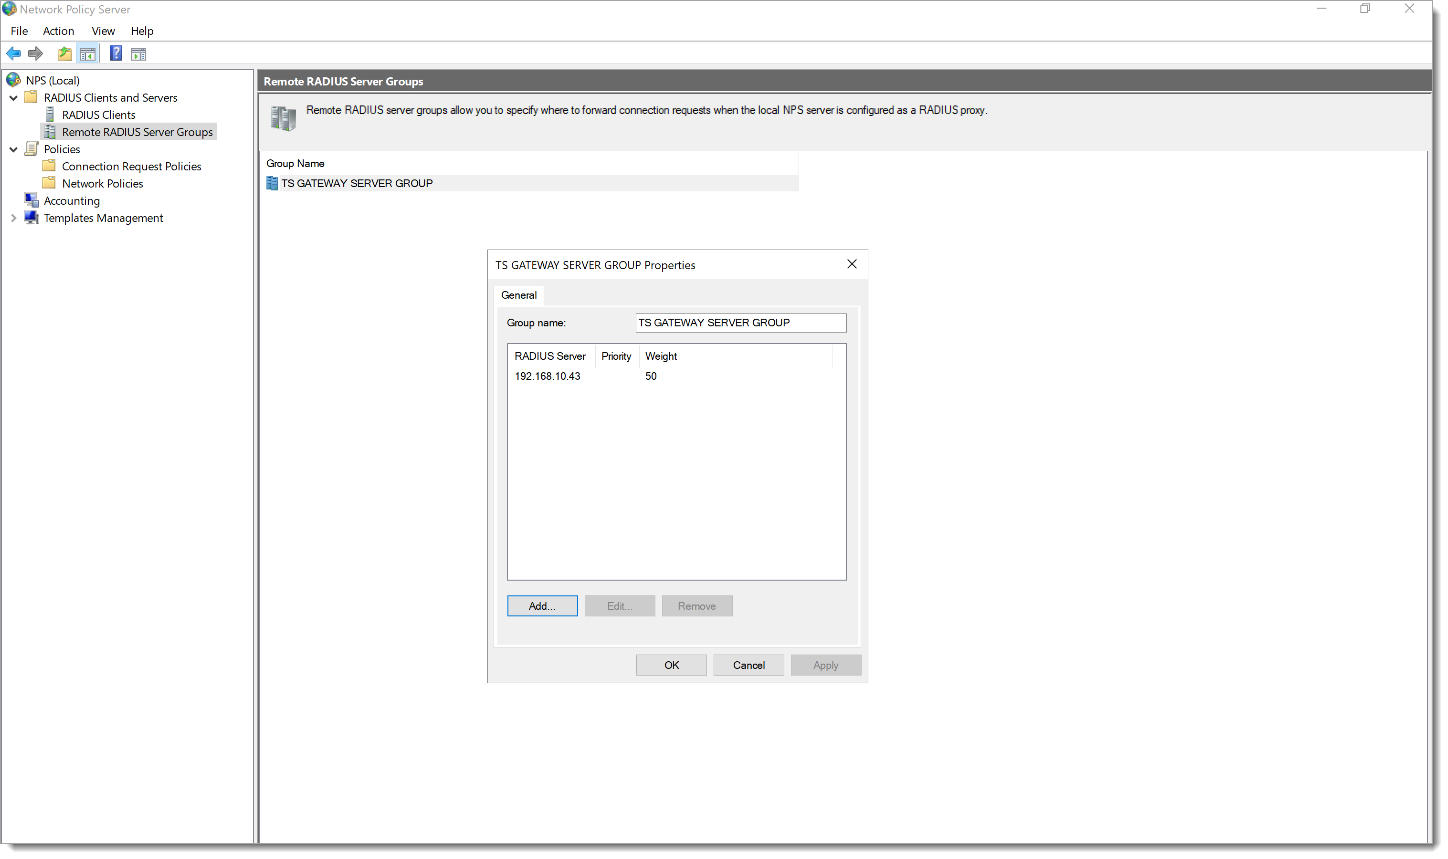
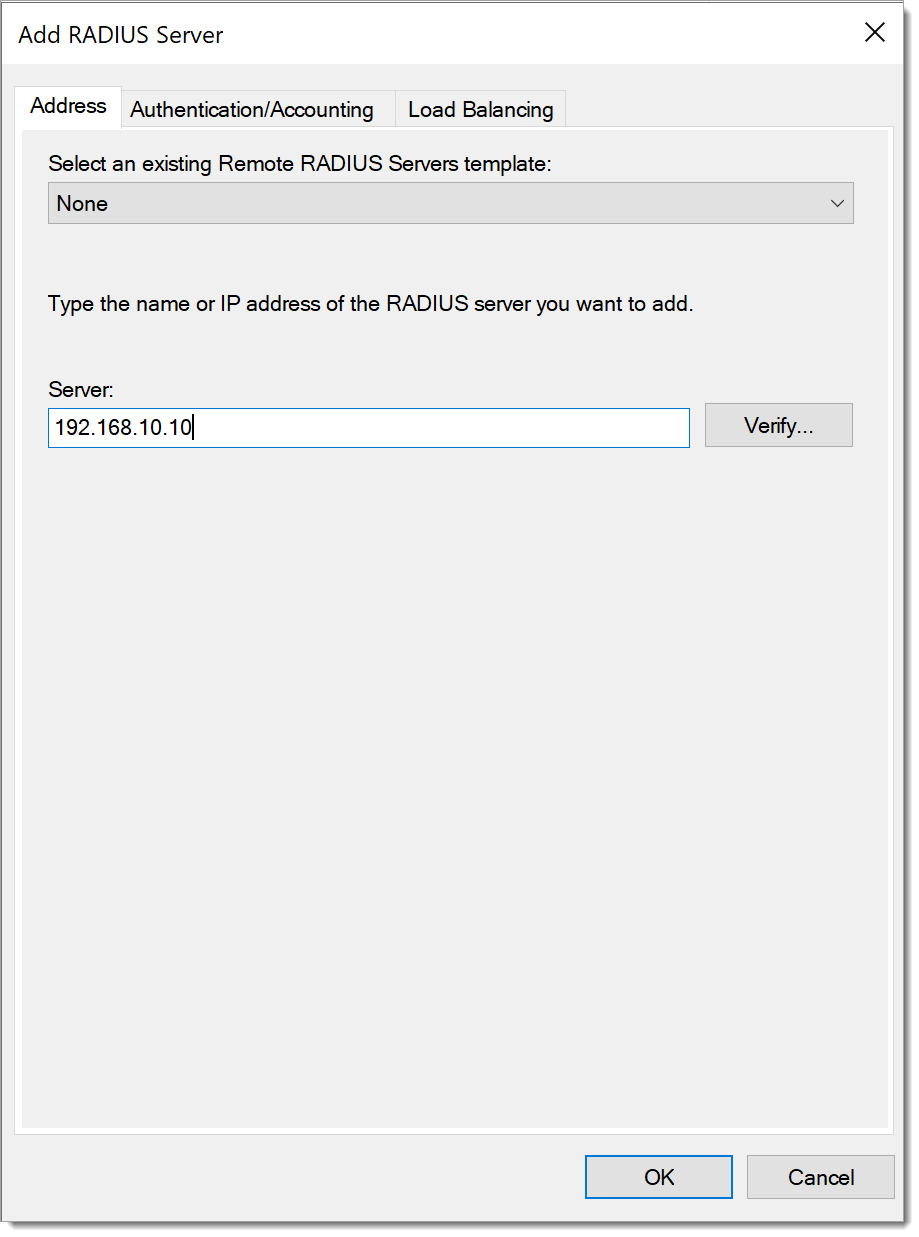
Enter the IP address of Acceptto Radius Server and navigate to Authentication/Accounting tab and enter shared secret of Acceptto Radius that configured earlier.
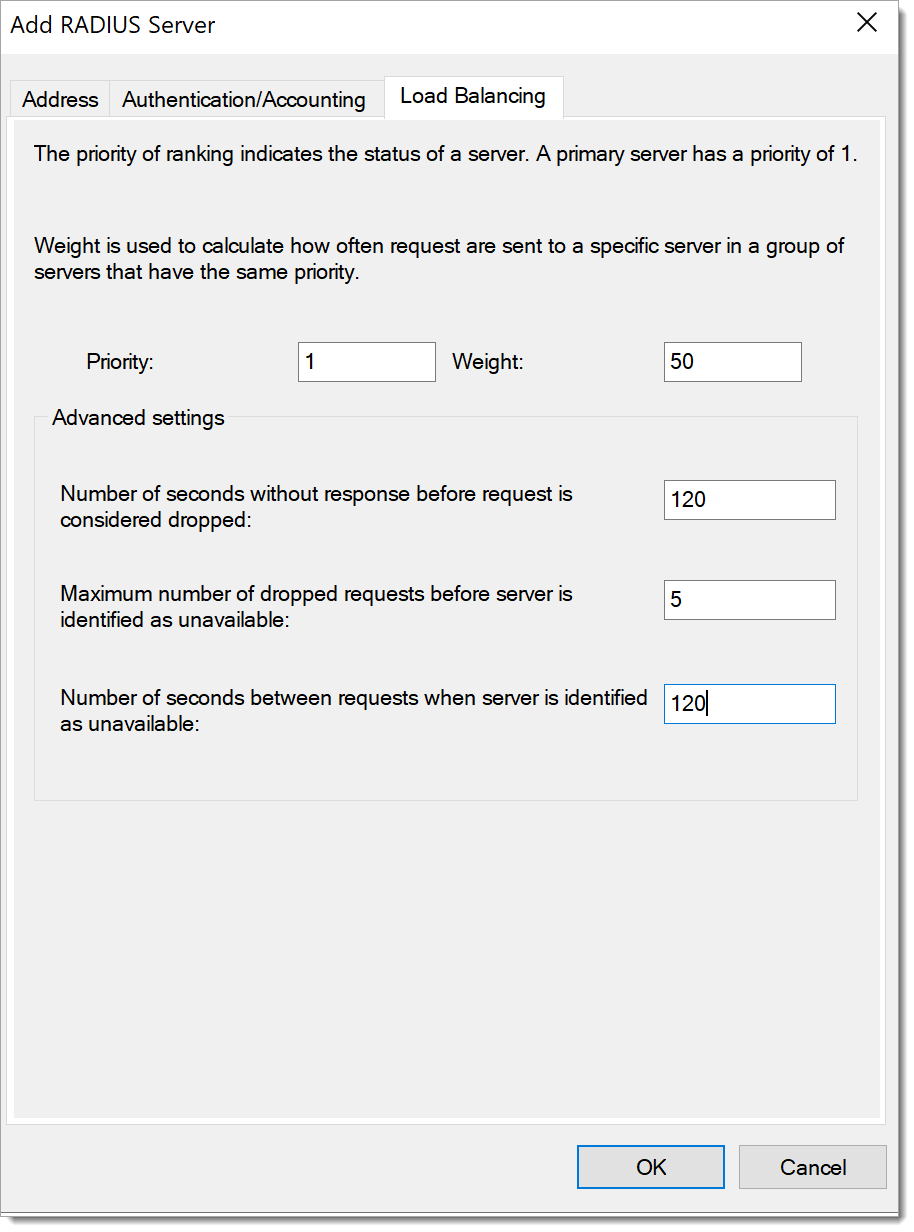
Go to Load Balancing tab and set the Number of seconds without response before request is considered drop and Number of seconds between requests when server is identified as unavailable options on 120 and click OK.
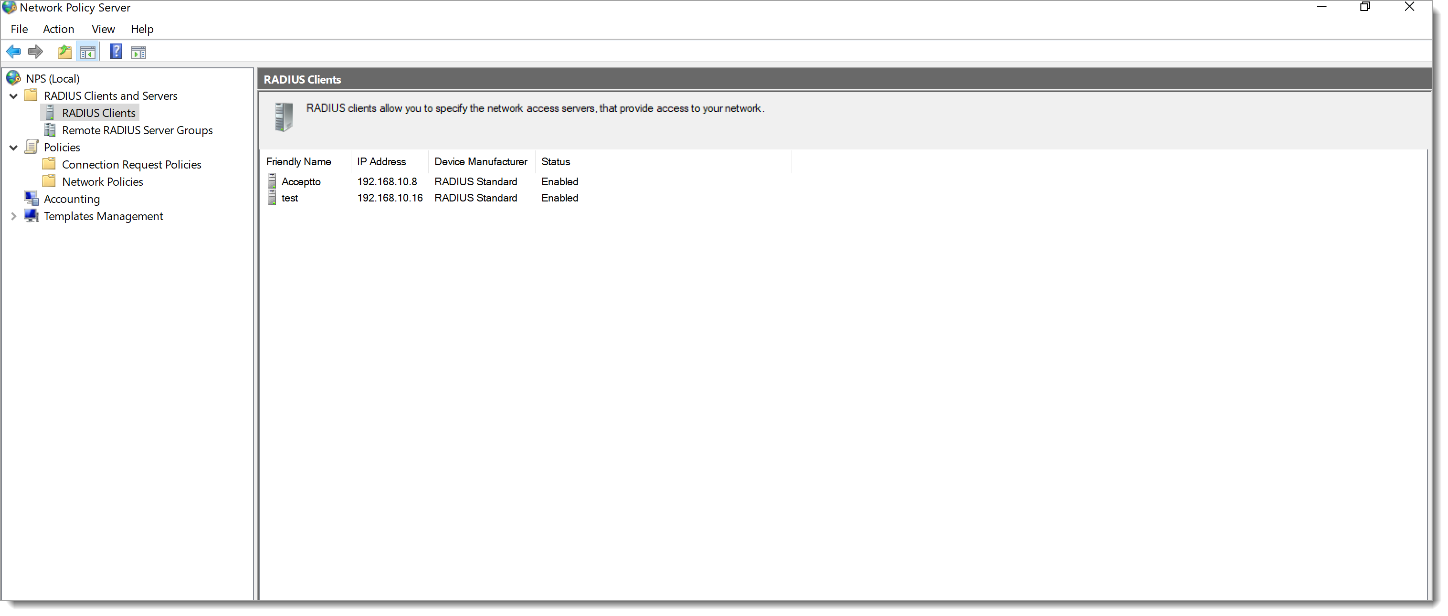
Right click on Radius Clients section and add RDP machines as radius clients to the NPS configuration.
Navigate to Policies section and click on Connection Request Polices.
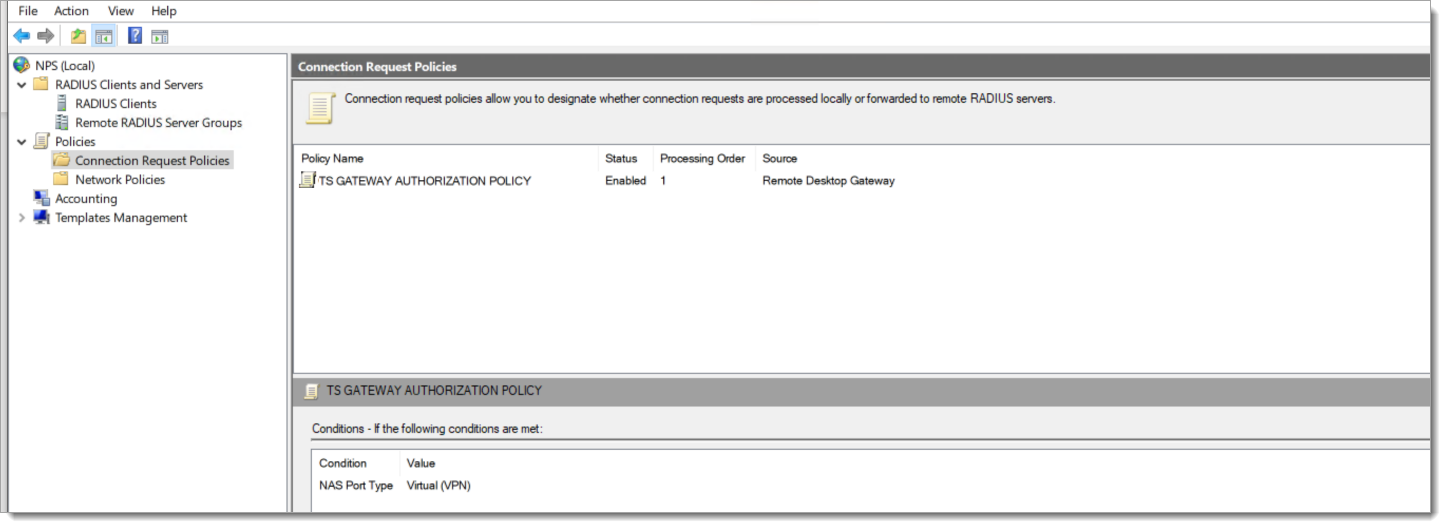
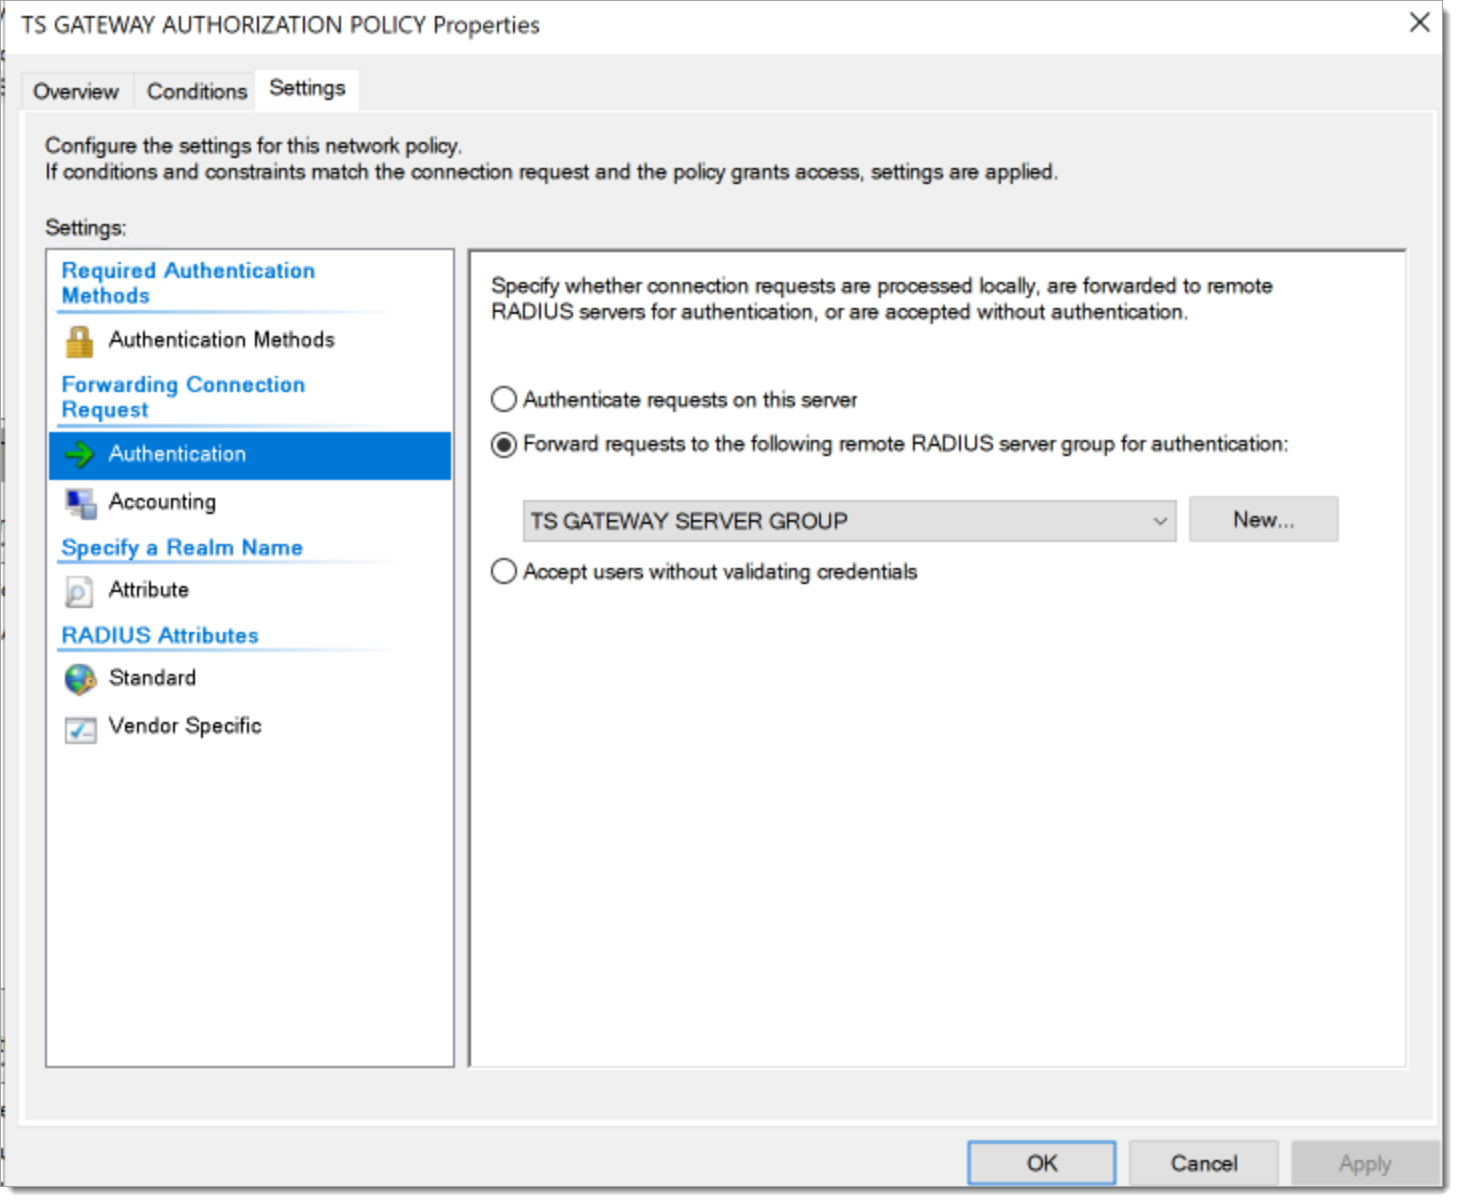
Right click on TS Gateway Authentication Policy and navigate to Settings tab, select Authentication and set authentication on Forward requests to the following remote RADIUS server group for authentication and click OK.
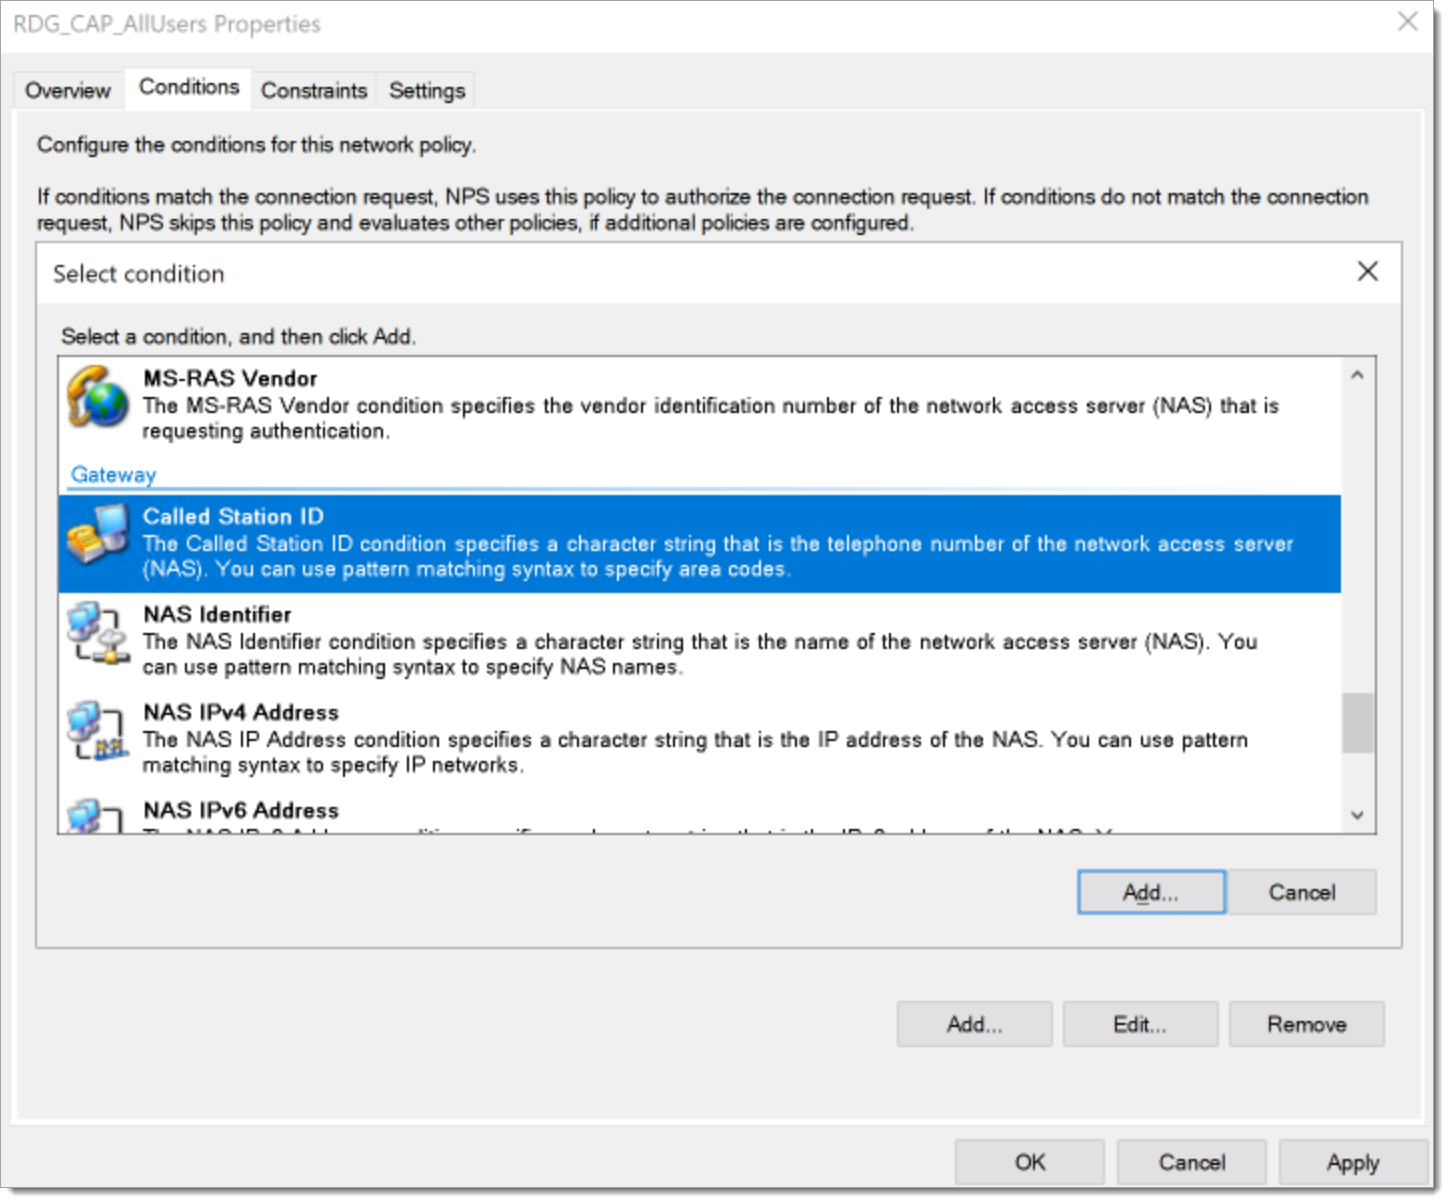
Go to Network Polices and double click on your RDG CAP policy.

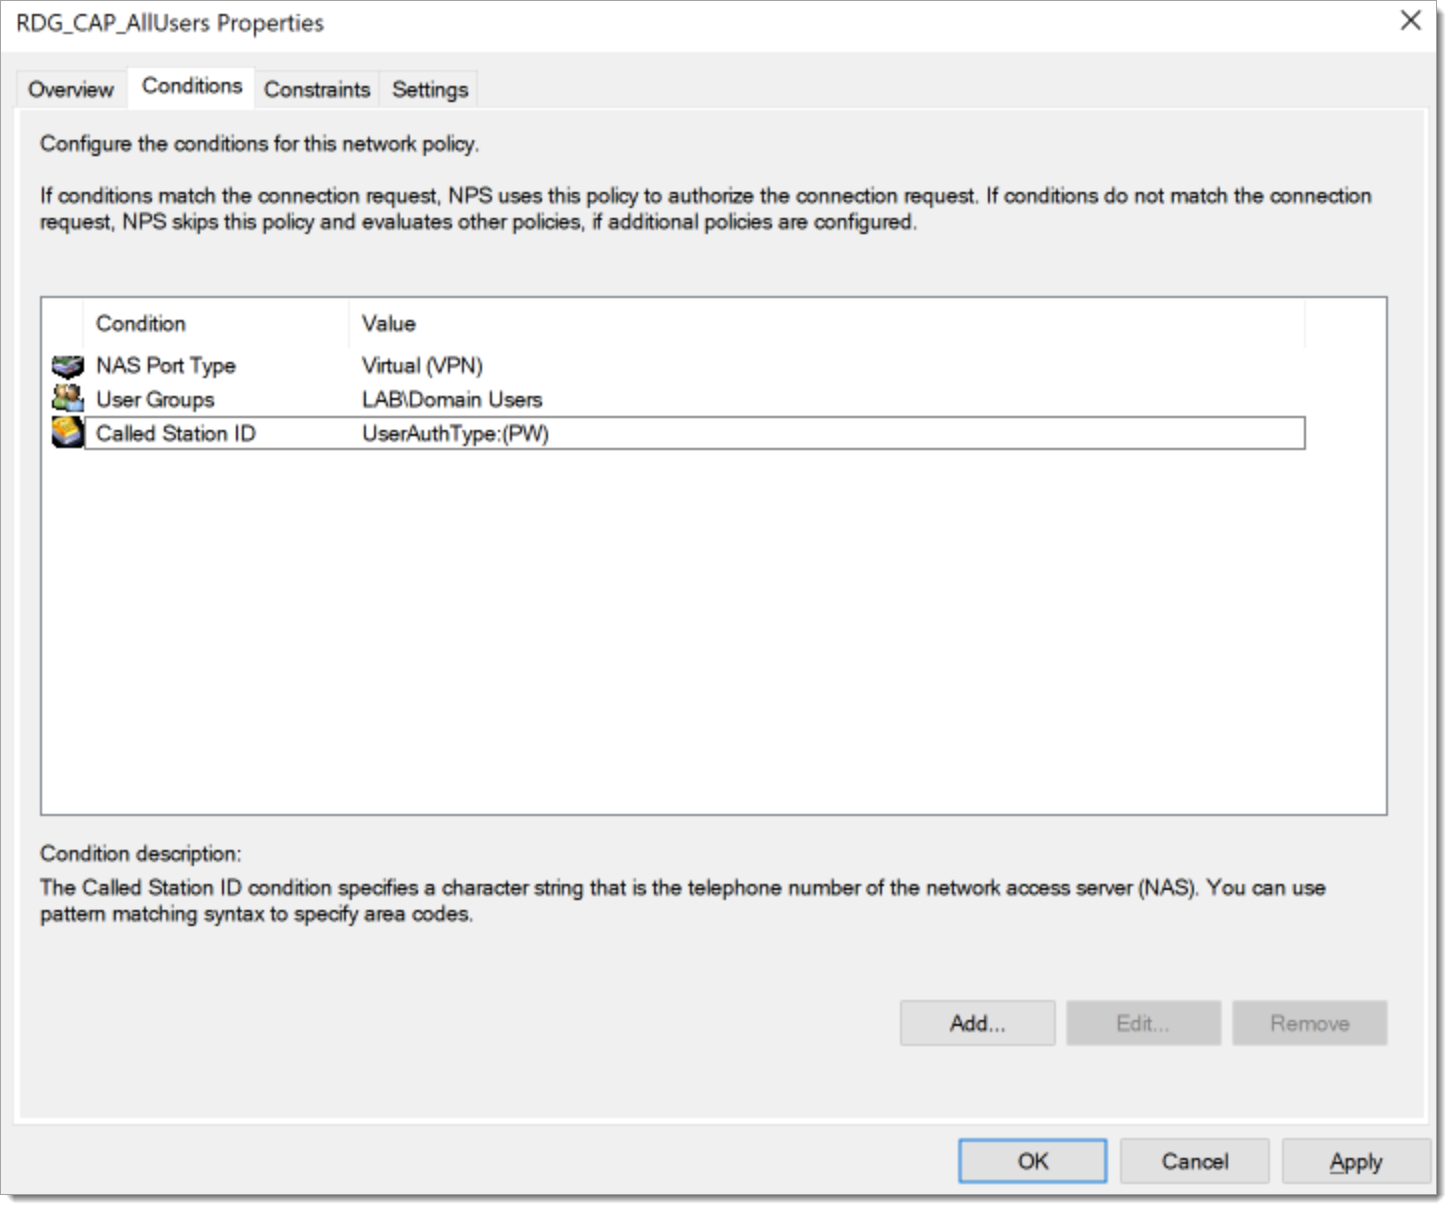
Click on the Conditions tab, click on Add and to add Called Station ID option and enter UserAuthType:(PW) and click OK.
Click OK to save RDG CAP.
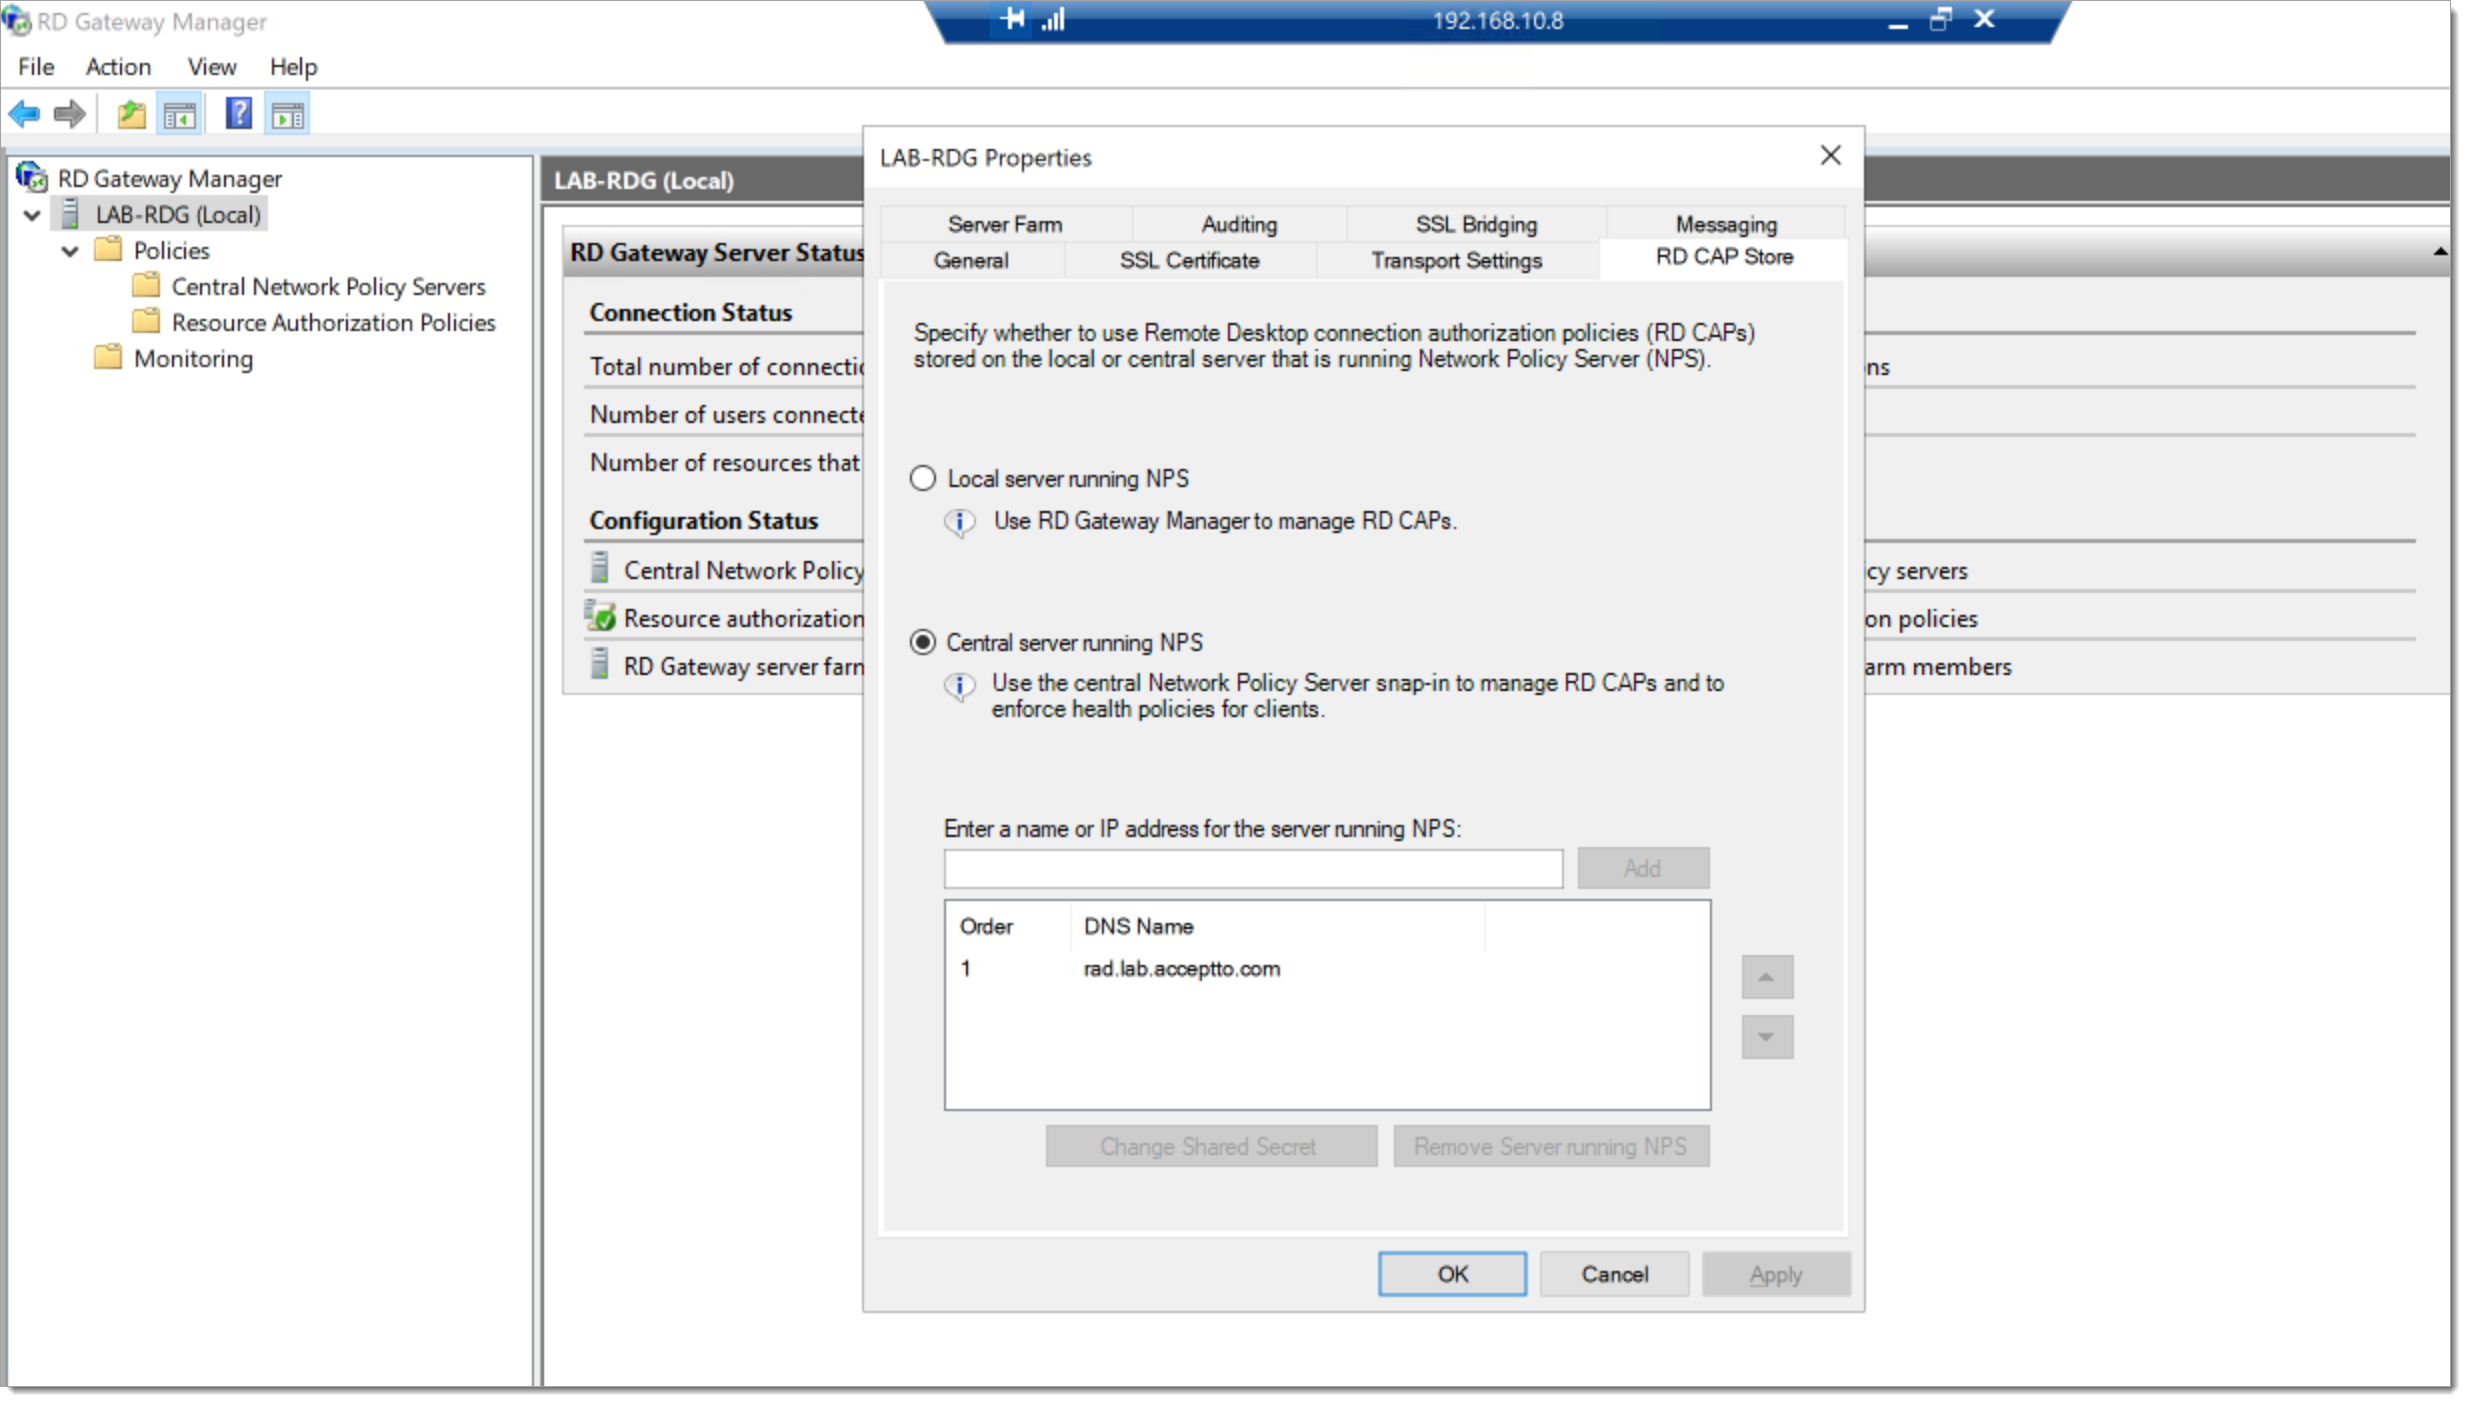
Open the RD Gateway Manager from your Start Menu.
Right click on your RD server in the left sidebar and click on Properties.
Select the RD CAP Store tab.
Select the Central server running NPS radio button and click OK.
Support
If you have questions or need assistance, contact SecureAuth Support.
Sales
Want to learn more about our MFA solutions? Contact our Professional Services for a demo today.
Disclaimer
All product names, trademarks, and registered trademarks are the property of their respective owners.
All company, product, and service names used in this document are for identification purposes only. The use of these names, trademarks, and brands do not constitute an endorsement by the SecureAuth Corporation.