Cisco VPN AnyConnect RADIUS integration
Multi-Factor Authentication (MFA) is an extra layer of security used when logging into websites or apps. Individuals are authenticated through more than one required security and validation procedure that only you know or have access to.
RADIUS is a protocol commonly used to authenticate, authorize, and account for user access and actions. Acceptto offers a simple solution for adding MFA to Cisco AnyConnect VPN via its Radius agent. This step-by-step integration instruction illustrates how to configure both Cisco AnyConnect VPN on Cisco ASA device and an Acceptto MFA solution.
Prerequisites
A previously set up Cisco VPN ASA with a working configuration.
An Acceptto RADIUS Agent that is configured and connected to your user directory. For example, Microsoft™ ‘Active Directory™’.
For more information, see the RADIUS deployment guide.
A user with administrative privileges for the Cisco ASA device.
Configure the Acceptto RADIUS Agent
To integrate Acceptto with your Cisco ASA, you will need to install an Acceptto RADIUS Agent on a machine within your network. This server will receive RADIUS requests from your Cisco ASA, check with the LDAP server to perform primary authentication, and then contact Acceptto cloud service for secondary authentication.
Login to the Acceptto RADIUS Agent with an administrative user and open the radius-agent-config.env file with an editor. It is located in the installed directory of RADIUS Agent. RADIUS clients are configured in this setting.
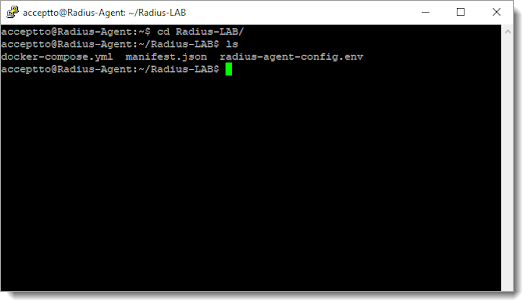
Go to the bottom of radius-agent-config.env file and change the ARA_CLIENTS attribute as follows. The values should be separated by semicolon (;).
ARA_CLIENTS = An optional name for your Cisco ASA; Internal IP address of your ASA; a shared secret
An example configuration might look like this:
ARA_CLIENTS = Cisco;10.1.0.160/32;testing12345
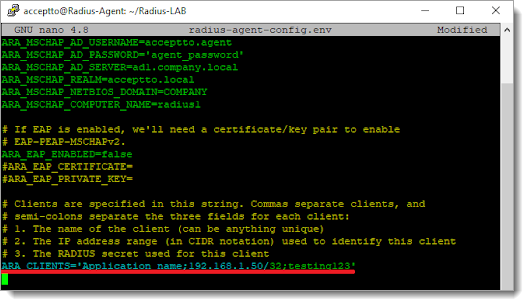
Save file and run the following command for set changes:
docker-compose down && docker-compose up -d
Cisco ASA Configuration for AnyConnect VPN and RADIUS
Login to the Cisco ASA administration interface with an administrative user.
Go to the AAA Server Groups.
Click Add to add a server group.
Setting
Value
AAA Server Group
Acceptto2
Protocol
RADIUS
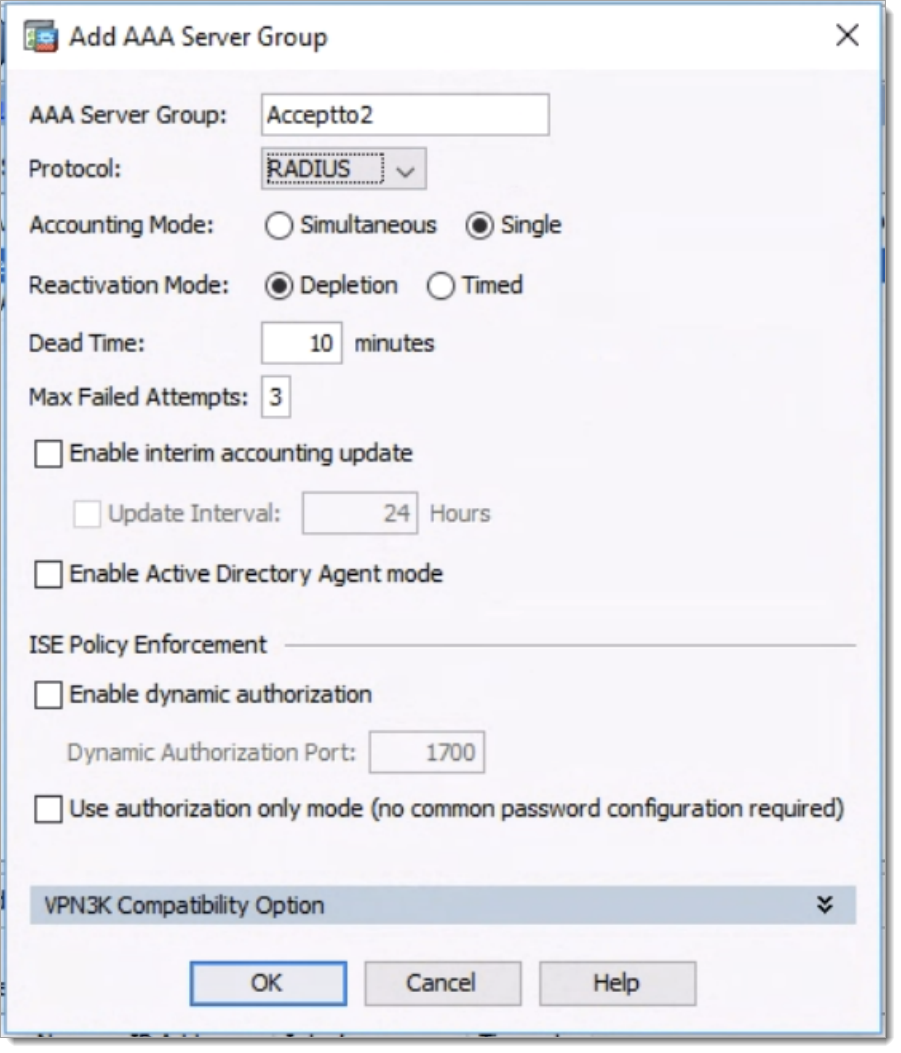
Configure Server Group
Click on the server group (e.g. Acceptto2) and use the following settings for Add AAA Server dialog.
Setting
Value
Interface Name
Management
Server Name or IP Address
IP Address of Your Acceptto RADIUS Agent
Time
90 Seconds (recommended)
Server Authentication Port
1812
Server Accounting Port
1813
Retry Interval
10 Seconds
Server Secret Key
Shared Secret Set in the Acceptto RADIUS Agent
Microsoft CHAPv2 Capable
Checked
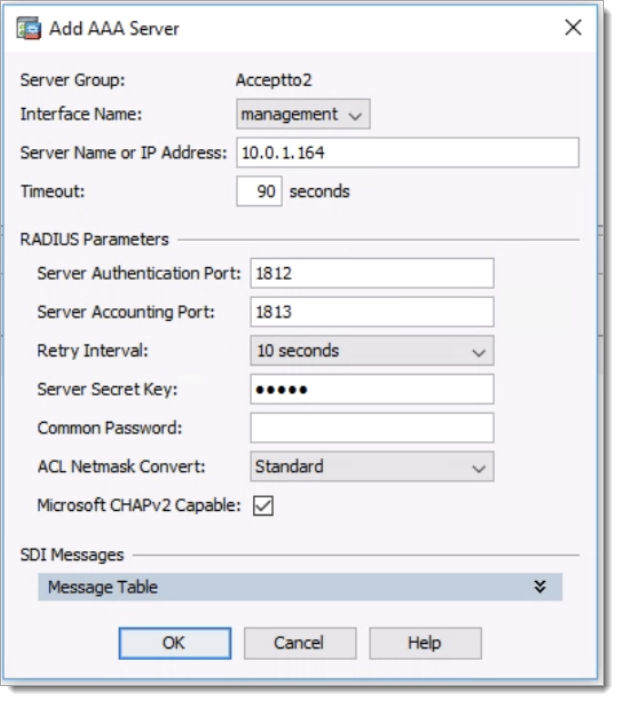
Click OK to apply the configuration.
To verify connectivity to the Acceptto RADIUS Agent, Select the AAA server that was created before and click the Test button.
On the "Test AAA Server" dialog, select Authentication.
Enter the user population that is going to be authenticated via RADIUS.
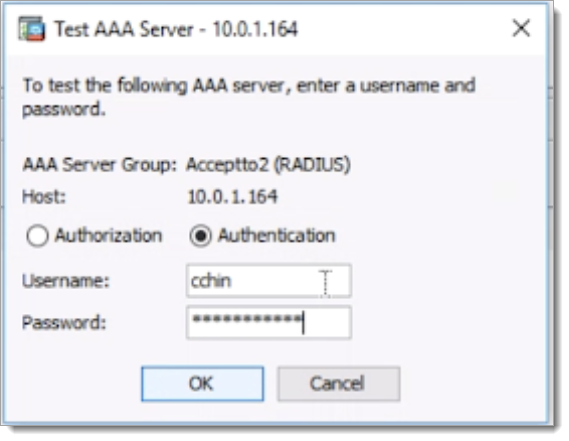
A message will be sent to the Acceptto It’sMe mobile app of the user for approval. Then, a pop-up window informs you if the test was successful or failed.
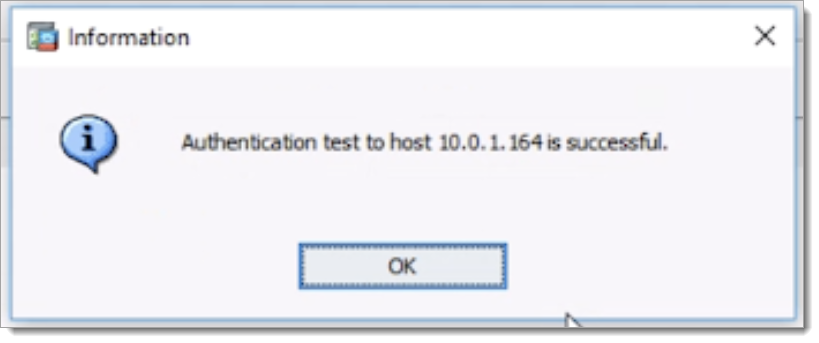
Set the SSL VPN Authentication Method to Acceptto RADIUS
Go to the Network (Client) Access section and select AnyConnect Connection Profiles.
Click on the connection profile (e.g. TunnelGroup2) that you want to add MFA authentication and click Edit.
Click on Basic and In the Authentication section select Acceptto2 from the AAA Server Group list.
Untick the Use LOCAL if Server Group fails.
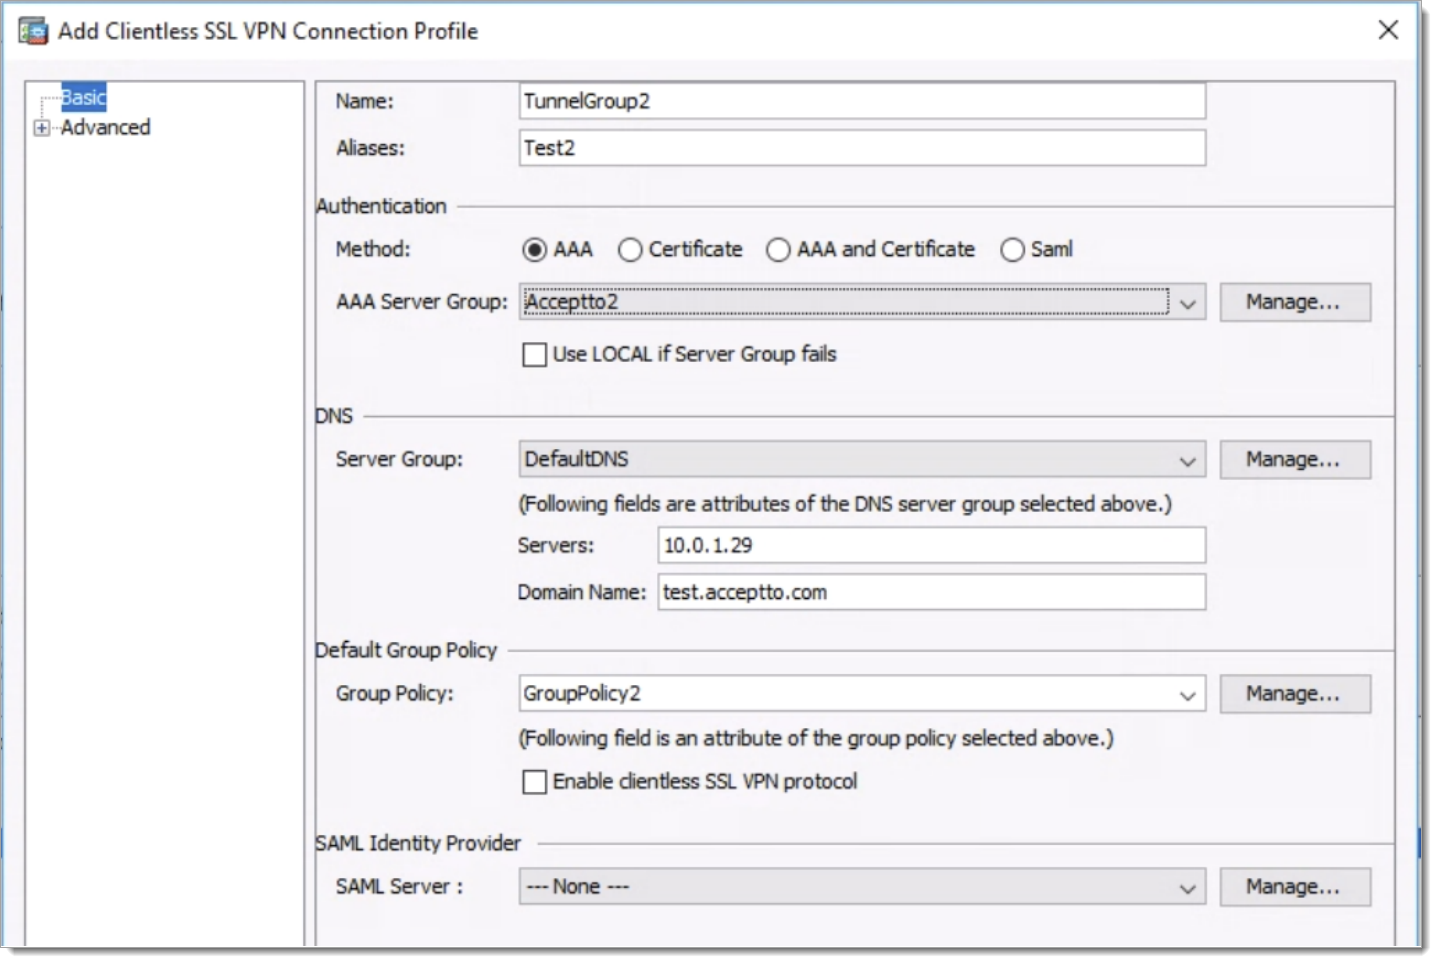
Click OK then click Apply.
Click Save to write all changes to the ASA device memory.
Note: Set the following setting If you want to give the user enough time to approve push notification:
In the Configuration section select Remote Access VPN.
Click on Network (Client) Access and go to AnyConnect Client Profile and click on Edit.
In the Preferences (Part2) section, find Authentication Timeout (seconds) and set 60.
Click OK and after that click Apply to activate settings.

Test Your Configuration
Enter your VPN Server address on Cisco AnyConnect Client and Click Connect.
Enter your username and password.
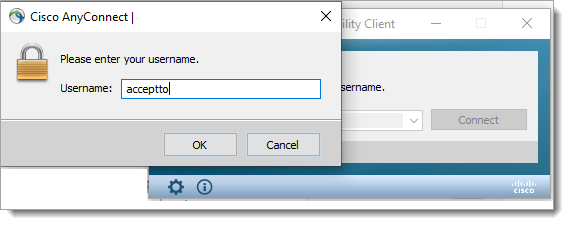
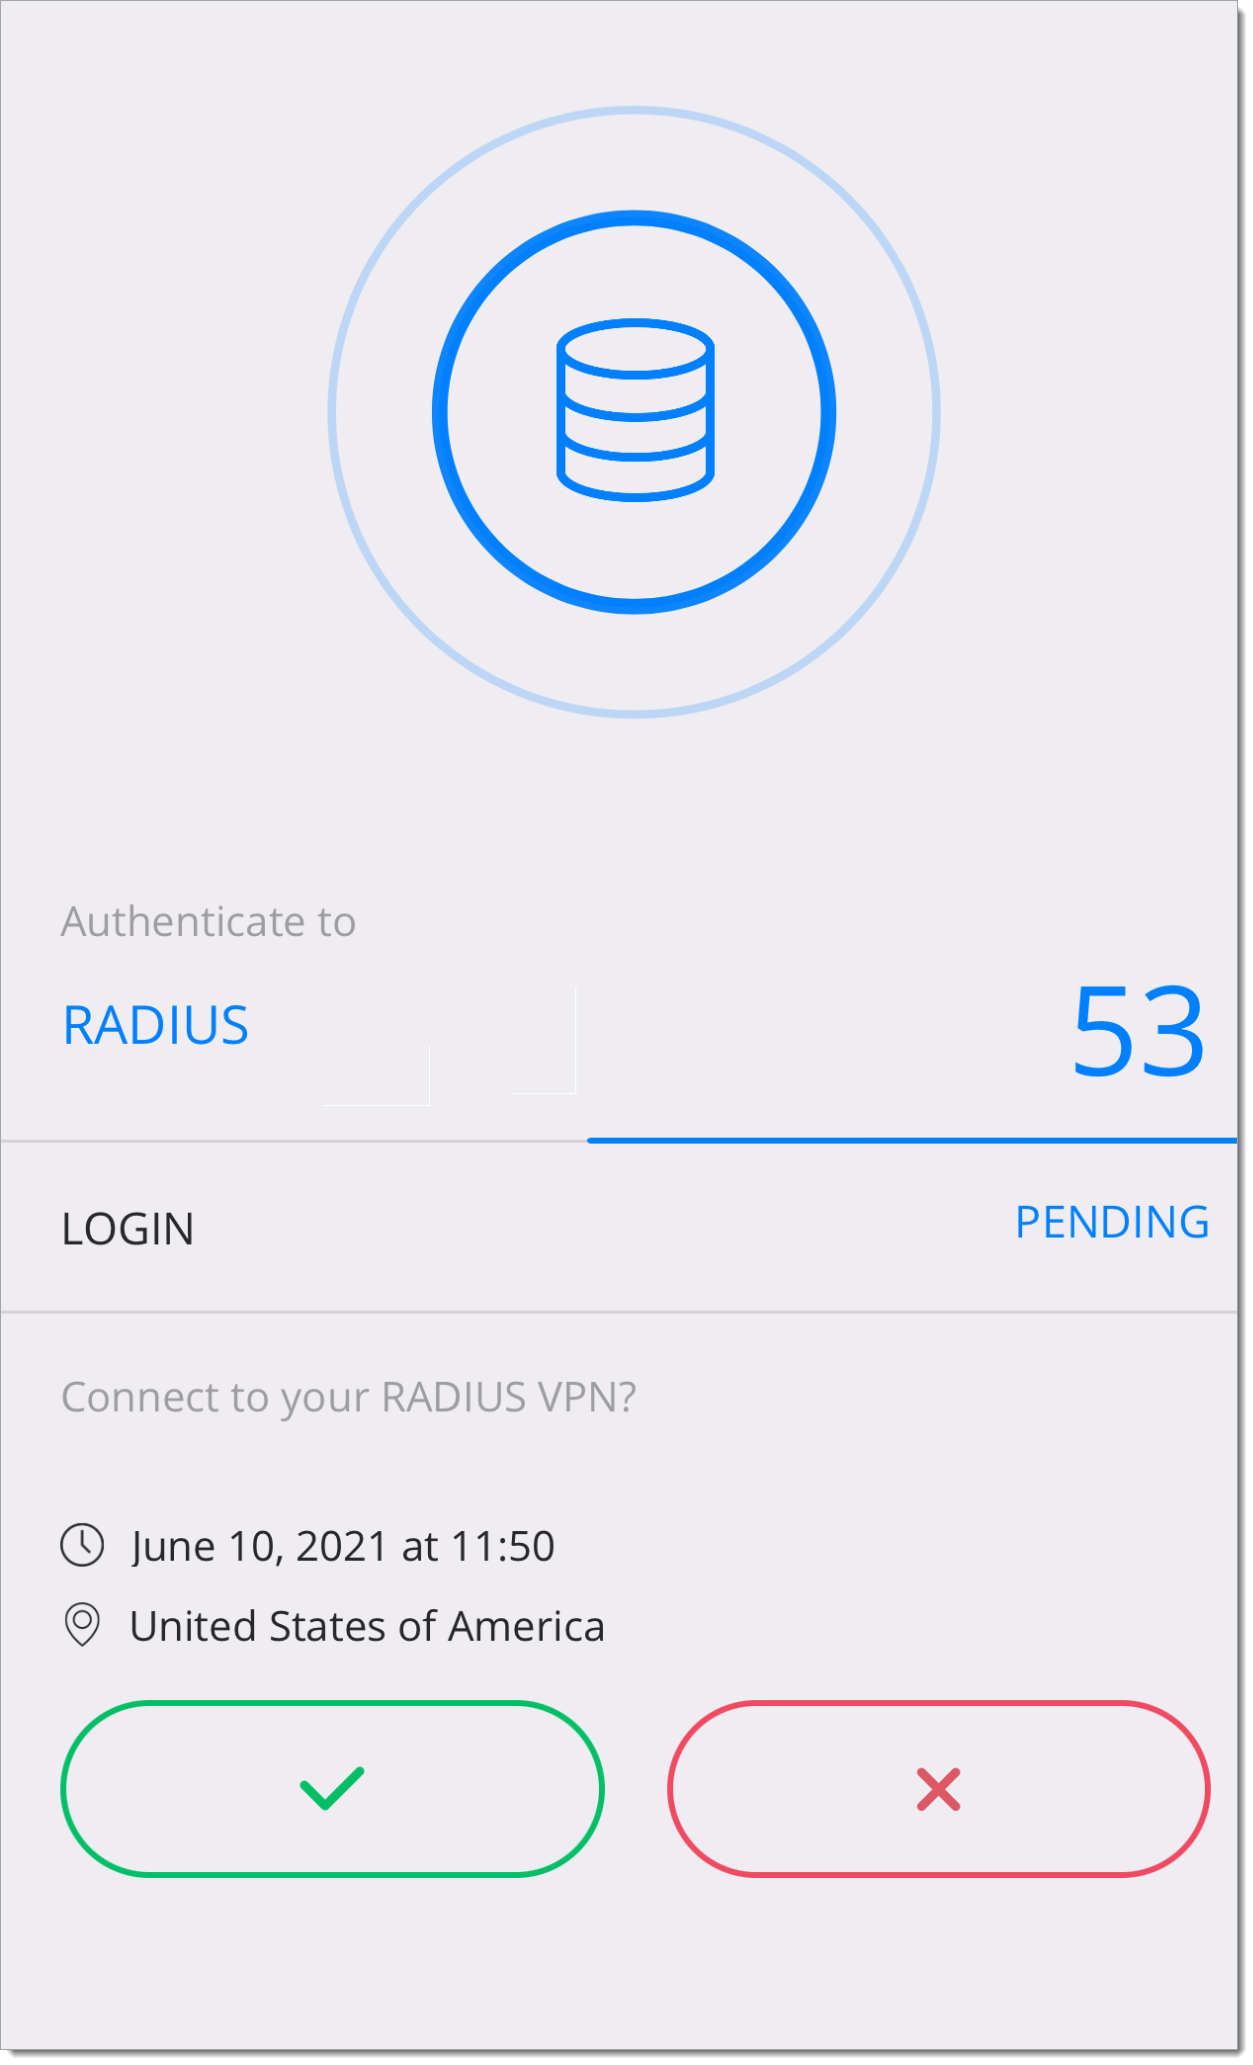
You will receive a push notification on your It’sMe mobile application to authorize access to your VPN.
Support
If you have questions or need assistance, contact SecureAuth Support.
Sales
Want to learn more about our MFA solutions? Contact our Professional Services for a demo today.
Disclaimer
All product names, trademarks, and registered trademarks are the property of their respective owners.
All company, product, and service names used in this document are for identification purposes only. The use of these names, trademarks, and brands do not constitute an endorsement by the SecureAuth Corporation.
Cisco are either registered trademarks or trademarks of Cisco, Inc. and/or one or more of its subsidiaries in the United States and/or other countries.
Microsoft and Active Directory are either registered trademarks or trademarks of Microsoft and/or one or more of its subsidiaries in the United States and/or other countries.