Workflow Tab Configuration
Use this guide to configure the Workflow tab in Advanced Settings (formerly Classic Experience) Web Admin for each SecureAuth® Identity Platform realm.
This includes Device Recognition (token and certificate properties), Workflow options (authentication modes, realm redirects, etc.), and consumption options (custom tokens, social identities, etc.).
Prerequisites
SecureAuth® Identity Platform release 19.07 or later
Open an existing realm in Advanced Settings
Note
Some Workflow settings are disabled in Advanced Settings for realms created in the New Experience.
Device Recognition
Use the steps in this section to configure the Identity Platform to enable end users to securely access resources using their unique device or browser profiles without requiring additional one-time passcodes (OTPs) for multi-factor authentication.
Device Recognition Method
In the Device Recognition Method section, set the following:
Integration Method
Select one of the following:
- Certification Enrollment and Validation
Select for web-based authentication (used most frequently for majority of application integrations).
- Certificate Enrollment Only
Select for X.509 VPN authentication.
- Mobile Enrollment and Validation
Select for mobile browser authentication or enrollment (e.g. native mobile apps, OATH enrollment).
Note
The selection made here alters the options for Client Side Control and IE / PFX / Java Cert Type.
Client Side Control
Based on the Integration Method set above, select one of the following:
Note
The selection made here alters the options for IE / PFX / Java Cert Type, and may require additional configuration steps.
IE / PFX / Java Cert Type
Select according to security preference.
Note
If Client Side Control is set to Device / Browser Fingerprinting, selection is disabled, so no dropdown menu will appear.
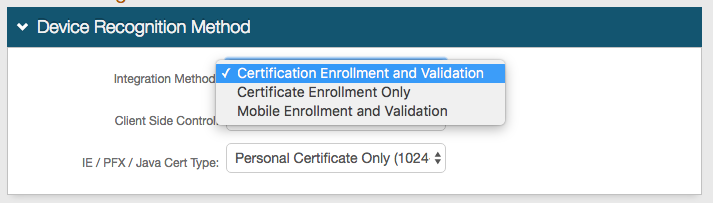
Click Save.
Certificate/Token Properties
In the Certificate / Token Properties section, set the following:
Certificate Expiration
Select one of the following:
- Password Expiration Date
Select if the certificate is to expire when the password expires.
- Private Mode Cert Length
Select if the certificate is to expire after a designated number of days.
Certificate Valid Until
Select one of the following:
- Cert Expiration Date
Select if the certificate is to remain valid up until its expiration.
- Private Mode Cert Length
Select if the certificate is to remain valid during a designated number of days.
Private Mode Cert Length
If Private Mode Cert Length is selected, set to the number of days a certificate remains valid and does not expire.
Public Mode Cert Length
If Integration Mode is set to Certificate Enrollment, set to the number of hours the Public Mode Certificate remains valid and does not expire.
Mobile Credential Length
Set to the number of hours the cookie delivered to a mobile device remains valid.
Global Cert Limit
Optional: Set to the maximum amount of certificates that a user can have at a time.
Global Mobile Limit
Optional: Set to the maximum amount of mobile cookies that a user can have at a time.
Check CRL
Select one of the following methods to to check the Certificate Revocation List:
- Fall Back to 2nd Factor
Select to continue to second factor authentication if the CRL check fails.
- Display Error Message
Select to display an error message if the CRL check fails.
- Disabled
Select to opt out of checking the CRL as it is not necessary with the Identity Platform.
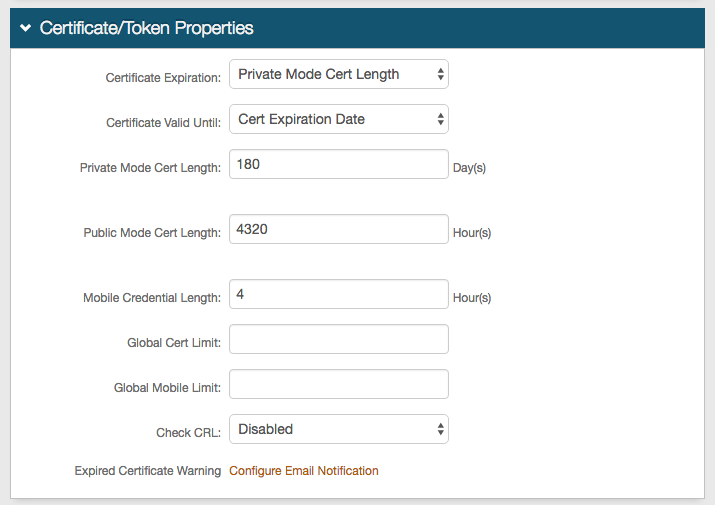
Optional: Click Configure Email Notification to enable and set up Expired Certificate Warning emails.
Email Notification
Select Enabled to enable warning notifications for expired certificates.
Multiple Certs per User
Select True to notify users of all certificate expirations, rather than just one.
Email Field
Select the Email Property that corresponds to the data store field that contains the user's email address to which the notifications are sent.
Warning Period (days)
Set to the number of days before the expiration for notifications to begin.
Notification Interval
Select one of the following:
- Hourly
Select for an email notification to be sent once per day.
- Daily
Select for an email notification to be sent once per hour.
Notification Start Time
Set to the time of day the email is sent.
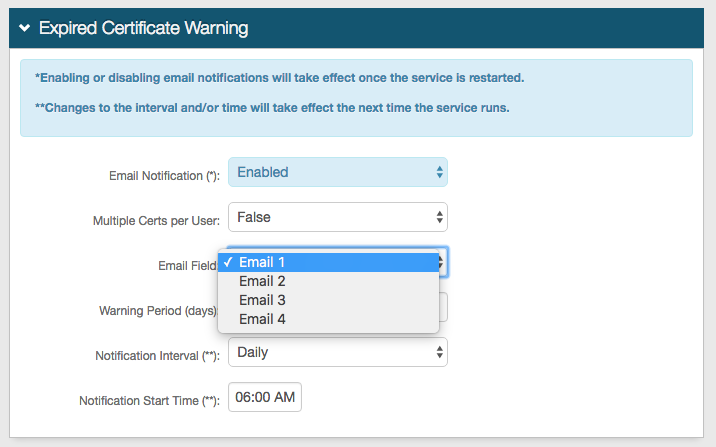
Click Save.
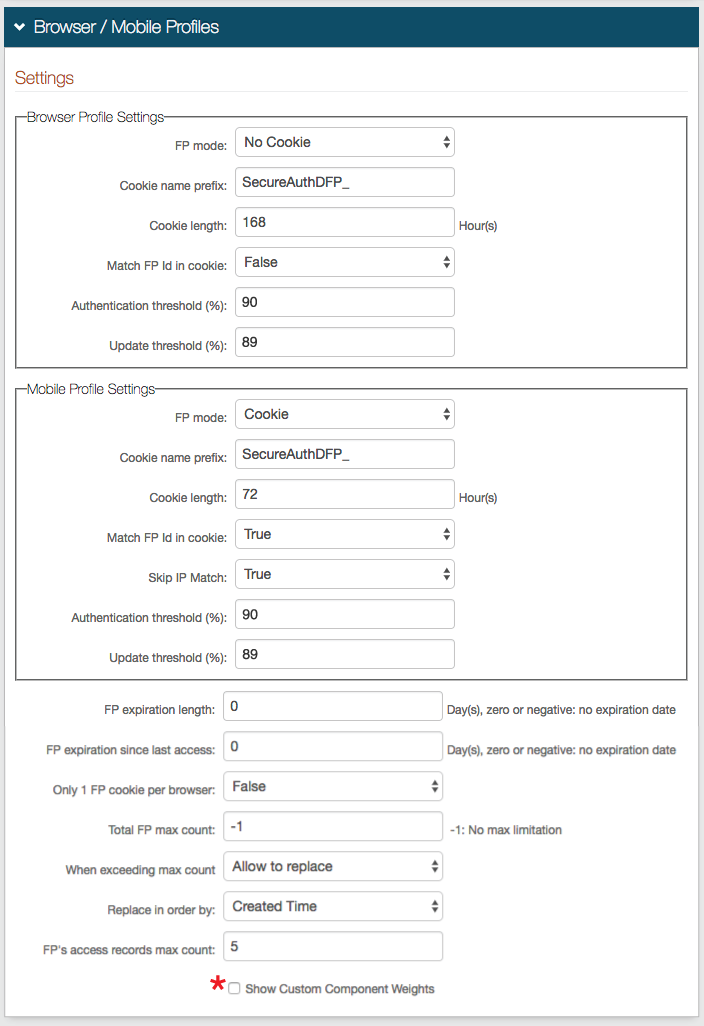
Browser / Mobile Profiles
Notice
The following configuration steps are only required if Device / Browser Fingerprinting is selected for the Client Side Control option.
 |
Workflow
Use the steps in this section to define the user login experience.
Login Screen Options
In the Workflow- Login Screen Options section, set the following:
Public/Private Mode
This generates a device / browser profile in this realm and checks for existing profiles.
Select Private and Public Mode, Public Mode Only, or Private Mode Only.
If the end-user selects Private Mode on the login page, then the Identity Platform checks for a certificate / token / device profile, or delivers a certificate / token to the browser or pulls information to create a device / browser profile for subsequent access attempts.
Default Public/Private
Select which option is selected by default (if Private and Public Mode is enabled) on the end-user login page.
Select Default Public, Default Private, or No Default.
Remember User Selection
Select True or False to set if the user's last Private / Public Mode selection is defaulted for subsequent access attempts.
Show UserID Textbox
This provides a username input field on the login pages for Certificate Enrollment and / or Cisco ASA integrations when the user ID is not provided by Cisco.
Select True or False. The default is False.
Inline Password Change
This allows users to change their password during the workflow process.
Select Enabled or Disabled.
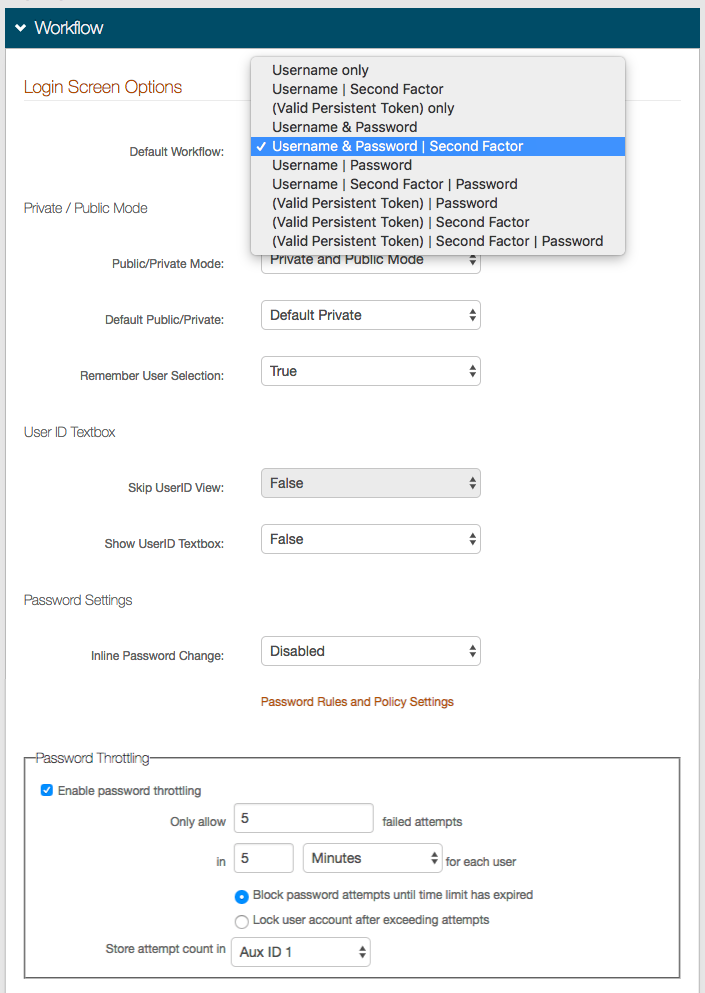
Click Save.
Session Timeout
Notice
These configuration steps are only required if session timeout occurs automatically after a set period of time.
In the Workflow- Session Timeout section, set the following:
Session State Name
Set the Session State Name or leave as the default value.
Idle Timeout Length
Set to the number of minutes before a session expires due to inactivity.
Display TimeOut Message
Select the action to take after the session expires due to inactivity.
Select Display Time Out, Auto Restart, or Disabled.
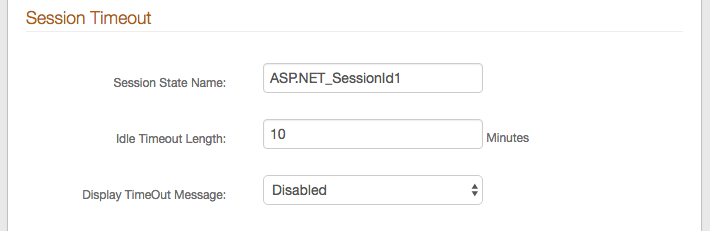
Click Save.
Token Persistence
Notice
This section applies to the Client Side Control option selected in the Device Recognition Method section above. The Device / Browser Profile, Native Cert, Java Cert, or UBC is the persistent token that can be validated and / or renewed through the workflow.
In the Workflow- Token Persistence section, set the following:
Validate Persistent Token
Select one of the following:
- True
Select if the Identity Platform is to check the validity of the persistent token during the authentication process.
- False
Select for this realm to only deliver certificates or create a profile, but not validate or renew the token.
Renew Persistent Token (After Validation)
Select True if the persistent token is to be renewed after the Identity Platform checks the validity.
This is only applicable if Validate Persistent Token is set to True.
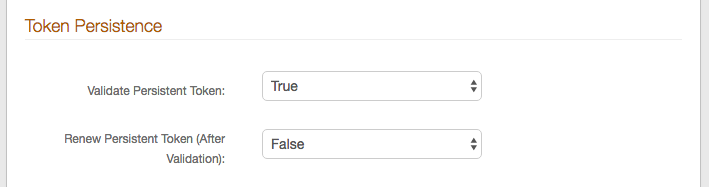
Click Save.
Redirects
Notice
Redirects are optional and may not be relevant for every realm configuration
In the Workflow- Redirects section, set the following:
Invalid Persistent Token Redirect
Set to where users are directed to acquire a new / valid persistent token, e.g. another SecureAuth Identity Platform realm.
This is especially useful in realms using (Valid Persistent Token) workflows as a valid token is required to access the resource
Token Missing Redirect
Set to where users are directed to acquire a new token, e.g. enrollment or provisioning realm.
This is used for Near Field Communications (NFC) tokens only.
Profile Missing Redirect
Set to where users are directed to retrieve a missing profile, e.g. profilemissing.aspx, or leave as default.
If Mobile, Redirect To
Set to an Identity Platform realm specifically configured for mobile access.
Mobile Identifiers
Set to common keywords that can be used to detect mobile devices and browsers, which then triggers the mobile redirect to the realm selected in the If Mobile, Redirect To field.
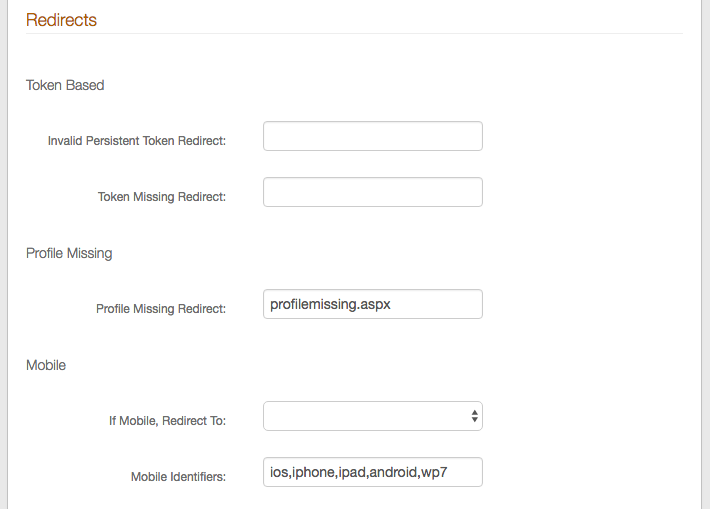
Click Save.
Termination Points
Notice
Termination Points are optional and may not be relevant for every realm configuration
In the Workflow- Termination Points section, set the following:
Client FQDN
Set to the Fully Qualified Domain Name (FQDN) of the client point of termination for SecureAuth Identity Platform validation.
SSL Termination Cert
Provide if enabling bi-lateral authentication and if not using SecureAuth Identity Platform as the termination point.
(or) SSL Cert Address
If the SSL Termination Cert cannot be provided, then set (or) SSL Cert Address to the FQDN or IP Address of the (typically) Load Balancer at which the SSL connection is being terminated to enable SecureAuth Identity Platform to retrieve the SSL certificate.
SSL Termination Point
Set to the FQDN of where the SSL certificate is terminated, which is communicated to SecureAuth Identity Platform to validate the information.

Click Save.
Multiple Workflow Configuration
Notice
This section applies only if this realm enables multiple data store integrations that lead to distinct workflows.
Refer to Multiple Workflow Configuration Guide for the configuration steps of this feature.
Identity / Authentication Consumers
Use the steps in this section to configure the Identity Platform's consumption options.
Custom Identity Consumer
Notice
Custom Identity Consumer configurations are optional and may not be relevant for every realm configuration
In the Custom Identity Consumer section, set the following:
Receive token
Select the type of token SecureAuth Identity Platform receives in the realm.
Require Begin Site
Select one of the following:
- True
Select if users are to acquire tokens / other information from a different site before logging in with SecureAuth Identity Platform.
- False
Select if no begin site is required. The default is False.
Begin Site
If Require Begin Site is set to True, select the type of Begin Site that is used in this realm, which which auto-populates the Begin Site URL field (unless Custom is selected).
Refer to the specific Begin Site Configuration Guide for full configuration steps.
Token Data Type (Receive)
Select where the User ID is stored in the received token.
Token Data Type (Send)
Select where the User ID is stored in the token sent to the SP.
Allow Transparent SSO
Select True if this realm utilizes SecureAuth Identity Platform SSO, and enables SP-initiated or Secure Portal SSO.
Refer to the specific Integration Guide to view the distinct configuration steps.

Click Save.
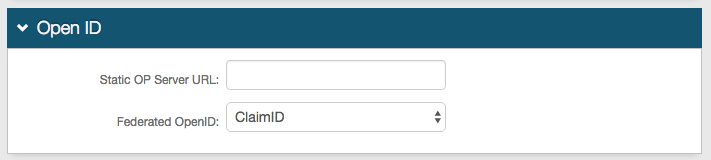
Open ID
Notice
Open ID configurations are only necessary if using Open ID in the realm
SAML Consumer
Notice
SAML Consumer configurations are only necessary if SecureAuth Identity Platform is accepting a SAML assertion from one or multiple Identity Providers.
Refer to SAML Multi-tenant Consumer Configuration Guide and SAML attribute consumption configuration for more information on these features.
Form Post
Notice
Form Post configurations are only necessary if SecureAuth Identity Platform is accepting a Form Post.

Social Identity
Notice
Social Identity configurations are only necessary if Social IDs are being consumed by SecureAuth Identity Platform for use in multi-factor authentication.
In the Social Identity section, set the following for each Social Identity platform:
Enable
Select True to enable the Social Identity platform for 2-Factor Authentication.
The available Social Identity platforms are: Facebook, Google, Windows Live, and LinkedIn.
Client ID
Provide the Client ID, which is provided by the Social Identity platform.
Note
The Client ID must match exactly here and on the Social Identity platform's site.
Client Secret
Provide the Client Secret, which is provided by the Social Identity platform.
Note
The Client Secret must match exactly here and on the Social Identity platform's site.
Store [Social Identity platform] ID
Select where to store the Social Identity platform ID (e.g. Aux ID 1).
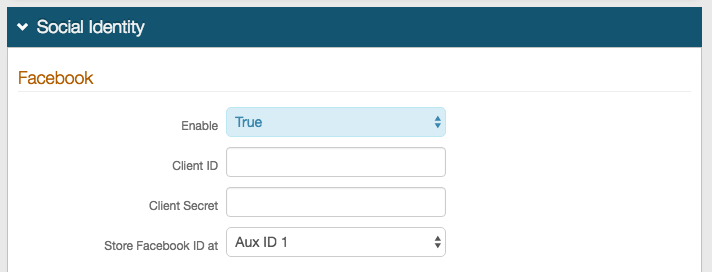
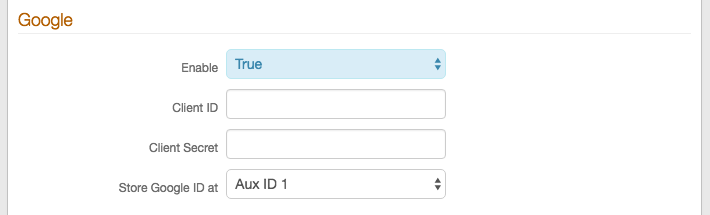
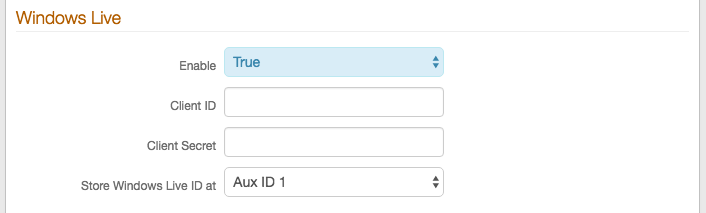
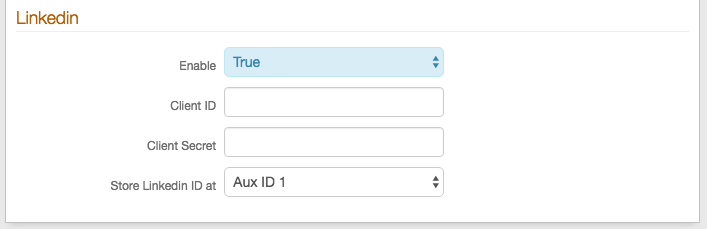
Click Save.
FBA WebService
Notice
FBA WebService configurations are only necessary if using SecureAuth Identity Platform Web Service Multi-data Store, and if required by the SP.
In the FBA WebService section, set the following:
Enable FBA WebService
Select True to enable.
FBA WebService UserName
Provide the FBA WebService UserName, which is the same as the Webservice Username in the Data tab.
FBA WebService UserName
Provide the FBA WebService Password that corresponds to the username.
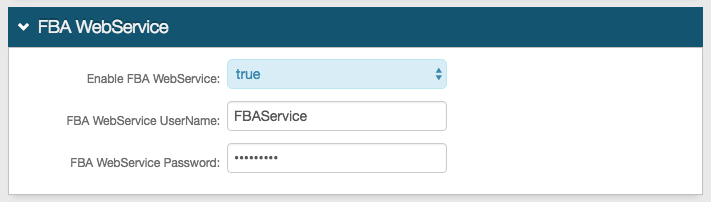
Click Save.
Consume Passcode from RADIUS 1.x Integrations
Notice
These configurations are only necessary if using SecureAuth RADIUS 1.0.x to make RADIUS web service calls to validate user information.
