Configure a DMZ SecureAuth Connection
A demilitarized zone network, or DMZ, is a subnetwork that organizations can use as an added layer of protection from external attacks.
By creating a DMZ in the Identity Platform, you separate internal network traffic from external network traffic. The external network (DMZ) contains accessible information and services while sensitive data store information remains behind a firewall on a separate internal network.
When end users access applications, data is sent to the external network (DMZ) first. The DMZ then connects to the internal network to verify credentials with the data store and if verified, the user is given access to the application.
Refer to the diagram below for a visual of how the DMZ process works.
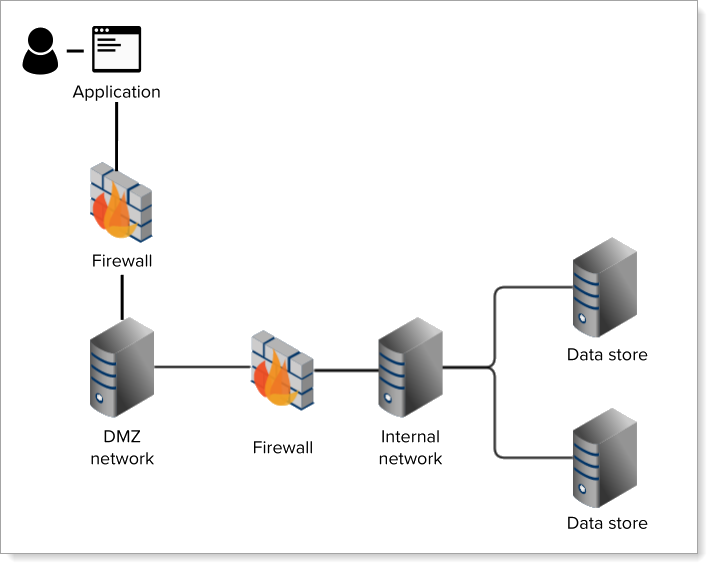 |
Follow the steps in this guide to set up a DMZ connection in the Identity Platform. Configuration will require the following steps:
Set up an application on the Internal IdP (internal network)
Create a DMZ data store on the External IdP (external network)
Enable FBA Web Service to connect the DMZ to the Internal IdP application
Create an application on the External IdP that connects to the DMZ data store
Note
If you have any questions or require assistance, please contact SecureAuth Support.
Prerequisites
SecureAuth® Identity Platform release 22.12 or later, hybrid deployment
Data store added to the Identity Platform
Configured authentication policy
Step A: Create application on the Internal IdP
In this section, you'll create an application on the Internal IdP which accesses your data store. You can create a DMZ connection for either internal applications or SAML applications configured for sign-on (SSO) access.
Internal applications
See Setting up an internal application for instructions on how to create a new internal application.
If you already have an existing application to use, skip to Step 2.
Click the pencil icon next to the application you will use to create a DMZ connection.
In the Redirect Information section, click the Copy to Clipboard link to copy the application URL. You will need this URL for the next section.
For example,
https://example.com/SecureAuth218.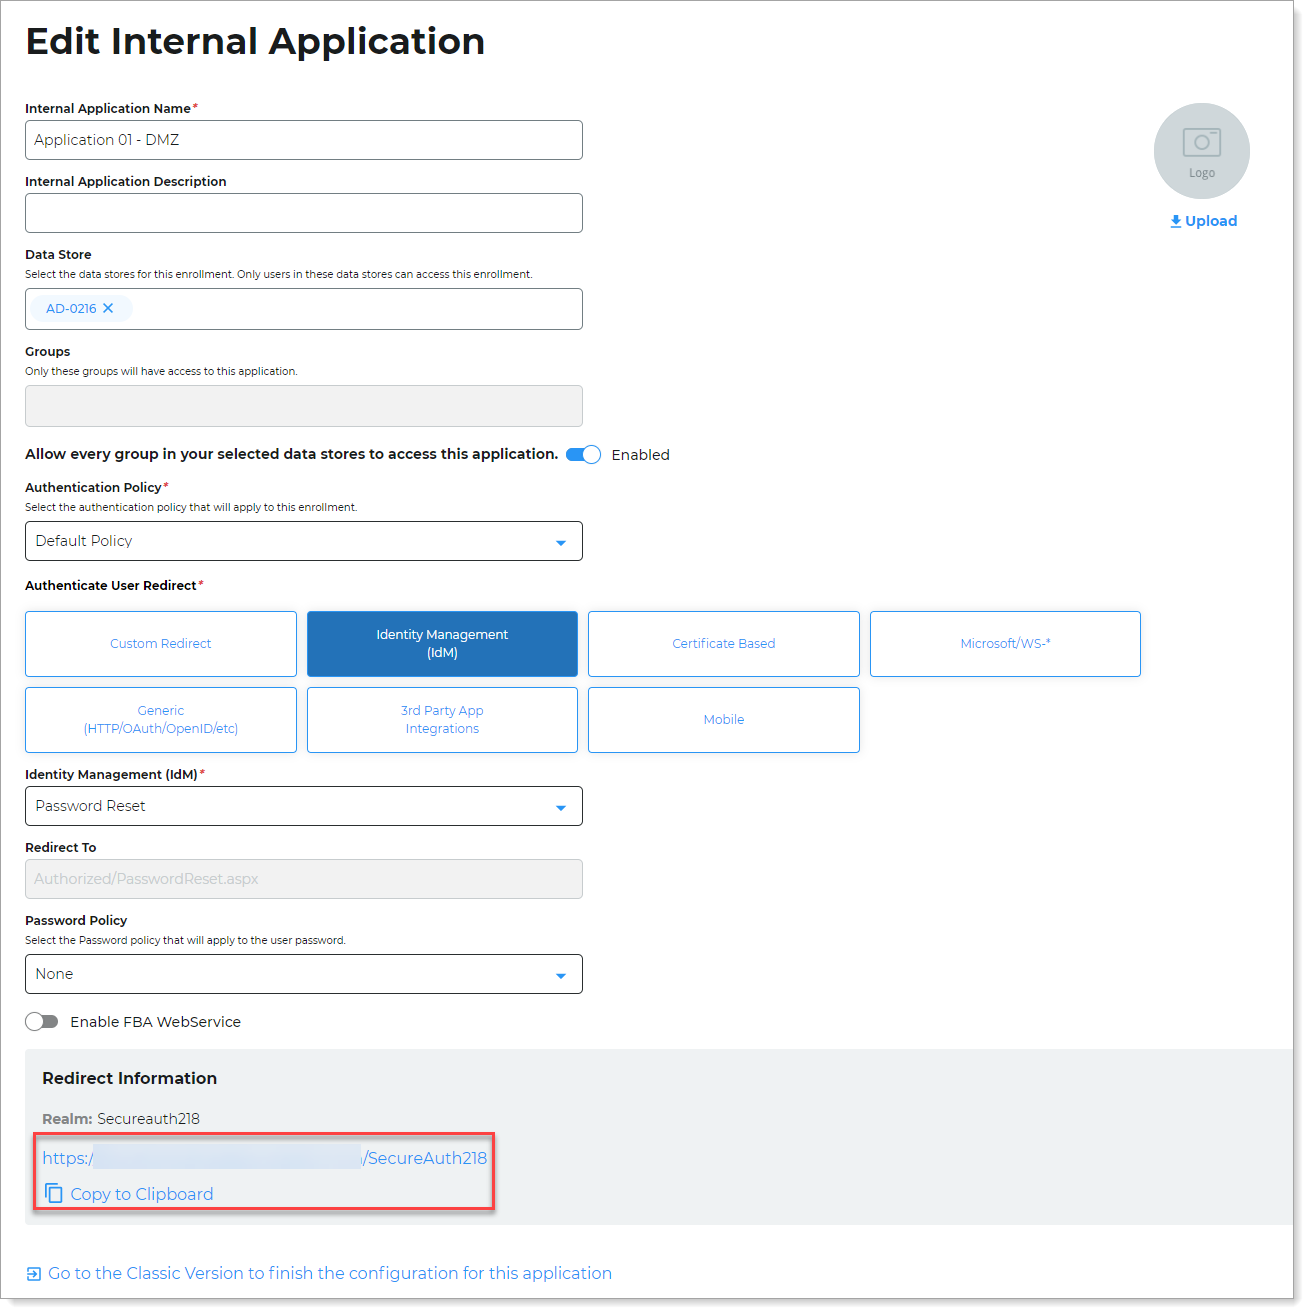
SAML applications
See SAML application integration for instructions on how to create a new SAML application integration for SSO access.
For other application integrations, see Application Manager overview.
If you already have an existing application to use, skip to Step 2.
Click the pencil icon next to the application you will use to create a DMZ connection.
Copy the application URL. You will need this URL for the next section.
For example,
https://example.com/SecureAuth28.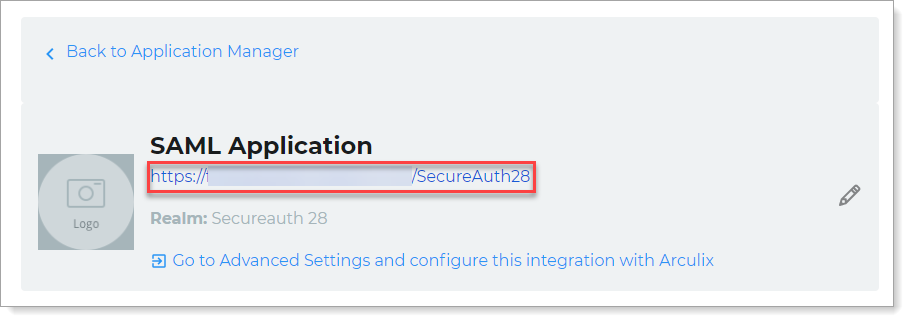
Step B: Create SecureAuth Connection (DMZ)
In this section, you'll create a data store to act as your external facing DMZ.
On the left side of the Identity Platform page, click Data Stores.
Click Add a Data Store.
Set the Data Store Name and select the Connection type as DMZ (SecureAuth Connection).

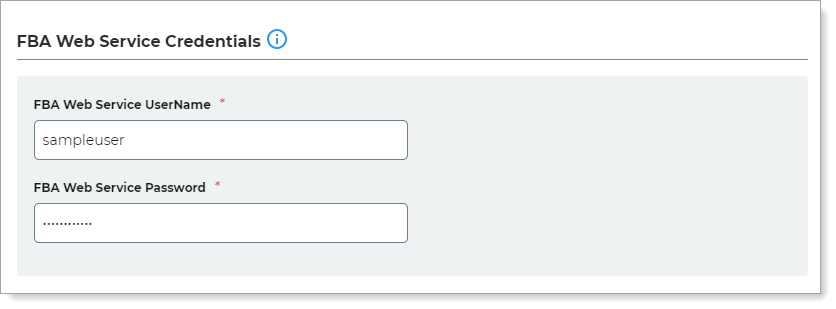
In the FBA Web Service Credentials section, create a username and password to use as a secure login connection to an internal server.
Note
The username and password that you create in this step must match the username and password you enter when enabling FBA Web Service in Step C.
In the SecureAuth Connections > Add SecureAuth Connections section, enter the URL for the application you created for DMZ connection in the previous section.
For example,
https://example.com/SecureAuth218.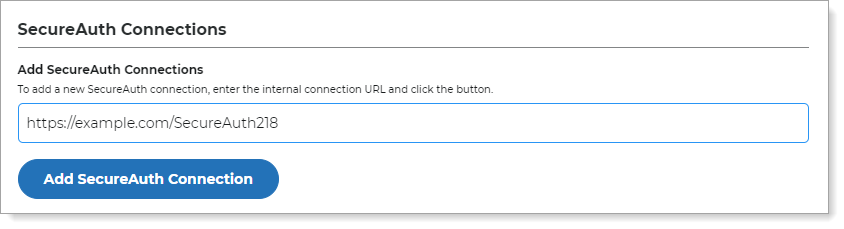
Click Add SecureAuth Connection.
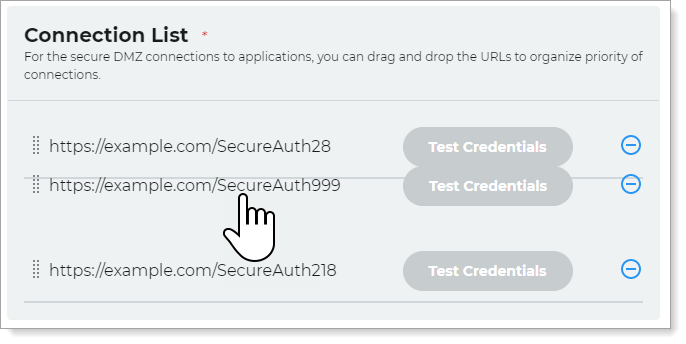
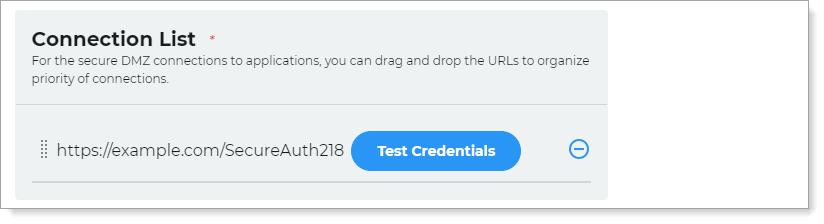
The connection appears in the Connection List.
Note
You can connect your DMZ data store to multiple applications. Drag and drop the connection URLs to organize the priority of connections.
When a user accesses the application on the External IdP, the DMZ will verify their credentials against each SecureAuth Connection, starting from the highest prioritized.
Optional. Click Test Credentials to test the connection.
Click Save Data Store.
Step C: Enable FBA Web Service
In this section, you'll enable FBA Web Service to connect your DMZ data store to the application created on the Internal IdP
Internal applications
On the left side of the Identity Platform page, click Internal Application Manager.
Click the pencil icon next to the application you created in Step A for DMZ connection.
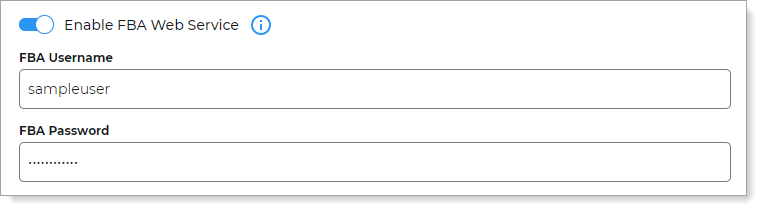
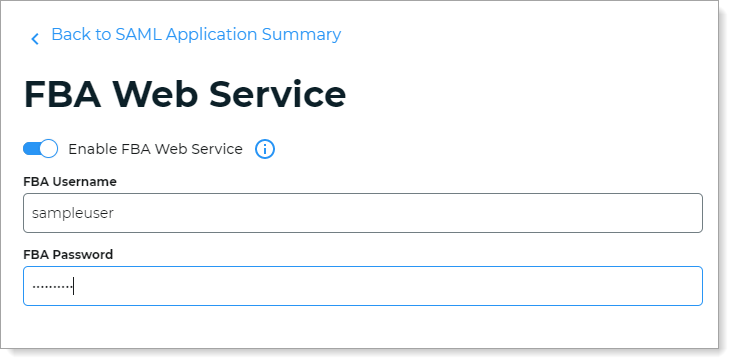
Slide the Enable FBA Web Service toggle to On.
Enter the same FBA Username and Password that you created in Step B.
Note
The username and password you enter here must match the username and password you created in Step B.
Click Update Connection.
SAML applications
On the left side of the Identity Platform, click Application Manager.
Click the pencil icon next to the application you created in Step A for DMZ connection.
Click the pencil icon next to FBA Web Service.

Slide the Enable FBA Web Service toggle to On.
Enter the same FBA Username and Password that you created in Step B.
Note
The username and password you enter here must match the username and password you created in Step B.
Click Update Settings.
Step D: Create application on the External IdP
In this section, you'll complete setting up your DMZ connection by creating an application on the External IdP. This is the application that users will access.
Internal applications
Follow instructions in Setting up an internal application to create a new internal application.
In the Data Store section, select the DMZ data store created in Step B.
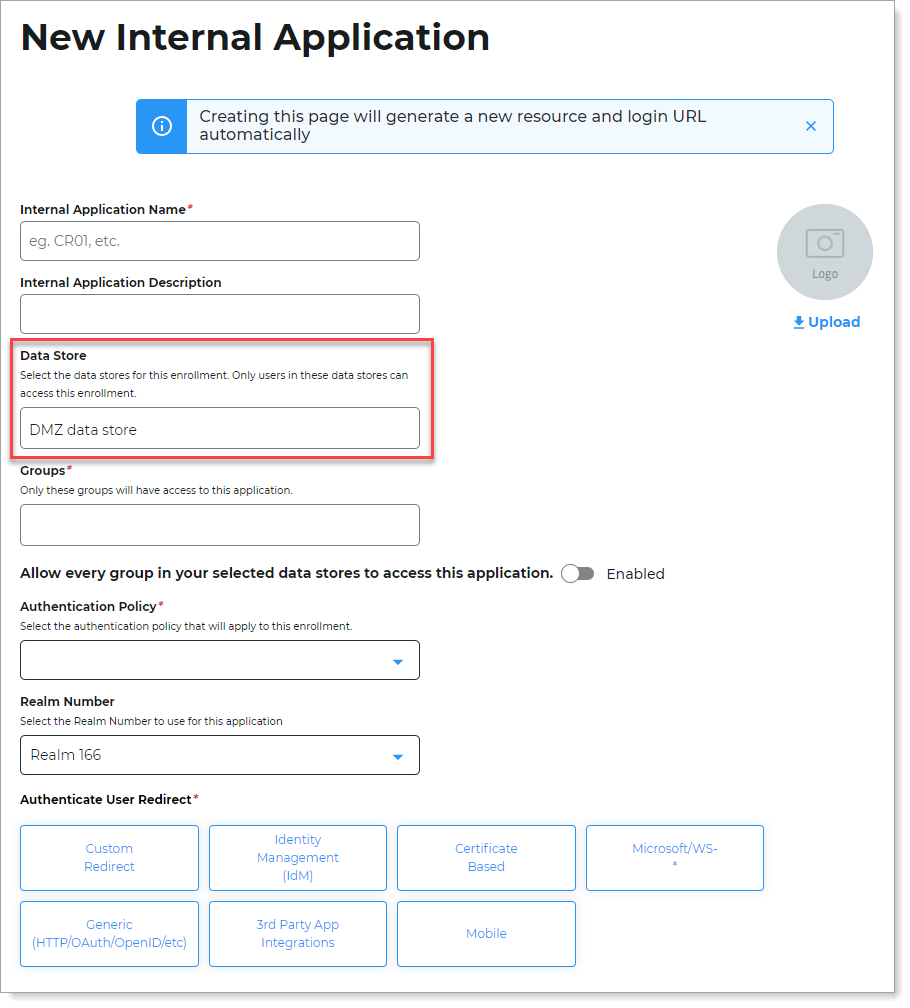
Click Create Connection.
SAML applications
For more information on setting up applications configured for SSO in the Identity Platform, see .
Follow instructions in SAML application integration to create a new SAML application integration for SSO access.
For other application integrations, see Application Manager overview.
In the Data Stores section, select the DMZ data store created in Step B.

Click Add Application.