SecureAuth RADIUS Diagnostic Tool
This guide provides instructions on how to run and diagnose your SecureAuth RADIUS server using the SecureAuth RADIUS Diagnostic Tool.
The SecureAuth RADIUS Diagnostic Tool has two basic purposes:
- Test SecureAuth IdP endpoint
Test the endpoints used by SecureAuth RADIUS. Use this tool to identify if the issue is with the SecureAuth RADIUS Server or the SecureAuth IdP realm that SecureAuth RADIUS is trying to access.
- Simulate the connection from a VPN client
Determine whether the issue is with VPN configuration in use, or in the connection between the VPN client and the SecureAuth RADIUS Server.
Download the SecureAuth RADIUS Diagnostic Tool
From the SecureAuth Product Downloads page, download and unzip the the SecureAuth RADIUS Diagnostic Tool.
Note
You must have Java 11 installed on the same machine as the SecureAuth RADIUS Diagnostic Tool.
Run the SecureAuth RADIUS Diagnostic Tool
On the machine where you have the SecureAuth RADIUS Diagnostic tool, use the following methods to run the tool.
Run.bat– Double-click this file to open a terminal at the corresponding URL on the machine for SecureAuth RADIUS. When you close this terminal, the application stops.Browser.bat– If you close a browser tab and can't remember the URL, you can double-click this file to open your default web browser at the corresponding URL for SecureAuth RADIUS.
The SecureAuth RADIUS Diagnostic Tool opens.

The tool has two tabs; see the following links for the type of request you want to run.
IDP – Allows you to send a request to a SecureAuth IdP realm.
Use the IDP tab to Send a SecureAuth IdP request.
RADIUS – Allows you to simulate a common VPN request to a SecureAuth RADIUS Server.
Use the RADIUS tab to Send a SecureAuth RADIUS request and Add attributes in a SecureAuth RADIUS request.
Send a SecureAuth IdP request
This section explains how to send a request to a specified SecureAuth idP realm.
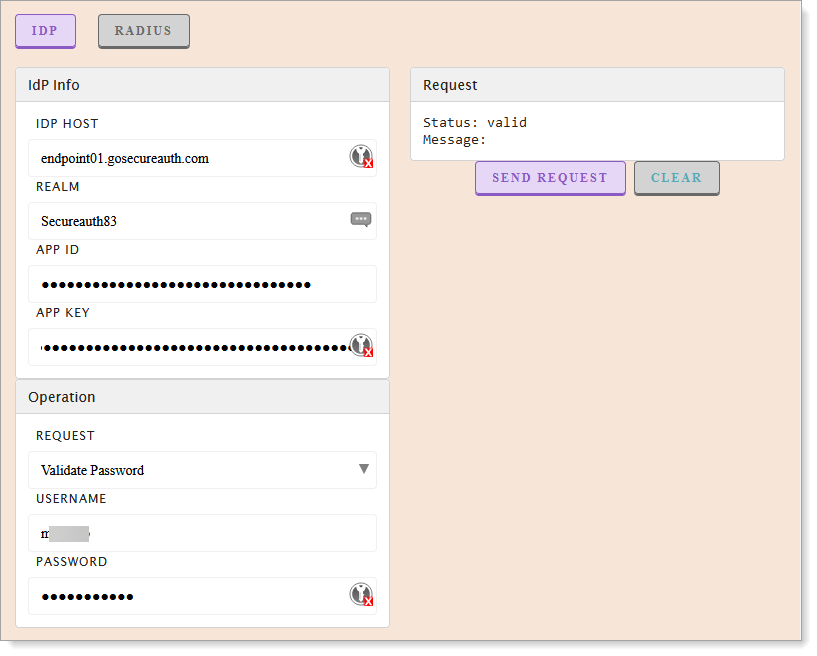
Sample request for Validate Password
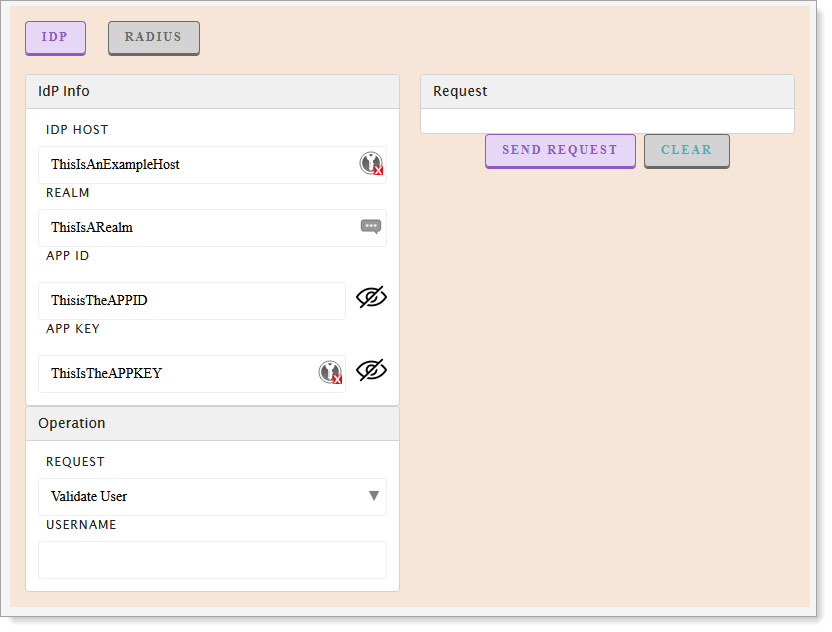
Sample request for Validate Password - show/hide inputs
On the machine where you have SecureAuth RADIUS Diagnostic Tool installed, double-click
Run.bat.The SecureAuth RADIUS Diagnostic Tool opens.
Select the IDP tab.
In the IdP Info section, enter information for the following fields.
This relates to the configurations set in Add IdP realms.
IdP Host
SecureAuth IdP hostname.
For example,
hostname.company.comIdP Realm
SecureAuth IdP realm name and number.
For example,
secureauth84APP ID
SecureAuth API Application ID.
APP Key
SecureAuth API Application Key.
In the Operation section, select the type of request you want to send.
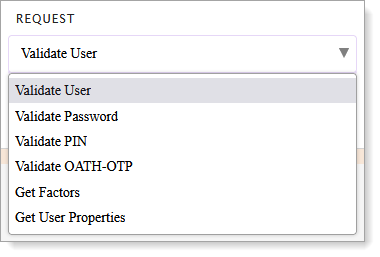
Type of request
Description and value to enter
Validate User
Validate a user in the specified SecureAuth IdP realm.
Enter the username to validate.
Validate Password
Validate the password for a user in the specified SecureAuth IdP realm.
Enter the username and password to validate.
Validate PIN
Validate the PIN for a user in the specified SecureAuth IdP realm.
Enter the username and PIN to validate.
Validate OATH-OTP
Validate the specific OATH-OTP for a user in the specified SecureAuth IdP realm.
Enter the username and OATH-OTP value to validate.
Get Factors
Get specific factors for the specified SecureAuth IdP realm.
Enter one or more factors in the request.
Get User Properties
Get all relevant properties for a specified user.
Enter the username in the request.
Click Send Request.
The result of the request appears in the Request section, similar to the following example.
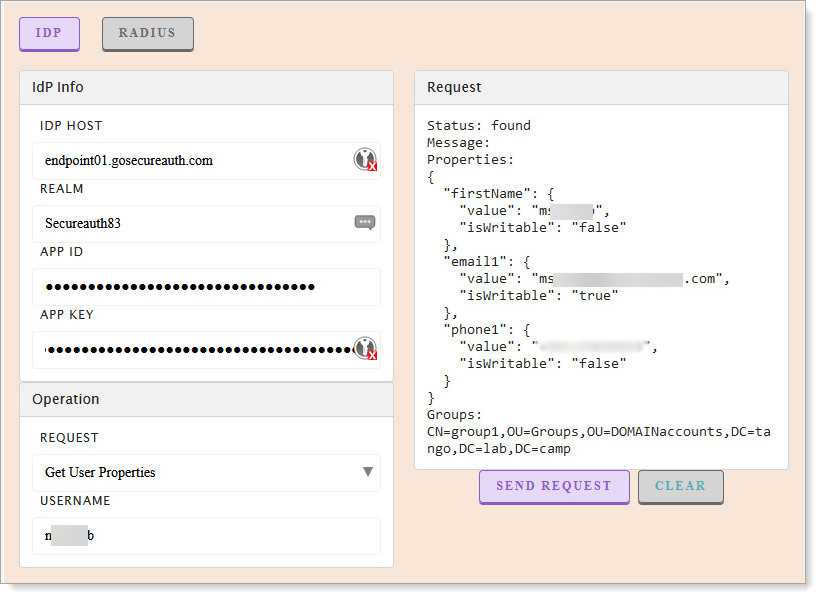
Sample request for Get User Properties
Send a SecureAuth RADIUS request
This section explains how to simulate a common VPN request to a SecureAuth RADIUS Server. Take note that the authentication workflow configuration must be configured through the normal SecureAuth RADIUS configuration in the RADIUS Clients settings.
On the machine where you have SecureAuth RADIUS Diagnostic Tool installed, double-click
Run.bat.The SecureAuth RADIUS Diagnostic Tool opens.
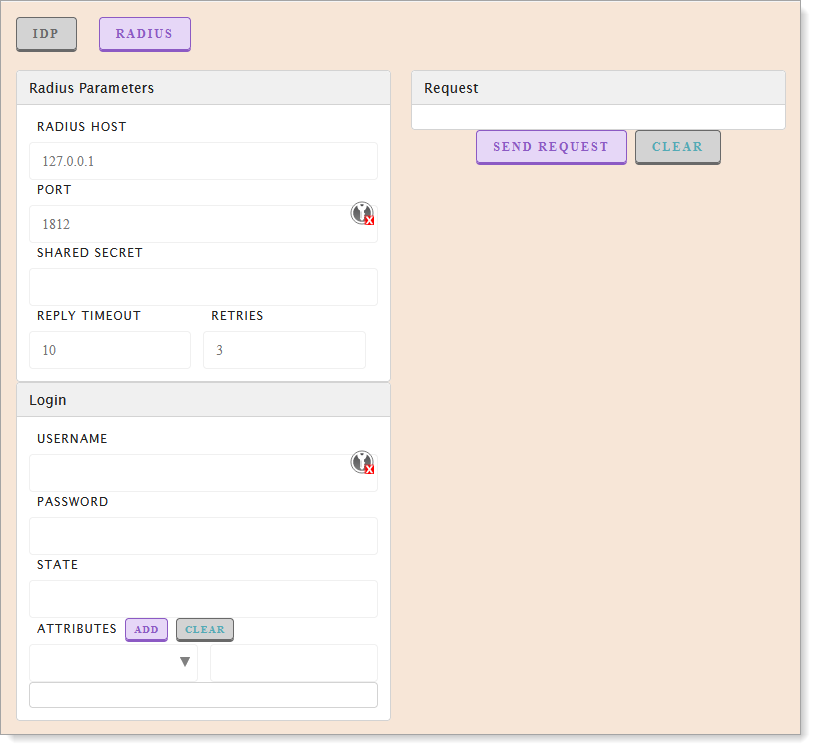
Select the RADIUS tab.
In the RADIUS Parameters section, enter the required information in the following fields:
This relates to the configurations set in Configure RADIUS Clients settings and Configure SecureAuth RADIUS settings.
RADIUS Host
The IP or URL where the SecureAuth RADIUS server is hosted.
If you are using this tool on the same machine where SecureAuth RADIUS server is installed, you can use
localhost.Port
Port number used by the SecureAuth RADIUS server to communicate with endpoints.
Shared Secret
The shared secret that was defined in the RADIUS Server Settings.
Reply Timeout
Set the time in seconds, to wait for a reply before timeout.
Retries
Set the allowed number of times to retry the request.
In the Login section, enter login credentials as an end user in a VPN client.
Username
Login username.
Password
Login password.
State
Read-only field displays the state code for the SecureAuth IdP request. It is essentially the cookie for the state of your ongoing request.
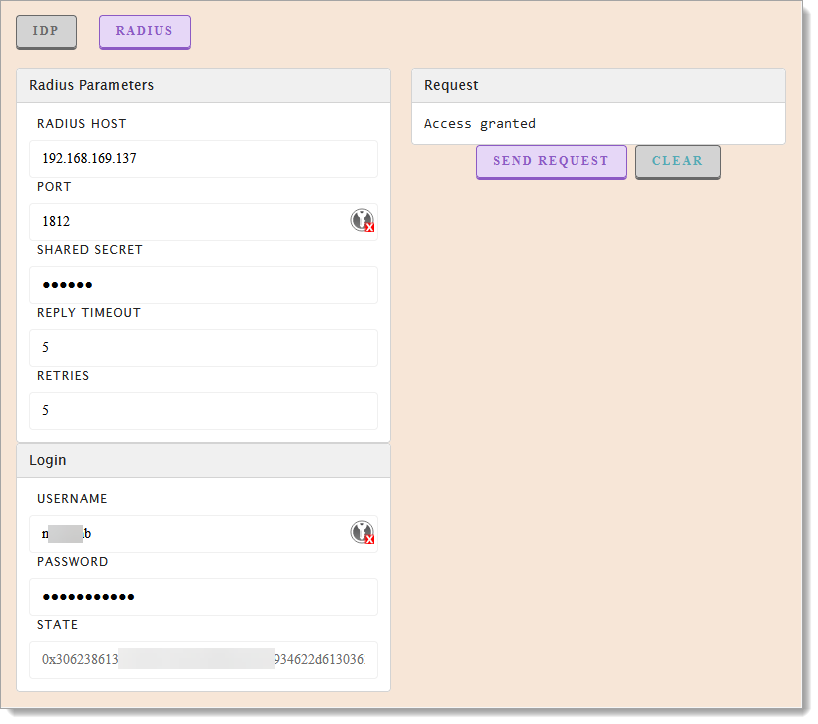
Click Send Request.
The result of the request appears in the Request section, similar to the following example of a request with 2FA.

Add attributes in a SecureAuth RADIUS request
This section explains how to add custom SecureAuth RADIUS attributes to your request. This is a common requirement in NTRadPing for troubleshooting RADIUS servers.
On the machine where you have SecureAuth RADIUS Diagnostic Tool installed, double-click
Run.bat.The SecureAuth RADIUS Diagnostic Tool opens.
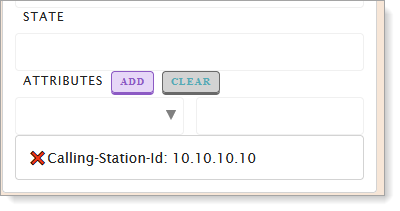
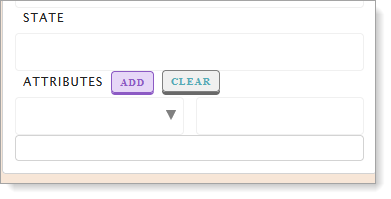
Select the RADIUS tab and scroll down the page to see the Attributes ADD and CLEAR buttons.
To add a new attribute, click the down arrow icon.

The option list appears.
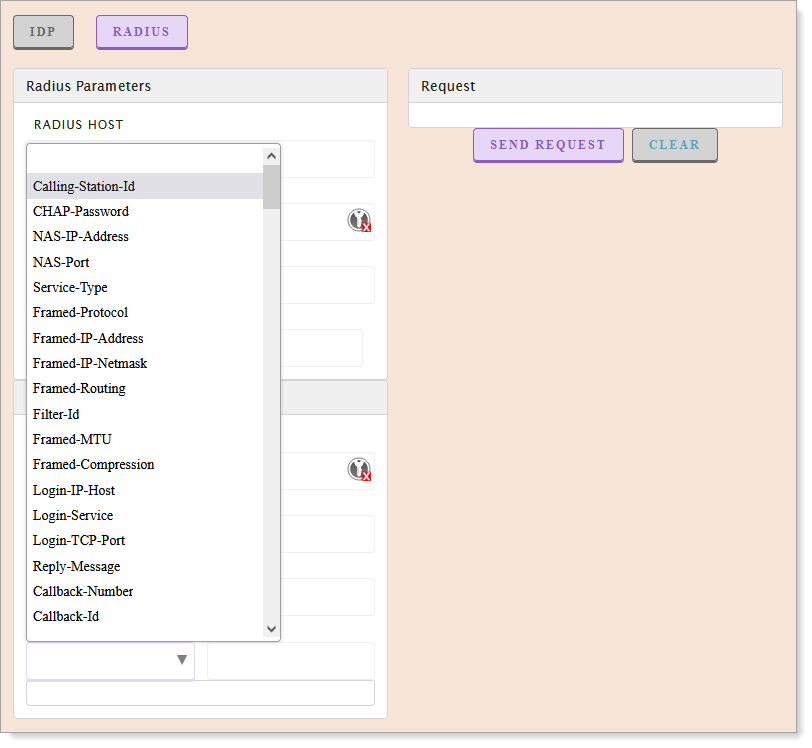
From the list, select an attribute and fill in the fields associated with that attribute.
In the following example, we selected the Calling-Station-Id attribute. Then, in the field on the right, enter the attributes for the Calling-Station-ID. For example,
10.10.10.10.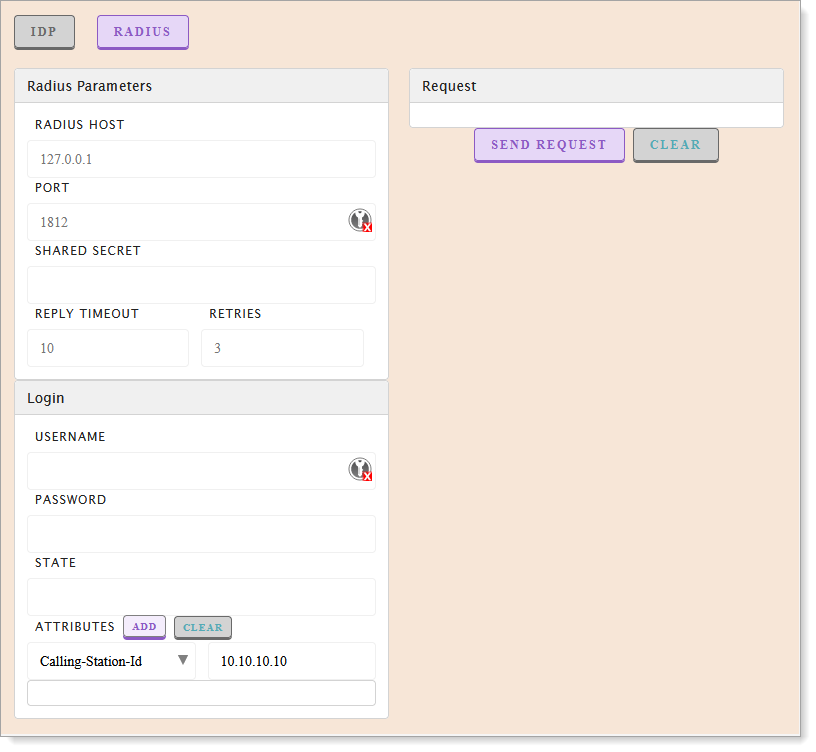
Click ADD and it appears in the list like the example shown next.
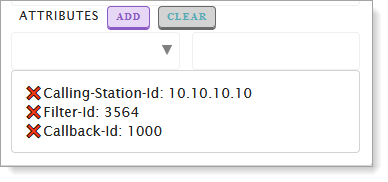
If needed, repeat the steps above to add more attributes.
For example, you can add two more attributes like the example shown next.
To manage the list of attributes, do the following:
To delete an attribute, click the red X to the left of the attribute.
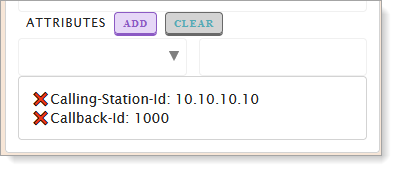
To remove all attributes, click CLEAR.
When you have set up your attributes, click Send Request.