Redirect legacy realm URL for internal applications
Use this procedure if you've set up an internal application in the New Experience to replace an existing legacy internal application that was created in Advanced Settings (formerly Classic Experience).
To continue using the login URL from the legacy realm, you can set up a redirect from the legacy realm to the new realm.
Prerequisites
SecureAuth® Identity Platform release 21.04 or later with on-prem deployment
For Identity Platform release 21.04 or later with cloud deployment, contact SecureAuth Support
New internal application set up and configured as in: Connecting a legacy internal application
Realm numbers for legacy internal application and new internal application
Procedure
In the Identity Platform, go to Advanced Settings.
Click the Admin Realm tab, and clear any selected realm check boxes.
Important
Make sure you do not have any selected realm check boxes, like
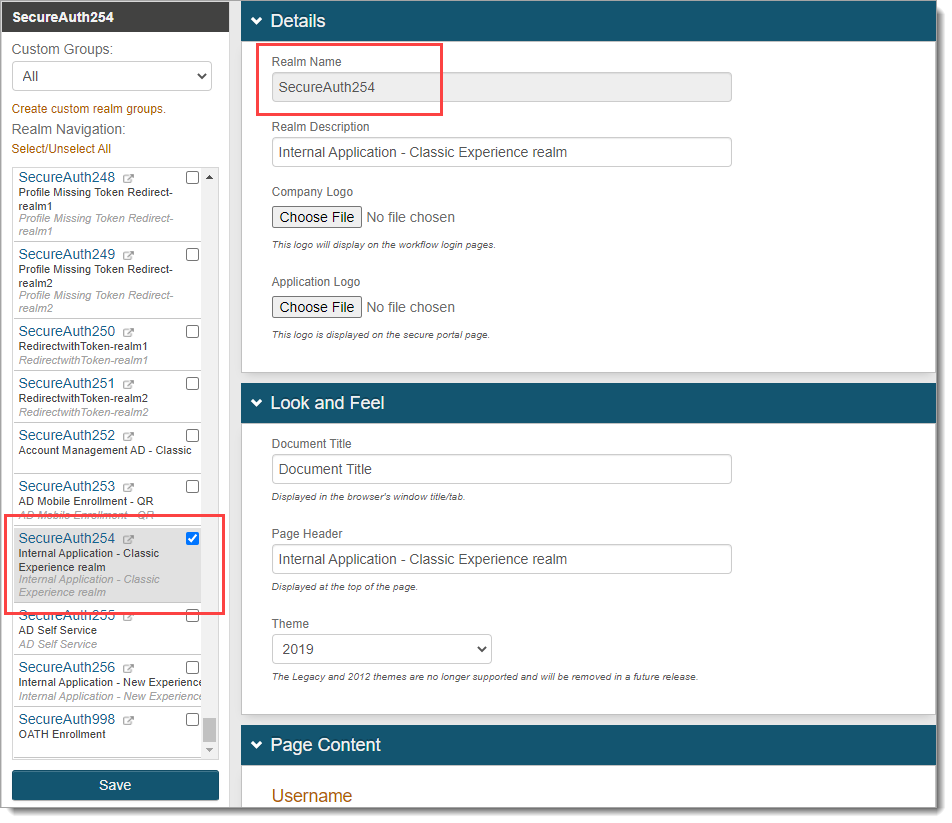
SecureAuth0.Click the legacy realm name and make sure you select the realm check box.
For example, the legacy realm is
SecureAuth254.Important
It is important that you first select and open the legacy realm.

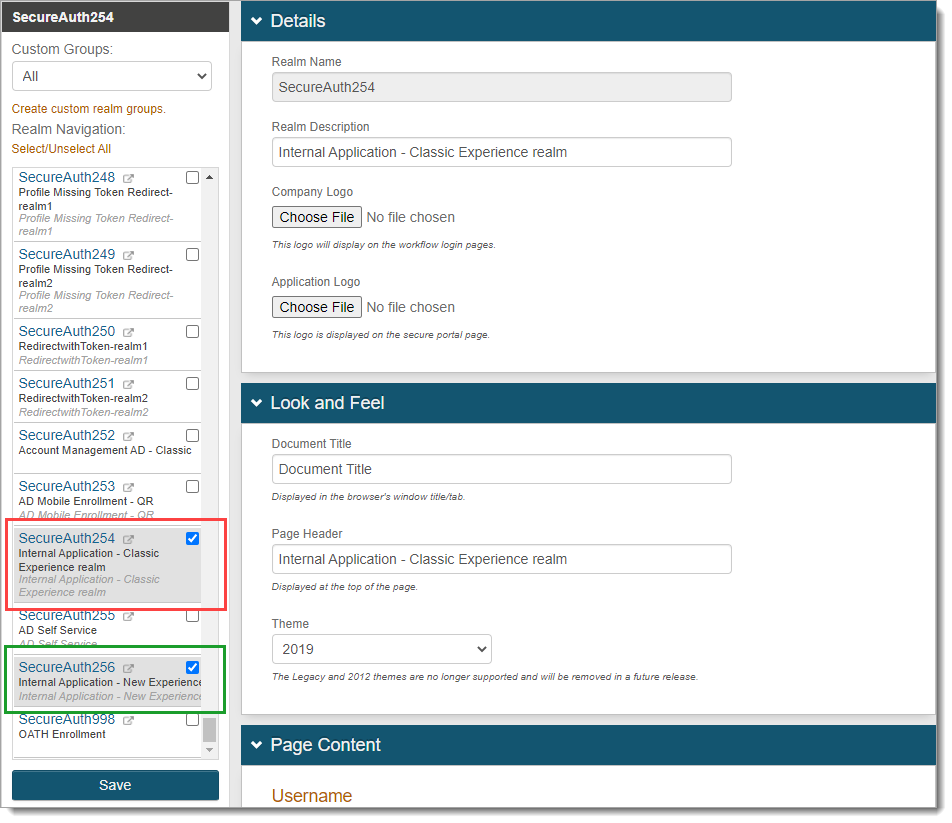
Next, find the matching new internal application realm and select only the realm check box.
For example, the new internal application realm you added using the Internal Application Manager is
SecureAuth256.Important
It is important that you select only the check box and not the realm name link.

Click Save and confirm your changes.
On the Identity Platform on-prem server, open the IIS Manager.
To redirect the legacy realm URL to the new realm URL, do the following:
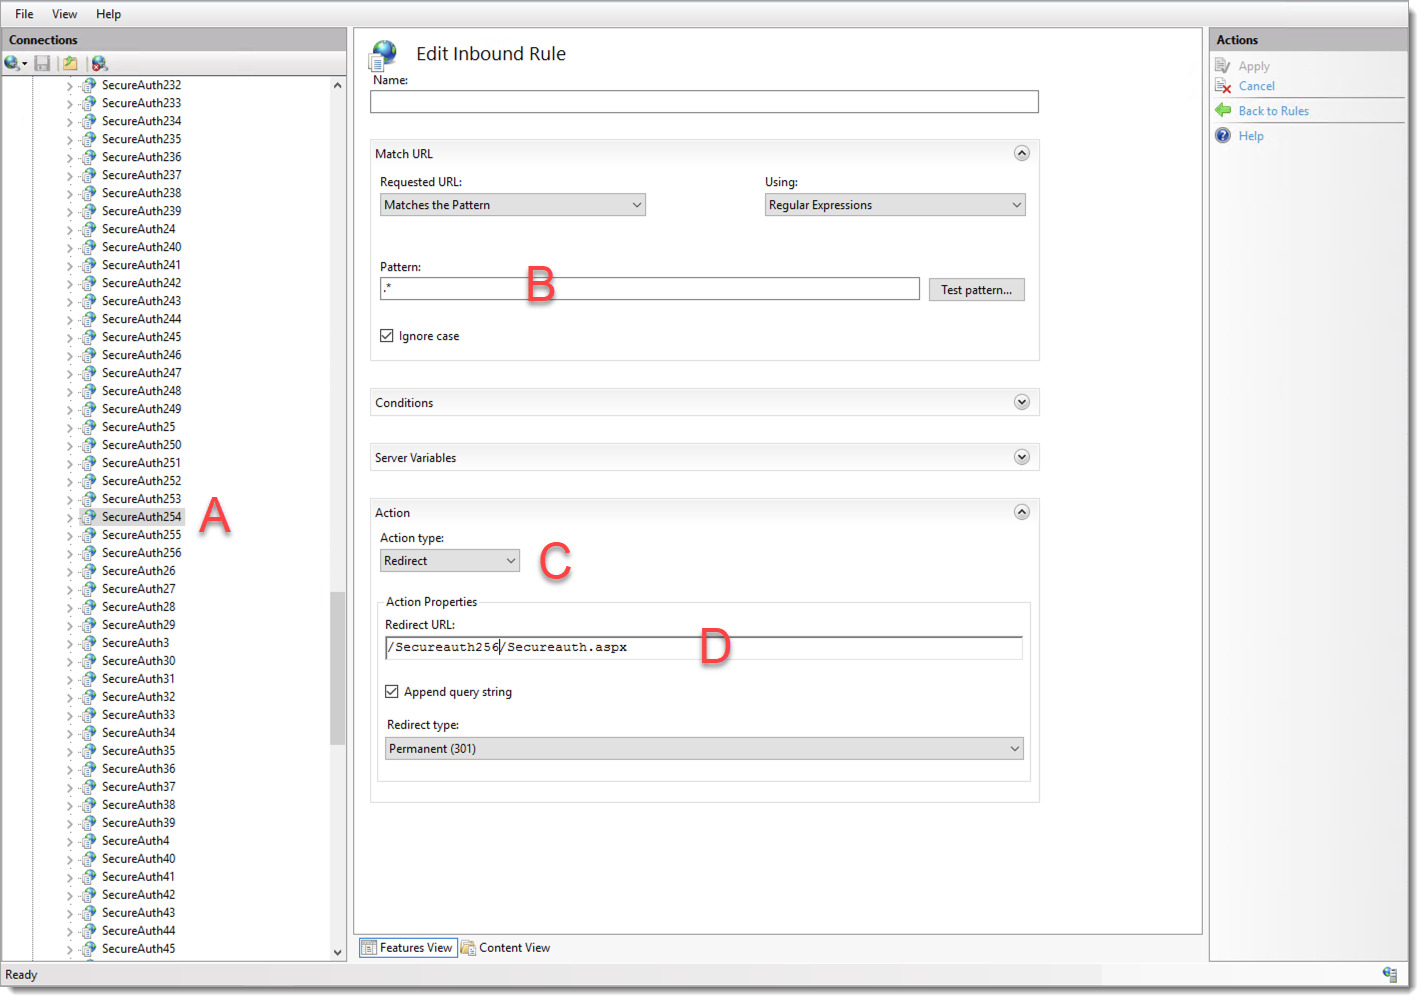
From list of realms, select the legacy realm.
For example the legacy realm is
SecureAuth254.Set the Pattern to
.*This catches any requests to the legacy realm.
Set the Action type to
Redirect.Set the Redirect URL to the new internal application realm.
For example, the new internal application realm is
SecureAuth256.

Apply your changes.