Configure SCIM provisioning for Salesforce
Use this guide to configure SCIM provisioning for Salesforce in SecureAuth® Identity Platform.
Prerequisites
Identity Platform release 22.12 or later, cloud or hybrid deployment
Identity Platform application integrated with Salesforce via SAML
For more information, see Salesforce application integration.
Salesforce administrator account
Step A: Enable SCIM in Salesforce
In this section, you will enable SCIM provisioning in Salesforce and obtain necessary information for Identity Platform configuration.
Log in to Salesforce as an administrator.
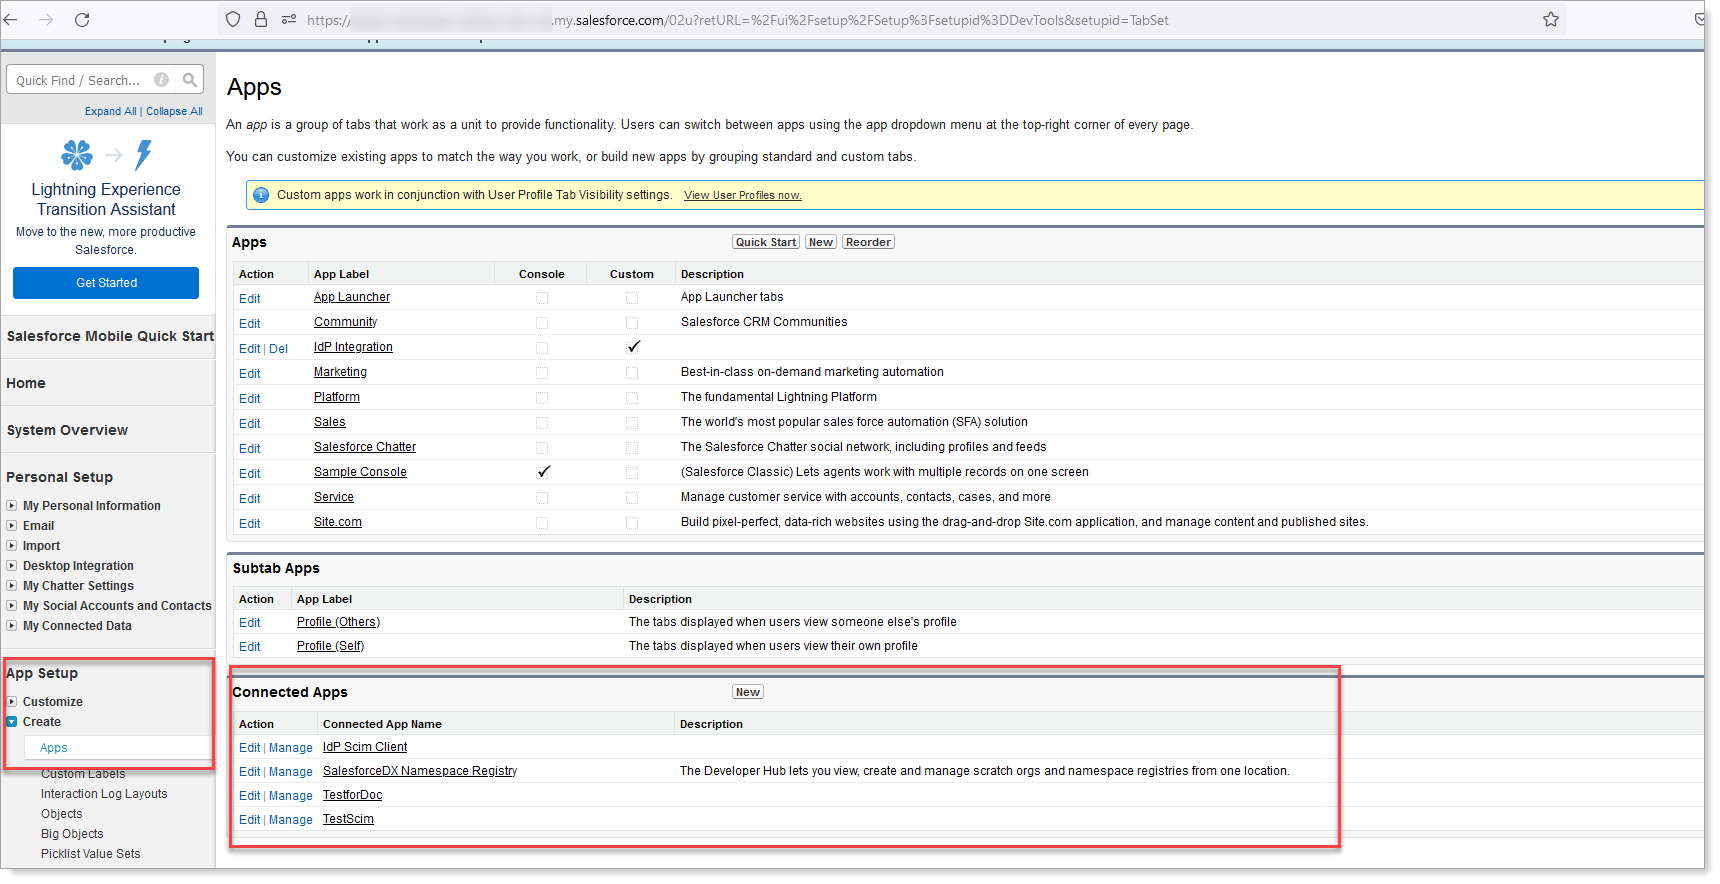
In the Quick Find search box, type Apps.
In the left navigation, from the App Setup section, expand Create > Apps.
In the Connected Apps section, click New.
The New Connected App page appears.
In the Basic Information section, set the following:
Connected App Name
Enter a unique name for your application.
For example, SecureAuth-SCIM.
API Name
Enter a unique name for your API.
For example, SecureAuth-SCIM.
Contact Email
Enter a contact email to receive a verification code from Salesforce to complete app creation.
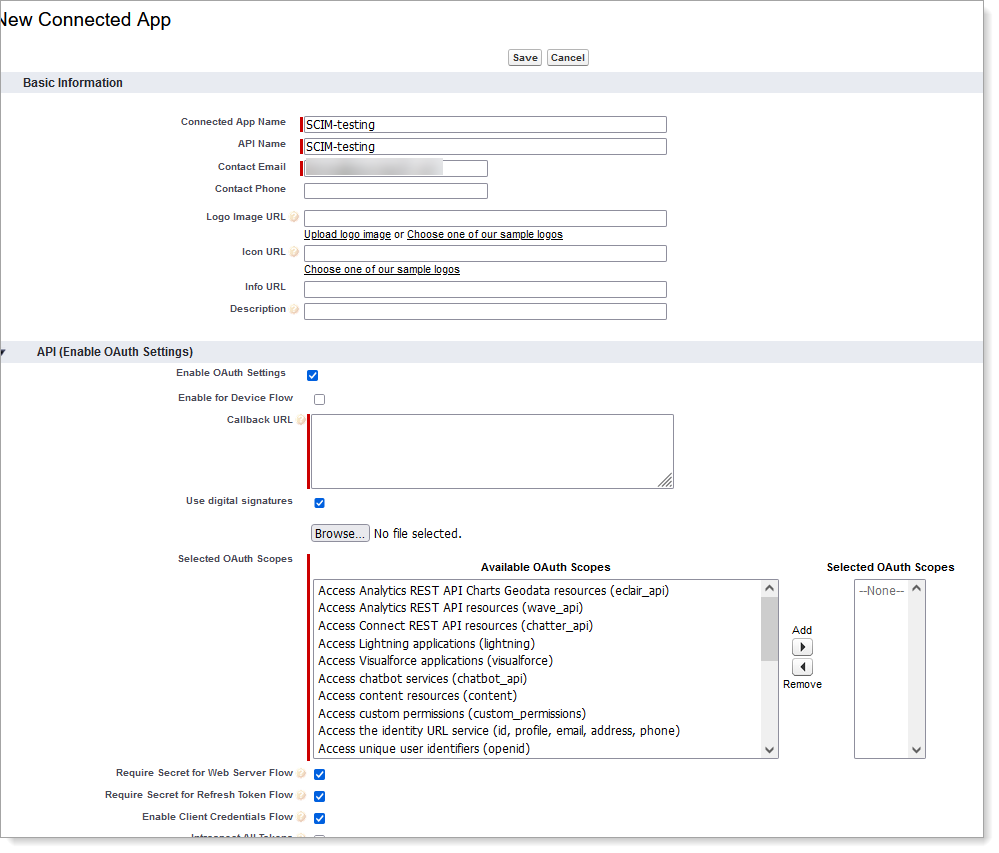
In the API (Enable OAuth Settings) section, set the following:
Enable OAuth Settings
Select the check box to enable OAuth settings.
Callback URL
Enter a Callback URL.
Selected OAuth Scopes
Select any Available OAuth Scopes and click the right arrow to add the scope to your Selected OAuth Scopes list.
To remove a scope, select any scope from the Selected OAuth Scopes list and click the left arrow.
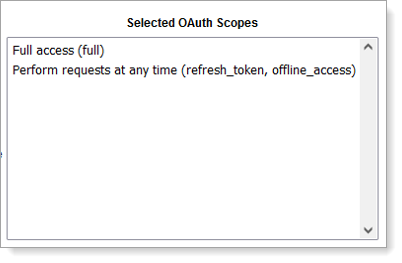
For example, select OAuth scopes for:
Full access (full)
Perform requests at any time (refresh_token, offline_access)
Require Secret for Web Server Flow
Select this check box.
Require Secret for Refresh Token Flow
Select this check box.
Enable Client Credentials Flow
Select this check box.
Save your changes.
Details about your newly created Connected Application appears.
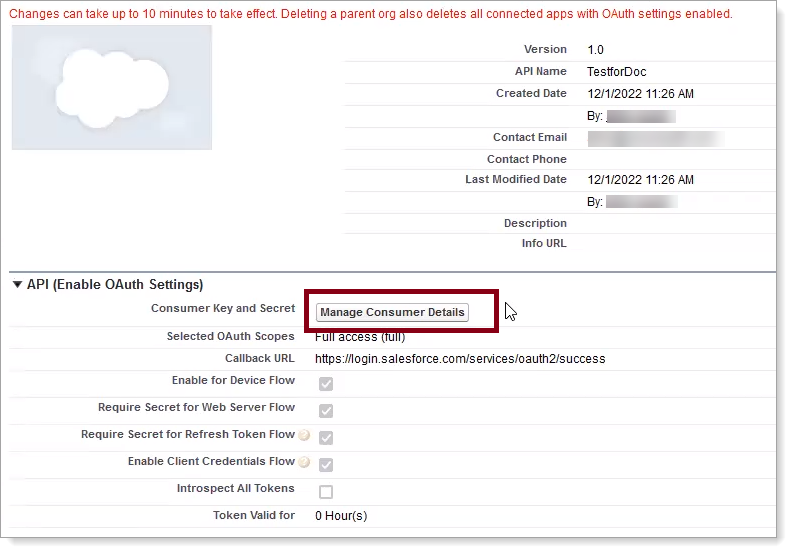
In the API (Enable OAuth Settings) section, click Manage Consumer Details.
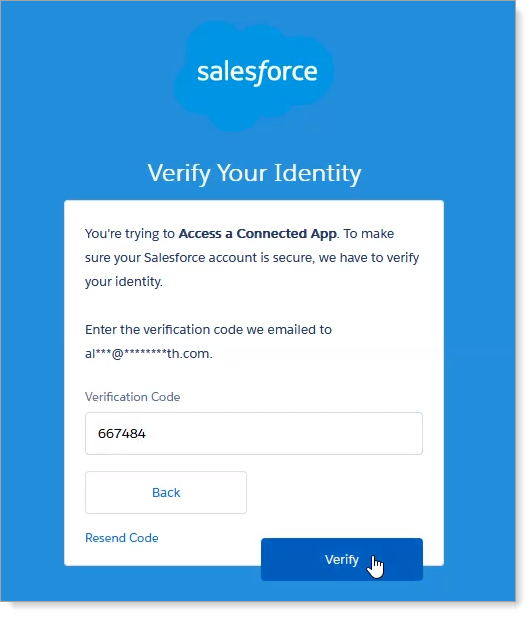
Salesforce will send a verification code to the Contact Email entered in Step 4.
Enter the verification code and click Verify.
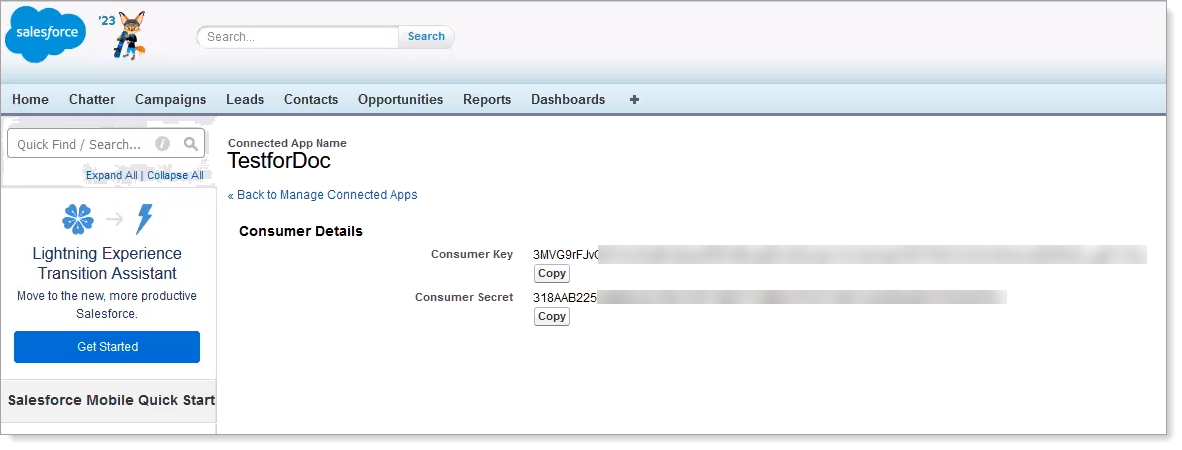
The Consumer Details page appears.
On the Consumer Details page, copy the values for the Consumer Key and the Consumer Secret.
You will need this information for Identity Platform configuration.
In the left navigation, go to App Setup > Apps.
In the Connected Apps section, click Manage next to the Connected App to enable SCIM on.

Click Edit Policies.

In the User Provisioning Settings section, select the Enable User Provisioning check box.
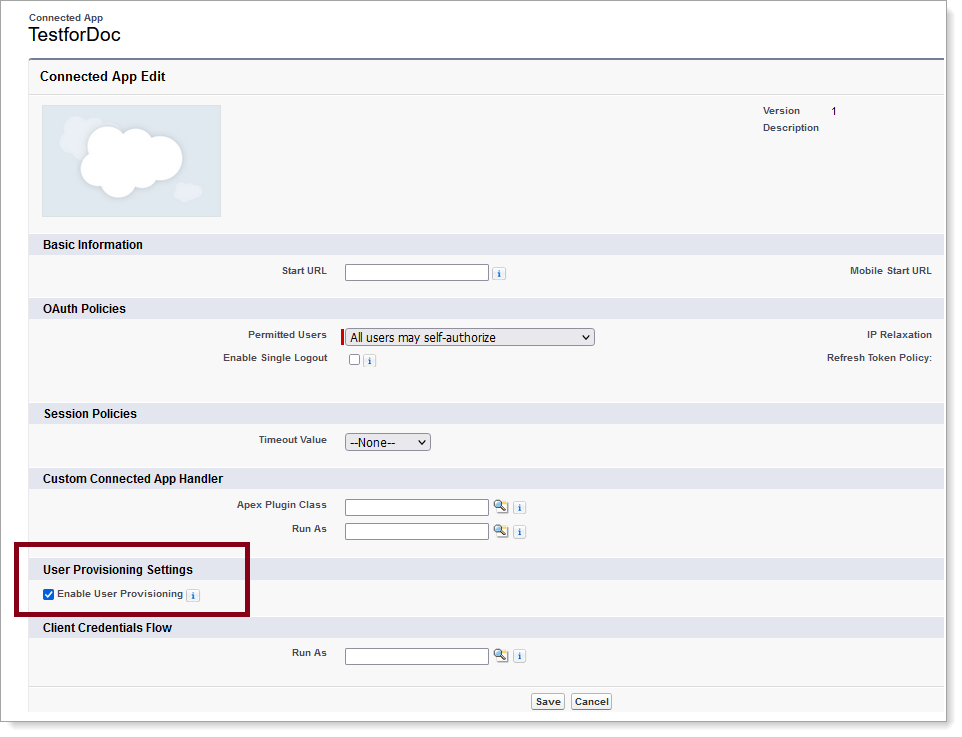
Save your changes.
Next, you will need to get the following information for the Identity Platform configuration.
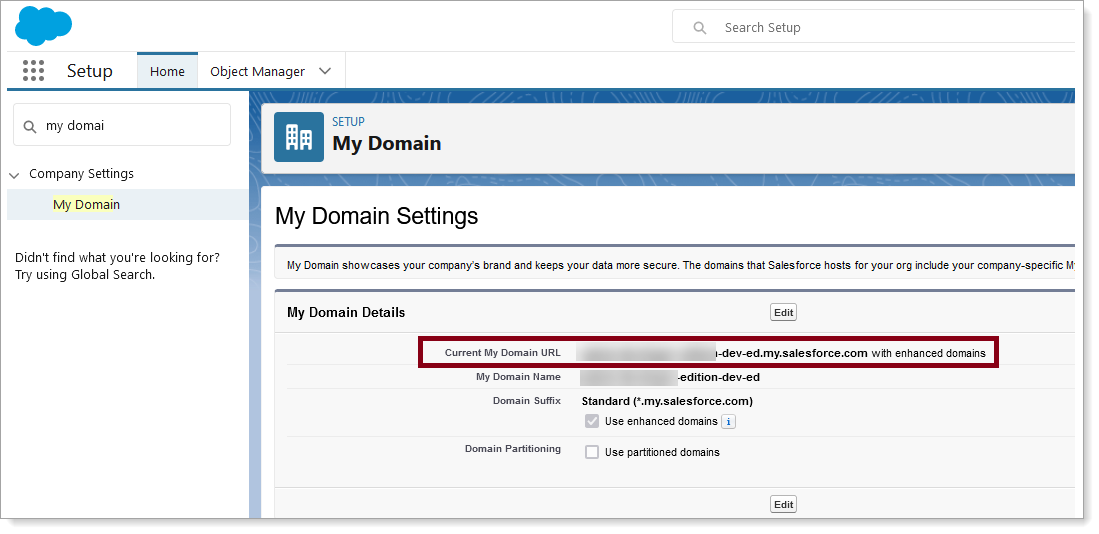
Go to Company Settings > My Domain.
In the My Domain Settings section, copy the Current My Domain URL.
You will need this information for Identity Platform configuration.
Step B: Create SCIM server in Identity Platform
In this section, you will create a SCIM server in the Identity Platform and assign it to your integrated Salesforce application.
On the left side of the Identity Platform, click SCIM Servers.
Click Add Server.

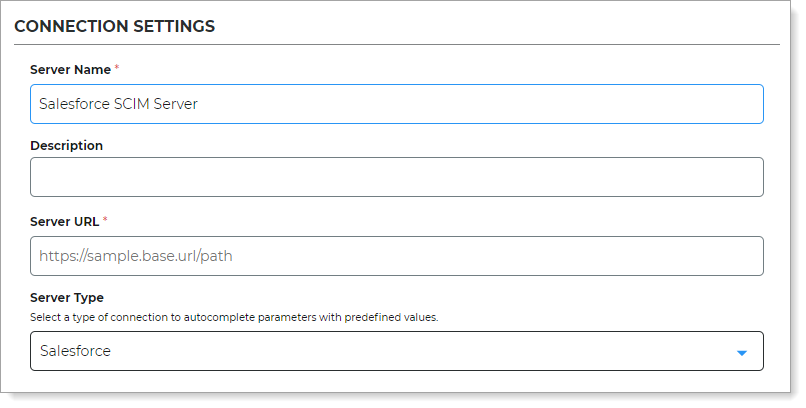
In the Connection Settings section, set the following:
Server Name
Enter a unique name.
For example, Salesforce SCIM Server.
Description
Enter a description.
Server URL
Enter
https://{domain-url}/services/scim/v2where{domain-url}is the Current My Domain URL copied from Salesforce in the previous section.Server Type
Select Salesforce.
A notice appears that it will autocomplete and overwrite the authentication settings, SCIM attributes, and static attributes, based on the selected Server Type. Click Continue.
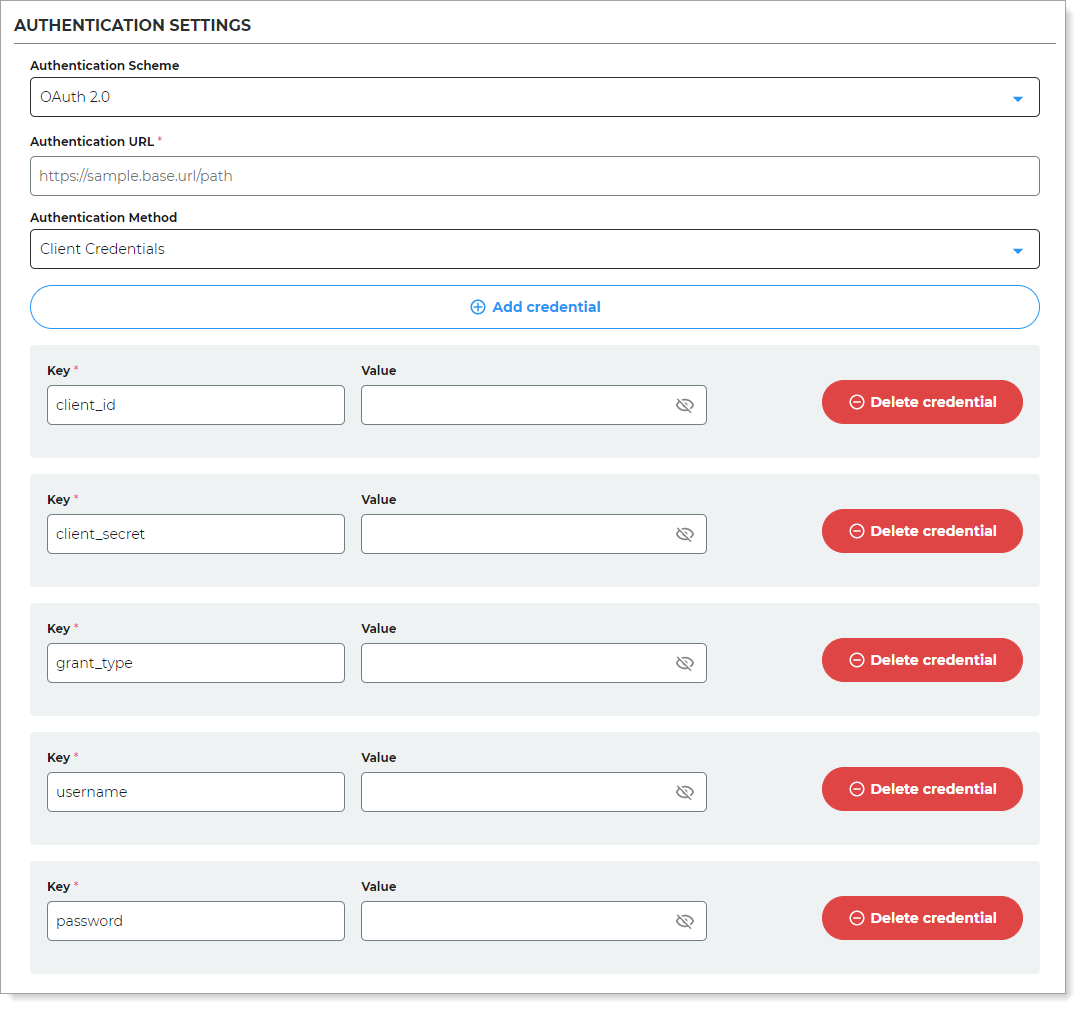
In the Authentication Settings section, set the following:
Authentication Scheme
Set to OAuth 2.0.
Authentication URL
Enter
https://{domain-url}/services/oauth2/tokenwhere{domain-url}is the Current My Domain URL copied from Salesforce in the previous section.Authentication Method
Set to Client Credentials
Credentials
client_id
Enter the Consumer Key copied from Salesforce in the previous section.
client_secret
Enter the Consumer Secret copied from Salesforce in the previous section.
grant_type
Enter password.
username
Enter the username for your Salesforce service account.
password
Enter the password for your Salesforce service account.
Click Create.
On the left side of the Identity Platform, click Application Manager.
Click the pencil icon next to the Salesforce application you will assign SCIM to.
In the SCIM Server section, click the pencil icon.

Select the SCIM server to apply to this application.
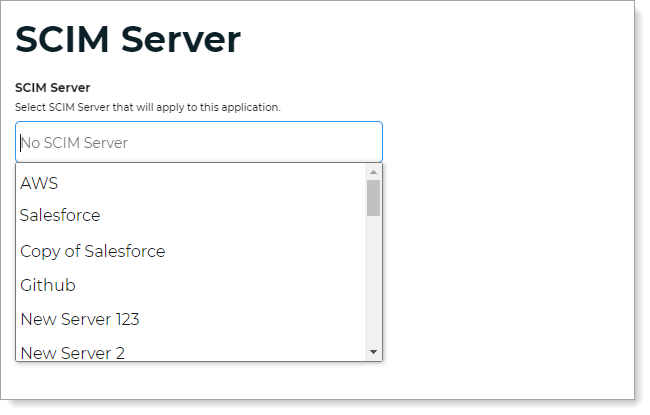
Click Update Settings.