Chain realms in the New Experience
Use realm chaining to strengthen authentication by requiring users to complete multiple verification steps across two linked realms. After a user authenticates in Realm A, they’re seamlessly redirected to Realm B with a secure token.
This guide helps you configure and chain two realms in the SecureAuth® Identity Platform. For clarity, we'll refer to these realms as Realm A and Realm B.
Prerequisites
Identity Platform release 21.04 or later
Step 1: Configure Realm A
Set up the first realm in the chain. You'll define how users authenticate, select MFA methods, and configure redirect logic to Realm B.
Create a policy for Realm A
In the New Experience, go to Policies and click Add new Policy.
Enter a Name for the policy and confirm it before making changes.
Tip
After you enter the policy name, click the green check mark next to the text field to confirm it. This saves the name to the system.
To apply the rest of your policy changes (like MFA settings or workflows), use the Save Changes button at the bottom of the screen.
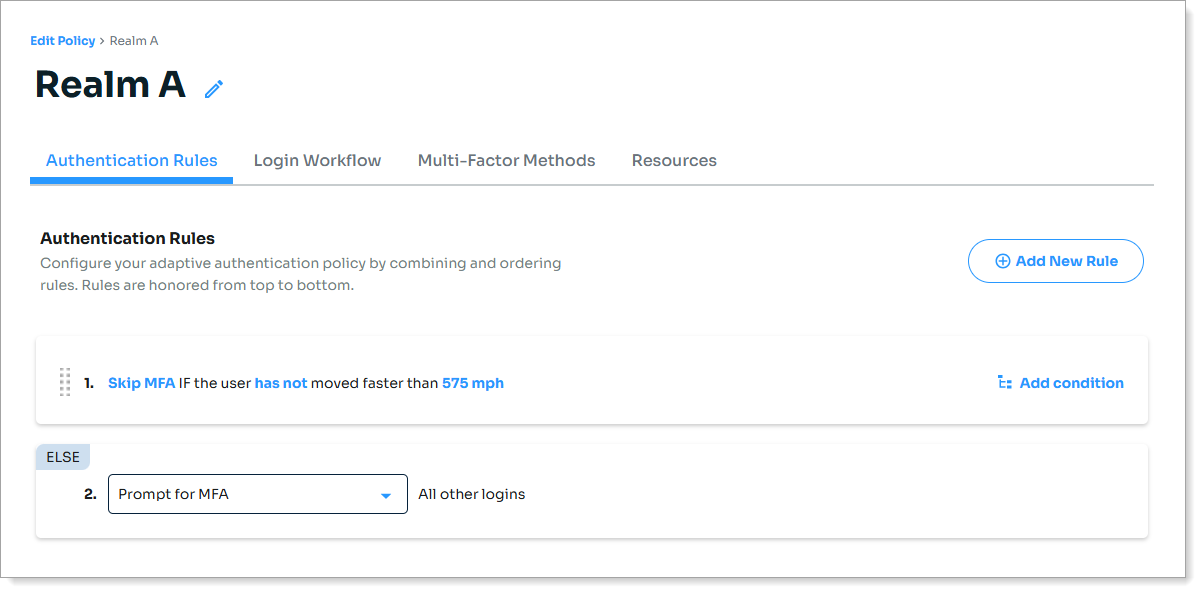
Select the Authentication Rules tab and add a rule to always Prompt for MFA.
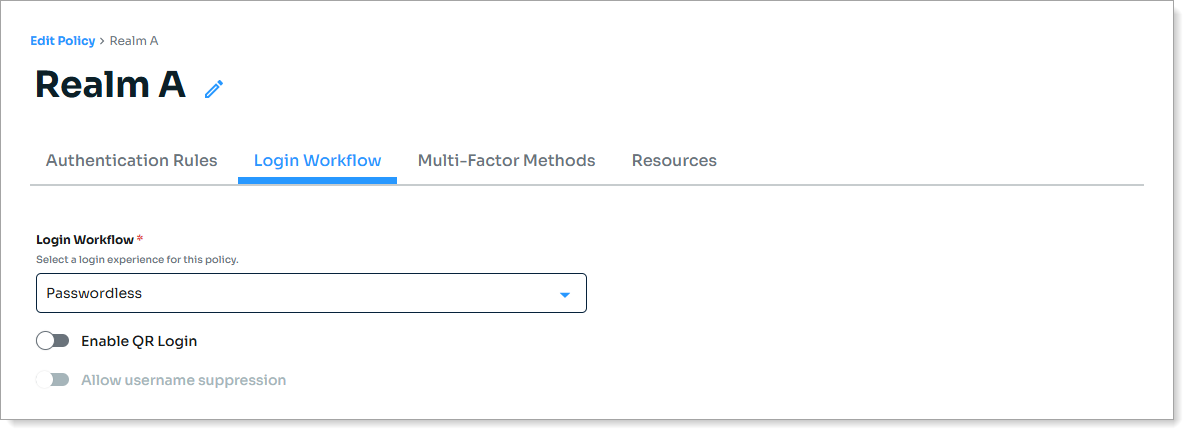
Select the Login Workflow tab and set Login Workflow to Passwordless.
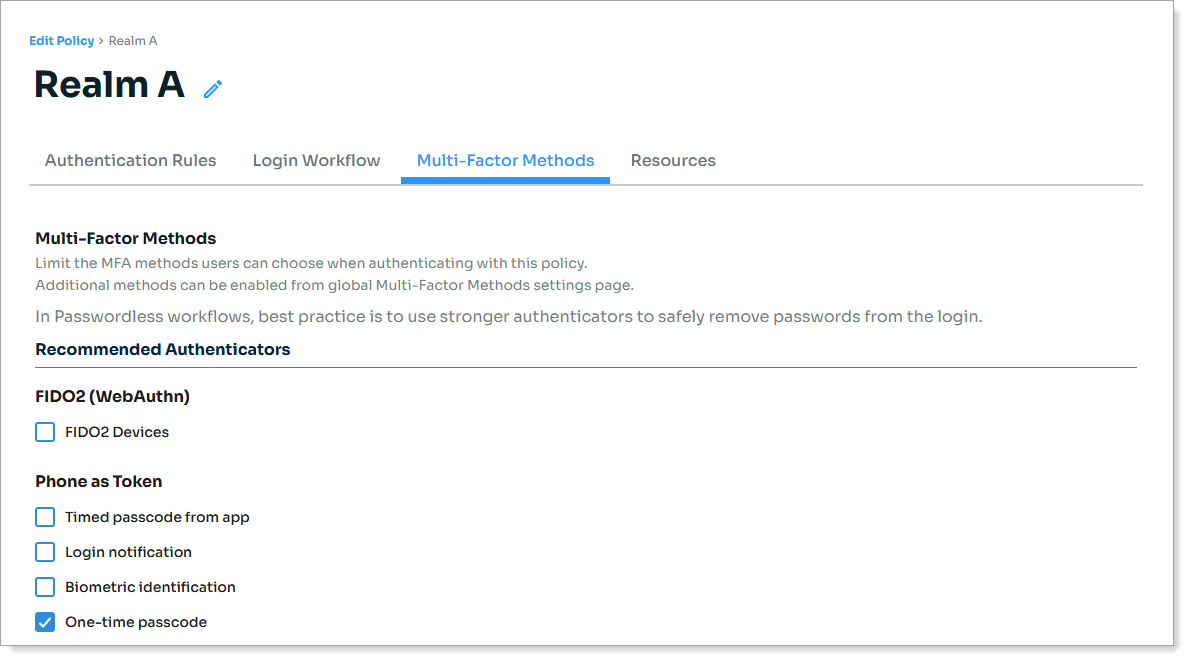
Select the Multi-Factor Methods tab and choose your MFA methods.
Save the policy.
Create Realm A
Go to Internal Application Manager and click Add New Internal Application.
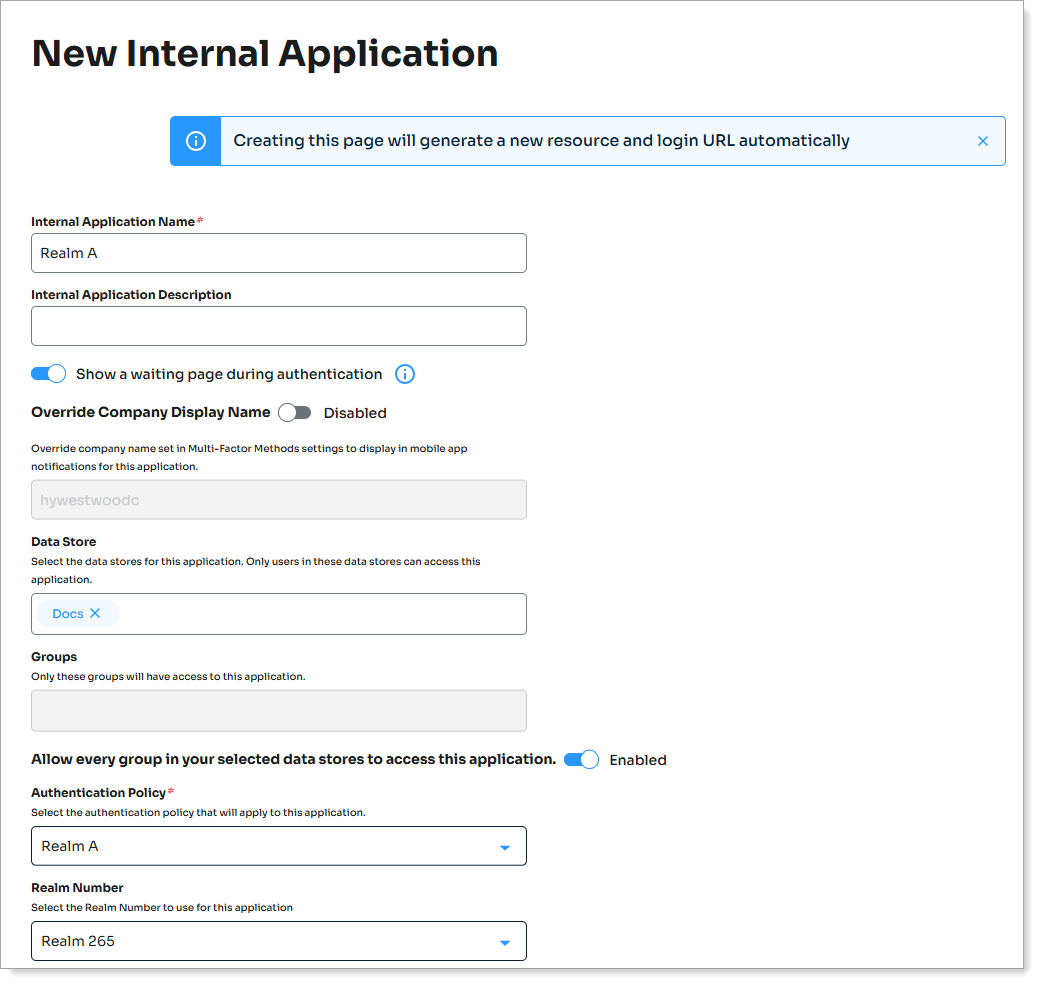
Set the following configurations:
Internal Application Name
Set the name of the internal application page.
This name is shown on the page header and document title of the end user login pages.
Note
If you change this name, it will overwrite any value that is set on the Overview tab in Advanced Settings.
Data Store
Enter the data store to authenticate and allow user access to the internal application.
Groups
Use one of the following options:
Enable the slider (On) to allow access for all groups in the selected data store.
Disable the slider (Off) and enter specific groups allowed to access.
Authentication Policy
Set to the Authentication Policy you just created for Realm A.
Set the authentication redirect:
Authenticate User Redirect
Set to Custom Redirect
Redirect To
Set to the realm number for Realm B. Typically, this will be the next consecutive realm number.
For example, since Realm A is number 265, so Realm B would be
/SecureAuth266/
Click Create Connection.
Step 2: Configure Realm B
Build the second realm in the chain. You can match Realm A’s passwordless setup or require a username and password, depending on your security needs.
Create a policy for Realm B
In the New Experience, go to Policies and click Add new Policy.
Enter a Name for the policy and confirm it before making changes.
Tip
After you enter the policy name, click the green check mark next to the text field to confirm it. This saves the name to the system.
To apply the rest of your policy changes (like MFA settings or workflows), use the Save Changes button at the bottom of the screen.
Select the Authentication Rules tab and add a rule to always Prompt for MFA.
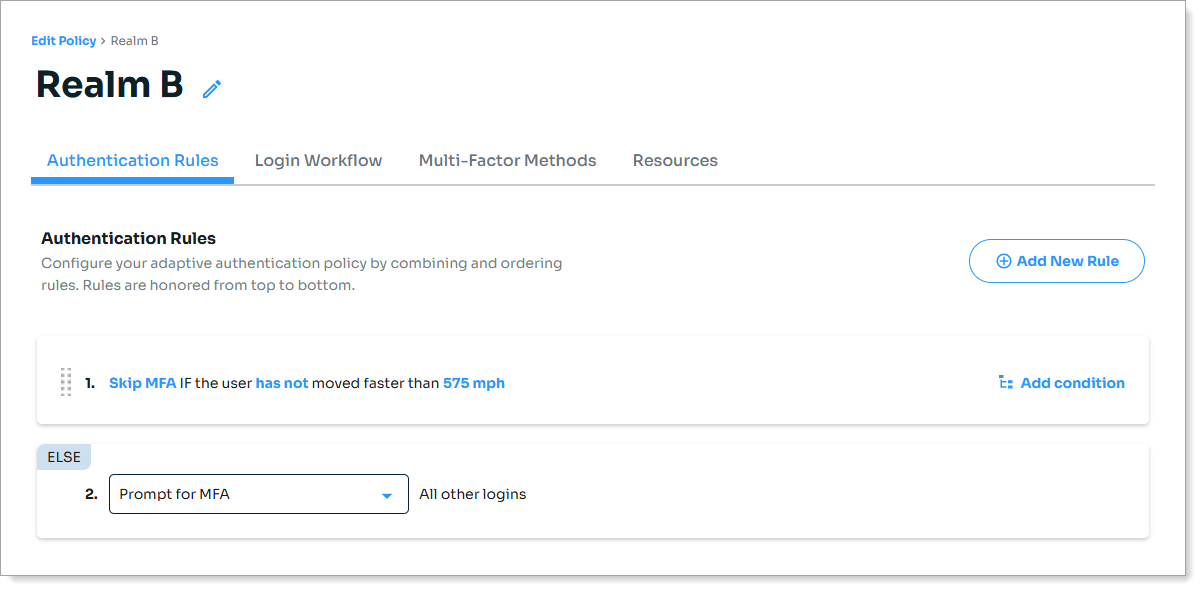
Select the Login Workflow tab and set Login Workflow to:
Passwordless, or
Username | MFA Method | Password if you want to require password entry
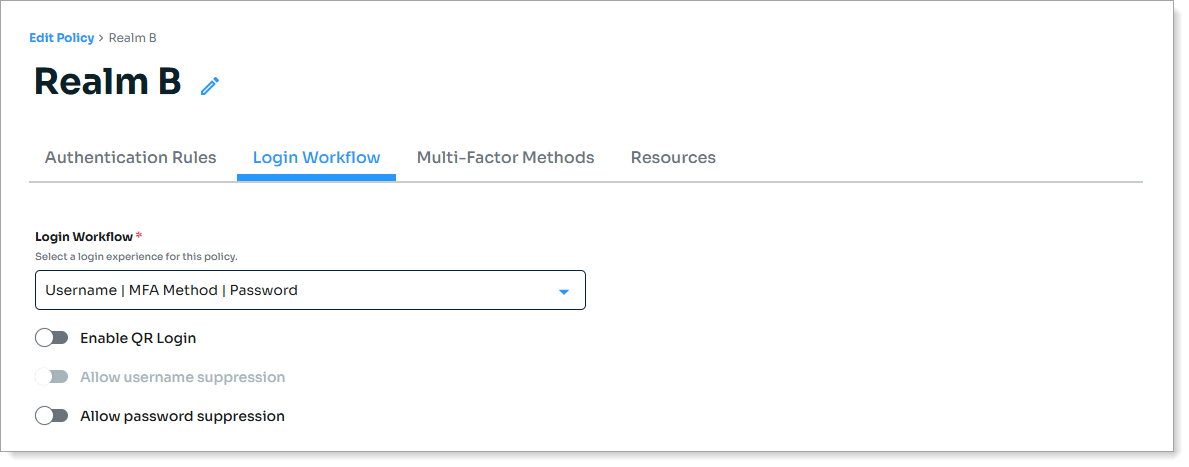
Select the Multi-Factor Methods tab and choose your MFA methods.
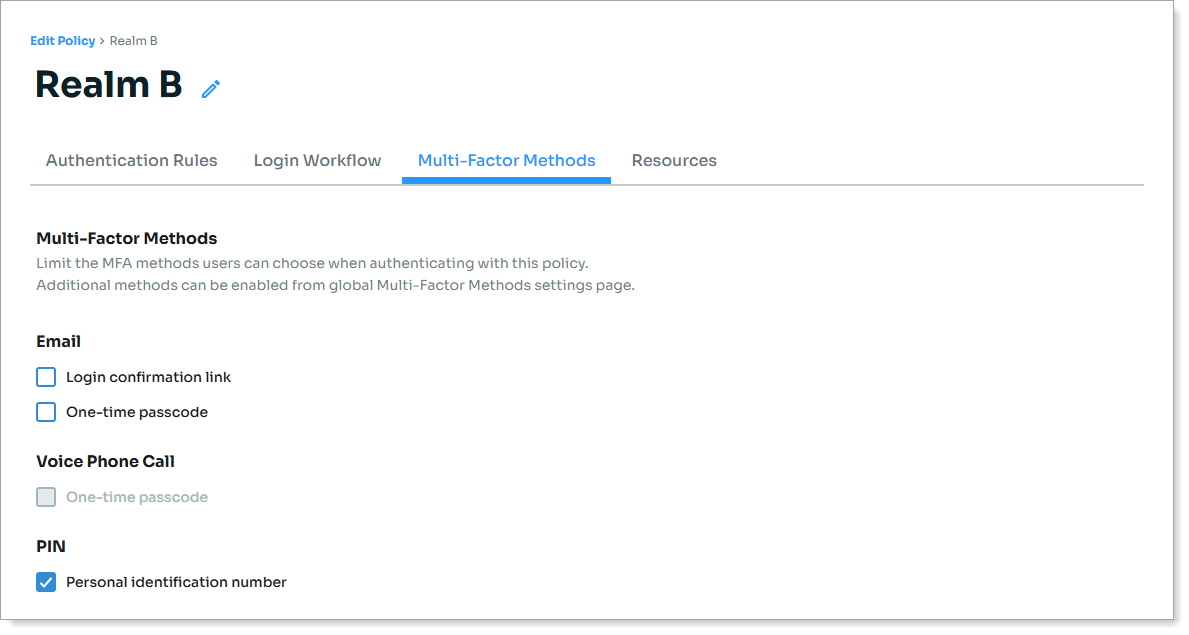
Save the policy.
Create Realm B
Go to Internal Application Manager and click Add New Internal Application.
Set the following configurations:
Internal Application Name
Set the name of the internal application page.
This name is shown on the page header and document title of the end user login pages.
Note
If you change this name, it will overwrite any value that is set on the Overview tab in Advanced Settings.
Data Store and Groups
Set the data store and group access using the same options as Realm A.
Authentication Policy
Set to the Authentication Policy you just created for Realm B.
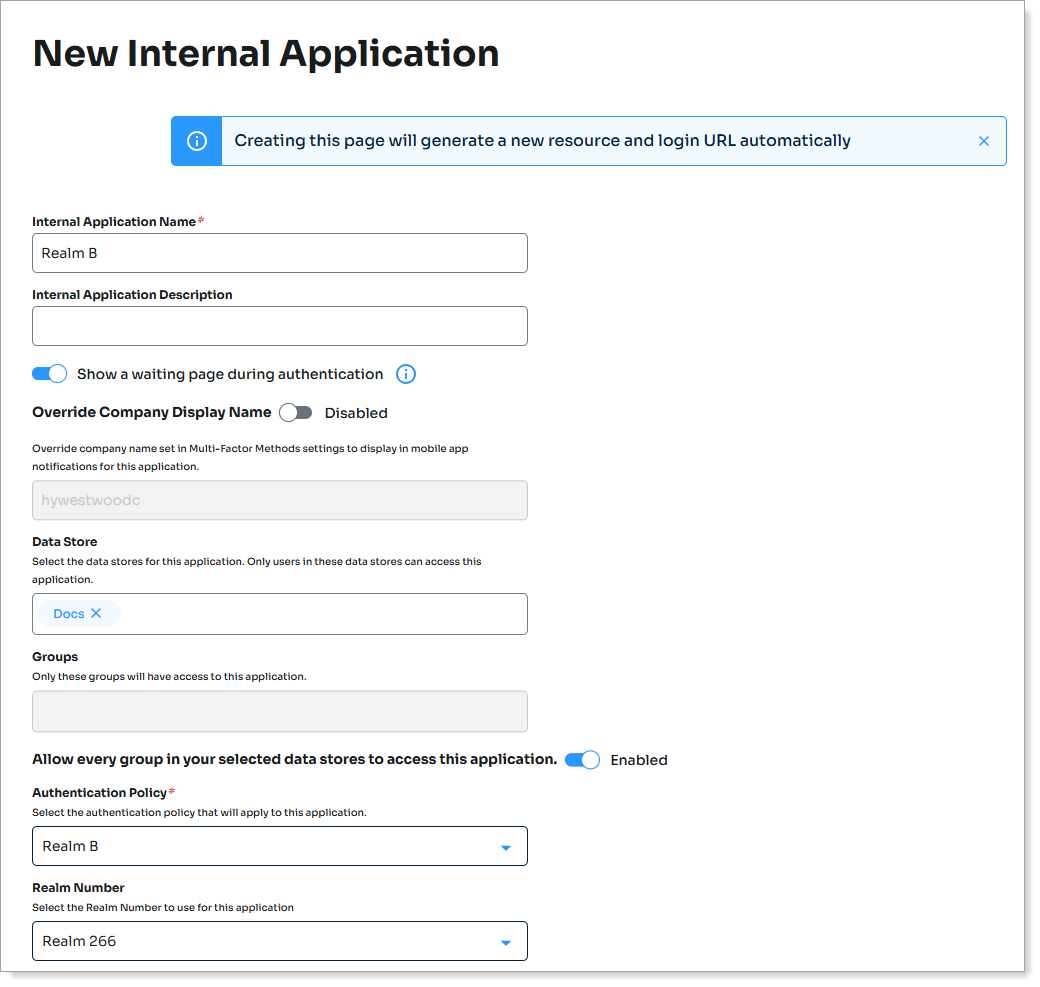
Under Authenticate User Redirect, set to Generic (HTTP / OAuth /OpenID / etc) and from the list, select Multi-Factor App Enrollment - URL
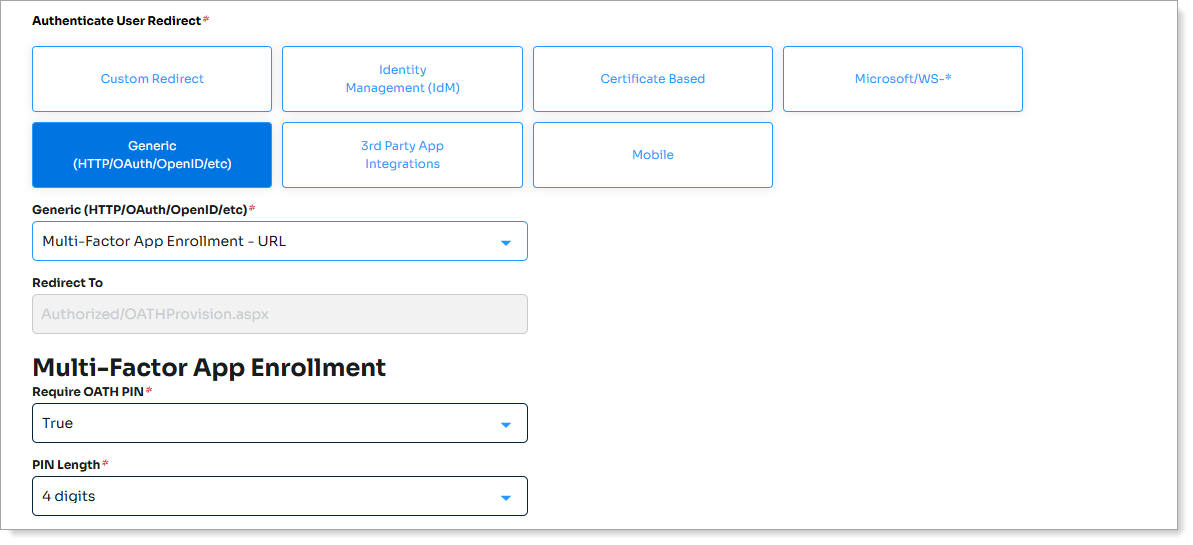
Click Create Connection.
Step 3: Chain the realms
Complete the chaining process by configuring Realm A and Realm B to securely share tokens and authentication cookies.
Configure Realm A
For Realm A, go to Advanced Settings > Post Auth tab.
Scroll down to the Forms Auth/SSO Token section, and click View and Configure FormsAuth keys/SSO Token.

In the Machine Key section, click Generate New Keys.
Copy the Validation Key and Decryption Key values
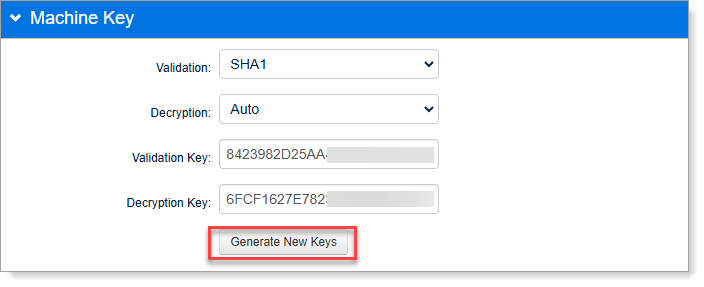
In the Authentication Cookies section, do the following:
Set the Pre-Auth Cookie value to match the Post-Auth Cookie value.
Copy the Post-Auth Cookie value for later configuration.
Change the Post-Auth Cookie value to the Post-Auth Cookie value of Realm B. Typically, this is:
PostAuth Token{Realm B realm number}.

Save your changes.
Configure Realm B
For Realm B, go to Advanced Settings > Post Auth tab.
Scroll down to the Forms Auth/SSO Token section and click View and Configure FormsAuth keys/SSO Token.
In the Machine Key section, set the following:
Validation Key
Enter the Validation Key copied earlier from Realm A
Decryption Key
Enter the Decryption Key copied earlier from Realm A.
In the Authentication Cookies section, change the Pre-Auth Cookie value to the Post-Auth Cookie value copied earlier from Realm A.

Select the Workflow tab and go to the Custom Identity Consumer section. Set the following:
Recieve Token
Set to Token.
Require Begin Site
Set to True.
Begin Site
Set to Custom.
Begin Site URL
Set to
/{Realm A}/, like/SecureAuthxxx/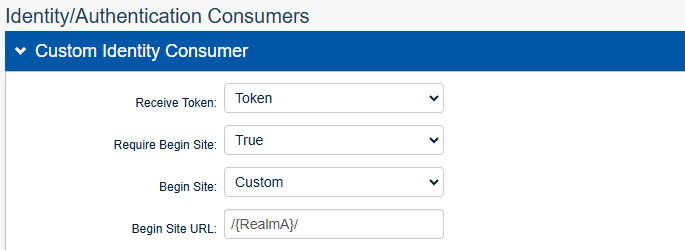
Save your changes.